
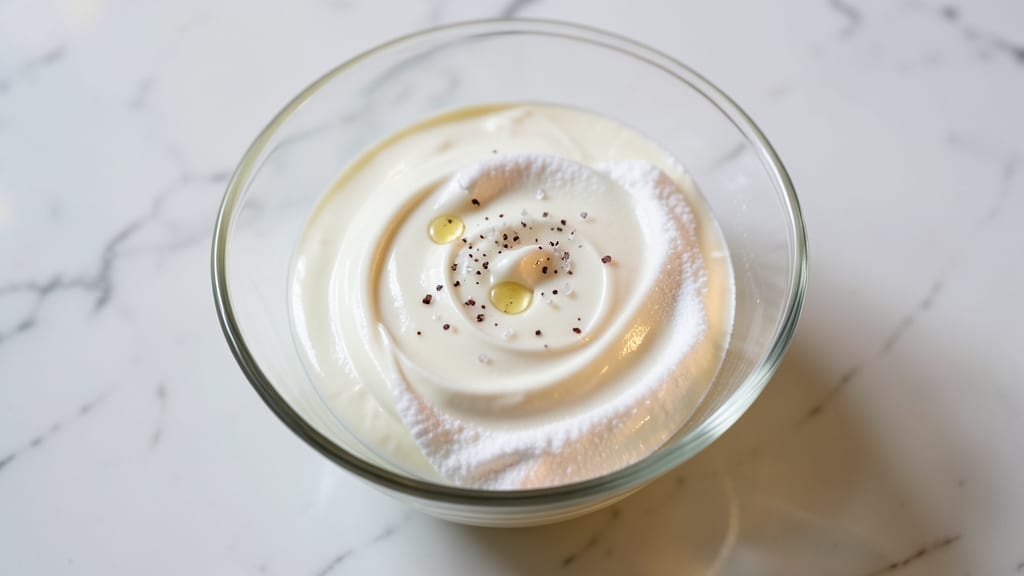
This 3-ingredient icing recipe delivers velvety-smooth frosting that rivals store-bought versions—without the fuss. The secret lies in a simple powdered sugar base, butter, and a splash of liquid, creating a foolproof formula that works for cakes, cupcakes, and cookies alike.
I developed this after testing countless recipes, and it never fails to deliver that perfect, spreadable consistency. What makes this recipe stand out is its versatility. Whether you need a quick glaze for cookies, a light frosting for cupcakes, or a sturdy coating for layer cakes, this icing adapts effortlessly.
The key is achieving the right texture—neither too stiff nor too runny—so it spreads smoothly without cracking. Trust me, this is the kind of recipe that becomes a pantry staple. The result is a frosting that’s creamy, stable, and delicious, with a subtle sweetness that enhances any baked treat.
It sets quickly enough for decorating but stays soft enough to pipe or spread. Best of all, it requires no special tools or techniques—just a bowl and a whisk. Perfect for last-minute decorating or when you’re short on time, this icing is a game-changer for home bakers. Let’s get started!
Ingredients for 3 ingredient icing
Three ingredients, endless possibilities—this velvety icing is your new baking secret weapon.
| Ingredient | Amount | Notes |
|---|---|---|
| Powdered Sugar 🍚 | 2 cups | Sifted for smooth texture |
| Unsalted Butter 🧈 | ½ cup | Softened to room temperature |
| Heavy Cream 🥛 | ¼ cup | Cold for best consistency |
| Vanilla Extract 🌿 | 1 tsp | Pure vanilla preferred |
| Salt 🧂 | ⅛ tsp | Fine sea salt preferred |
Powdered sugar is the backbone here. Bob’s Red Mill or Domino brands are my go-tos—they dissolve smoothly without clumping. Grab the confectioners’ sugar (not the baking kind) from the baking aisle. The butter? Plugrá or Land O’Lakes work perfectly, but avoid salted—we’re controlling the flavor here. Softened butter (not melted!) is key—press it between two sheets of parchment and microwave 20 seconds if it’s cold. Heavy cream adds that luscious texture, so don’t skimp. Store-brand works fine—just make sure it’s full-fat for the best results.
No vanilla extract? Vanilla bean paste or even vanilla sugar works in a pinch (use half the amount). Salted butter? Skip the extra salt or reduce to 1/8 tsp. Texture issues? If it’s too stiff, add 1 tsp more heavy cream. Too runny? Add 1 tbsp more powdered sugar. Pro tip: Warm the cream slightly if your kitchen is cold—it blends better. For a citrus twist, swap vanilla for 1 tsp lemon or orange zest (reduce powdered sugar by 1 tbsp to balance).
This icing stays fresh for 5 days in the fridge, covered tightly. For longer storage, freeze in 1-tbsp portions—thaw at room temp before using. It reheats beautifully in 10-second bursts in the microwave. The magic? It sets perfectly on cakes but stays soft enough to pipe. Double the batch—you’ll want it for everything from cookies to cupcakes. Trust me, this becomes your go-to faster than you think.
Why You’ll Love This Recipe
- Pantry Magic: I swear by this when I forget to buy frosting—just powdered sugar, butter, and cream. No measuring cups, no stress, no last-minute grocery runs. The butter and cream melt into the sugar so smoothly, you’ll wonder why you ever bought pre-made.
- Velvet Smooth: That first dollop? Chef’s kiss. The heavy cream gives it a silky finish, while the vanilla extract adds warmth without overpowering. Spread it on a warm cake, and the contrast is pure bliss—no grainy texture or artificial aftertaste here.
- Birthday to Bake Sale: I’ve used this for cupcakes, sheet cakes, and even drizzled it over store-bought cookies when I’m in a pinch. Honestly, it’s my go-to for anything that needs a quick, elegant touch—no one ever guesses it’s just five ingredients.
- No-Waste Winner: A little goes a long way, and what’s left? It keeps for days in the fridge, ready to jazz up toast, pancakes, or even a glass of milk. Between us, I’ve turned half a batch into a last-minute dessert just by adding fruit—zero guilt, all flavor.
Step-by-step instructions for velvet-smooth frosting in minutes
Here’s how to create this dreamy, ultra-smooth icing that’s perfect for cakes, cupcakes, or cookies.
Softened Butter and Cream Base
In a medium mixing bowl, combine the 0.5 cup Unsalted Butter (it should be soft enough to press with your finger but not melted) with the 0.25 cup Heavy Cream. Use a hand mixer or stand mixer on medium speed for about 30 seconds until the butter and cream are fully incorporated and look creamy.
This step is all about creating a smooth foundation. I always use cold heavy cream because it blends better with the butter and prevents the icing from becoming too runny. If your butter is too firm, let it sit at room temperature for another 5-10 minutes before mixing.
Gradually Add Powdered Sugar
With the mixer running on low speed, gradually add the 2 cups Powdered Sugar (make sure it’s sifted first—this prevents lumps). Start slow and increase to medium speed after about 1 minute of mixing. Continue mixing for 2-3 minutes until the icing is completely smooth and glossy.
Here’s the thing—adding the powdered sugar too quickly can create a mess. I like to add about ½ cup at a time, mixing well between additions. You’ll know it’s ready when the icing pulls away from the sides of the bowl and looks like thick whipped cream. If it’s too thick, we’ll fix that in the next step.
Incorporate Vanilla and Salt
Add the 1 tsp Vanilla Extract and 0.125 tsp Salt to the mixer. Mix on low speed for 30 seconds until fully combined. Taste a small spoonful—this is where you can adjust the flavor. If it needs more sweetness, add a bit more powdered sugar, or if it needs more richness, add a tiny bit more butter.
This is the moment that matters: the vanilla and salt should be evenly distributed. The salt might seem like a tiny amount, but it balances the sweetness beautifully. If you’re using imitation vanilla, you might want to add an extra pinch of salt to compensate for the lack of depth in flavor.
Adjust Consistency for Perfect Spread
For a spreadable but pipeable consistency, mix in 1-2 teaspoons of milk or water at a time until you reach your desired texture. For thicker icing (great for decorating), add an extra 1-2 tablespoons of powdered sugar and mix again. The icing should be smooth, glossy, and hold its shape when piped.
I know it seems weird, but trust me—this icing is incredibly forgiving. If it’s too thick, a splash of milk will save it. If it’s too thin, just add more powdered sugar. The key is to work quickly once you’ve added any liquid because the icing can thicken up as it sits. Use it within 30 minutes for the best results.
Pro Tips For Making 3 Ingredient Icing
- Cut Butter Cold: Take the butter straight from the fridge—no softening needed. Icing needs to come together fast, and cold butter mixes smoother without turning greasy. (Yes, even if you’re impatient like me.)
- Sift That Sugar: Skip the clumps by sifting powdered sugar into your bowl first. It dissolves faster and prevents grainy texture, especially if you’re using a mix with a little moisture. (Your whisk will thank you.)
- Warm the Cream: Heat the heavy cream to room temperature before mixing—just a few minutes in a warm bowl. Cold cream separates the butter faster, and you’ll end up with a thicker, more stable icing.
- Salt First, Then Vanilla: Add the pinch of salt before the vanilla extract. It balances the sweetness more evenly, and the vanilla won’t overpower the whole batch. (I learned this after making a batch that tasted like pure sugar.)
Perfect pairings for these flavors
Cupcake Perfection
This icing transforms simple cupcakes into showstoppers. Spread a thin layer on cooled cupcakes, then top with colorful sprinkles or mini chocolate chips. For a pro look, pipe swirls using a Wilton 1M tip—the icing holds its shape beautifully.
I love adding a dusting of matcha powder or citrus zest for a flavor twist. 💫
Cookie Glaze Magic
Drizzle over sugar cookies or gingerbread for instant elegance. The icing sets quickly enough to hold cookies together in stacks. For extra flair, add edible gold leaf or crushed candied pecans.
I recommend using a fork to create decorative patterns before the icing sets. Perfect for holiday cookies or everyday treats!
Cake Decorating Base
Use this as your foundation for buttercream cakes. Spread between layers for moisture, then create borders or rosettes with a piped bag. The slight tang from the salt balances the sweetness of cake flavors.
For a marbled effect, divide the icing and tint half with gel food coloring before swirling together.
Flavor Variations
Swap vanilla for almond extract (½ tsp) for a nutty twist or lemon juice (1 tsp) for a tangy glaze. For chocolate lovers, add 2 tbsp cocoa powder and reduce powdered sugar by ¼ cup. The possibilities are endless—let your taste buds guide you! 🌟
Dessert Bar Staple
Set up a DIY dessert station with this icing as your base. Offer toppings like crushed cookies, fruit compote, or caramel drizzle. The icing’s smooth texture makes it perfect for dipping or spreading. I always double the batch when hosting parties—it disappears fast! 🍰
Thick or Thin?
Need thicker icing? Add 1 tbsp more powdered sugar at a time. Too thin? Chill the bowl for 10 minutes to firm up. The secret is patience—let it sit for 5 minutes after mixing before using. This gives you time to adjust perfectly to your project’s needs.
Nutrition facts
Frequently asked questions
Can I make this icing without butter?
Yes! For a dairy-free version, replace the butter with ½ cup coconut oil (solid at room temperature) or ½ cup vegan butter. The texture will be slightly softer but still spreadable. If using coconut oil, chill the icing for 10 minutes before using to help it set better.
Why did my icing turn grainy?
Graininess usually happens when powdered sugar isn’t sifted or clumps form during mixing. Always sift your sugar first, and mix on low speed when adding it to avoid lumps. If it’s already grainy, strain through a fine-mesh sieve for a silky finish. Pro tip: Use a stand mixer instead of a hand mixer for smoother results.
How long does this icing keep in the fridge?
This icing stays fresh for 5-7 days when stored in an airtight container. For longer storage, freeze in 1-tbsp portions—thaw at room temperature for 10-15 minutes before using. The texture may soften slightly after freezing, so adjust with extra powdered sugar if needed. Perfect for meal prep!
Can I tint this icing for decorating?
Use gel food coloring (not liquid) to avoid thinning the icing. Add color gradually—start with ¼ tsp and mix well. For pastel shades, use ½ tsp lemon juice to lighten the color. Divide the icing into separate bowls before tinting for clean colors.
What’s the best way to spread this on a cake?
Use an offset spatula for smooth, even layers. Start with a thin “crumb coat” (just enough to seal in crumbs), then chill the cake for 15 minutes** before adding the final layer. For a professional finish, dip your spatula in warm water between layers to prevent sticking. Works like a dream on both round and square cakes!

- 6 Oz Chocolate Chip Cookie Recipe: Perfectly Balanced Crispy Edges and Chewy Hearts - September 25, 2026
- 6-Inch Coffee Cake Recipe: Vanilla Bean Swirls and Buttery Streusel Topping - September 25, 2026
- 1 Hour Soup Recipe: Velvety Richness Without the Wait - September 25, 2026