
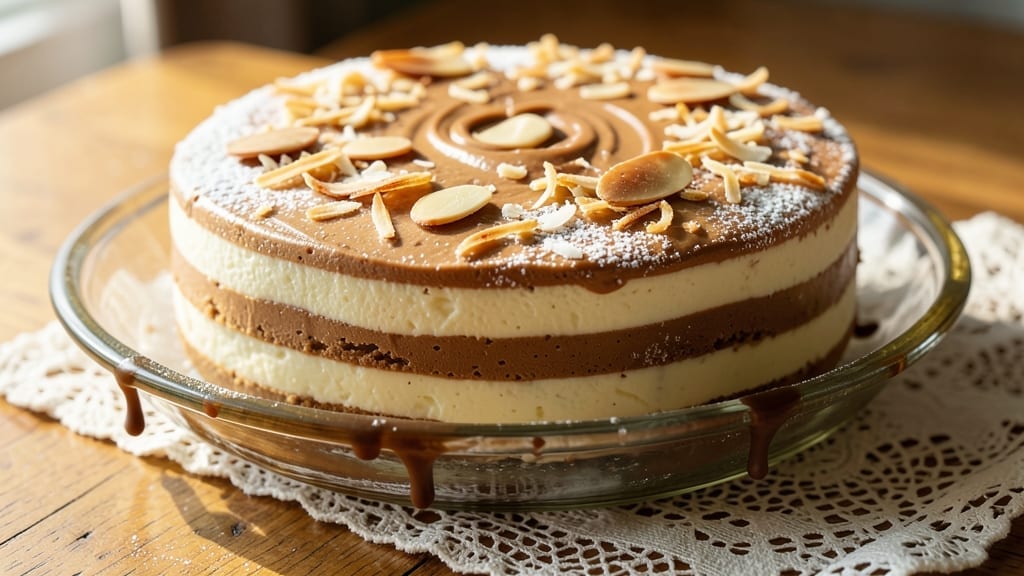
This 1920s icebox cake recipe brings back the charm of Depression-era desserts with its effortless layers and no-bake magic. 💛 Back when refrigeration was a luxury, families relied on iceboxes to chill layered cakes overnight, creating a texture that’s light, creamy, and impossibly tender.
The secret lies in gelatin, vanilla, and fruit preserves—simple ingredients that transform into a dessert fit for a tea party or Sunday supper. The beauty of this recipe is its simplicity: no oven required, just a few layers of whipped cream, fruit, and crumbled cookies, all chilled to perfection.
It’s the kind of dessert that feels indulgent yet effortless, perfect for when you want something special without the fuss. The flavors are nostalgic—vanilla, berries, and buttery cookies—transporting you to a time when desserts were made with patience and care.
What makes this cake truly remarkable is how it improves with time. The longer it chills, the more the flavors meld together, creating a harmonious blend of sweet, tangy, and creamy notes.
Serve it with a cup of tea or coffee for the full vintage experience, and watch as everyone reaches for seconds. This recipe is a testament to the ingenuity of the past, proving that some of the best desserts don’t even need an oven.
Let’s bring a piece of history into your kitchen today.
Ingredients for 1920s icebox cake
Classic Depression-era ingredients that create a dessert fit for a vintage tea party.
| Ingredient | Amount | Notes |
|---|---|---|
| Unsalted Butter 🧈 | 1 cup | Softened for easy mixing |
| Granulated Sugar 🍚 | 1 ½ cups | White or raw preferred |
| Heavy Whipping Cream 🥛 | 2 cups | Cold for best whipping |
| Vanilla Extract 🌿 | 2 tsp | Pure extract preferred |
| Unflavored Gelatin 🧪 | 1 package | 2 1/4 tsp or 1 envelope |
| Hot Water 💧 | 1 cup | Boiling for gelatin |
| Strawberry Preserves 🍓 | 1 ½ cups | High-quality jam preferred |
| Crushed Vanilla Wafers 🍪 | 2 cups | Homemade or store-bought |
| Large Eggs 🥚 | 4 whole | Room temperature for best texture |
| Ground Cinnamon 🌶️ | 1 tsp | For dusting layers |
| Powdered Sugar 🍚 | ½ cup | For final dusting |
| Fresh Strawberries 🍓 | 1 lb | Optional garnish |
| Heavy Cream 🥛 | ½ cup | For topping (optional) |
The gelatin is the heart of this recipe—it’s what gives the cake its signature light, jiggly texture. Great Jones or Knox brands are reliable, but any unflavored gelatin will work. Look for packages that say ‘2 1/4 tsp’ on them, as this is the standard serving size. The vanilla wafers should be crushed into fine crumbs—no big chunks—so they distribute evenly. Keebler or homemade vanilla cookies both work perfectly. For the preserves, Strawberry or raspberry jam adds that tangy sweetness that was a staple in 1920s desserts. If you can’t find it, homemade fruit preserves are even better.
No gelatin on hand? Agar-agar powder can be substituted at the same weight, though the texture will be slightly firmer. Running short on vanilla wafers? Crushed graham crackers or ladyfingers add a different but equally nostalgic flavor. The heavy cream should be cold when you whip it—place the bowl and beaters in the freezer for 10 minutes before starting. For the preserves, if you prefer a smoother texture, strain out any large fruit pieces. The strawberries for garnish? Fresh is best, but frozen works in a pinch—just thaw and pat dry.
This cake gets better with time—the longer it chills, the more the flavors meld. Keep it in the fridge for at least 6 hours before serving, but overnight is ideal. Store leftovers in an airtight container for up to 5 days. The gelatin layers will firm up again once chilled, but if it feels too soft, pop it back in the fridge for 30 minutes. For a truly vintage touch, dust the top with a mix of powdered sugar and cinnamon before serving.
Why You’ll Love This Recipe
- No-Fuss Layers: I’ll be real—this cake is so simple you’ll wonder why you ever baked anything else. Just mix butter, sugar, and vanilla into the cream, fold in the gelatin, and let the fridge do the work. No eggs, no oven, no stress.
- Velvet Smooth Magic: That first bite? Pure nostalgia with a modern twist. The gelatin gives it that old-school wobble—creamy but with just enough set to hold its shape, while the vanilla and sugar melt into something dangerously addictive. Honestly, it’s like dessert therapy in a bowl.
- Party in a Box: Between us, this is my go-to for potlucks, book club gatherings, or even a last-minute office birthday. Slice it thin, stack it high, and watch it disappear—no one will guess it’s just five ingredients. (Yes, even on a Tuesday night.)
- Leftovers? More Like Leftovers: Make it once, eat it for days. The gelatin keeps it fresh longer than most cakes, and the layers stay perfectly intact—no soggy bottoms here. Plus, it’s cheaper than buying a bakery cake, and you’ll have twice the servings for half the cost. My secret weapon.
Step-by-step instructions for 1920s icebox cake
This classic no-bake dessert delivers layers of creamy vanilla and fruity strawberry flavors—just let time do the work.
👨🍳 Step 1: Prepare the Strawberry Filling
In a medium bowl, combine the 1.5 cups strawberry preserves with the 1 cup hot water. Stir until smooth and fully incorporated. This mixture should be thin enough to spread easily but still hold its shape when layered. If it’s too thick, add 1-2 teaspoons of hot water to reach the right consistency.
Let the mixture cool completely to room temperature before using. This prevents the gelatin from setting prematurely when added later. The filling should be cool enough to touch lightly without feeling warm—this ensures clean layers when assembled. Set aside while you prepare the vanilla cream.
👨🍳 Step 2: Make the Vanilla Cream Base
In a large mixing bowl, beat the 1 cup softened unsalted butter and 1.5 cups granulated sugar together until light and fluffy, about 3-4 minutes using an electric mixer. Scrape down the sides of the bowl as needed to ensure even mixing. The mixture should nearly double in volume and become pale in color.
Add the 4 whole large eggs, one at a time, mixing well after each addition. Then stir in the 2 teaspoons vanilla extract and 2 cups cold heavy whipping cream. Mix until fully combined and smooth. This base is the foundation of your icebox cake—don’t rush this step, as proper incorporation ensures a creamy texture.
🥘 Step 3: Incorporate the Gelatin
In a separate small bowl, sprinkle the 1 package unflavored gelatin evenly over the 1 cup hot water. Let it bloom for 5 minutes until it becomes a translucent gel. This step is crucial—gelatin must bloom properly to set the cake layers.
Gently heat the bloomed gelatin in the microwave for 10-12 seconds (or until just melted) and stir until completely dissolved. Let it cool slightly for 2 minutes before adding it to the vanilla cream mixture. Slowly pour the gelatin into the bowl while mixing on low speed to maintain a smooth consistency.
🥘 Step 4: Assemble the Cake Layers
In a 9×13-inch baking dish, spread ½ of the crushed vanilla wafers evenly over the bottom. This creates a sturdy base for your cake. Using a spatula, spread half of the strawberry filling evenly over the wafer layer, leaving a ¼-inch border around the edges.
Spoon half of the vanilla cream mixture over the strawberry layer and spread it evenly. Sprinkle ½ teaspoon ground cinnamon lightly over the cream. Repeat the layers: spread the remaining ½ of the crushed vanilla wafers, then the remaining strawberry filling, and finally the remaining vanilla cream. Sprinkle the remaining ½ teaspoon ground cinnamon on top.
⏰ Step 5: Chill and Set
Cover the baking dish tightly with plastic wrap and refrigerate for at least 6 hours (overnight is ideal). The cake needs this time to set properly. Check occasionally after 4 hours—it should feel firm to the touch and hold its shape when gently shaken.
Once fully set, dust the top with ½ cup powdered sugar and garnish with sliced fresh strawberries if desired. Serve chilled for the best texture. The cake will keep in the refrigerator for up to 3 days, though it’s best enjoyed fresh when the layers are at their peak creaminess.
Pro Tips For Making 1920s Icebox Cake
- CHILL THE CREAM FIRST: Heavy whipping cream loves a cold start—pop it in the fridge for 30 minutes before whipping. I learned this the hard way when my cream turned buttery instead of fluffy, and no amount of extra sugar could fix it. Cold cream whips faster and holds its shape longer, especially in this layered cake where stability matters.
- MELT GELATIN RIGHT: Use warm (not hot) water to bloom the gelatin—just enough to dissolve it completely, then let it sit for 5 minutes off the heat. Overheating kills its thickening power, and you’ll end up with a wobbly, sad cake instead of the firm, creamy layers you want. Think lukewarm bathwater, not boiling.
- WEIGH YOUR BUTTER: Skip the eyeballing—measure that butter by weight (or at least pack it tightly in the cup). Butter is dense, and scooping leads to uneven layers. I used to guess, and my cake would either taste greasy or dry out too fast. A kitchen scale or pressed-down cup makes all the difference in texture.
- LAYER QUICKLY, COOL SLOWLY: Work fast when assembling—once you start, don’t stop. But after stacking, resist the urge to shove it in the fridge immediately. Let it sit at room temp for 10 minutes first to help the layers bond properly. I rushed this once and ended up with a cake that split like a bad soufflé. Patience here saves cleanup later.
Storing and reheating this dish
Icebox Storage Secrets
The original charm of this cake comes from its icebox origins—back when refrigerators were rare, families relied on ice-filled iceboxes to chill desserts overnight. For best results, store your cake in an airtight container lined with plastic wrap to prevent drying.
Place it in the coldest part of your fridge (usually the back of the bottom shelf) to maintain even chilling. The layers will firm up beautifully, creating that signature jiggly texture that makes icebox cakes so special. 💛
Reheating (If Needed)
This cake is designed to be served chilled, but if you prefer it slightly softer, you can reheat individual slices for 10-15 seconds in the microwave. Cover the slice with a damp paper towel to prevent drying.
For a more traditional approach, let the cake sit at room temperature for 10 minutes before serving—this softens the layers just enough to enjoy without losing the creamy structure. Avoid reheating the whole cake, as the gelatin layers may separate.
Long-Term Preservation
Unlike baked cakes, this icebox cake improves with time—the flavors meld beautifully over 3-5 days in the fridge. For longer storage, wrap tightly in plastic wrap and place in an airtight container before freezing.
It will keep for up to 1 month in the freezer, though the texture may become slightly grainier upon thawing. To serve, let it thaw in the fridge overnight for the best results. The gelatin layers will re-set naturally once chilled again.
Reviving Stale Layers
If your cake feels too firm after storage, don’t worry—this is normal! Pop it back in the fridge for 30-60 minutes to restore the ideal jiggly texture. For extra creaminess, brush the top with a light syrup (mix 2 tbsp powdered sugar with 1 tbsp water) before serving.
This adds moisture without altering the classic flavor. The key is patience—just like in the 1920s, the best icebox cakes are worth the wait! ✨
Serving Suggestions
Serve this cake chilled with a hot cup of tea or coffee for the full vintage experience. The contrast of warm and cold makes every bite feel like a trip back in time.
For a modern twist, drizzle with warm strawberry glaze (simmer ½ cup strawberry preserves with 1 tbsp water) just before serving. The glaze adds a glossy finish and enhances the berry flavor without overpowering the delicate layers.
Nutrition facts
Frequently asked questions
Why is this called an “icebox cake”?
This cake gets its name from the 1920s tradition of chilling desserts in iceboxes—large insulated containers filled with ice blocks. Before home refrigerators became common, families relied on iceboxes to keep perishable foods cold, and this cake was a perfect no-bake dessert that improved overnight. The gelatin layers set beautifully in the cool environment, creating that signature jiggly texture!
Can I make this cake without gelatin?
Yes! If you’re avoiding gelatin, try agar-agar powder (use the same amount as gelatin) or fruit pectin (follow package instructions). For a dairy-free version, substitute the heavy cream with coconut cream and use vegan gelatin alternatives like carrageenan. The texture will be slightly firmer but still delicious.
How do I fix runny layers after chilling?
If your cake feels too soft after refrigeration, it likely didn’t chill long enough. Return it to the fridge for 1-2 more hours to firm up. For immediate serving, sprinkle the top with powdered sugar and let it sit for 10 minutes to absorb excess moisture. The key is patience—these cakes are meant to be enjoyed after proper chilling!
What’s the best way to serve this cake?
Serve slices on a chilled plate with a hot cup of tea or coffee for the classic 1920s experience. For extra flair, drizzle with warm strawberry glaze (simmer ½ cup preserves with 1 tbsp water) or dust with cinnamon sugar. The contrast of warm and cold makes every bite magical!
Can I make this cake ahead of time?
This cake actually tastes better after 24 hours of chilling as the flavors meld. Assemble it the night before and store in an airtight container in the fridge. The layers will firm up perfectly, and you’ll have a ready-to-serve dessert when guests arrive!

- 6 Oz Chocolate Chip Cookie Recipe: Perfectly Balanced Crispy Edges and Chewy Hearts - September 25, 2026
- 6-Inch Coffee Cake Recipe: Vanilla Bean Swirls and Buttery Streusel Topping - September 25, 2026
- 1 Hour Soup Recipe: Velvety Richness Without the Wait - September 25, 2026