
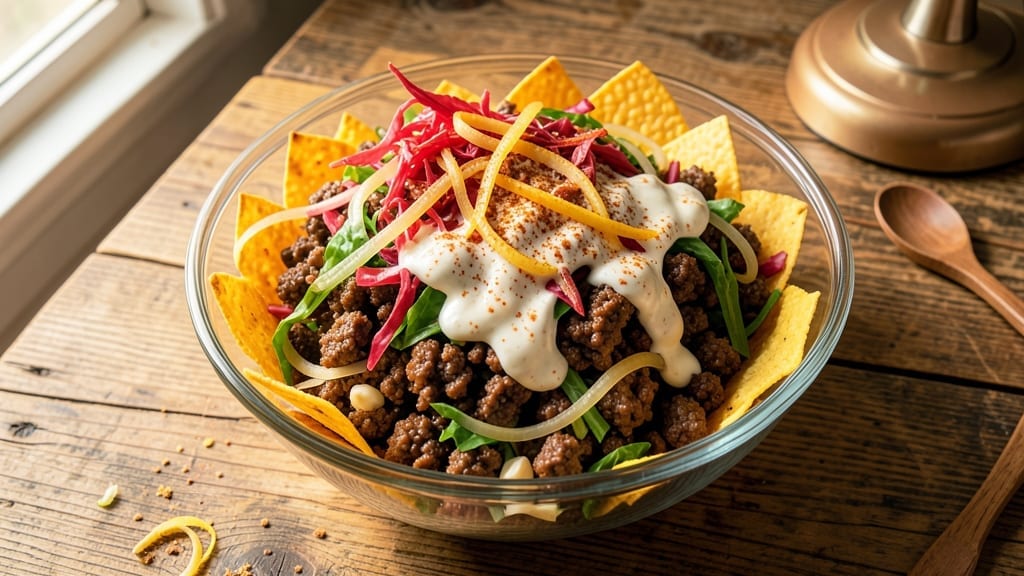
This 1970s taco salad recipe brings back the bold, crunchy flavors that made it a retro favorite—ground beef seasoned with chili powder and cumin, piled high on crisp lettuce with melted cheese and tangy toppings.
The key to authentic 70s style? Crunchy shells (optional but traditional), a perfect balance of spice and creaminess, and that satisfying mix of textures that makes every bite irresistible.
What sets this recipe apart is the old-school technique of browning ground beef with onions and garlic until deeply flavorful, then mixing in spices that were popular in the era—just enough chili powder for heat without overpowering.
The salad comes together in minutes, but the flavors develop as you mix everything, creating that perfect retro taste that’s both nostalgic and satisfying.
By the time you’re done, you’ll have a taco salad that’s crisp, cheesy, and packed with bold flavors—just like the ones you remember from diners and backyard cookouts.
The secret lies in the toppings: sour cream for creaminess, salsa for tang, and optional hard-boiled eggs or olives for extra texture. Serve it in a big bowl for sharing or individual bowls for a satisfying meal.
This recipe is versatile enough for weeknight dinners or party appetizers, and the flavors only get better the next day. Whether you’re recreating a classic or introducing someone to the magic of 70s-style tacos, this dish delivers the perfect mix of nostalgia and satisfaction.
Ingredients for 1970’s taco salad
Crunchy shells, bold spices, and melty cheese—this 70s classic comes together fast.
| Ingredient | Amount | Notes |
|---|---|---|
| Ground Beef 🥩 | 1 ½ lb | Lean or 85% lean preferred |
| Yellow Onion 🧅 | 1 whole | Diced medium size |
| Garlic Cloves 🧄 | 4 cloves | Minced for deep flavor |
| Tortilla Chips 🍟 | 4 cups | Crushed for retro crunch |
| Shredded Lettuce 🥬 | 8 cups | Iceberg or romaine blend |
| Shredded Cheddar Cheese 🧀 | 2 cups | Sharp cheddar preferred |
| Sour Cream 🥛 | ½ cup | Full-fat for creaminess |
| Salsa 🌶️ | ½ cup | Medium or pico de gallo |
| Chili Powder 🌶️ | 1 ½ tbsp | For authentic 70s heat |
| Ground Cumin 🌿 | 1 tsp | Toasted for depth |
| Salt 🧂 | 1 tsp | Kosher or sea salt |
| Black Pepper 🌶️ | ½ tsp | Freshly ground preferred |
| Vegetable Oil 🫒 | 1 tbsp | For browning beef |
| Lime Juice 🍋 | 1 tbsp | Freshly squeezed |
| Hard-Boiled Eggs 🥚 | 2 whole | Optional for extra protein |
The ground beef is where the magic happens. 85% lean gives you that perfect balance of flavor and texture—leaner cuts can get dry when browning. I grab mine from Kroger’s deli counter when they have it pre-ground, or use Costco’s bulk beef for better value. The onions? Yellow onions add sweetness, but red onions work too if you’ve got them. For the chips, Fritos or Tostitos are the retro classics—crush them yourself for that perfect crunch instead of using pre-crushed. The garlic? Four cloves is plenty, but if you love garlic, add an extra one. Just don’t skip it—it’s what makes the beef taste homemade.
No chili powder? Mix 1 tsp smoked paprika with 1/2 tsp cayenne for a close substitute. Dried cumin works fine, but if you’ve got whole cumin seeds, toast them in a dry pan for 30 seconds first—it makes a huge difference. The sour cream is non-negotiable for that 70s creaminess, but Mexican crema is even better if you can find it. The salsa can be store-bought (I love Herdez or La Costeña), but homemade is always fresher. For the eggs, hard-boiled is traditional, but if you’re in a rush, skip them—the salad still tastes amazing. The lime juice? Fresh is best, but bottled lime juice works in a pinch.
The chips and cheese keep best in separate containers—airtight containers for both. The chips stay crunchy for 2 days if you store them in the fridge, but honestly, they’re better fresh. The cheese? Wrap it tightly and it’ll last 5-7 days. The beef mixture can be made ahead and stored for 3 days in the fridge—it actually tastes better the next day as the flavors meld. For parties, I double the batch and keep everything in separate bowls so people can build their own salads. The leftovers? Freeze the beef mixture for up to 3 months—just thaw and mix with fresh toppings when you’re ready to serve.
Why You’ll Love This Recipe
- No Fuss Prep: I swear by this recipe because it’s basically a one-bowl wonder. Brown the ground beef with onion and garlic—ten minutes max—and the rest is just tossing in chips, lettuce, and whatever toppings you have. Honestly, it’s the kind of meal where you can still have a conversation while you eat.
- Garlic-Kissed Magic: That minced garlic and onion caramelizing in the beef? It’s the secret weapon. The crispy edges on the tortilla chips soak up just enough of that savory, slightly sweet beef mixture—like a crunchy, flavor-packed hug in every bite.
- Leftover Goldmine: Between us, this salad only gets better the next day. The chips soften just enough to hold onto the beef juices, and the lettuce stays crisp if you store it right. Pack it for lunch or reheat it for dinner—it’s my go-to for lazy days.
- Budget-Friendly Feast: Ground beef, onions, and chips? Check. Lettuce? Check. This recipe doesn’t break the bank, and it stretches easily for a crowd. I’ll make a double batch for game day or a family gathering—everyone clears their plates, and my wallet stays happy.
Step-by-step instructions for 1970s taco salad
Here’s how to build this nostalgic dish with perfect texture and bold flavors!
Brown the Ground Beef Perfectly
Heat the 1 tablespoon vegetable oil in a large skillet over medium-high heat until shimmering. Add the 1.5 lb ground beef and break it apart with a wooden spoon, working it into smaller crumbles for even cooking. Let it brown undisturbed for 3-4 minutes—this creates those delicious crispy edges we want.
Once the beef starts releasing its juices and turning brown, stir in the 1 whole yellow onion (already diced) and cook for another 5 minutes until the onion softens and becomes translucent. Here’s the thing—don’t drain the fat! We’ll use it later to build flavor. Add the 4 cloves minced garlic, 1.5 tablespoons chili powder, 1 teaspoon ground cumin, 1 teaspoon salt, and 0.5 teaspoon black pepper, stirring constantly for 1 minute until fragrant. The spices should bloom and create that authentic 70s taco flavor.
Assemble the Crunchy Base
In a large mixing bowl, combine the 4 cups crushed tortilla chips with the 8 cups shredded lettuce. This is where the magic happens—those crispy chips will stay crunchy while soaking up all the delicious flavors. I like to give it a gentle toss with my hands to distribute the chips evenly throughout the lettuce.
Add the browned beef mixture to the bowl and stir gently to combine. The warm beef will help soften the chips slightly while keeping that retro crunch. Sprinkle the 2 cups shredded cheddar cheese over everything and toss again. The cheese will start melting slightly from the heat, creating pockets of gooey goodness throughout the salad.
Finish with Tangy Toppings
Drizzle the 0.5 cup sour cream evenly over the salad and toss lightly to distribute. Then add the 0.5 cup salsa and the 1 tablespoon lime juice, giving everything another gentle mix. The lime juice brightens up all the rich flavors and cuts through the creaminess of the sour cream.
Here’s where it gets fun—if you’re using the 2 whole hard-boiled eggs, slice them in half lengthwise and place them on top of the salad. You can also chop them and mix them in if you prefer. The eggs add a nice protein boost and keep the salad more substantial. Serve immediately while the chips are still crispy and the cheese is melty!
Serve with Confidence
Divide the taco salad among 4 serving bowls and let everyone customize their own with additional toppings if desired. I always recommend serving this with a side of warm tortilla chips on the table for extra crunch. The salad should be packed with textures—crunchy chips, creamy cheese, cool lettuce, and that perfectly seasoned beef.
This is the moment that matters: the first bite should deliver all those nostalgic 70s flavors in every mouthful. The crispy chips, the tangy lime, the spicy beef, and the cool creaminess all come together perfectly. Real talk—this salad is so good it’ll transport you back to the disco era with every forkful!
Pro Tips For Making 1970’S Taco Salad
- CRUSH THE ONIONS: Dice that yellow onion into ¼-inch pieces—smaller than you think. I used to eyeball it, but anything bigger than a pea stays tough even after cooking. Toss them in the beef mixture early so they soften properly, not just sit there like sad, crunchy reminders of your laziness.
- SALVAGE THE LETTUCE: Drain and spin-dry the shredded lettuce hard—no soggy salad base. I learned this after watching my first batch turn into a sad, watery mess when the chips absorbed all the dressing. Use a clean kitchen towel or salad spinner; wringing it by hand just won’t cut it.
- DON’T OVERMIX THE BEEF: Once your ground beef is browned, push it to one side of the pan and let it sit for 30 seconds. This prevents a dense, gray block of meat that tastes like it’s been through a war. Stir in the onions and garlic after they’ve had a chance to crisp slightly—this builds flavor, not mush.
- TOAST THE CHIPS RIGHT: Spread tortilla chips on a baking sheet and toast them at 350°F for 3–5 minutes until they’re just starting to crisp. This revives stale chips and keeps the salad from turning into a soggy chip salad. Skip this, and you’re just serving sad, limp triangles at the bottom of your bowl.
Flavor customization for this dish
Spice Level Control
Adjust the heat to your preference by tweaking the chili powder. For a milder version, reduce it to 1 tbsp and add ½ tsp cayenne for subtle warmth. If you love spice, increase the chili powder to 2 tbsp and add 1 tsp smoked paprika for depth.
I often start with the original 1.5 tbsp and let guests add extra heat with hot sauce on the side. 🌶️
Cheese Variations
Swap the sharp cheddar for Monterey Jack if you prefer a milder, creamier texture. For extra richness, mix in ½ cup crumbled queso fresco or ½ cup cotija cheese at the end.
I love adding ½ cup pepper jack cheese for a spicy kick—it melts beautifully and adds a subtle heat. 🧀
Protein Swaps
Use ground turkey or chicken breast for a lighter option—just increase the spices slightly since lean meats absorb flavors differently. For a vegetarian version, replace the beef with ½ lb crumbled black beans or ½ lb seasoned lentils, then add 1 cup corn kernels for texture.
I’ve also made this with shredded rotisserie chicken for a quicker meal. 🥩
Topping Upgrades
Add ¼ cup chopped cilantro for freshness or ¼ cup diced avocado for creaminess. For extra crunch, sprinkle ¼ cup toasted pepitas or ¼ cup crushed Fritos on top.
I also like adding 2 tbsp chopped green onions for a bright finish. These toppings keep the salad vibrant and add layers of flavor. 🥗
Dairy-Free Options
Replace the sour cream with ½ cup Greek yogurt mixed with 1 tbsp lime juice and a pinch of salt. For the cheese, use ½ cup dairy-free shredded cheese (like Violife) or ¼ cup nutritional yeast for a cheesy flavor without dairy.
The salad stays delicious while accommodating dietary needs. 🌱
Retro Presentation
Serve in a large glass bowl for that classic diner look, or use individual ceramic taco salad bowls for a fun touch. Garnish with extra crushed chips around the edge and a lime wedge on the side.
For a party platter, arrange the salad on a wooden board with toppings in small bowls for customization. This adds that nostalgic 70s vibe! 🍽️
Nutrition facts
Frequently asked questions
Why does the 1970s version use crushed tortilla chips instead of taco shells?
The original 70s taco salad relied on crushed chips for that signature retro crunch that stays crispy even when mixed with other ingredients. Taco shells were more common in later decades, but the chips gave the salad its iconic texture—think of it like the “crunch factor” that made diner versions so satisfying. Plus, they’re easier to mix evenly throughout!
Can I make this salad ahead of time?
Yes! The beef mixture can be made 3 days ahead and stored in the fridge, while the chips and cheese keep best separately. The day of serving, just toss everything together and add fresh toppings. The flavors actually develop more overnight, making it taste even better the next day!
What’s the best way to keep the chips crispy?
Store them in an airtight container in the fridge, and add them to the salad just before serving. For extra crunch, toast the chips in a dry skillet for 2 minutes before crushing them—they’ll stay crispier longer. The key is keeping them separate from the wet ingredients until the last moment!
Is there a way to make this salad spicier?
Add ½ tsp cayenne pepper or 1 tsp hot sauce to the beef mixture, or sprinkle diced jalapeños on top. For extra heat, serve with a side of salsa verde or hot sauce for customization. The 70s version was often milder, but you can definitely crank up the spice!
Can I use store-bought taco seasoning instead?
While you can substitute, the original 70s flavor relied on specific spices like cumin and chili powder without the extra fillers in many commercial mixes. For best results, stick with the recipe’s spices—it’s what gives that authentic retro taste. If you must use store-bought, choose a low-sodium version and add extra cumin!

- 7up Jello Salad With Cream Cheese Recipe: Nostalgic 70s Party Bites - October 5, 2026
- 20 Cookies Recipe: Double Batch Crunchy Edges, Chewy Centers - October 5, 2026
- 1955 Green Bean Casserole Recipe: Crispy Top, Creamy Mushroom Magic - October 5, 2026