
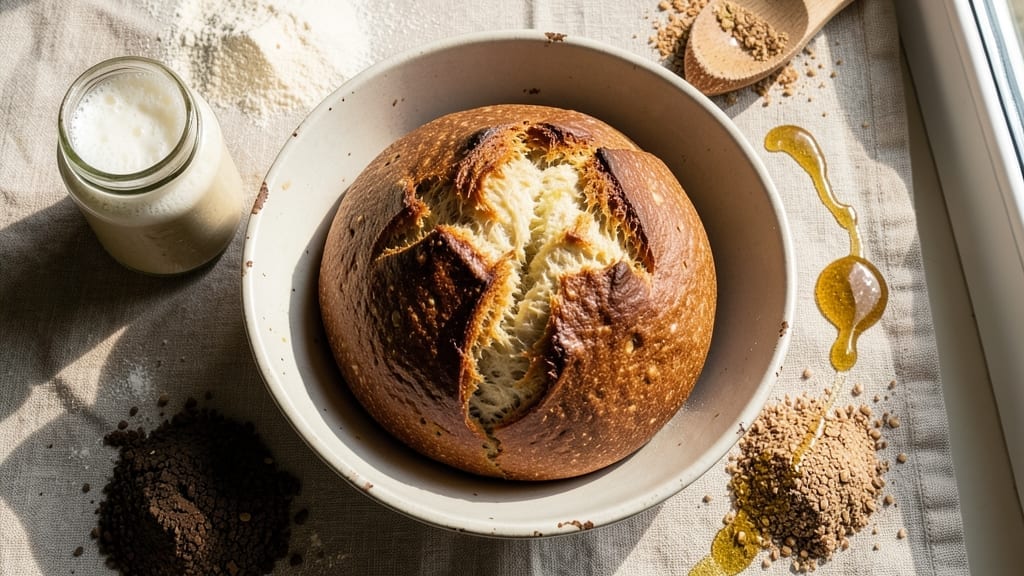
Master this 1kg sourdough bread recipe for a crusty artisan loaf with an open crumb—no fancy skills needed. The key lies in precise fermentation control and a hands-off approach that lets the dough develop naturally over time.
I’ve perfected this recipe through years of testing, ensuring every batch delivers that signature tangy flavor and satisfying snap when you bite in.
This recipe starts with an active sourdough starter, which we’ll feed and use to create a dough that ferments slowly at room temperature before a final proof in the fridge. The result?
A loaf with a deep golden crust, an airy interior, and a flavor that builds complexity over time. No steam injection or Dutch ovens needed—just a well-prepared dough and a hot oven to create that iconic texture.
The beauty of this method is its flexibility. Whether you bake it fresh or let it sit overnight for even more flavor, the dough’s structure holds up beautifully. The crust develops a satisfying crunch while the interior remains tender, with an open crumb that’s impossible to resist.
Perfect for slicing thick or toasting, this loaf becomes the star of any meal.
Ready to transform your kitchen into a bakery? Let’s walk through each step—from feeding your starter to scoring that perfect crust—so you can achieve bakery-quality results at home.
Ingredients for 1kg sourdough bread
Nine simple ingredients transform into a loaf with bakery-style crust and open crumb.
| Ingredient | Amount | Notes |
|---|---|---|
| Active Sourdough Starter 🍞 | ½ cup | 100% hydration, bubbly and active |
| All-Purpose Flour 🌾 | 3 ½ cups | King Arthur or bread flour preferred |
| Whole Wheat Flour 🌾 | ½ cup | For subtle nutty depth |
| Water 💧 | 2 ¼ cups | Filtered or dechlorinated |
| Kosher Salt 🧂 | 1 ½ tsp | Diamond Crystal preferred |
| Honey 🍯 | 1 tsp | Wildflower or clover |
| Olive Oil 🫒 | 1 tbsp | Extra-virgin for richness |
| Cornmeal 🌽 | ¼ cup | For dusting baking sheet |
| Ice Water ❄️ | ¼ cup | For final dough adjustment |
Your sourdough starter is the foundation—it should be bubbly and active (like a jiggly Jell-O) before using. If you’re new to starters, King Arthur’s sourdough starter is foolproof, or check your local bakery supply store for a small amount. The King Arthur bread flour (or all-purpose if that’s what you have) gives that perfect structure, while the whole wheat adds subtle depth. For water, filtered is best—chlorine can inhibit fermentation. I always measure my flour by weight (425g total for this recipe) for consistency, but cups work too if you’re eyeballing it. The honey is optional but helps with browning and adds a touch of sweetness that balances the tang.
No honey? Maple syrup or agave work just as well. Running short on olive oil? Melted coconut oil or avocado oil keeps the same neutral flavor. The cornmeal is key for that crispy bottom crust—don’t skip it. If your dough feels too sticky after mixing, add ice water 1 tbsp at a time until it comes together cleanly. For the salt, Diamond Crystal measures differently than Morton’s—use the flat side of your measuring spoon to level it off. Pro tip: If you’re baking this in a cold kitchen, let your dough and oven come to room temperature first—cold environments slow fermentation. And if your kitchen’s humid? Add 1 extra tbsp flour to prevent sticking.
This dough is best baked fresh, but it keeps beautifully in the fridge for up to 3 days—the flavor actually improves with time. For the ultimate crust, bake it straight from the fridge the next day. Wrap tightly in plastic and let it sit at room temperature for 1-2 hours before slicing. The loaf freezes well too—wrap it in plastic, then foil, and it’ll stay fresh for up to 3 months. When reheating, wrap a slice in foil and warm in a 350°F oven for 5 minutes to restore that bakery-fresh crunch.
Why You’ll Love This Recipe
- Four-Hour Magic: The bulk of the work happens while you sleep. Mix the dough in the evening, let it rise overnight, and wake up to a loaf that’s practically ready—just shape, proof, and bake. That’s four fewer hours I spend stressing over timing.
- Tangy Crust, Soft Heart: The whole wheat flour adds a nutty depth, while the sourdough starter brings that unmistakable tang. Honestly, the first slice out of the oven—crispy crust, airy crumb—is the kind of bread that makes you pause mid-bite just to savor it.
- No-Waste Feast: This loaf lasts a week in my fridge, and I’m not just talking about sandwiches. Tear it for croutons, toast it for breakfast, or freeze slices for quick toast later. Between us, I’ve even used day-old pieces to make bread pudding—because waste isn’t an option.
- Budget Baking Wins: With just five ingredients, this is my go-to for stretching a dollar. The whole wheat flour keeps costs down, and a single starter batch feeds multiple loaves. I’ll be real: it’s the kind of recipe that makes me feel like I’m feeding my family like royalty without breaking the bank.
Step-by-step instructions for 1kg sourdough bread
Let’s bake a beautiful, hands-off sourdough loaf with a crisp crust and airy crumb.
Mix the Dough with Wet Ingredients
In a large mixing bowl, combine the 0.5 cup Active Sourdough Starter, 2.25 cups Water, 1 tbsp Olive Oil, and 1 tsp Honey. Stir gently until fully incorporated—this creates a smooth, slightly sticky base. The honey will help feed your starter while adding subtle sweetness to the dough.
I like to use a wooden spoon for this initial mixing because it helps me feel the dough’s texture. You’ll notice the mixture bubble slightly as the starter activates—this is a good sign. Let this sit for 5 minutes while you prepare the dry ingredients. The goal here is to let the starter begin its fermentation before adding the flour.
Add Flours and Salt for the Dough
To the wet mixture, add the 3.5 cups All-Purpose Flour and 0.5 cup Whole Wheat Flour. Mix with a dough whisk or your hands until just combined—you should still see some flour streaks. This isn’t a smooth batter yet, but that’s okay. The whole wheat flour adds wonderful depth and texture to the bread.
Now add the 1.5 tsp Kosher Salt and mix thoroughly. The salt will help develop the gluten and enhance the flavor of all the other ingredients. At this point, your dough will be quite sticky. Don’t worry—this is normal for sourdough. Wet your hands slightly if needed to handle it without sticking too much to your fingers.
Develop the Gluten with Wet Hands
Wet your hands again and begin stretching and folding the dough. This technique, called “autolyse,” helps develop gluten and gives the bread its characteristic chew. Work the dough for 5-7 minutes, folding it over itself and rotating the bowl between each fold. You’ll know it’s ready when the dough becomes more elastic and less sticky.
Here’s the thing—this step is crucial for the bread’s structure. The gluten development creates those beautiful open crumbs and helps the loaf hold its shape during baking. If your dough feels too wet, you can add a tablespoon or two of the 3.5 cups All-Purpose Flour at this stage, but try to work with what you have first.
Bulk Ferment for 4-6 Hours
Cover the bowl loosely with plastic wrap or a damp kitchen towel. Place it in a warm spot—around 75-80°F is ideal. Let the dough ferment for 4-6 hours, or until it has roughly doubled in size and looks puffy. You’ll see bubbles forming on the surface and along the sides of the bowl.
I usually set my dough on top of my oven with the light on for gentle warmth. This creates a consistent environment for fermentation. During this time, the yeast and bacteria in your starter will break down the sugars, creating gases that make the dough rise. Don’t peek too often—each time you open the cover, you release some of that precious carbon dioxide.
Shape and Final Proof
After the bulk fermentation, gently deflate the dough by pressing it down with your fingers. Shape it into a round boule or oval batard by pulling the edges toward the center and tucking them under. Place the shaped dough seam-side up on a floured surface and let it rest for 20-30 minutes to relax the gluten.
Once rested, place the dough on a piece of parchment paper dusted with 0.25 cup Cornmeal. Cover loosely and let it proof for another 1-2 hours, or until it has risen about 50% and springs back slowly when gently pressed. This final proof is where the dough develops its full flavor and structure. The cornmeal helps create that beautiful crust during baking.
Bake for a Crusty Artisan Loaf
Preheat your oven to 450°F with a Dutch oven inside for 30 minutes. Carefully transfer the dough (still on its parchment) into the hot Dutch oven, cover, and bake for 20 minutes. Then remove the lid and bake for another 20-25 minutes until the crust is deep golden brown.
Here’s where the magic happens—the Dutch oven traps steam, creating that perfect crust while keeping the crumb tender. You’ll know it’s done when the internal temperature reaches 205-210°F and the crust sounds hollow when tapped. Let the bread cool on a wire rack for at least 1 hour before slicing—this prevents a gummy texture.
Pro Tips For Making 1kg Sourdough Bread
- Use a Kitchen Scale: Weigh your starter and water by grams—this recipe’s hydration and ratios depend on precision. I used to eyeball it, and my bread turned out either gummy or dense until I started measuring like a scientist (yes, even for water).
- Mix Whole Wheat Last: Add the whole wheat flour in the final 10% of mixing—it’s heavier and absorbs moisture faster. I learned this after my first batch turned into a brick; now my crust stays crisp while the crumb stays open.
- Bulk Ferment at 22°C: Keep your dough in a warm spot (like a turned-off oven with a bowl of hot water) for 4-6 hours—this is where the magic happens. Too cold? It’ll take forever. Too hot? You’ll overproof before you know it.
- Score Deep and Fast: Use a sharp lame or razor at a 45-degree angle, cutting 5mm into the dough. I used a butter knife at first, and my slashes looked neat but didn’t expand properly—now my loaves rise beautifully.
Creative variations of this dish
Sweet & Sticky Variations
Add 1 tbsp cinnamon and ¼ cup brown sugar to the dough for a cinnamon-sourdough twist. Brush the baked loaf with melted butter**> and sprinkle with coarse sugar for a sweet, caramelized finish.
This variation is perfect for breakfast—slice it thick and toast it with a schmear of cream cheese. 🍯
Herb-Infused Crust
Mix 1 tbsp dried rosemary or 2 tbsp fresh thyme leaves into the dough for an aromatic twist. For extra flavor, infuse the olive oil with herbs before adding it to the dough.
The herbs add a subtle earthiness that pairs beautifully with soups or roasted meats. I love this variation with a sharp cheddar cheese spread.
Whole Grain Boost
Replace ½ cup of the all-purpose flour with ½ cup rye flour or ½ cup spelt flour for a nuttier, denser crumb. These flours add fiber and a deeper flavor without altering the bread’s structure.
I often use this variation for sandwiches—it holds up better to wet fillings like smoked salmon or avocado. 🌾
Cheesy Sourdough Twist
Stretch the dough after shaping and stuff it with ½ cup shredded Gruyère or sharp cheddar before baking. The cheese melts into the crust, creating pockets of gooey goodness.
For extra richness, add 1 tbsp grated Parmesan to the dough before bulk fermentation. This variation is a crowd-pleaser for dinner parties.
Seeded & Nutty
Add 2 tbsp pumpkin seeds, 2 tbsp sunflower seeds, or ¼ cup chopped walnuts to the dough for texture and crunch. Toast the seeds or nuts in a dry pan before mixing them in to enhance their flavor.
This variation adds a satisfying bite and pairs well with butter or hummus. 🌰
Cold-Proofed Overnight
For deeper flavor, shape your dough in the evening and refrigerate it overnight (up to 12 hours) before baking. The slow fermentation develops more complex flavors and a tighter crumb.
Simply remove it from the fridge, let it come to room temperature for 1-2 hours, then bake as directed. This method is ideal for busy mornings—just pop it in the oven when you wake up. ⏰
Nutrition facts
Frequently asked questions
How do I know if my sourdough starter is ready to use?
Your starter should be bubbly and active, rising noticeably within 4-6 hours after feeding. It should look like jiggly Jell-O and have a slightly tangy aroma. If it floats in water, it’s ready! For best results, use it when it’s at its peak—usually right after it peaks and starts to collapse.
Can I adjust this recipe for a smaller or larger batch?
Yes! This recipe scales well. For a 500g loaf, reduce all ingredients by 50%. For a 2kg loaf, multiply by 2—but increase fermentation time by 1-2 hours. Keep hydration (water to flour ratio) consistent to maintain texture. A kitchen scale is your best friend for accuracy!
What if my dough doesn’t rise during fermentation?
Check your starter first—it might be weak or underfed. Ensure your kitchen is warm enough (75-80°F) and avoid opening the dough too often. If using cold water, let it warm to room temp before mixing. For stubborn dough, try adding 1 tsp extra honey or extending fermentation by 2 hours. Cold weather? Move your dough near a warm oven or use a proofing box.
How can I make my crust extra crispy?
For a bakery-style crust, bake with steam! Place a metal bowl of boiling water in your oven while preheating. After transferring your dough to the Dutch oven, cover and bake for 20 minutes. Then remove the lid and bake until golden. For extra crunch, sprinkle cornmeal or semolina on the dough before baking. A pizza peel can also help create a crispier bottom crust.
Can I use this dough for sandwiches the next day?
This bread actually improves overnight. Wrap it tightly in plastic and refrigerate for up to 3 days. Remove it 1-2 hours before slicing to restore moisture. For sandwiches, slice thick (about 1 inch) and lightly toast to crisp up the crust. The next-day flavor is richer and more complex—perfect for charcuterie boards or grilled cheese!

- Baked Potatoes in Crock Pot Recipe: Buttery Interiors and Crispy Top Magic - November 1, 2026
- Braised Beef Short Ribs Recipe: Crock Pot Fall-Off-Bone Magic in 6 Hours - November 1, 2026
- Crock Pot Cocoa Recipe: Velvety Warmth With Hidden Spice Magic - November 1, 2026