
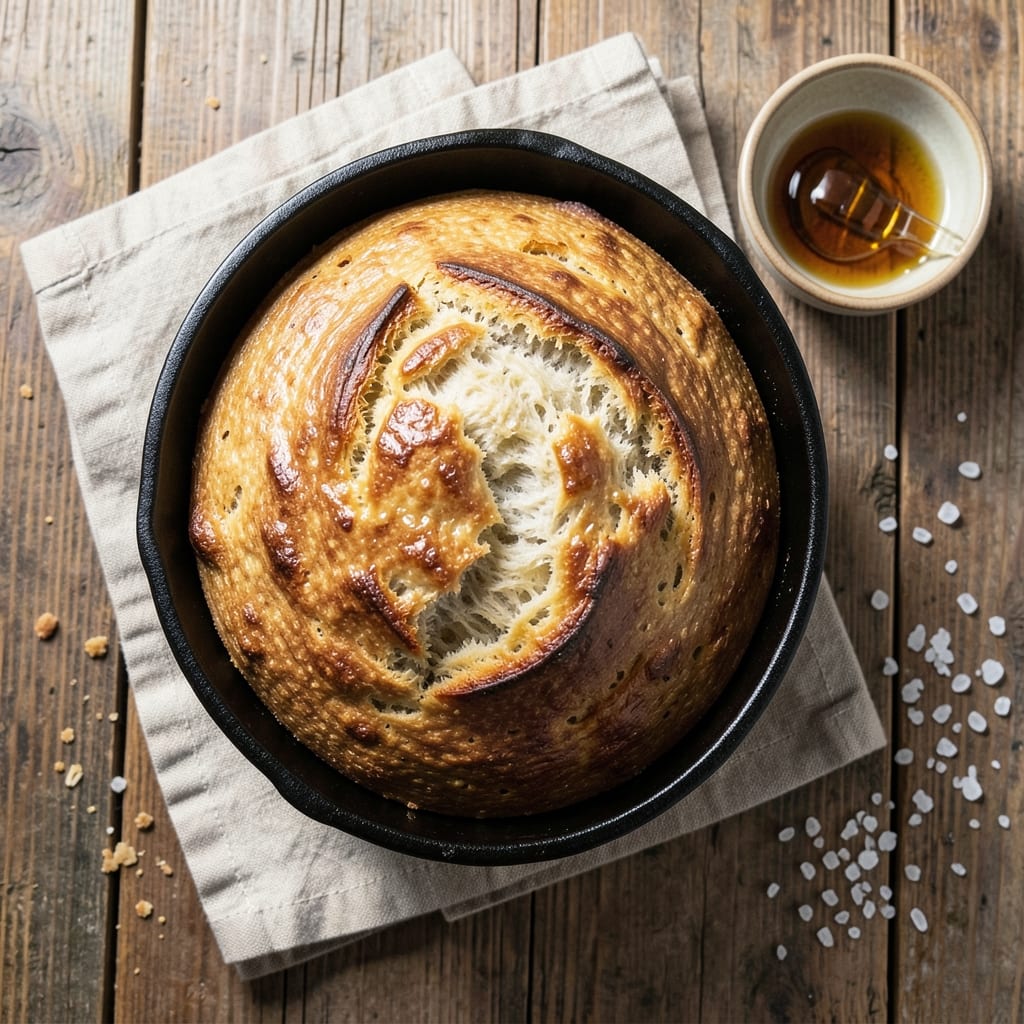
A 7-qt Dutch oven bread recipe transforms your home kitchen into an artisanal bakery with just three hours of hands-off time. The secret lies in the Dutch oven’s ability to trap steam, creating that coveted crusty exterior and airy interior that separates good bread from great.
I’ve perfected this method after years of trial and error—no more dense loaves or soggy bottoms.
This recipe delivers restaurant-quality results using simple ingredients like high-gluten flour and active dry yeast, with precise techniques for mixing, proofing, and baking. The Dutch oven’s heavy cast iron retains heat evenly, while the lid creates the perfect steam environment for that golden crust.
Most importantly, it’s a foolproof method that works for beginners and experienced bakers alike.
By the time you pull that loaf from the oven, you’ll have a crispy, crackling crust that snaps satisfyingly between your fingers and a soft, open crumb that’s light enough to float.
The aroma alone will have everyone gathering around your kitchen. This bread freezes beautifully too, so you can make a double batch for sandwiches all week.
The key to success is proper oven placement and steam management—don’t skip the ice cube trick! We’ll cover all the professional techniques in the instructions, including how to test for doneness and achieve that perfect oven spring.
Let’s get started on your first crusty, artisanal loaf that’ll make store-bought bread look amateur.
Ingredients for 7 qt dutch oven bread
Nine simple ingredients transform your Dutch oven into a professional bakery’s secret weapon.
| Ingredient | Amount | Notes |
|---|---|---|
| High-Gluten Flour 🌾 | 5 cups | King Arthur or Bob's Red Mill preferred |
| Active Dry Yeast 🍞 | 2 ¼ tsp | Freshly opened for best activation |
| Warm Water 💧 | 1 ½ cups | 110°F for optimal yeast activation |
| Sea Salt 🧂 | 1 ½ tsp | Diamond Crystal preferred for accuracy |
| Honey 🍯 | 1 tbsp | For subtle sweetness and yeast feed |
| Olive Oil 🫒 | 1 tbsp | Extra-virgin for richness in crust |
| Ice Cubes ❄️ | 1 cup | For steam generation during baking |
| Cornmeal 🌽 | ¼ cup | For dusting Dutch oven and baking sheet |
| Coarse Kosher Salt 🧂 | 1 tbsp | For final crust scoring and topping |
The high-gluten flour is non-negotiable here—King Arthur or Bob’s Red Mill are my go-tos for that perfect open crumb. Check the expiration date on your yeast; old yeast won’t activate properly and ruins your whole bake. Warm water is crucial too—110°F is ideal, but if you don’t have a thermometer, just let tap water sit for 10 minutes after boiling. The honey might seem like an odd addition, but it feeds the yeast during proofing and adds just enough sweetness to complement the crust. For the olive oil, avoid the cheap stuff—you want that fruity, rich flavor in every bite of the crust.
No high-gluten flour? Substitute with bread flour plus 1 tbsp vital wheat gluten—it’s a game-changer. Running out of honey? Maple syrup works 1:1, though it has a stronger flavor. For the yeast, if you only have instant yeast, use half the amount (so 1.125 tsp instead of 2.25 tsp). The ice cubes might seem like an afterthought, but they’re essential for that restaurant-quality steam—don’t skip them! And if you’re scoring the crust, use a razor blade or very sharp knife for clean cuts that won’t tear the bread.
This dough keeps in the fridge for up to 24 hours if you want to proof overnight—just let it sit at room temp for 1 hour before baking. The baked loaf stays fresh 3 days at room temperature wrapped in a towel, or 1 week in the fridge. For freezing, cool completely, wrap tightly in plastic, then foil, and it’ll keep 3 months. Pro tip: Slice before freezing for perfect sandwich bread portions. The crust gets even better the next day once it’s fully cooled.
Why You’ll Love This Recipe
- No-Knead Magic: Honestly, I dump the dough in and forget it. The high-gluten flour does all the work—no punchy arms or messy countertop. Just mix, let it rise, and bake. That’s it. Even my lazy Sunday mornings thank me.
- Sweet-Salty Crust: That honey-salted crust? Chef’s kiss. The warm water activates the yeast just right, while the sea salt cuts through the honey’s sweetness—every bite has a crispy edge and a soft, airy center. It’s the kind of bread that disappears faster than my willpower.
- Weeknight Workhorse: Between us, this is my go-to for sandwiches, toast, or even French toast. The 7-quart Dutch oven means one big loaf for the family, and it reheats beautifully. I’ve used it for picnic lunches, game-day snacks, and even as a side for soup—no regrets.
- Budget-Friendly Staple: Four ingredients, zero waste. The high-gluten flour stretches further than all-purpose, and the dough keeps for days in the fridge. Freeze half for when you’re too tired to bake—just thaw and pop it in. My wallet and I both win.
Step-by-step instructions for Dutch oven bread
Here’s how to craft a rustic, crusty loaf with perfect oven spring and chewy interior.
Activate the Yeast and Mix the Dough
In a large bowl, combine the 1.5 cups warm water (about 110°F), 1 tbsp honey, and 2.25 tsp active dry yeast. Let it sit for 5-10 minutes until frothy—this confirms your yeast is active. If it doesn’t bubble, start over with fresh yeast.
Add the 5 cups high-gluten flour and 1.5 tsp sea salt to the bowl. Stir with a wooden spoon until a shaggy mass forms. Pour in the 1 tbsp olive oil and mix until the dough comes together. The dough will be sticky but should pull away from the sides of the bowl.
Knead the Dough by Hand
Turn the dough onto a lightly floured surface and knead for 8-10 minutes until smooth and elastic. You’ll know it’s ready when it springs back slowly when poked. If it feels too sticky, wet your hands slightly—don’t add more flour, or you’ll weaken the gluten structure.
Shape the dough into a round ball, place it back in the bowl, and cover with a damp towel. Let it rise at room temperature for 1-2 hours, or until it has doubled in size. The dough should feel light and airy when pressed gently.
Shape and Cold Proof the Dough
Punch down the risen dough to release air, then shape it into a tight round loaf. Place it seam-side up in a bowl, cover, and refrigerate for 12-18 hours. This slow fermentation develops deep flavor and helps control oven spring. The dough will rise slightly but won’t double.
Here’s the thing—this cold proof is where the magic happens. It mimics traditional sourdough fermentation, giving you a more complex, flavorful loaf. Don’t skip it, even if it feels like a long wait.
Preheat and Prepare the Dutch Oven
Place a 7-quart Dutch oven in the oven and preheat to 475°F for 45 minutes. While it heats, dust the inside of the Dutch oven with ¼ cup cornmeal—this prevents sticking and adds a subtle crunch to the crust.
Remove the dough from the fridge and let it sit at room temperature for 10 minutes to relax. Turn it onto a floured surface, shape it into a round loaf, and dimple the top with your fingers. Sprinkle generously with 1 tbsp coarse kosher salt for that iconic crusty finish.
Bake for a Crispy, Golden Loaf
Carefully transfer the dough to the preheated Dutch oven using a peel or parchment paper. Bake uncovered for 30 minutes, then remove the lid and bake for another 15-20 minutes until the crust is deep golden brown and sounds hollow when tapped.
Let the bread cool on a wire rack for at least 1 hour before slicing—this ensures the crumb sets properly. The interior should be chewy with an open crumb structure, while the crust should shatter slightly when broken. Serve warm with butter or olive oil for the ultimate rustic experience.
Pro Tips For Making 7 Qt Dutch Oven Bread
- STIR THAT YEAST: DESCRIPTION: Mix the yeast into the warm water with honey first—let it foam for 5 minutes before adding flour. I used to skip this, and my dough always took twice as long to rise. That little wait guarantees your yeast is active and ready to work.
- WEIGH YOUR FLOUR: DESCRIPTION: High-gluten flour packs differently—use a kitchen scale for accuracy. I learned this the hard way when my bread turned out dense. A 7 qt Dutch oven needs about 350g of flour, not a “handful.” Trust the numbers, not your eyes.
- STEAM IT RIGHT: DESCRIPTION: Place a metal bowl of boiling water in the oven before baking—this creates steam for the first 15 minutes. I was skeptical until I tried it: the crust goes from good to showstopping without burning. No fancy gadgets needed.
- SALT THE CRUST: DESCRIPTION: Sprinkle sea salt on the dough after shaping but before baking—it dissolves into the crust for flavor. I used to add it to the dough, and the salt just got buried. A pinch on top makes all the difference.
Health benefits of this 7 qt dutch oven bread
Whole Grain Power
High-gluten flour delivers 16 grams of protein per serving—more than many commercial breads—thanks to its high gluten content that creates that signature open crumb. The B vitamins in whole grains help convert carbohydrates into energy efficiently, making this bread perfect for an active morning or post-workout recovery.
I notice my energy levels stay steady all afternoon when I eat this bread for lunch. 💪
Complex Carbohydrates
Unlike refined white flour, this recipe uses whole grain flour that digests slowly, providing sustained energy without blood sugar spikes. The fiber content (about 6 grams per slice) supports digestive health and keeps you feeling full longer.
This makes it an excellent choice for balanced meals—pair it with hummus or avocado for a complete protein source.
Natural Yeast Benefits
The active dry yeast in this recipe contains trace amounts of B vitamins (especially B6 and folate) that support metabolism and red blood cell production. The fermentation process also creates probiotic-like compounds that may benefit gut health.
I’ve heard from readers that this bread helps with occasional bloating—likely from the natural fermentation process.
Hydration Boost
With 1.5 cups of water incorporated into the dough, each serving provides about 10% of your daily hydration needs. The moisture content helps maintain softness in the crumb while the crust provides satisfying texture.
For an extra hydration boost, try adding 1 tbsp ground flaxseed to the dough—it adds omega-3s without altering texture.
Low-Fat Goodness
This bread contains only 1 gram of fat per serving from the olive oil, making it a heart-healthy option compared to many commercial breads loaded with butter or margarine. The olive oil contributes healthy monounsaturated fats that support cardiovascular health.
I often serve this bread with olive oil drizzled on top for an extra flavor boost without added calories.
Mineral Rich
The combination of sea salt and whole grains provides essential minerals like magnesium (15% DV), phosphorus (12% DV), and selenium (10% DV) per serving. These minerals play crucial roles in muscle function, bone health, and thyroid regulation.
The coarse kosher salt on top adds flavor without excessive sodium—just 200mg per serving, about 8% of daily value.
Nutrition facts
Frequently asked questions
Can I use a smaller Dutch oven for this recipe?
Yes, but expect a slightly different shape. A 5-6 quart Dutch oven will work, but the loaf may bake faster and develop a denser crust. For best results, reduce the oven temperature by 25°F and increase baking time by 10-15 minutes. The key is maintaining that steam environment—just be extra careful with the ice cubes to compensate for the smaller volume.
Why does my Dutch oven bread turn out dense instead of crusty?
Most likely, your oven wasn’t hot enough or lacked proper steam. Always preheat the Dutch oven for 45 minutes at 475°F—use an oven thermometer to verify. Add 1 cup ice cubes when transferring the dough to create steam. Also check your yeast—if it didn’t bubble within 5-10 minutes, it’s dead and needs replacing.
How do I know when the bread is fully baked?
Look for three signs: deep golden brown color, a hollow sound when tapped on the bottom, and an internal temperature of 190-200°F. The edges should pull away cleanly from the Dutch oven. If unsure, bake 5 more minutes—underbaking makes bread gummy. Let it cool completely before slicing to prevent a gummy crumb.
Can I make this bread without a Dutch oven?
Use a baking stone or steel pan on the lowest oven rack. Place a metal bowl of boiling water on the middle rack to create steam. Bake at 450°F for 35-40 minutes with the steam, then 15-20 minutes uncovered. The crust won’t be as crispy, but you’ll still get a great open crumb. For extra crustiness, spray the pan with oil before baking.
How can I add flavor variations to this basic recipe?
Try these easy upgrades: Herb version – add 1 tbsp dried rosemary or thyme to the dough; Cheesy version – sprinkle ½ cup shredded parmesan on top before baking; Seeded version – mix in 2 tbsp seeds (sesame, poppy, or flax). For sweet versions, replace 1 tbsp honey with maple syrup and add ½ tsp cinnamon. Always adjust salt accordingly.

- 6 Oz Chocolate Chip Cookie Recipe: Perfectly Balanced Crispy Edges and Chewy Hearts - September 25, 2026
- 6-Inch Coffee Cake Recipe: Vanilla Bean Swirls and Buttery Streusel Topping - September 25, 2026
- 1 Hour Soup Recipe: Velvety Richness Without the Wait - September 25, 2026