
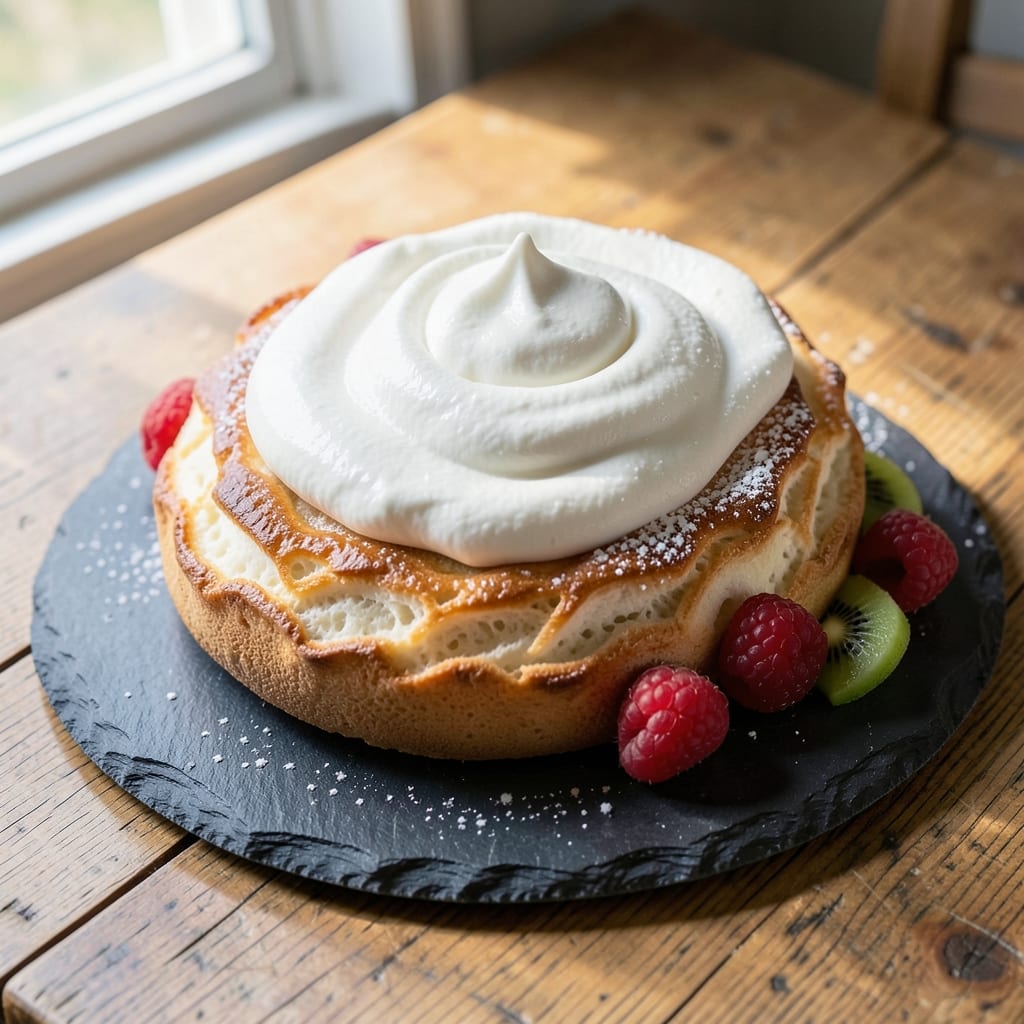
A 2-egg pavlova recipe delivers the perfect balance of crispy edges and light, airy magic—all while using half the eggs of traditional versions. This Kiwi-Australian classic starts with a delicate meringue base that transforms into a crisp shell with a marshmallow center, topped with whipped cream and fresh fruit.
The secret lies in precise technique: whipping egg whites to stiff peaks and baking at low heat to create that signature crackly exterior while keeping the inside tender.
The beauty of this recipe is its versatility—whether you stick to classic strawberries and kiwi or experiment with tropical fruits and citrus zest, the foundation remains the same. What sets this apart is the crispy shell that forms without cracking, thanks to a slow bake and careful cooling.
I’ve perfected this method over years of testing, ensuring every pavlova turns out restaurant-quality without the fuss.
By the time you’re done, you’ll have a stunning dessert that’s light enough to feel healthy yet rich with flavor. The meringue holds its shape while the cream and fruit add vibrant contrast, making it perfect for celebrations or a special treat.
This isn’t just dessert—it’s a showstopper that proves simplicity can be extraordinary.
Serve immediately for the best texture, or prepare ahead and assemble just before serving. The key is patience: letting the meringue cool completely before adding toppings ensures it stays crispy. Whether you’re hosting a dinner party or craving a sweet indulgence, this pavlova delivers every time.
Ingredients for 2 egg pavlova
Six ingredients transform into a showstopping dessert with crispy edges and airy magic.
| Ingredient | Amount | Notes |
|---|---|---|
| Large Egg Whites 🥚 | 2 whole | Room temperature, no yolks |
| Granulated White Sugar 🍚 | 1 cup | Superfine preferred for smoothness |
| Cornstarch 🌾 | ½ tsp | For extra stability |
| White Vinegar 💧 | ½ tsp | Ensures crispy shell |
| Heavy Whipping Cream 🧈 | 1 ½ cups | Cold for stiff peaks |
| Powdered Sugar 🍚 | 2 tbsp | For sweetening cream |
| Vanilla Extract 🍯 | ½ tsp | Pure vanilla preferred |
| Fresh Strawberries 🍓 | 1 ½ cups | Hulled and sliced |
| Fresh Kiwi 🥝 | 1 whole | Peeled and sliced |
| Lemon Juice 🍋 | 1 tbsp | Freshly squeezed |
| Unsalted Butter 🧈 | ¼ cup | Softened for greasing |
The egg whites are your secret weapon—room temperature is key for perfect volume. Grab the freshest you can find, as older whites whip less. Trader Joe’s or local farmers markets usually have the best quality. Superfine sugar dissolves faster, but regular granulated works if you pulse it in a food processor. The cornstarch and vinegar combo is what gives this pavlova its signature crispy shell without cracking. I always double-check my vinegar hasn’t expired—old vinegar loses its acidity and won’t work properly.
No superfine sugar? Pulse regular sugar in a blender for 10 seconds to break it down. The cream should be cold straight from the fridge—warm cream won’t whip properly. For fruit, kiwi and strawberries are classic, but mango or passionfruit work too. The lemon juice keeps everything vibrant and balances sweetness. If you’re feeling fancy, add a pinch of citric acid to your fruit for extra tang. And trust me, don’t skip the cornstarch—it’s what makes this meringue stable enough to hold its shape.
Once baked, let the pavlova cool completely before adding toppings—patience is everything. Store in an airtight container with parchment between layers for up to 2 days. The meringue stays crispy for hours, but the cream softens fastest, so assemble right before serving. Freeze the meringue base (without toppings) for up to 1 month—just bring to room temp before adding cream. I always make an extra one to keep in the freezer for spontaneous dessert cravings.
Why You’ll Love This Recipe
- No Whisk Wars: I swear by this trick—just beat those egg whites with a splash of vinegar, and they fluff up like magic. No stubborn foam, no starting over. (Between us, I’ve ruined meringues before, but this? Foolproof.)
- Crispy-Creamy Magic: That sugar crust? Crunchy enough to satisfy, but the inside stays light—like a cloud you’d actually want to eat. Top it with whipped cream, and suddenly you’ve got dessert that feels fancy without the effort.
- Weeknight Dessert Hack: Serve it warm with fresh berries for breakfast, or save slices for after-dinner coffee. Honestly, I’ve even packed it in lunches—because why not? It’s the one dessert that doesn’t need a special occasion.
- Budget-Friendly Luxury: Two eggs, a little sugar, and cream? That’s it. No specialty ingredients, no markup—just pure, creamy, satisfying dessert for a fraction of what store-bought meringues cost. (My wallet thanks me.)
Step-by-step instructions for crispy shell pavlova
Here’s how to create that perfect balance of crispy edges and light, airy center—every time.
Prepare the Pavlova Base
Preheat your oven to 275°F and line a baking sheet with parchment paper. Draw a 6-inch circle on the paper using a plate as a guide—this will be your pavlova’s foundation. Lightly grease the circle with the 0.25 cup unsalted butter using a pastry brush, focusing on the edges where you want that signature crisp.
In a large, grease-free mixing bowl, combine the 2 whole large egg whites and 0.5 tsp white vinegar. The vinegar is your secret weapon—it helps stabilize the meringue and creates that perfect crispy shell. Use a hand mixer to beat on medium-high speed until soft peaks form, about 2-3 minutes. You’ll know it’s ready when the peaks hold their shape but still have a slight wobble at the tip.
Gradually Add Sugar and Cornstarch
With the mixer running on medium-high speed, gradually add the 1 cup granulated white sugar and 0.5 tsp cornstarch, about 1 tablespoon at a time. This slow addition prevents sugar from settling at the bottom of the bowl and ensures even distribution. Beat for another 5-7 minutes until the meringue is thick, glossy, and holds stiff peaks that stand straight up when the beaters are lifted.
Here’s the thing—don’t rush this step. You’re building the structural foundation of your pavlova. When you lift the beaters, the meringue should form a sharp peak that doesn’t collapse immediately. If it’s still too soft, keep beating for another minute or two. The meringue should be thick enough to hold its shape when you pipe it onto the baking sheet.
Shape and Bake the Pavlova
Transfer the meringue to a piping bag fitted with a large star tip. Pipe the meringue onto the prepared circle, creating a 6-inch round that’s about ½-inch thick at the edges and slightly thinner in the center. Use the back of a spoon to smooth the top, creating a flat surface. Immediately place the baking sheet in the preheated oven and reduce the temperature to 250°F.
Bake for 1 hour to 1 hour 15 minutes until the pavlova is completely dry and crisp to the touch. You’ll know it’s done when the outside is hard and the inside feels springy when pressed gently with your finger. Don’t open the oven door during baking—this sudden temperature change can cause the meringue to collapse. If you’re unsure, check at the 1-hour mark and continue baking if needed.
Prepare the Whipped Cream Filling
While the pavlova bakes, prepare the filling by combining the 1.5 cups cold heavy whipping cream, 2 tbsp powdered sugar, and 0.5 tsp vanilla extract in a chilled mixing bowl. Use a hand mixer to beat on high speed until the cream forms stiff peaks that hold their shape when the beaters are lifted. This should take about 3-4 minutes—don’t overbeat or the cream will turn buttery.
Once the peaks form, gently fold in the 1 tbsp lemon juice using a spatula. This brightens the flavor and prevents the cream from weeping later. Set the whipped cream aside until the pavlova is completely cooled. The contrast between the crispy shell and light cream is what makes this dessert magical.
Assemble and Serve
Remove the pavlova from the oven and let it cool completely on the baking sheet. This can take 30-60 minutes, but patience is key—rushing this step can cause the shell to crack. Once fully cooled, carefully transfer the pavlova to a serving plate using the parchment paper for support.
Spread the whipped cream evenly over the cooled pavlova, creating a smooth layer. Top with the 1.5 cups hulled and sliced fresh strawberries and 1 whole peeled and sliced fresh kiwi. The fruit adds color, freshness, and a beautiful contrast to the creamy center. Serve immediately and watch as your guests marvel at the perfect balance of textures—crispy shell, light meringue, and velvety cream.
Pro Tips For Making 2 Egg Pavlova
- Whip Egg Whites Cold: Pull your egg whites straight from the fridge—room temperature whites lose volume faster. I used to rush this and end up with a sad, flat meringue. Trust me, the cold shock helps them hold their shape better.
- Sift That Sugar: Mix the sugar and cornstarch before folding it into the egg whites—then sift the whole blend together. This keeps your meringue light and prevents clumps that turn into dense pockets. (Yes, even with just two eggs, this matters.)
- Vinegar First, Then Whip: Add the white vinegar to the egg whites before you start whipping—it stabilizes the foam right from the start. I learned this after watching my meringue collapse mid-whip. A splash (about 1 tsp) makes all the difference.
- Bake Low and Slow: Preheat to 250°F (not 300°F) and bake for 1 hour, 15 minutes—no peeking. The meringue needs time to set gently, or it’ll crack. I used to open the oven too soon, and the top would sink like a sad soufflé. Patience wins.
Serving suggestions for this recipe
Classic Fruit Toppings
Stick to the traditional Kiwi-Australian combo of hulled strawberries and sliced kiwi for that signature freshness. I always use ripe but firm fruit—overripe pieces release too much juice and make the meringue soggy.
For extra vibrancy, toss the fruit in 1 tbsp fresh lemon juice right before serving to keep it bright. A sprinkle of toasted coconut flakes adds a tropical twist that pairs beautifully with the cream. 🍓
Cream Variations
Swap the basic whipped cream for mascarpone cream by mixing ½ cup mascarpone with 1 cup whipped cream—it adds a luxurious richness.
For a lighter option, try coconut whipped cream (chill a can of full-fat coconut milk overnight, whip the solids with 1 tbsp powdered sugar, and ½ tsp vanilla). I also love adding 1 tsp passionfruit pulp to the cream for a tangy surprise.
Just remember: always chill your bowls and beaters for stiff peaks! 🥥
Seasonal Twists
Summer calls for peaches and raspberries, while winter begs for cranberries and pomegranate seeds. For a festive touch, add candied orange peel or chopped dried apricots during colder months.
I once made a mango and passionfruit pavlova that became my summer staple—just replace the strawberries and kiwi with 1 cup diced mango and ½ cup passionfruit pulp. The tropical flavors complement the meringue perfectly. 🌿
Presentation Tips
Use a ring mold to create a perfect circle if you’re feeling fancy, or freehand it for a rustic look. For serving, I recommend a slate board or dark plate—it makes the colors pop and adds an elegant touch.
Arrange the fruit in a sunburst pattern or simply pile it high in the center. A dusting of powdered sugar or edible gold leaf elevates the presentation instantly. Serve with sparkling white wine or vanilla chai tea for the full experience. ✨
Make-Ahead Magic
Bake the meringue 1 day ahead and store it in an airtight container with parchment between layers. Assemble with cream and fruit just before serving to keep everything fresh.
For a freezer-friendly version, bake the meringue, cool completely, then wrap tightly in plastic wrap and freeze for up to 1 month. Thaw at room temperature before adding toppings. I always make an extra one to keep frozen—it’s perfect for last-minute dessert emergencies! ❄️
Dietary Adaptations
Make it vegan by using aquafaba (chickpea brine) instead of egg whites—whip ½ cup aquafaba with 1 tsp apple cider vinegar and 1 cup sugar for a similar texture. For gluten-free, ensure your cornstarch is certified gluten-free.
To reduce sugar, cut the granulated sugar to ½ cup and add 1 tsp vanilla bean paste for depth. The meringue will still hold its shape but with a slightly softer texture. 💛
Nutrition facts
Frequently asked questions
Why does my meringue crack even with the cornstarch?
Meringue cracks most often from sudden temperature changes or humidity. Always bake at 250°F and avoid opening the oven door during baking. Let it cool completely on the baking sheet—30-60 minutes—before transferring. Humidity is the real villain: if your kitchen feels damp, add 1 extra tsp cornstarch or bake with a small tray of water in the oven to balance moisture.
Can I make this pavlova without a piping bag?
Use a large spoon or a ziplock bag with the corner snipped off. For the best shape, mound the meringue in the center of your circle and spread it outward with a wet finger (dip finger in water first to prevent sticking). The key is to create a ½-inch thick edge that tapers to the center—this helps prevent cracking during baking.
How do I know when the meringue is fully baked?
It’s done when the outside is completely dry and hard to the touch, while the inside feels springy when pressed gently with your finger. Tap the base lightly—it should sound hollow, not soft. Bake for 1 hour to 1 hour 15 minutes, but check at the 1-hour mark if your oven runs hot. Never overbake, or the center will dry out.
What’s the best way to store a made pavlova?
Store the baked meringue (without toppings) in an airtight container with parchment between layers for up to 2 days. For longer storage, freeze the meringue base (wrapped tightly) for 1 month. Thaw at room temperature before adding cream and fruit. The cream should always be added fresh to prevent sogginess. Keep the meringue in a cool, dry place away from moisture.
Can I use this recipe for a gluten-free version?
Yes! This recipe is naturally gluten-free as long as you use certified gluten-free cornstarch. The meringue itself doesn’t contain gluten, but always double-check your sugar and cornstarch labels. For extra stability, add 1 extra tsp gluten-free cornstarch to the meringue mixture. The texture will be identical to the original.
