
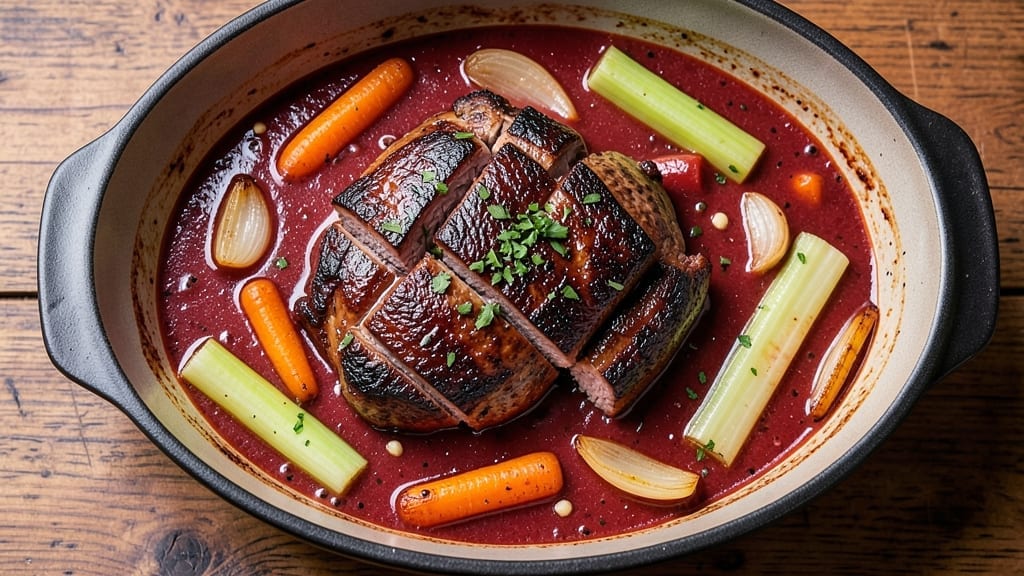
A 2-hour beef stew recipe transforms tough cuts into melt-in-your-mouth perfection with deep, rich flavors that develop as it simmers. The secret lies in proper browning and slow cooking—techniques that build layers of caramelized depth while keeping the meat tender.
This method delivers restaurant-quality results without requiring overnight prep, though the flavors do improve with time.
What sets this stew apart is its balance of technique and simplicity. You’ll start by searing beef chuck in batches to develop a flavorful crust, then deglaze the pot to capture every savory bit. The vegetables soften just enough to absorb the rich, aromatic broth while maintaining their structure.
The result? A hearty stew where every spoonful delivers tender meat, caramelized vegetables, and a sauce so flavorful it tastes better the next day.
By the time you serve it, you’ll have a pot of deeply satisfying beef stew with fork-tender meat and vegetables swimming in a velvety, herb-infused broth.
The aroma alone will have everyone gathering at the table, and the first bite will confirm why this method consistently delivers professional-quality results at home.
Serve with crusty bread for dipping or alongside roasted potatoes to soak up every last drop of that flavorful broth. The beauty of this recipe is its versatility—it works as a comforting weeknight dinner or a showstopping centerpiece for gatherings. Let’s get started on creating this deeply flavorful stew.
Ingredients for 2 hour beef stew
Sixteen ingredients transform tough beef into restaurant-quality stew with deep caramelized flavors.
| Ingredient | Amount | Notes |
|---|---|---|
| Beef Chuck Roast 🥩 | 3 lb | Cut into 1.5-inch cubes, trimmed of fat |
| Yellow Onions 🧅 | 2 whole | Medium size, sliced into half-moons |
| Carrots 🥕 | 4 whole | Medium size, peeled and cut into chunks |
| Celery Stalks 🥬 | 4 whole | Cut into 1-inch pieces, including leaves |
| Garlic Cloves 🧄 | 6 cloves | Peeled and smashed with side of knife |
| Tomato Paste 🍅 | ½ cup | High-quality, no sugar added |
| Dry Red Wine 🍷 | 1 cup | Bold variety like Cabernet Sauvignon |
| Beef Broth 💧 | 4 cups | Homemade or low-sodium store-bought |
| Fresh Thyme 🌿 | 2 tbsp | Leaves only, chopped finely |
| Fresh Rosemary 🌿 | 1 tbsp | Needles only, chopped |
| Bay Leaves 🌿 | 2 whole | Dried, standard size |
| All-Purpose Flour 🌾 | 2 tbsp | For thickening, if needed |
| Olive Oil 🫒 | 2 tbsp | Extra-virgin for searing |
| Kosher Salt 🧂 | 1 ½ tsp | Diamond Crystal preferred |
| Freshly Ground Black Pepper 🌶️ | 1 tsp | Coarsely ground |
The beef chuck is non-negotiable here—its marbling and connective tissue create that melt-in-your-mouth texture. Look for well-marbled cuts at your butcher or the meat department, avoiding anything with excessive fat. If you’re buying a whole roast, trim it yourself for better control. For the vegetables, fresh is best, but frozen carrots and celery (thawed) work in a pinch. The onions should be yellow—not red or white—they hold up better during long cooking. And that tomato paste? Rao’s or Mutti brands are my go-to for their rich, concentrated flavor without added sugar.
No red wine? Substitute with beef broth plus 1 tbsp balsamic vinegar—it’ll still develop depth, just with a slightly different profile. Fresh herbs are ideal, but dried thyme at one-third the amount works if you’re short on time. The flour is only for emergency thickening if the stew gets too thin, but honestly, this recipe rarely needs it. For the broth, homemade is best, but even the budget store-bought versions work if you use low-sodium. And if you’re worried about the wine’s alcohol content, don’t be—it burns off completely during the long simmer.
This stew tastes even better the next day, so make it ahead if possible. Store in an airtight container in the fridge for up to 5 days, or freeze for 3 months. For reheating, warm gently on the stove with a splash of broth or water—never microwave, as it can make the meat tough. The flavors continue developing overnight, so if you can, let it sit at room temperature for 30 minutes before serving. And always keep that extra broth from the pot—it’s liquid gold for dipping bread or stretching the stew if needed.
Why You’ll Love This Recipe
- Set-It-and-Forgot: (Yes, even on a Tuesday night)
- Deep, Slow-Cooked Magic: That beef chuck? It practically melts into tender, pull-apart perfection. The garlic and onions caramelize into the broth, giving it this rich, almost wine-like depth—like a hug in a bowl. (My picky husband actually licks his spoon.)
- Leftovers That Don’t Suck: Honestly, this stew tastes better the next day. I make a double batch on Sundays, freeze half, and reheat it for lazy nights. The flavors meld even more overnight, and it’s still hearty enough to fill up my college-age son’s bottomless pit.
- Budget Feeds a Crowd: A single chuck roast stretches to feed four (or five if you’re me and sneak extra). The veggies—onions, carrots, celery—are cheap staples, and the garlic adds flavor without cost. It’s my go-to for game nights or when friends drop by unexpectedly. No one leaves hungry.
Step-by-step instructions for deep-rich beef stew
Here’s the method for developing complex, layered flavors in just two hours.
Sear the Beef Chuck Roast for Maximum Flavor
Heat the 2 tablespoons olive oil in a heavy Dutch oven over medium-high heat until shimmering. Working in batches if needed, add the 3 lb beef chuck roast cut into 1.5-inch cubes and sear for 3-4 minutes per side until deeply browned. This step is critical—it develops the Maillard reaction that creates rich, caramelized flavors.
Don’t crowd the pan or the temperature will drop, preventing proper browning. I press down gently on the beef with a spatula during the first minute to ensure even contact with the hot surface. Once all pieces are browned, transfer them to a plate and set aside. You’ll notice the beef releases easily from the pan when properly seared.
Develop the Vegetable Base and Aromatics
In the same Dutch oven, add the sliced 2 whole yellow onions, 4 whole carrots cut into chunks, and 4 whole celery stalks cut into 1-inch pieces. Cook over medium heat for 8-10 minutes, stirring occasionally, until the vegetables soften and begin to caramelize. This process builds sweetness that forms the stew’s foundation.
Add the 6 cloves garlic smashed with the side of your knife and the 0.5 cup tomato paste, stirring to combine. Cook for another 2 minutes until the garlic becomes fragrant and the tomato paste darkens slightly. This step creates a rich, umami-packed base that will carry through the entire cooking process. If the vegetables stick to the bottom, add a splash of beef broth to deglaze.
Deglaze and Build the Stew Base
Pour in the 1 cup dry red wine and scrape up all the browned bits from the bottom of the pot with a wooden spoon. This deglazing step captures all the concentrated flavors you’ve built so far. Let the wine simmer for 3-4 minutes until reduced by half, allowing the alcohol to cook off and the flavors to intensify.
Stir in the 4 cups beef broth, 1.5 teaspoons kosher salt, and 1 teaspoon freshly ground black pepper. Bring to a gentle simmer, then return the seared beef to the pot. Add the 2 whole bay leaves, 2 tablespoons fresh thyme, and 1 tablespoon fresh rosemary. The stew should now be bubbling gently—this is where the magic begins.
Simmer to Perfection and Thicken the Sauce
Cover the Dutch oven and simmer over low heat for 1 hour to 1 hour 15 minutes, or until the beef is fork-tender. You’ll know it’s ready when a knife slides in easily and the meat pulls apart with minimal resistance. The liquid should have reduced slightly, creating a rich, velvety consistency.
If the stew needs thickening, mix the 2 tablespoons all-purpose flour with 1 tablespoon cold water to create a slurry. Stir this into the stew and simmer for an additional 5-10 minutes until the sauce reaches your desired thickness. Taste and adjust seasoning—you may need to add more salt or pepper depending on your broth’s saltiness. The stew should be deeply flavorful with a perfect balance of richness and acidity.
Rest and Serve for Maximum Flavor Development
Remove the stew from heat and let it rest, covered, for 15-20 minutes. This resting period allows the flavors to meld and the beef to reabsorb some of the cooking liquid, resulting in even more tender, juicy meat. Skim off any excess fat that has risen to the surface if desired.
Ladle the stew into serving bowls, garnishing each portion with a sprinkle of fresh thyme or rosemary if you like. The flavors will continue to develop as it sits, making this an even better stew the next day. Serve with crusty bread or over buttered egg noodles to soak up every last drop of that rich, aromatic sauce.
Pro Tips For Making 2 Hour Beef Stew
- SEAR THE CHUCK ROAST FIRST: Skip the slow start—hit that beef with high heat in a dry pot for 3-4 minutes per side until deep brown. I used to rush this, and the stew always tasted flat. A good crust locks in flavor and keeps the meat tender.
- CUT VEGETABLES EVENLY: Onions into ½-inch chunks, carrots in 1-inch batons, celery in 1-inch pieces—no smaller. Uneven sizes mean some veggies turn to mush while others stay crunchy. (Yes, it’s tedious, but it’s worth it.)
- DON’T SKIP THE BROWNED GARLIC: Smash those garlic cloves with the flat side of your knife before adding them to the pot—it releases more flavor. And if they burn? Pull them out immediately. Burnt garlic ruins everything.
- ADD LIQUID IN STAGES: Start with just enough broth to deglaze the pot, then add the rest later. Too much liquid too soon dilutes the stew’s depth. I learned this after making a stew so watery it tasted like sad soup.
Dietary considerations for these flavors
Gluten-Free Adaptation
This stew is naturally gluten-free as written, but I always double-check my ingredients. The beef broth is the only potential concern—opt for certified gluten-free brands like Annie’s or Imagine if you’re sensitive.
For thickening, skip the flour entirely or use a cornstarch slurry (mix 1 tbsp cornstarch with 1 tbsp water) instead. The stew’s richness comes from the wine and tomato paste, so no gluten is needed for depth. 🌾
Low-Carb Options
To make this stew keto-friendly, reduce the 4 cups beef broth to 3 cups and increase the beef to 3.5 lbs for more protein. Swap carrots for ½ cup sliced mushrooms (they add umami without carbs) and omit the tomato paste—its natural sugars add up.
Use xanthan gum (¼ tsp) instead of flour for thickening if needed. The wine and herbs provide all the flavor without carbs. 🥩
Dairy-Free Considerations
This recipe is already dairy-free, but if you’re avoiding all animal products, substitute the beef with mushrooms or lentils (use 1.5 cups dried lentils for texture). For umami depth, add 1 tbsp soy sauce or miso paste when deglazing.
The wine and broth provide enough richness without dairy. Always check your broth label for hidden dairy additives. 🌱
Allergen-Friendly Swaps
For nut allergies, ensure your beef broth is nut-free (some brands process in shared facilities). If avoiding wine, use 1 cup beef broth + 1 tbsp balsamic vinegar instead.
For soy allergies, omit any soy-based thickeners and rely on cornstarch. The recipe’s core flavors work beautifully without common allergens—just verify each ingredient’s processing environment. 💡
Protein Boost
Add 1 cup cooked quinoa or ½ cup cooked lentils per serving for extra protein without altering texture. For a heartier stew, include ½ lb smoked sausage (like kielbasa) sliced into rounds—cook it with the beef during searing. The sausage adds smoky depth while increasing protein content significantly. 💪
Nutrition facts
Frequently asked questions
Can I use a different cut of beef instead of chuck roast?
Yes, but chuck is ideal for its marbling and connective tissue. Try stew beef or chuck short ribs (trimmed of excess fat) for similar results. Avoid lean cuts like sirloin—they’ll dry out during long cooking. For extra tenderness, use 3 lb beef short ribs instead of chuck cubes.
Why does my stew taste watery even after simmering?
Watery stews often come from insufficient browning or too much liquid. First, ensure you properly seared the beef to build flavor. If needed, simmer uncovered for 10-15 minutes to reduce the liquid, or make a cornstarch slurry (1 tbsp cornstarch + 1 tbsp water) to thicken. For next time, reduce broth to 3 cups instead of 4.
Can I make this stew in an Instant Pot or slow cooker?
For the Instant Pot, brown the beef first, then cook on high pressure for 45 minutes with natural release. In a slow cooker, use 6 hours on low or 3 hours on high. The wine and tomato paste should still be added at the start. The key is longer cooking time—both methods work beautifully for tenderizing the meat.
What vegetables can I add for variety?
Try adding 1 cup diced potatoes (add after 30 minutes of simmering) or ½ cup sliced mushrooms (cook with onions). For heartier stews, include 1 cup chopped kale or ½ cup frozen peas at the end. Just remember—denser veggies need longer cooking time, while delicate ones should go in later.
How do I reheat leftover beef stew?
Never microwave—it makes the meat tough. Instead, reheat gently on the stove over low heat with a splash of broth or water. Cover and stir occasionally until warmed through (10-15 minutes). For extra richness, add a pat of butter or a splash of wine while reheating. The flavors actually improve overnight!

- 12 Bean Chili Recipe: Hearty Slow-Cooked Depth With 12 Legumes - October 17, 2026
- 5 Seed Bread Recipe: Nutty Crunch and Artisan Flavor in One Loaf - October 17, 2026
- 1 Lb Macaroni Salad Recipe: Bold, Crunchy, and Crowd-Pleasing - October 17, 2026