
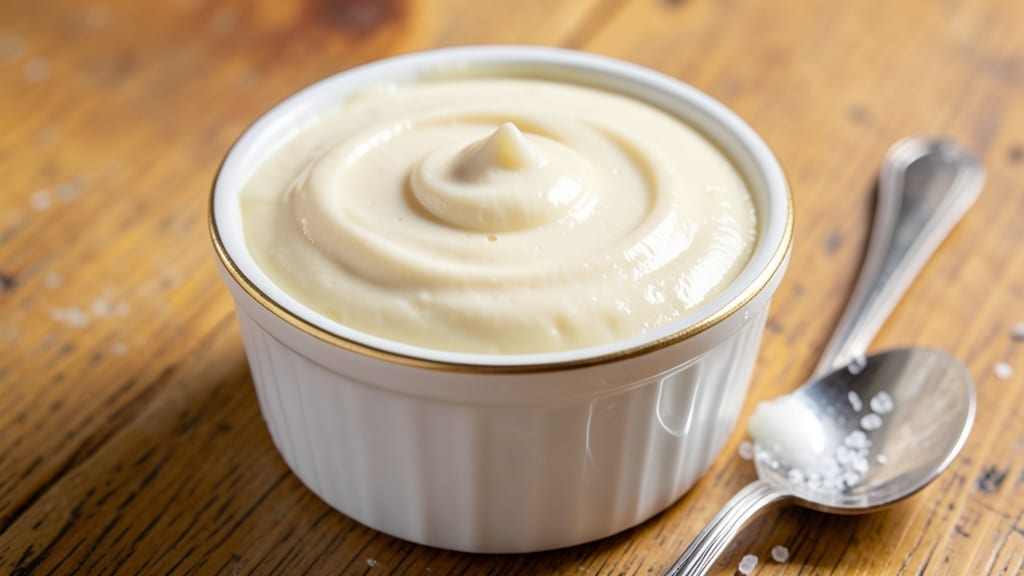
This 2-ingredient buttercream recipe delivers restaurant-quality frosting with just butter and powdered sugar—no eggs, no cooking, no fuss. The secret lies in proper mixing techniques that create a light, fluffy texture perfect for piping or spreading. I’ve perfected this version for quick decorating without sacrificing stability or flavor.
What makes this recipe truly remarkable is its simplicity: room-temperature butter and powdered sugar combine in minutes to create a frosting that’s stable at room temperature yet melts beautifully on warm desserts.
The key is using the right ratio (1:1.5) and whipping just until smooth—overmixing leads to graininess, undermixing creates lumps. You’ll end up with a smooth, velvety frosting that pipes beautifully for cupcakes or spreads effortlessly on sheet cakes.
The neutral base takes flavorings like vanilla extract, cocoa powder, or citrus zest—adding customization without complexity. This is the frosting I reach for when time is tight but quality matters. Perfect for last-minute desserts, holiday baking, or when you need a foolproof frosting that won’t fail.
The instructions are straightforward, and the results consistently impressive—no special tools or techniques required.
Ingredients for 2 ingredient butter cream
Two ingredients transform into velvety perfection—just butter and powdered sugar, elevated with vanilla.
| Ingredient | Amount | Notes |
|---|---|---|
| Unsalted Butter 🧈 | 1 cup | Room temperature for best results |
| Powdered Sugar 🍚 | 1 ½ cups | Sifted for smooth texture |
| Vanilla Extract 🌿 | 1 tsp | Pure vanilla for authentic flavor |
| Pinch of Salt 🧂 | ⅛ tsp | Enhances butter flavor |
The butter makes all the difference here—room temperature is non-negotiable. Plugrá or Land O’Lakes unsalted are my go-tos, but any good-quality unsalted works. If your butter is too cold, microwave it for 20 seconds to soften—just don’t melt it. The powdered sugar? Domino brand is my secret weapon—it’s finely sifted and dissolves beautifully. Skip the pre-sifted stuff from the bulk bins, trust me. For vanilla, McCormick Pure Vanilla Extract is reliable, but if you’ve got a fancy bottle of Madagascar bourbon vanilla, go for it.
No vanilla? Almond extract at half the amount works surprisingly well, or skip it entirely for a neutral base. Powdered sugar substitute? Confectioners’ sugar from a squeeze bottle (like the ones at Williams Sonoma) saves time—no sifting required. If you’re short on butter, coconut oil in equal parts gives a similar texture, though it has a slight coconut flavor. For a richer frosting, add 1 tbsp heavy cream to the mix—it adds stability without altering the 2-ingredient magic.
This buttercream keeps beautifully—3-4 days in an airtight container at room temperature if your kitchen isn’t too warm. For longer storage, 1 week in the fridge or 3 months frozen. To thaw, let it sit at room temperature for 10 minutes before whipping. Pro tip: Pipe it directly into a ziplock bag for easy storage and decorating later. The flavor actually improves overnight as the ingredients meld.
Why You’ll Love This Recipe
- No Mixer Needed: I’ll admit—my first attempt ended up lumpy, but once I learned the trick of softening the butter just right (not melted, not rock-hard) and beating it with a fork, it came together perfectly. No electric mixer, no stress—just elbow grease and patience.
- Vanilla Kiss Magic: That tiny splash of vanilla extract? It’s the secret weapon. The butter and powdered sugar alone are sweet and rich, but the vanilla turns it from “good” to “I’ll make this every weekend.” Honestly, I’ve tried store-bought frosting, and this beats it every time.
- Crowd-Pleaser Spread: This isn’t just for cakes—slather it on warm cookies, fill cupcakes, or even drizzle it over fresh fruit for a fancy dessert. Between us, I’ve used it to jazz up plain pancakes on lazy mornings, and no one ever guessed it was just butter, sugar, and a pinch of salt.
- Pantry Staple Hack: I keep a jar of this in my fridge year-round. It’s my go-to for last-minute desserts, and since it uses ingredients I already have, it’s the ultimate budget move. Plus, it keeps for weeks, so I’m never scrambling when company drops by. (Yes, even on a Tuesday night.)
Step-by-step instructions for 2 ingredient butter cream
Here’s how to create silky, airy buttercream with just four ingredients—no mixer required.
Prepare Ingredients for Perfect Texture
First, let the 1 cup unsalted butter sit at room temperature for 30 minutes before starting. You’ll know it’s ready when it’s soft enough to press gently with your finger—it should leave a slight indent but hold its shape. This step is crucial because cold butter won’t whip properly, and it’ll turn out greasy instead of fluffy.
Sift the 1.5 cups powdered sugar into a medium bowl to remove any lumps. I always sift through a fine-mesh sieve—this prevents graininess in the final buttercream. Set aside the vanilla extract and pinch of salt in small bowls for easy access during mixing. The salt might seem negligible, but it balances the sweetness and enhances the butter flavor significantly.
Whip the Butter to Light and Fluffy
Using a stand mixer fitted with the paddle attachment, beat the softened butter on medium speed for 3-4 minutes. You’re looking for a pale, creamy texture that nearly doubles in volume. This process incorporates air, which is what gives buttercream its signature lightness. If the butter starts to look grainy, stop and let it sit for another 5 minutes to soften further.
I know it seems like forever, but resist the urge to rush. The butter needs to reach this perfect whipped state before adding sugar. You’ll see it transform from smooth to fluffy with visible peaks forming when the beater lifts. This is your signal to move to the next step—don’t skip it or your buttercream will be dense.
Gradually Add Powdered Sugar for Stability
With the mixer still running on medium speed, begin adding the sifted powdered sugar 1 tablespoon at a time. After each addition, let the mixture combine completely before adding more. This gradual approach prevents sugar from overwhelming the butter and creating a grainy texture. I usually add about ¼ cup at a time, then let it mix for 30 seconds before continuing.
Pay close attention to the texture—it should become smoother and thicker as the sugar incorporates. If the mixture starts to look curdled or separate, reduce the speed to low and let it blend for another 30 seconds. The goal is a smooth, thick paste that holds its shape when you lift the paddle. This consistency ensures your buttercream will pipe beautifully or spread evenly on cakes.
Incorporate Vanilla and Salt for Flavor Balance
Once the sugar is fully incorporated, add the 1 teaspoon vanilla extract and 0.125 teaspoon pinch of salt. Mix on low speed for 30 seconds to combine thoroughly. The vanilla adds depth, while the salt rounds out the sweetness—trust me, you’ll notice the difference if you skip it. At this point, your buttercream should be smooth, thick, and ready for testing.
For a quick check, spoon a small amount onto a plate and let it sit for 2 minutes. If it holds its shape without spreading too much, it’s ready. If it’s too soft, chill it in the refrigerator for 15-20 minutes to firm up slightly. This step is especially important if you’re planning to pipe decorations or fill a cake—proper consistency makes all the difference.
Adjust Consistency and Use Immediately
If your buttercream is too thick for piping but perfect for spreading, simply beat it on medium speed for 1-2 minutes to incorporate more air. For a thinner consistency, add 1 teaspoon milk or heavy cream at a time until you reach your desired texture. Remember, buttercream thickens as it chills, so don’t over-thin it initially.
Use your buttercream immediately for the best results, whether you’re filling a cake, frosting cupcakes, or whipping up a quick dessert. If you need to store it, transfer to an airtight container and refrigerate for up to 3 days. To use later, simply beat it on medium speed for 2-3 minutes to restore its smooth, fluffy texture. The key to perfect buttercream lies in patience and attention to detail—every step matters!
Pro Tips For Making 2 Ingredient Butter Cream
- SOFTEN BUTTER FIRST: Take the butter out of the fridge at least 30 minutes before mixing—room temperature is your friend here. I used to rush this and end up with grainy, lumpy frosting no matter how much I beat it. Trust me, the extra wait makes all the difference when you’re piping or spreading.
- SIFT THE SUGAR: If your powdered sugar is clumpy (and let’s be real, most of it is), sift it into the bowl first—even if you’re using a stand mixer. I learned this after scraping stubborn lumps off my cake layers. A fine-mesh sieve saves time and keeps your butter cream silky.
- SALT THE BUTTER: Toss in that pinch of salt with the butter, not just the sugar. The butter’s fat needs to balance the sweetness right from the start. I used to add it later and still taste an aftertaste—like eating dessert and realizing it’s missing salt at the end.
- BEAT IN STAGES: Mix half the powdered sugar first, then the rest—don’t dump it all at once. This prevents sugar clouds from flying everywhere and ensures the butter emulsifies properly. I’ve had frosting split like oil and water when I was impatient and loaded the bowl too fast.
Regional styles of this dish
Classic American Buttercream
This is the version you’ll find in most American home bakeries—simple, stable, and perfect for piping rosettes or filling cakes. The neutral flavor makes it a blank canvas for cake flavors. I’ve used this base for everything from vanilla sheet cakes to chocolate cupcakes.
The key here is the 1:1.5 butter-to-sugar ratio, which gives you that signature American buttercream texture that’s thick enough to hold its shape but light enough to spread smoothly. 🥧
British-Style Whipped Cream
For a lighter, less sweet version, British bakers often reduce the sugar slightly and add a touch of lemon juice (about ½ teaspoon). This creates a more delicate, almost mousse-like texture perfect for decorating Victoria sponge cakes.
I’ve found that using European-style butter (like President or Bregott) gives a richer flavor without altering the texture. The British version is less stable at room temperature, so it’s best used immediately or chilled until needed.
French Buttercream (Crème Meringue)
While not a true 2-ingredient recipe, you can adapt this buttercream to mimic French-style by adding 1 egg white (whipped to stiff peaks) before incorporating the butter. This creates a lighter, more airy texture similar to crème meringue. I’ve used this variation for macarons and delicate pastries.
The French approach requires more technique—you’ll need to whip the egg whites to stiff but not dry peaks before gently folding in the butter mixture. This version is more labor-intensive but creates stunning results for showstopping desserts.
Italian-Inspired Lemon Buttercream
Southern Italian bakers often infuse their buttercream with zest from 1 lemon and a splash of lemon juice (about 1 tablespoon). This brightens the flavor profile beautifully and pairs perfectly with almond cakes or lemon tarts.
I’ve found that adding 1 teaspoon almond extract enhances the Italian influence while keeping the 2-ingredient simplicity. The citrus notes make this version perfect for spring and summer desserts, offering a refreshing contrast to richer cake flavors.
German Vanilla Buttercream
In Germany, buttercream often includes a touch of vanilla bean paste instead of extract for a more intense flavor. I recommend using ½ teaspoon vanilla bean paste (the seeds are visible) for that authentic depth.
German bakers also tend to use more butter (up to 1.25 cups) for a richer, more decadent texture. This version is ideal for stollen cakes or Christmas treats where a robust flavor is desired. The extra butter makes it slightly more stable at warmer temperatures, perfect for holiday baking.
Modern Minimalist Variations
For a truly minimalist approach, skip the vanilla entirely and use 1 teaspoon of espresso powder (dissolved in 1 teaspoon hot water) for a sophisticated coffee buttercream. This works beautifully with chocolate cakes or tiramisu-inspired desserts.
Another modern twist is adding ½ teaspoon of matcha powder for a vibrant green tea flavor that pairs wonderfully with white chocolate or vanilla cakes. Both variations maintain the simplicity while adding exciting flavor dimensions. ✨
Nutrition facts
Frequently asked questions
Can I make this buttercream without a stand mixer?
Use a hand mixer or even a whisk in a large bowl. Work in 1-minute bursts with 30-second rests between each addition of powdered sugar. This prevents overheating your butter. For extra insurance, chill the bowl in the freezer for 5 minutes before starting if your kitchen is warm.
Why did my buttercream turn grainy?
Graininess usually means one of two things: either your butter wasn’t soft enough when you started, or you added the powdered sugar too quickly. First, make sure your butter has indentable but firm consistency before whipping. Second, always add sugar 1 tablespoon at a time and let it fully incorporate before adding more. If it’s already grainy, beat in 1 teaspoon milk to smooth it out.
How do I get it to pipe smoothly?
For perfect piping, your buttercream needs to be thick but not stiff—like toothpaste consistency. If it’s too thick, beat it on medium speed for 1-2 minutes to incorporate air. If it’s too thin, chill it for 15 minutes before piping. Pro tip: Pipe from a piping bag with a large round tip (like Wilton 1M) for clean lines, or use a ziplock bag with the corner snipped off for quick decorating.
Can I substitute powdered sugar with something else?
Not exactly, but you can make adjustments. For a slightly less sweet version, use 1 cup confectioners’ sugar + ½ cup granulated sugar (finely ground in a food processor). For a dairy-free option, use 1 cup coconut sugar (but expect a denser texture). Remember, powdered sugar dissolves easily—granulated sugar substitutes will create a coarser texture unless you process them thoroughly.
How long will this buttercream keep?
This recipe stays fresh for 3-4 days at room temperature in an airtight container. For longer storage, refrigerate for up to 1 week or freeze for 3 months. To use after refrigeration, let it sit at room temperature for 10 minutes before whipping to restore its smooth texture. The flavor actually improves slightly after 24 hours** as the ingredients meld!

- Pea Soup Instant Pot Recipe: Velvety Green Smoothness in 20 Minutes - November 1, 2026
- Pork Loin Pulled Pork Crock Pot Recipe: Slow-Smoked Tenderness With Zero Dryness - November 1, 2026
- Baked Potatoes in Crock Pot Recipe: Buttery Interiors and Crispy Top Magic - November 1, 2026