
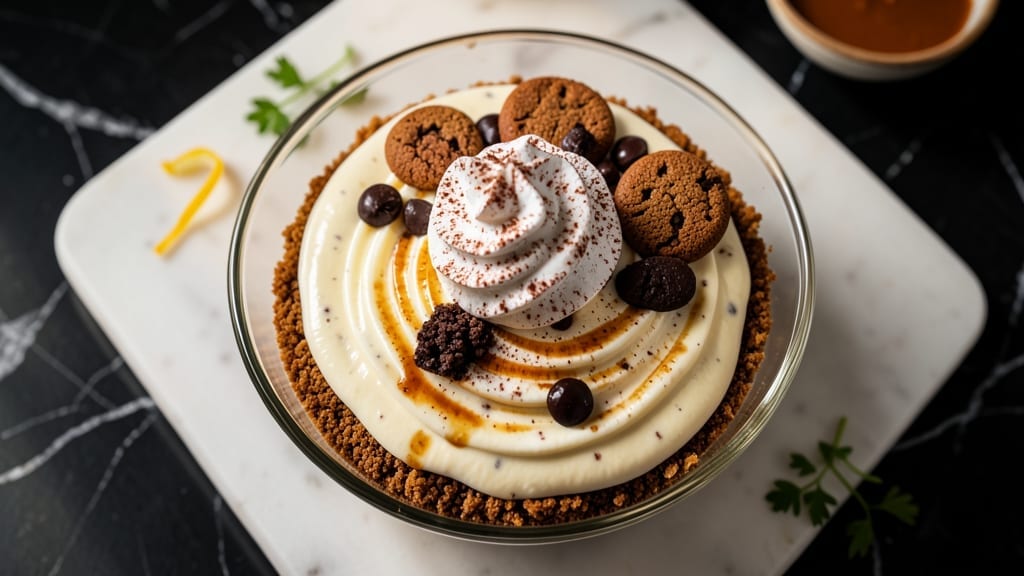
This 2-ingredient ice cream cake recipe delivers restaurant-worthy dessert with zero baking and just 10 minutes of effort—perfect for hot days or last-minute cravings. The secret lies in a simple crust (like graham crackers or chocolate cookies) layered with your favorite ice cream, then chilled until firm.
I’ve tested this with vanilla, chocolate, and even cookie dough ice cream, and it never disappoints.
The beauty of this recipe is its foolproof simplicity: no oven, no eggs, and no specialized skills required. You’ll need just two core ingredients—a sturdy crust and ice cream—and optional toppings like whipped cream or sprinkles for extra flair.
The crust provides structure while the ice cream adds richness, creating a dessert that’s creamy, cool, and irresistibly easy.
What you’ll end up with is a no-bake ice cream cake that’s ready in minutes but tastes like it took hours to prepare. The layers hold together beautifully after chilling, and every slice delivers that perfect balance of crisp crust and velvety ice cream.
It’s ideal for parties, potlucks, or satisfying a sudden dessert craving without the fuss.
For best results, use a 10×10-inch pan and let the cake chill for at least 2 hours before slicing. Serve with a dollop of whipped cream or a drizzle of melted chocolate for the full indulgence. Here’s how to assemble it effortlessly—no experience needed.
Ingredients for 2 ingredient ice cream cake
Two core ingredients plus optional toppings—this no-bake dessert is pure magic with zero fuss.
| Ingredient | Amount | Notes |
|---|---|---|
| Graham Crackers 🍪 | 16 whole | Crushed into fine crumbs |
| Vanilla Ice Cream 🍦 | 2 cups | Premium brand for best texture |
| Unsalted Butter 🧈 | ¼ cup | Melted for binding crust |
| Chocolate Cookies 🍪 | 12 whole | Alternative crust option |
| Dark Chocolate Chips 🍫 | ½ cup | For optional topping |
| Whipped Cream 🥛 | ½ cup | For garnish |
| Sprinkles 🌈 | ¼ cup | Optional colorful topping |
| Coconut Oil 🥥 | 1 tbsp | For greasing pan |
| Sea Salt 🧂 | ½ tsp | For sprinkling |
| Melted Chocolate 🍫 | ¼ cup | For drizzling |
| Cookie Dough Ice Cream 🍪 | 2 cups | Alternative flavor option |
The crust is your foundation, so don’t skimp on quality. Honey Maid graham crackers or Oreo cookies work best—their sturdy texture holds up beautifully. For chocolate lovers, Nutter Butter or chocolate sandwich cookies add a rich twist. Grab a 10×10-inch pan from your baking supply stash, and if you’re feeling fancy, line it with parchment paper for easy removal. The butter or coconut oil is non-negotiable—it’s what binds those crumbs into a solid layer that won’t crumble when you slice. Trust me, melted butter is the secret weapon here.
Ice cream flavors are totally up to you—vanilla is classic, but cookie dough or chocolate chip take this to the next level. No premium ice cream? Häagen-Dazs or Breyers are worth the splurge for that ultra-creamy texture. Short on time? Store-brand ice cream works in a pinch, but it won’t be as velvety. For the toppings, whipped cream is a must, and Store-brand or homemade both shine. Sprinkles? Jelly Belly or Wilton add that playful touch, but honestly, any colorful bits you’ve got will do. Pro tip: Let your ice cream sit at room temperature for 10 minutes before assembling—it’ll be easier to spread and won’t melt too fast.
This cake is all about patience—chill for at least 2 hours before slicing, or it’ll be a messy disaster. Store leftovers in the fridge for up to 3 days, but honestly, it’s best enjoyed fresh. For make-ahead magic, assemble the cake a day in advance and keep it covered in the freezer. When you’re ready to serve, let it sit at room temperature for 10 minutes so the ice cream doesn’t feel too hard. And if anyone asks, this is not a ‘quick’ dessert—it’s a ‘no-bake genius’ dessert. Serve with a side of smugness.
Why You’ll Love This Recipe
- Here’s what sold me: the buttery graham crust holds up perfectly against the creamy ice cream, while the chocolate cookie crumbles add this addictive crunch. Top it with dark chocolate chips, and every bite feels like a warm hug from a dessert you didn’t know you needed.
- No-Fuss Assembly: I swear, this cake comes together faster than my coffee brews on a lazy morning. Crush graham crackers, mix in melted butter, press into a pan—done. The ice cream layer? Just scoop and freeze. That’s it.
- Melty Magic Layers: Here’s what sold me: the buttery graham crust holds up perfectly against the creamy ice cream, while the chocolate cookie crumbles add this addictive crunch. Top it with dark chocolate chips, and every bite feels like a warm hug from a dessert you didn’t know you needed.
- Party in a Pan: Between us, this is my go-to for birthdays, potlucks, or when I need dessert now without stressing. Swap vanilla ice cream for cookies ‘n cream or salted caramel—suddenly, it’s a crowd-pleaser that costs less than takeout. (Yes, even on a Tuesday night.)
Step-by-step instructions for 2 ingredient ice cream cake
Here’s how to create this dreamy dessert with just two core ingredients and minimal effort.
Prepare the Crust Base
For the graham cracker crust, crush all 16 whole graham crackers into fine crumbs using a food processor or rolling pin. I like to pulse them in batches until they resemble coarse sand—this creates the perfect textural contrast with the creamy filling. In a medium bowl, combine the graham cracker crumbs with the 0.25 cup melted unsalted butter. Mix until the crumbs are uniformly moistened and the mixture holds together when pressed.
Press the mixture firmly into an 8-inch round springform pan, using the back of a spoon to create an even, compact layer. This is crucial for preventing a crumbly texture later. For extra flavor, I sprinkle the 0.5 teaspoon sea salt evenly over the crust before pressing it down—just a pinch enhances every bite. Chill the crust in the freezer for 10 minutes while you prepare the filling. The cold crust will stay firm when you add the ice cream, preventing any melting issues.
Assemble the Ice Cream Layers
Remove the chilled crust from the freezer and let it sit at room temperature for just 2 minutes—this prevents the ice cream from melting too quickly when you add it. Spread 1 cup of the 2 cups vanilla ice cream evenly over the crust, using a spatula to create a smooth, level layer. The ice cream should reach the edges of the pan but not overflow. Place the pan back in the freezer for 5 minutes to partially set the first layer.
After 5 minutes, remove the pan and add the second cup of vanilla ice cream, spreading it in the same way. For a cookie dough twist, you can substitute 1 cup of the vanilla ice cream with the 2 cups cookie dough ice cream—just be sure to work quickly to prevent melting. The key here is speed; keep everything moving so the ice cream doesn’t soften too much. Once both layers are added, return the pan to the freezer for 10 minutes to fully set.
Create the Topping Layers
While the cake sets, prepare the toppings. In a separate bowl, gently fold the 0.5 cup whipped cream with the 0.25 cup sprinkles, reserving a few for garnish. This creates a light, airy topping that contrasts beautifully with the dense ice cream. For a chocolate variation, melt the 0.25 cup dark chocolate chips and drizzle them over the cake in a zigzag pattern. Let the chocolate set slightly at room temperature for 2 minutes before adding the whipped cream mixture.
Once the ice cream cake is fully set (after the 10 minutes in the freezer), remove it from the pan and place it on a serving plate. Spread the whipped cream mixture evenly over the top, using the back of a spoon to create gentle swirls. Sprinkle the reserved sprinkles on top for a festive touch. For an extra indulgent finish, drizzle the melted chocolate in another zigzag pattern over the whipped cream. Serve immediately for the creamiest texture, or chill for 15 minutes if you prefer a firmer dessert.
Final Touches and Serving
Here’s the thing—this cake is best enjoyed straight from the freezer, but if you need to store it, wrap it tightly in plastic wrap and place it back in the freezer for up to 2 hours. When ready to serve, let it sit at room temperature for 5 minutes to soften slightly. The contrast between the crisp graham cracker crust and the cool, creamy ice cream filling is what makes this dessert magical.
Slice the cake into 4 equal wedges using a warm knife—this ensures clean cuts and prevents the ice cream from sticking. Serve each portion immediately with an extra dollop of whipped cream and a sprinkle of sea salt on top. The salt enhances the sweetness of the ice cream, creating a perfect balance of flavors. This dessert is so easy, yet it feels like a showstopper—perfect for last-minute celebrations or satisfying dessert cravings.
Pro Tips For Making 2 Ingredient Ice Cream Cake
- Chill the Butter First: Grab that stick of unsalted butter straight from the fridge—no thawing needed. I used to soften it first, but cold butter melts slower in the graham cracker mix, giving you time to press those crumbs together without turning them into a greasy mess. Trust me, your crust will hold better.
- Toast the Crumbs: Lightly toast the graham crackers and chocolate cookies in a dry pan for 2-3 minutes until they’re fragrant and just starting to brown. This step makes the crust taste deeper and prevents sogginess—no one wants a cake that falls apart after one bite.
- Press Firm, Not Fast: When layering the crumb mixture, press it down evenly with the bottom of a glass or your palm—apply steady pressure, not quick smacks. Rushing leads to air pockets, and your cake will end up lopsided or crumbly. Think of it like packing snow for a snowball.
- Freeze the Layers: Pop each layer (crust and ice cream) into the freezer for 10 minutes before adding the next one. This keeps the ice cream from melting too fast and ensures clean slices. Yes, it adds time, but your cake won’t turn into a puddle.
Flavor customization for these flavors
Classic Vanilla Twist
Stick with the original vanilla ice cream for a timeless flavor combo that never disappoints. The creamy sweetness pairs perfectly with the buttery graham cracker crust, creating a crowd-pleaser that feels indulgent yet simple.
For extra depth, fold 1 teaspoon of vanilla extract into the melted butter before pressing the crust—this adds a subtle richness that elevates the whole dessert. 💛
Cookie Dough Dream
Swap out vanilla for cookie dough ice cream to transform this into a kid-friendly favorite. The chunks of cookie dough add delightful texture and a nostalgic flavor that’s hard to resist. I like to use Ben & Jerry’s Cookie Dough for its signature taste, but any quality brand works.
For a grown-up twist, mix ½ cup cookie dough ice cream with ½ cup salted caramel ice cream—the salty-sweet combo is next-level.
Chocolate Lover’s Version
For a decadent twist, use chocolate ice cream and replace the graham cracker crust with crushed Oreos or Nutter Butter cookies. The cocoa-packed crust complements the ice cream beautifully, creating a dessert that tastes like a chocolate cake.
To take it further, drizzle melted white chocolate over the top before adding whipped cream—it adds a sophisticated contrast. 🍫
Fruity Surprise
Brighten things up with strawberry or mango ice cream for a refreshing, summery dessert. The natural sweetness of the fruit cuts through the richness of the crust, making it perfect for warm weather.
Pair with a raspberry coulis (blend ½ cup frozen raspberries with 1 tablespoon honey) drizzled on top for an elegant finish. A sprinkle of toasted coconut flakes adds crunch and tropical vibes.
Spiced Chai Delight
Infuse the crust with warmth by mixing 1 teaspoon chai spice blend (cinnamon, cardamom, ginger, and cloves) into the melted butter. Top with chai-spiced ice cream (look for brands like Ben & Jerry’s Chai Tea or make your own by mixing vanilla ice cream with 1 teaspoon chai spice).
The aromatic spices elevate the dessert into something cozy and unexpected—perfect for fall or holiday gatherings. ✨
Nutty Crunch Add-On
For texture lovers, fold ¼ cup chopped pecans or walnuts into the crust mixture before pressing it into the pan. The nuts add a satisfying crunch that contrasts with the creamy ice cream.
For a peanut butter twist, use peanut butter ice cream and sprinkle crushed Reese’s Pieces on top. The salty-sweet crunch is pure magic—trust me, your taste buds will thank you. 🌟
Nutrition facts
Frequently asked questions
Can I make this ice cream cake without a springform pan?
Use a regular 8-inch round cake pan or even a 9-inch pie dish. Line it with parchment paper for easy removal, especially if you’re using cookie crusts that might stick. Just press the crust firmly into the bottom and sides to create a sturdy base. For extra insurance, chill the pan in the freezer for 15 minutes before adding the ice cream layers.
Why does my ice cream cake get messy when slicing?
This usually happens if the cake didn’t chill long enough or if the ice cream melted too much during assembly. Always let the cake set in the freezer for the full 2 hours before slicing. For cleaner cuts, dip your knife in hot water for 2 seconds between slices—this prevents sticking. Work quickly and serve immediately to maintain that perfect texture.
What’s the best ice cream brand for this recipe?
Premium brands like Häagen-Dazs, Ben & Jerry’s, or Breyers work best because their higher fat content gives a creamier texture that holds up better during chilling. However, any quality ice cream will work—just let it sit at room temperature for 10 minutes before using to prevent premature melting. For budget-friendly options, look for brands with at least 12% milkfat for the best results.
Can I make this ahead of time?
Yes! Assemble the cake completely and freeze it for up to 24 hours before serving. When ready to enjoy, let it thaw in the fridge for 30 minutes to soften slightly. For parties, this is a great make-ahead option—just add fresh toppings like whipped cream or sprinkles right before serving. The flavors actually improve after chilling overnight!
How do I fix a cracked crust?
If your crust develops cracks, simply press melted chocolate or extra whipped cream into the gaps before adding the final toppings. The melted chocolate will act as a glue, and the whipped cream will camouflage any imperfections. For a more permanent fix, you can also create a thin chocolate ganache (mix 2 tablespoons chocolate chips with 1 tablespoon cream) to spread over the cracks before adding the final layer of ice cream.

- Baked Potatoes in Crock Pot Recipe: Buttery Interiors and Crispy Top Magic - November 1, 2026
- Braised Beef Short Ribs Recipe: Crock Pot Fall-Off-Bone Magic in 6 Hours - November 1, 2026
- Crock Pot Cocoa Recipe: Velvety Warmth With Hidden Spice Magic - November 1, 2026