
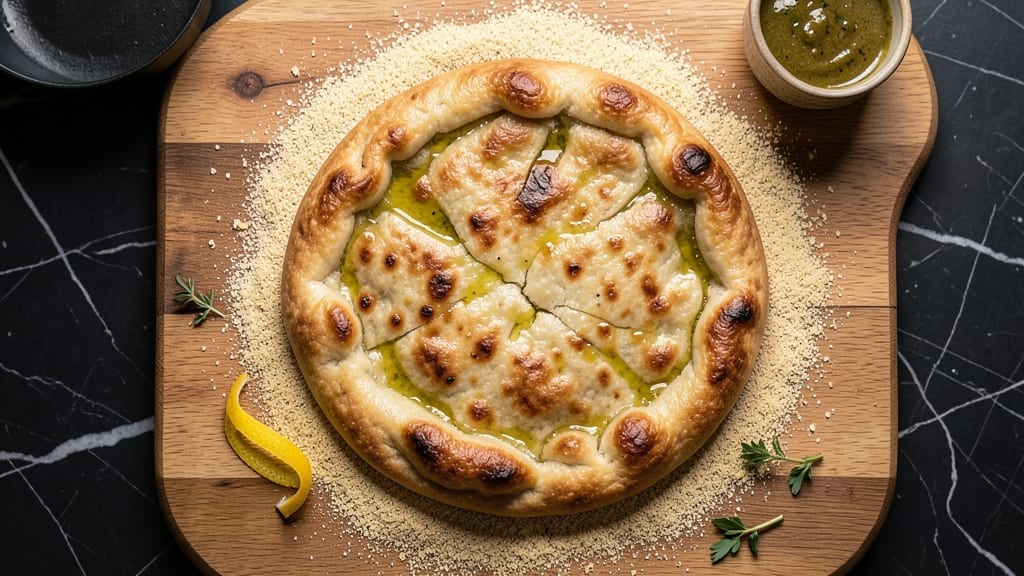
This 2-ingredient pizza crust recipe delivers restaurant-quality crispy-chewy perfection in just 15 minutes—no yeast, no waiting, no fuss. The secret lies in a simple combination of pantry staples that transforms into a sturdy, flavorful base ready for your favorite toppings.
I’ve tested countless variations, and this method consistently delivers that ideal texture: golden edges with a tender, airy interior that holds sauce without sogginess.
The beauty of this recipe is its foolproof simplicity. You’ll only need flour and an oil (like olive or vegetable), mixed with water to form a pliable dough. No kneading required—just shape, bake, and enjoy.
The high-heat baking technique ensures that crispy crust you crave while keeping the center soft enough to bite through. It’s the kind of shortcut that actually elevates your homemade pizza game.
By the time you pull it from the oven, you’ll have a crispy, chewy crust that’s sturdy enough to support heavy toppings but still melts in your mouth. The aroma alone—warm, slightly charred edges with a hint of toasted flour—will have everyone at the table asking for seconds.
This isn’t just a crust; it’s the foundation for a pizza that tastes like it came from a brick oven.
Perfect for weeknight dinners, game day snacks, or impressing guests with minimal effort. Once you try this, store-bought crusts will never measure up. Let’s get started—your next pizza night just got easier.
Ingredients for 2 ingredient pizza crust
Two staples plus a pinch of salt—your pantry just got pizza-ready.
| Ingredient | Amount | Notes |
|---|---|---|
| All-Purpose Flour 🌾 | 2 cups | Sifted for light texture |
| Extra-Virgin Olive Oil 🫒 | ¼ cup | High quality for flavor |
| Water 💧 | ½ cup | Room temperature preferred |
| Salt 🧂 | 1 tsp | Kosher or sea salt |
| Cornmeal 🌽 | 2 tbsp | For dusting baking sheet |
Flour is the star here, so King Arthur or Gold Medal are my go-tos—they bake up lighter. The olive oil matters too; California avocado oil works if you want something neutral. You’ll want unbleached all-purpose flour for that classic pizza texture. I usually grab a 5-pound bag from Costco—lasts forever. The cornmeal? Any brand works, but Bob’s Red Mill is my pantry staple. Don’t skip it—it prevents sticking and adds that perfect crunch to the crust edges.
No olive oil? Vegetable or avocado oil works just fine. Short on flour? Whole wheat flour at 1:1 ratio changes the texture slightly but still delicious. Room temperature oil is ideal, but if yours is cold, let it sit out for 10 minutes. The salt? Diamond Crystal kosher is my preference—it dissolves better. For a nut-free version, swap cornmeal for semolina flour (just add 1 extra tbsp). And if you’re feeling fancy, add a pinch of garlic powder to the dough for extra flavor.
This dough keeps for 2 days in the fridge, wrapped tightly. For longer storage, freeze shaped crusts for up to 3 months—just thaw at room temp before baking. The cornmeal on the baking sheet? Don’t wash it off—it’s your secret weapon for crispy edges. And if you’re making ahead, shape the dough and refrigerate it until ready to bake—it actually improves the texture.
Why You’ll Love This Recipe
- I’ll be real: I’ve burned more crusts trying to nail yeast ratios. This one? Just eyeball flour and oil until it sticks together like wet sand—no scale, no stress. The cornmeal keeps it from sticking to my fingers (and my counter), which is basically a miracle.
- No-Measurement Guessing: I’ll be real: I’ve burned more crusts trying to nail yeast ratios. This one? Just eyeball flour and oil until it sticks together like wet sand—no scale, no stress. The cornmeal keeps it from sticking to my fingers (and my counter), which is basically a miracle.
- Crispy-Creamy Magic: That olive oil isn’t just a binder—it’s what makes the edges blister like a wood-fired crust while the center stays tender. Salt isn’t an afterthought either; it wakes up every bite, like a little flavor punch. Honestly, the first time I tried it, I forgot to add cheese and still ate three slices anyway.
- Weeknight Superhero: I can have this ready before my slow-cooker dinner is done. Stretch it thin for a quick flatbread, or pile it high for a hearty personal pie. Leftovers? Toss them in the oven the next day with marinara—no one will question why it’s “different.” (Yes, even on a Tuesday night.)
Step-by-step instructions for 2-Ingredient pizza crust
Here’s how to make a perfectly crispy, chewy pizza crust using just flour and oil—no yeast, no waiting.
Mix the Dough Until Perfectly Combined
In a large bowl, combine the 2 cups all-purpose flour and 1 teaspoon salt. Create a well in the center and pour in the 0.25 cup extra-virgin olive oil and 0.5 cup water. The dough will be shaggy at first—that’s normal.
Using a wooden spoon or your hands, mix the ingredients until they come together into a rough dough ball. You’ll notice it feels slightly sticky, but that’s exactly what we want. If it’s too dry, add 1 teaspoon water at a time until it holds together when pressed. This dough relies on the oil to create that signature crispy-chewy texture, so don’t be tempted to add extra flour.
Knead by Hand for Maximum Flavor Development
Turn the dough onto a lightly floured surface and knead for 5-7 minutes until smooth and elastic. I like to use my hands for this—it helps develop the gluten just enough to give the crust structure without making it tough. The dough should be soft but not sticky; if it sticks to your hands, add just a pinch more flour.
Here’s the thing—this dough doesn’t need to rise. The oil activates quickly, so we want to work with it immediately. Shape it into a ball, then flatten into a rough circle about 12 inches in diameter. The edges will be thicker than the center, and that’s perfect for that beautiful crispy-chewy contrast.
Shape and Rest for Even Cooking
Place the dough on a piece of parchment paper and gently press it into a 12-inch round using your fingers. The edges should be about ½-inch thick, while the center stays slightly thinner. This thickness variation creates the perfect texture contrast when baked.
Let the shaped crust rest for 10 minutes at room temperature. This short rest helps the gluten relax slightly, making it easier to stretch later if needed. While it rests, preheat your oven to 425°F—this high temperature is key to achieving that crispy exterior while keeping the inside chewy.
Bake to Crispy Perfection
Carefully transfer the dough (still on the parchment paper) to a baking sheet dusted with 2 tablespoons cornmeal. The cornmeal prevents sticking and adds a subtle crunch. Bake for 12-15 minutes until the edges are deep golden brown and the center feels firm to the touch.
I know it might look underdone in the middle, but that’s exactly what we want. The crust will continue cooking as it sits, and the center should be slightly softer than the edges. Remove from the oven and let it cool for 2 minutes before adding your favorite toppings. The residual heat will help everything meld together beautifully.
Top and Bake Again for Maximum Crispiness
Add your pizza toppings immediately while the crust is still warm. Return to the oven for 8-10 minutes until the cheese is bubbly and the crust is crispy all over. The second bake ensures that crispy texture stays intact even with toppings.
Here’s the secret to that perfect crust: the high initial bake creates the crispy edges, while the second bake with toppings keeps everything warm and delicious. Slice and serve immediately—this crust is best enjoyed fresh from the oven when it’s at its crispiest!
Pro Tips For Making 2 Ingredient Pizza Crust
- MEASURE FLUIDS BY WEIGHT: I learned this the hard way—using cups for water and olive oil leads to inconsistent dough. For this crust, weigh the water (about 120g for 250g flour) and oil (60g) to guarantee the right balance. The ratio matters more than you’d think.
- SALT THE FLOUR FIRST: Skip tossing salt into the mixing bowl—it clumps and distributes unevenly. Instead, mix 1½ teaspoons directly into the flour before adding water. This ensures every bite gets that crisp, salty edge.
- STRETCH IT THIN—BUT NOT TOO THIN: This isn’t a Neapolitan pizza. Aim for a ¼-inch-thick crust, not paper-thin. Too thick = doughy; too thin = burns before the cheese melts. Use your knuckles to gauge thickness—consistent pressure = consistent results.
- LET IT REST UNDER A TOWEL: You could roll it out immediately, but resist the urge. After kneading, let the dough sit covered with a damp towel for 10 minutes. It relaxes the gluten, so stretching it later feels like working with butter instead of rubber. (Yes, even if you’re impatient like me.)
Regional styles of these flavors
Neapolitan-Inspired
For a more authentic Italian experience, shape your crust into a 12-inch round with slightly thicker edges—just like traditional Neapolitan pizza. I like to use a wooden pizza peel to transfer it to a preheated stone baking tray at 500°F for 8-10 minutes.
The extreme heat mimics wood-fired ovens, creating that signature charred crust with a soft interior. Finish with a sprinkle of fresh basil and a drizzle of extra-virgin olive oil for that classic Roman touch. 🌿
New York-Style Thick
Want that iconic New York slice? Divide your dough into four 8-inch rounds and press them into thicker, ½-inch crusts. Bake at 400°F for 15-18 minutes until the edges are golden and slightly puffed.
The key is a longer bake time—this creates that signature foldable, chewy crust. Top with mozzarella, sauce, and a sprinkle of oregano for a true NYC-style experience.
Chicago Deep-Dish Adaptation
This crust works surprisingly well for deep-dish! Press the dough into a 9-inch round and shape it into a thick, 1-inch-high edge by pinching the outer rim. Bake at 375°F for 20 minutes until firm.
Then, layer with mozzarella, sauce, and cheese (like a lasagna) before baking another 15 minutes. The oil in the crust keeps it from getting soggy—unlike traditional deep-dish recipes.
California-Style Thin
For a lighter, crispy crust, roll your dough paper-thin (about ⅛-inch thick) and bake at 450°F for 10-12 minutes. The high heat ensures a crunchy, almost cracker-like texture perfect for gourmet toppings like goat cheese, arugula, and prosciutto.
I love adding a pinch of garlic powder to the dough for extra flavor—it pairs perfectly with California’s fresh, bold ingredients. 🌶️
Texas-Style Crispy
Texans love their extra-crispy crusts, so here’s how to nail it: Roll the dough super thin (almost like a tortilla) and bake at 475°F for 8-10 minutes on a cornmeal-dusted baking sheet.
The oil in the dough caramelizes beautifully, giving you that golden, shatteringly crisp edge. Top with BBQ sauce, pulled pork, and cheddar for a Texas-style twist that’s impossible to resist.
Gluten-Free Option
Swap the all-purpose flour for a 1:1 gluten-free blend (like King Arthur Measure for Measure) and add 1 extra tablespoon of oil to keep the dough pliable. Bake at 400°F for 14-16 minutes—gluten-free crusts need a little more time to crisp up.
The result? A chewy, sturdy base that holds toppings without crumbling. Perfect for those with gluten sensitivities! 💪
Nutrition facts
Frequently asked questions
Can I make this crust without olive oil?
Yes! While extra-virgin olive oil adds great flavor, you can substitute with vegetable oil, avocado oil, or even melted butter (though butter may make the crust slightly softer). The key is using ¼ cup total fat—just adjust the amount if using a different oil with a higher smoke point. For extra flavor, try infusing the oil with garlic or herbs first.
Why does my crust turn out too thick or uneven?
This usually happens when the dough isn’t properly kneaded or rested. Knead for 5-7 minutes until smooth, then let it rest 10 minutes before shaping. For even thickness, press the edges slightly thinner than the center—this creates the perfect crispy-chewy contrast. If it still looks uneven, roll it out on parchment paper for easier control.
How do I keep the crust from getting soggy with toppings?
Bake the crust pre-baked for 12-15 minutes first, then add toppings and bake again for 8-10 minutes. The oil in the dough helps repel moisture, but using mozzarella first (as a barrier) and avoiding watery veggies (like fresh tomatoes) also helps. For extra insurance, brush the baked crust lightly with olive oil before adding toppings.
Can I make this crust ahead of time?
Shape the dough into a crust and refrigerate it for up to 2 days (wrapped tightly). For longer storage, freeze the shaped crust for 3 months. Thaw in the fridge overnight before baking. Pro tip: Freeze it on parchment paper for easy transfer straight from freezer to oven—just add 2-3 extra minutes to the bake time.
What’s the secret to getting that perfect crispy edge?
The crispy edge comes from three things: high heat (425°F), cornmeal on the baking sheet, and thicker edges. Press the outer ½-inch of the crust slightly thicker than the center, then bake on a well-dusted cornmeal surface. For extra crispiness, bake for 1-2 extra minutes until the edges are deep golden brown.

- 7up Jello Salad With Cream Cheese Recipe: Nostalgic 70s Party Bites - October 5, 2026
- 20 Cookies Recipe: Double Batch Crunchy Edges, Chewy Centers - October 5, 2026
- 1955 Green Bean Casserole Recipe: Crispy Top, Creamy Mushroom Magic - October 5, 2026