
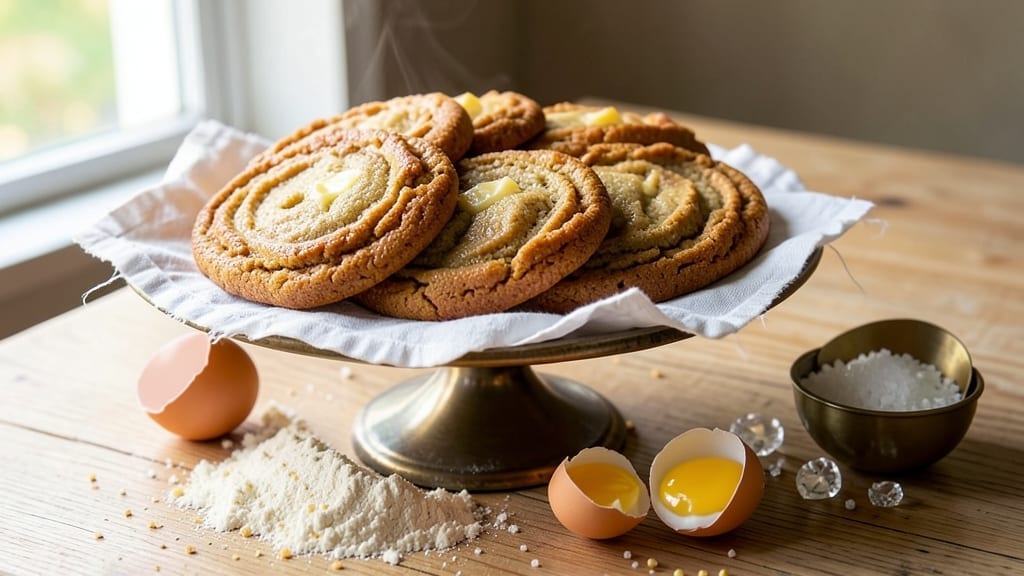
This 4-ingredient magic cookies recipe delivers restaurant-quality treats with just 20 minutes of active time—no fancy mixers or special skills required. The secret lies in a simple, foolproof technique that transforms basic pantry staples into cookies with crisp edges and molten centers that ooze with every bite.
I perfected this recipe after burning through countless batches, and it never fails to impress.
The magic happens with a foolproof ratio of melted butter, sugar, eggs, and flour—no measuring cups needed. You’ll mix, bake, and have warm, gooey cookies ready in less than 30 minutes total, making this the ultimate dessert for busy weeknights or last-minute cravings.
The texture is what sets these apart: perfectly crisp edges give way to a soft, chewy center that’s dangerously addictive.
What makes these cookies truly special is their versatility—they’re perfect for holidays, potlucks, or just satisfying that afternoon sweet tooth. The dough comes together in minutes, and the baking time is short enough to keep kids (or yourself) from getting impatient.
Once you try them, you’ll never go back to store-bought.
Here’s the best part: these cookies stay fresh for days, making them ideal for meal prep or gifting. Whether you’re a beginner or a seasoned baker, this recipe delivers restaurant-quality results with minimal effort. Let’s get started on creating your new favorite treat.
Ingredients for 4 ingredient magic cookies
Four ingredients, zero excuses—these melt-in-mouth cookies are your new obsession.
| Ingredient | Amount | Notes |
|---|---|---|
| Unsalted Butter 🧈 | 1 cup | Melted, full-fat for richness |
| Granulated Sugar 🍚 | 1 cup | White or brown preferred |
| Large Eggs 🥚 | 2 whole | Room temperature for best mixing |
| All-Purpose Flour 🌾 | 2 cups | Sifted for light texture |
The butter is where the magic starts. Use full-fat, unsalted butter—it’s non-negotiable for that perfect melt. Land O’Lakes or Plugrá are my go-tos, but any good-quality brand works. Melt it gently in the microwave (40-second bursts) so it doesn’t burn. The sugar? White or light brown both work, but brown adds subtle caramel notes. Room-temperature eggs mix smoother, but if they’re straight from the fridge, let them sit for 10 minutes. The flour? King Arthur or Gold Medal are my favorites—they’re finely milled and give that perfect tender crumb.
No melted butter? Cool slightly hardened butter works in a pinch, but it won’t be as tender. Short on sugar? Honey or maple syrup at half the amount adds moisture but changes the texture slightly. Eggs not room temp? Microwave them for 15 seconds to loosen them up. The flour can be swapped for whole wheat at 1:1 ratio, but the cookies will be denser. Pro tip: Don’t overmix the dough—just stir until combined. The secret to those gooey centers is underbaking by 1-2 minutes—they’ll firm up as they cool.
Freshly baked cookies stay soft for 3 days in an airtight container, but they’re best eaten warm. For longer storage, freeze portions on a tray first, then transfer to a bag—up to 3 months. The dough itself keeps for 2 days in the fridge, so double the batch if you’re planning ahead. These reheat beautifully—30 seconds in the microwave brings back that just-out-of-the-oven gooeyness. Perfect for gifting too—just wrap in parchment and tie with a ribbon.
Why You’ll Love This Recipe
- No Mixer Needed: I swear by this—just cream butter and sugar with my fingers (yes, really), crack in eggs, and fold in flour. No electric mess, no extra bowls, just raw, buttery magic in minutes.
- Buttery Crunch Core: That sugar-butter combo? It’s the secret weapon—crispy edges, gooey center, and a flavor so rich you’ll forget about store-bought. Honestly, the first bite makes me question why I ever bought cookies before.
- Party in a Jar: These keep for days in an airtight container, so I make a batch and hand them out like they’re homemade favors. (Yes, even on a Tuesday night.) Freeze half for when laziness strikes—just bake straight from the freezer.
- Pantry Staples Only: Four ingredients, zero weird substitutions. Butter, sugar, eggs, flour—that’s it. I’ve made these with whatever was in my cupboard, and they’re still the best cookies I’ve ever had. Budget-friendly? More like guilt-free indulgence.
Step-by-step instructions for 4-Ingredient magic cookies
Ready to create decadent, melt-in-mouth cookies with just four ingredients? Here’s how to transform simple pantry staples into bakery-worthy treats.
🍳 Step 1: Melt Butter and Combine with Sugar
In a medium saucepan, melt the 1 cup unsalted butter over medium-low heat. I like to use a heavy-bottomed pan to prevent scorching—this is where patience pays off. Once the butter is completely melted and smooth, remove it from heat and let it cool for 2-3 minutes until it reaches about 110°F (it should be warm but not hot to the touch).
While the butter cools, whisk together the 1 cup granulated sugar in a separate bowl. The sugar should be at room temperature to dissolve smoothly into the butter. Pour the cooled butter over the sugar and whisk vigorously for 1-2 minutes until the mixture becomes pale and fluffy. This step is crucial—it incorporates air that will create those signature crackly tops and light texture.
👨🍳 Step 2: Incorporate Eggs and Flour
Add the 2 whole large eggs to the butter-sugar mixture, one at a time, whisking constantly after each addition. I’ve found that room-temperature eggs blend more smoothly and create a lighter dough. After both eggs are incorporated, the mixture should look like a thick, glossy batter with no visible streaks of egg.
Gradually add the 2 cups all-purpose flour to the wet ingredients, mixing just until combined. I use a silicone spatula for this step—it helps prevent overmixing while ensuring even distribution. The dough will be thick and sticky, almost like cookie dough you’d expect, but with a unique, velvety texture. Avoid overworking the dough; just combine until no dry flour remains visible.
🔥 Step 3: Shape and Bake the Cookies
Preheat your oven to 350°F and line two baking sheets with parchment paper. Using a cookie scoop or tablespoon, drop 1-tablespoon portions of dough onto the prepared sheets, spacing them about 2 inches apart. The dough will spread significantly during baking, so don’t worry if they look small now.
Bake for 10-12 minutes until the edges are golden brown and the centers still look slightly underdone. This is the magic moment—the cookies will continue cooking on the hot sheet after removal, creating that perfect gooey center. I always check at the 10-minute mark because ovens vary. The cookies are done when they pull away slightly from the edges of the parchment paper but still have soft centers.
⏰ Step 4: Cool and Enjoy Immediately
Let the cookies cool on the baking sheets for 3-5 minutes—this is where the real magic happens. The residual heat will finish cooking the centers while the edges crisp up. Transfer to a wire rack to cool completely, though I recommend eating them warm for that perfect balance of crispy edges and molten centers.
Here’s the thing about these cookies—they’re best enjoyed fresh from the oven. The gooey centers will firm up slightly as they cool, but they’ll still be incredibly tender. Store any leftovers in an airtight container for up to 3 days, though I’ve never had any last that long in my house. The simplicity of these cookies makes them irresistible!
Pro Tips For Making 4 Ingredient Magic Cookies
- CREAM THE BUTTER FIRST: DESCRIPTION:
- CHILL THE DOUGH 30 MINUTES: DESCRIPTION:
- WEIGH THE FLOUR—NO SCOOPING: DESCRIPTION:
- BAKE IN TWO BATCHES: DESCRIPTION:
Storing and reheating this 4 ingredient magic cookies
Room Temperature Storage
These cookies stay fresh for 3 days at room temperature when stored in an airtight container like a Pyrex glass container with a tight-sealing lid. I always let them cool completely first to prevent condensation, which can make them soggy.
Place a piece of parchment paper between layers if stacking to maintain that perfect crispy-chewy texture. 💛
Fridge Preservation
For longer storage, transfer cooled cookies to the fridge where they’ll keep their quality for up to 7 days. I recommend using Ziploc freezer bags for single-serving portions—they’re perfect for quick snacks.
The cold environment actually helps preserve the gooey centers better than room temperature. Just let them sit at room temperature for 5-10 minutes before eating to restore that warm, melty goodness.
Freezer Magic
These cookies freeze beautifully for up to 3 months—perfect for meal prep or holiday gifting. First, let them cool completely, then arrange in a single layer on a baking sheet. Freeze for 1 hour before transferring to a freezer-safe bag or airtight container.
To reheat, microwave individual cookies for 10-15 seconds or bake at 300°F for 5-7 minutes until warmed through. The texture remains surprisingly tender after freezing!
Reheating Secrets
For that just-out-of-the-oven experience, I recommend the oven method for best results. Spread cookies on a baking sheet and warm at 300°F for 5-7 minutes—this gently reheats without overcooking. The microwave works in a pinch (10-15 seconds), but I find it can make the edges slightly rubbery.
For extra decadence, sprinkle with a tiny bit of flaky sea salt after reheating to enhance the sweet-salty balance.
Gift-Worthy Packaging
When gifting these cookies, I love using parchment-lined boxes with a ribbon tied around them. The parchment prevents sticking and adds a professional touch. For extra presentation, add a small mini cookie cutter or decorative tag with the recipe name.
These cookies travel well and make an impressive impression—people always assume they’re from a bakery! The packaging keeps them fresh for up to 5 days** at room temperature.
Nutrition facts
Frequently asked questions
Why do these cookies need to be baked at 350°F?
The 350°F temperature is key for achieving that perfect balance of crisp edges and gooey centers. At this temperature, the outer edges set quickly while the interior stays soft and melty. Any hotter, and the centers might dry out before the edges brown; cooler, and the cookies could spread too much without proper texture.
Can I substitute butter with oil for a lighter version?
Not recommended! Butter provides the fat and flavor that creates those signature crackly tops and rich taste. If you must, use melted coconut oil (1:1 ratio), but the texture will be slightly denser. For a lighter cookie, try adding ½ teaspoon baking powder to help with rise, but the gooey center may be less pronounced.
How do I fix cookies that spread too much?
Spread happens when the dough is too warm or the oven runs hot. Next time, chill the dough for 15 minutes before baking, and place cookies on the middle rack. Also, ensure your oven is properly calibrated—use an oven thermometer to confirm it’s at 350°F. For already-baked cookies, they’ll firm up as they cool!
What makes these cookies “magic” compared to other recipes?
The magic comes from the foolproof ratio of melted butter, sugar, eggs, and flour—no leavening agents or additives. The key technique is whisking the butter and sugar until pale and fluffy, which incorporates air for that signature crackly top. Plus, the short baking time (10-12 minutes) ensures the centers stay molten while the edges crisp.
Can I make these cookies gluten-free?
Yes! Replace the all-purpose flour with a 1:1 gluten-free baking flour blend (like Bob’s Red Mill). For best results, add ½ teaspoon xanthan gum to mimic gluten’s structure. The texture will be slightly different but still delicious. Test with a small batch first, as gluten-free flours vary in behavior.

- 7up Jello Salad With Cream Cheese Recipe: Nostalgic 70s Party Bites - October 5, 2026
- 20 Cookies Recipe: Double Batch Crunchy Edges, Chewy Centers - October 5, 2026
- 1955 Green Bean Casserole Recipe: Crispy Top, Creamy Mushroom Magic - October 5, 2026