
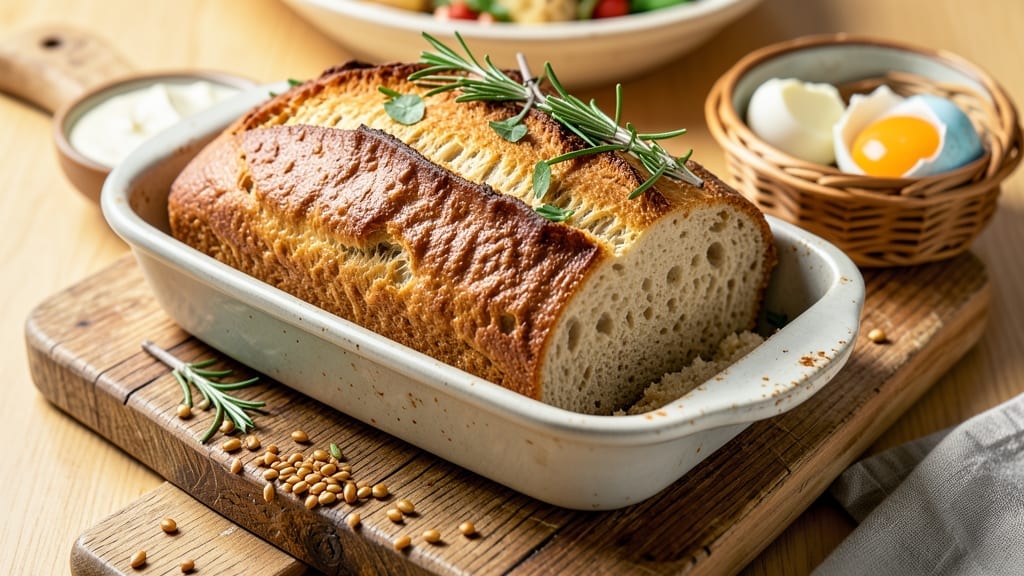
A 2 lb spelt bread machine recipe transforms your kitchen into an artisan bakery with minimal effort—just load, set, and forget. This loaf delivers a nutty, hearty texture with a crisp crust and soft interior, perfect for sandwiches or toast.
The bread machine handles the heavy lifting while you focus on enjoying the process. Spelt flour brings natural sweetness and depth, creating a flavor profile richer than standard white bread. With whole grain goodness and a hands-off approach, this recipe is ideal for busy schedules.
The dough develops naturally in the machine, ensuring a perfect rise and even bake every time. By the end, you’ll have a golden, aromatic loaf that stays fresh for days. The nutty aroma fills your home, and each slice offers satisfying chewiness.
Whether you’re feeding a family or meal prepping, this recipe delivers professional-quality results without the fuss. Store leftovers wrapped at room temperature for up to 3 days or freeze for longer shelf life. The versatility of this bread makes it a staple for any pantry.
Let’s get started on your hands-off artisan loaf!
Ingredients for 2 lb spelt bread machine
Spelt flour, yeast, and butter create a nutty, hearty loaf in your bread machine.
| Ingredient | Amount | Notes |
|---|---|---|
| Spelt Flour 🌾 | 2 ½ cups | Whole grain for nutty flavor |
| Bread Machine Yeast 🍞 | 2 ¼ tsp | Active dry or fast-rise |
| Granulated Sugar 🍚 | ¼ cup | For dough development |
| Unsalted Butter 🧈 | ½ cup | Softened to room temperature |
| Whole Milk 🥛 | 1 cup | Warmed to 110°F |
| Large Eggs 🥚 | 1 whole | Room temperature |
| Salt 🧂 | 1 ½ tsp | Kosher or sea salt |
| Olive Oil 🫒 | 1 tbsp | Extra-virgin preferred |
| Honey 🍯 | 1 tbsp | For subtle sweetness |
| Whole Wheat Flour 🌾 | ¼ cup | For added texture |
| Instant Yeast 🍞 | ½ tsp | Optional for extra rise |
Spelt flour is the star here—look for Bob’s Red Mill or King Arthur brands for the best texture. The whole grain version gives that signature nutty flavor, but if you can’t find it, regular whole wheat flour works in a pinch. Butter should be softened but not melted (press a finger in—it should leave a slight indent). Trader Joe’s sells a great tub of unsalted butter for this. The yeast is non-negotiable—bread machine yeast is specifically formulated for consistent results. If you’re using active dry yeast, let it proof in warm milk for 5 minutes before adding to the machine.
No spelt flour? White whole wheat flour is the closest substitute—same nutty flavor, slightly lighter texture. Butter too expensive? Vegetable oil at half the amount keeps things moist. The honey can be swapped for maple syrup (same quantity), but don’t use agave—it’s too strong. For a lighter loaf, add 1 tsp baking powder to the whole wheat flour. The bread machine program matters—use the ‘whole wheat’ setting if available, or ‘basic’ for 3-4 hours. If your machine has a ‘dough’ cycle, use that first to mix everything before baking.
This loaf stays fresh for 5-6 days wrapped in a cotton towel at room temperature. For longer storage, freeze slices in a bag—just thaw at room temperature for 10 minutes before toasting. The crust gets crunchier as it cools, so slice while still warm if you prefer a softer bite. Leftovers make great toast or French toast. The nutty aroma lingers for hours, so bake when you want your kitchen smelling like a bakery. Double the recipe if your machine can handle it—homemade bread never lasts long.
Why You’ll Love This Recipe
- Bread Machine Magic: I swear by this recipe—just toss the spelt flour, yeast, and warm milk into the machine, and let it do the work. No kneading, no stress, just hands-off baking while you sip coffee or prep dinner.
- Buttery Golden Crust: That touch of unsalted butter and sugar gives it a rich, caramelized crust that’s almost too pretty to eat. Honestly, I’ve caught myself taking extra slices just to admire it before the toast hits the pan.
- Weeknight Workhorse: Slice it for toast, pack it for lunches, or serve it warm with soup—this bread handles everything. Between us, it’s my go-to when I’m too tired to bake from scratch but still want something better than store-bought.
- Budget-Friendly Staple: Spelt flour might sound fancy, but it stretches farther than all-purpose, and a 2 lb loaf lasts my family five days. Plus, using milk and butter instead of pricey add-ins keeps it affordable without sacrificing flavor.
Step-by-step instructions for 2 lb spelt bread machine recipe
Here’s how to create a rich, nutty loaf with minimal effort using your bread machine.
Combine Wet Ingredients in the Bread Pan
In the bread machine pan, mix together the 1 cup whole milk (warmed to 110°F) and the 1 whole large eggs at room temperature. Add the 0.5 cup unsalted butter (softened) and the 1 tbsp olive oil, then stir until fully combined. This creates a smooth base that helps incorporate the dry ingredients later.
Next, whisk in the 0.25 cup granulated sugar, 1 tbsp honey, 1.5 tsp salt, 2.25 tsp bread machine yeast, and 0.5 tsp instant yeast. The yeast should begin activating immediately—you’ll see small bubbles forming on the surface. This is your first sign the dough is coming together properly.
Add Dry Ingredients and Mix Thoroughly
In a separate bowl, combine the 2.5 cups spelt flour and 0.25 cup whole wheat flour. Sift the mixture directly into the bread pan to avoid clumps. Using a wooden spoon or silicone spatula, gently fold the dry ingredients into the wet mixture until just combined—you should still see some flour streaks. Overmixing at this stage develops gluten too early, which can make the final bread dense.
I like to scrape down the sides of the pan to ensure all the flour incorporates evenly. The dough should be sticky but manageable—if it’s too dry, add 1 tablespoon of the warmed milk to help bind everything. The texture should resemble thick pancake batter rather than stiff dough.
Select Bread Machine Settings and Start
Choose the “Basic White Bread” setting on your bread machine (even though we’re using spelt flour, this setting provides the best rise profile). The machine will automatically knead the dough for 5-10 minutes until it reaches the proper consistency—you’ll see it pull away from the sides of the pan and become smooth and elastic.
If your machine has a “Dough” setting, select that instead for even better control. The dough should rise to about 75% of the pan’s height during the kneading cycle. If it doesn’t reach this point, the yeast may need more time or the environment might be too cold—try placing the machine in a slightly warmer area of your kitchen.
Allow First Rise and Shape Automatically
The bread machine will then begin the first rise cycle, which typically takes 1-1.5 hours. During this time, the dough should double in size and develop small bubbles on the surface. If the dough rises too quickly (in under an hour), your kitchen might be too warm—cover the pan loosely with a clean kitchen towel to slow the fermentation.
Once the rise is complete, the machine will automatically punch down the dough and begin the second rise. This second rise is crucial for developing the bread’s structure and flavor. The dough should again reach about 75% of the pan’s height before the baking cycle begins.
Bake to Golden Perfection
The bread machine will automatically switch to baking mode, typically at 350°F. Baking time will vary by machine but usually takes 45-60 minutes. You’ll know it’s done when the bread has a deep golden-brown crust and sounds hollow when tapped on the bottom.
For extra crispiness, I recommend brushing the warm loaf with a little melted butter while it’s still in the pan. Let it cool on a wire rack for at least 30 minutes before slicing—this resting period allows the crumb to set properly and prevents a gummy texture. The final loaf should have a dense, nutty crumb with a crisp exterior and a subtle sweetness from the honey.
Pro Tips For Making 2 Lb Spelt Bread Machine
- Warm the Milk First: Spelt flour absorbs liquid like a sponge, but cold milk just makes the dough stubborn. Heat the whole milk to about 110°F (43°C)—just warm enough to dissolve the sugar and butter completely—before mixing. This keeps the gluten from tightening up prematurely, giving your bread a lighter crumb. (Yes, even if you’re impatient like me, resist the urge to skip this.)
- Weigh Your Butter: Unsalted butter’s density varies wildly between brands, and eyeballing it in a bread machine recipe throws off moisture balance. Use a kitchen scale for exactly 2 tablespoons (28g)—packed lightly, not mashed. Too much butter makes the dough sticky and gummy; too little leaves the bread dry. I learned this after a batch that looked like a hockey puck.
- Skip the Over-Kneading: Spelt dough is delicate—it develops gluten faster than wheat but also falls apart if you overwork it. Let the machine do the heavy lifting: start with the “dough” setting, then switch to “bake” immediately after the dough forms (usually 5–7 minutes). If it looks shaggy, that’s fine—it’ll smooth out in the baking cycle. I used to stop it to “fix” the dough, and it always ended up dense.
- Brush with Cold Water: For that golden crust without burning, spray the loaf with cold water right before the final 5 minutes of baking. The steam creates a crisp shell while keeping the interior soft. (Pro move: do this after the machine’s timer starts—no peeking!) My grandmother swore by this, and she was right: it’s the thing that makes spelt bread look like it belongs in a bakery window.
Pro cooking tips for 2 lb spelt bread machine
Dough Consistency Secrets
Spelt flour absorbs more liquid than all-purpose, so your dough will be stickier than usual. I recommend using a damp silicone spatula to scrape every last bit from the pan—this ensures even hydration.
If the dough feels too dry after mixing, add 1 tablespoon of warmed milk and let it rest for 5 minutes before continuing. The ideal texture should resemble thick pancake batter that clings slightly to your fingers but pulls away cleanly. 🌾
Yeast Activation Test
Before adding yeast, test its potency by mixing ½ teaspoon with ¼ cup warm milk (110°F) and 1 teaspoon sugar. If it bubbles vigorously within 5 minutes, your yeast is active.
For spelt bread, I use 2.25 teaspoons bread machine yeast plus ½ teaspoon instant yeast—this double yeast boost ensures a reliable rise, especially in cooler kitchens. Store your yeast in the freezer to extend its shelf life to 6 months.
Temperature Control Tips
Bread machines thrive between 75-80°F. If your kitchen is colder, place the machine on a preheated oven light or near a warm spot. For extra insurance, warm the milk to 110°F—this activates the yeast faster.
Avoid placing the machine near drafts or air conditioning vents, as temperature fluctuations can cause uneven rising. I’ve found that covering the pan loosely with a towel during rise helps maintain consistent warmth. ⏰
Crust Perfection Hacks
For a crispy crust without drying out the interior, brush the baked loaf with melted butter while still warm. For added flavor, mix 1 teaspoon honey into the butter before brushing.
If your bread develops a pale crust, try increasing the baking time by 5-10 minutes or covering the loaf with a damp paper towel during the last 15 minutes of baking. The ideal crust should be golden-brown with slight cracks—this indicates proper moisture balance. 🔥
Machine-Specific Adjustments
Not all bread machines handle spelt flour equally. For Panasonic models, use the “Whole Wheat” setting for better texture. KitchenAid machines work best with the “Basic” setting but may need 15-20 minutes extra baking time.
If your machine has a “Dough” cycle, use it first to mix ingredients thoroughly before switching to “Bake”. Always grease the pan lightly with olive oil to prevent sticking—spelt dough has a tendency to cling more than standard bread dough.
Storage and Freshness
Wrap cooled bread in a cotton towel and store at room temperature for 5-6 days—this preserves moisture better than plastic. For longer storage, slice and freeze individual portions in airtight containers. To revive frozen slices, toast directly from frozen for 2-3 minutes longer than usual.
The nutty aroma intensifies as the bread ages, making it even more delicious after 2-3 days. I keep a loaf wrapped on my counter at all times—it disappears faster than I can bake it! 💫
Nutrition facts
Frequently asked questions
Why does my spelt bread turn out dense instead of light?
Spelt flour contains more protein than white flour, which can develop too much gluten if overmixed. Use the bread machine’s “whole wheat” setting and avoid handling the dough excessively. The stickiness is normal—don’t add extra flour. Also ensure your yeast is fresh (test it in warm milk first) and your kitchen is between 75-80°F for proper rising.
Can I substitute spelt flour with regular whole wheat?
Yes, but expect a slightly denser texture. Use white whole wheat flour for the closest flavor match, replacing spelt 1:1. For lighter bread, add 1 teaspoon baking powder to the whole wheat flour. The nutty depth will be less pronounced, but the bread will still be delicious. If using regular whole wheat, increase milk by 2 tablespoons to compensate for its dryness.
How do I know when my bread machine cycle is complete?
Your machine will beep when done, but also check for these signs: a deep golden-brown crust, a hollow sound when tapped on the bottom, and internal temperature of 190-200°F. The dough should pull away from the pan edges completely. If the crust is pale, bake 5-10 minutes longer. Never remove bread too early—it needs 30 minutes to set properly before slicing.
Can I add seeds or nuts to this recipe?
Add ½ cup seeds (sunflower, pumpkin) or chopped nuts (walnuts, almonds) during the final kneading phase. For extra flavor, toast seeds in a dry pan for 2-3 minutes before adding. Just reduce the spelt flour by 2 tablespoons to maintain the right dough consistency. Avoid adding too many nuts/seeds—they can make the bread dry.
What if my bread machine doesn’t have a “whole wheat” setting?
Use the “basic” setting but extend the cycle by 15-20 minutes—spelt flour needs more time to bake properly. If your machine has a “dough” cycle, use it first to mix ingredients thoroughly, then switch to “bake.” For KitchenAid models, select “white bread” but add 1 extra tablespoon of oil to prevent drying. Always grease the pan well—spelt dough sticks more than regular bread dough.

- Pea Soup Instant Pot Recipe: Velvety Green Smoothness in 20 Minutes - November 1, 2026
- Pork Loin Pulled Pork Crock Pot Recipe: Slow-Smoked Tenderness With Zero Dryness - November 1, 2026
- Baked Potatoes in Crock Pot Recipe: Buttery Interiors and Crispy Top Magic - November 1, 2026