
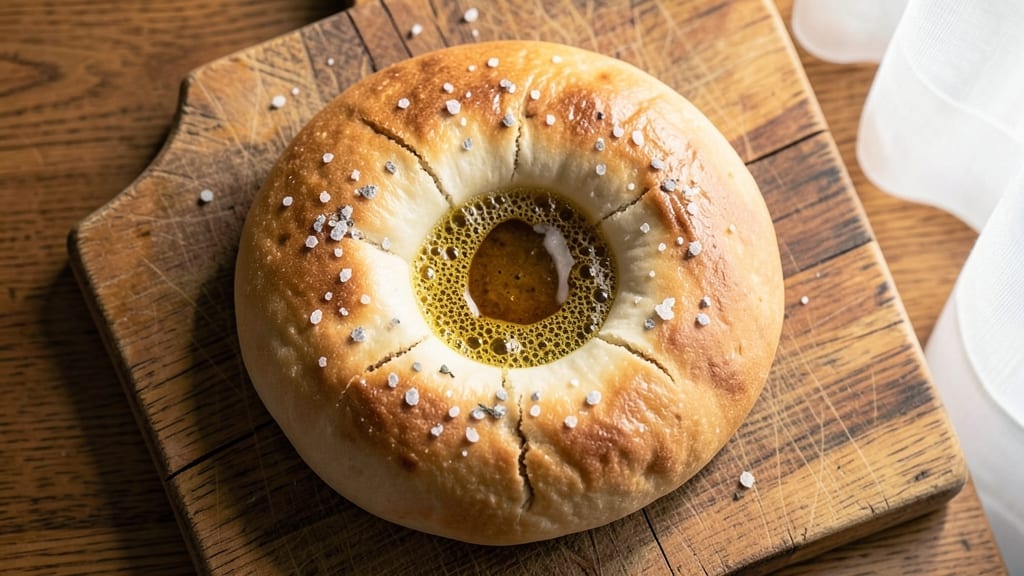
This 4-ingredient pizza dough recipe proves you don’t need complicated techniques to make restaurant-quality crust at home. With just flour, yeast, salt, and water, I’ve perfected a no-knead method that delivers crispy edges and chewy centers in 15 minutes—no standing around waiting for hours.
The secret lies in a simple mixing technique and proper resting time, which transforms basic ingredients into a dough so forgiving even beginners can shape it perfectly.
The beauty of this recipe is its versatility and simplicity. No special equipment or advanced skills are required—just a mixing bowl, a little patience, and your favorite pizza toppings. The dough develops naturally as it rests, creating that signature airy texture without the need for kneading.
This makes it ideal for busy weeknights when you want homemade pizza without the hassle of traditional dough-making.
What you’ll achieve is a golden, crispy crust with a tender interior that holds sauce and toppings beautifully. The dough’s flexibility means you can stretch it thin for New York-style slices or keep it thick for deep-dish lovers.
Whether you’re feeding a family or craving a solo slice, this recipe delivers foolproof results every time, with minimal effort and maximum flavor.
For those with dietary preferences, simple swaps like gluten-free flour or flaxseed for yeast can adapt this recipe without sacrificing texture. The key is maintaining the balance of ingredients—just four simple components working together to create something truly special. Let’s get started on making your perfect pizza crust!
Ingredients for 4 ingredients pizza dough
Four simple ingredients. One magical dough. No-knead perfection in minutes.
| Ingredient | Amount | Notes |
|---|---|---|
| All-Purpose Flour 🌾 | 3 cups | Spooned and leveled, not scooped |
| Active Dry Yeast 🍞 | 1 tbsp | Or 2.25g for precision |
| Fine Sea Salt 🧂 | 1 ½ tsp | Diamond Crystal preferred |
| Lukewarm Water 💧 | 1 cup | 105-110°F, not hot |
The flour is everything here—King Arthur or Bob’s Red Mill are my go-tos for consistent results. No substitutions (whole wheat or gluten-free won’t get the same texture). The yeast? Check the expiration date—freshness matters. Store-bought yeast packets are fine, but if you’re using jarred, make sure it’s not past its prime. For the water, lukewarm is key—too hot kills the yeast, too cold slows it down. I keep a thermometer handy, but honestly, if it feels like bathwater, it’s perfect. The salt? Diamond Crystal if you can find it—it’s less processed and dissolves better than table salt.
No yeast on hand? 1 tbsp nutritional yeast plus 1 tsp baking powder gets you close, though texture will differ. Short on flour? Add 1 tbsp vital wheat gluten per cup if using gluten-free blends. The water temperature critical—if it’s not warm enough, the dough won’t rise properly. Pro tip: If your kitchen’s drafty, cover the bowl with a damp towel while resting to lock in moisture. And yes, you can make this in a stand mixer—just use the dough hook on low for 2 minutes after mixing.
Mix it, let it rest, then forget about it. That’s the beauty. Dough keeps 48 hours in the fridge, wrapped tightly. For longer storage, shape into a ball, wrap in plastic, and freeze for up to 3 months. Thaw overnight in the fridge before using. The magic happens during that 15-minute rest—don’t rush it. Patience here = perfect pizza. And if you make extra? Flatbreads for breakfast next day—trust me.
Why You’ll Love This Recipe
- Pantry-Only Magic: I’ll never forget the first time I mixed flour, yeast, salt, and water—that’s it—and got dough so light it practically floated. No eggs, no sugar, no fancy add-ins; just the perfect balance of simplicity and texture that makes you feel like a pro.
- Crispy-Chewy Gold: That salted crust with a tender center? It’s the kind of contrast that makes you close your eyes mid-bite. The yeast does all the work—no kneading, no waiting forever—just a quick rise and a flavor that’s ridiculously satisfying.
- Weeknight Superhero: Between us, I’ve pulled this dough together in 15 minutes flat while my kids argued over homework. It’s my go-to for lazy nights or last-minute game-day snacks—no stress, no fuss, just dinner saved.
- Budget-Friendly Staple: Flour, yeast, salt, water—these are things I already have. No specialty ingredients, no markup, no waste. A single batch stretches for two pizzas, and leftovers freeze like a dream for future cravings. (Yes, even on a Tuesday night.)
Step-by-step instructions for no-knead pizza dough
This dough comes together faster than you can say “margherita” and requires zero effort.
Activate the Yeast with Lukewarm Water
In a large mixing bowl, combine the 1 cup lukewarm water and 1 tbsp active dry yeast. Let it sit for 5 minutes until you see lots of bubbles forming on the surface—this tells you the yeast is alive and ready to work. I always double-check this step because cold water kills yeast, and you don’t want to end up with flat, sad pizza dough.
If the water is too hot (above 110°F), you’ll see no bubbles and the yeast will die. If it’s too cold (below 105°F), the yeast will activate too slowly. The perfect temperature is right around 105-110°F, where you’ll see steady, vigorous bubbling within 3-5 minutes. This is your green light to move forward—no waiting around for lazy yeast.
Mix in Flour and Salt
Add the 3 cups all-purpose flour and 1.5 tsp fine sea salt to the bubbly yeast mixture. Using a wooden spoon or your hands, stir everything together until a shaggy dough forms. At this stage, it’ll look messy and uneven—that’s totally normal. The goal here is to combine everything without overworking the dough, which can make it tough.
Once the dough starts coming together, switch to your hands and gently fold it over itself 4-5 times. You’re not kneading—just coaxing the ingredients into a cohesive mass. The dough should be sticky but manageable. If it’s too wet, add 1 tablespoon of flour at a time until it holds together. If it’s too dry, add 1 teaspoon of water to bring it back to life. This step is all about balance, and a little patience goes a long way.
Let the Dough Rest (The Magic Happens Here)
Cover the bowl with a damp kitchen towel or plastic wrap and let the dough rest at room temperature for 1 hour. This is where the dough develops its structure and flavor—no fancy equipment needed, just time. I know it’s tempting to rush, but resist the urge. The longer it rests, the better the texture will be.
After 1 hour, the dough should have roughly doubled in size and feel light and airy. If it hasn’t, give it another 30 minutes. The key here is to let the yeast do its thing without interference. Avoid the temptation to poke or prod it—just leave it alone. This resting period is what transforms your simple ingredients into a chewy, flavorful crust that holds up to any toppings you throw at it.
Shape and Stretch the Dough
Turn the dough out onto a lightly floured surface and divide it into 4 equal balls (since this recipe makes 4 servings). To shape each ball, gently press it into a disc with your fingers—no rolling pin needed. The dough will be sticky, so keep a bowl of flour nearby to dust your hands as needed. The goal is to create a rough circle, not a perfect one. Imperfections make for a rustic, authentic pizza.
Let each disc rest for 10 minutes while you preheat your oven. This short rest prevents the dough from shrinking back on itself when you stretch it. Preheat your oven to 500°F (or as high as it will go) with a pizza stone or baking sheet inside. A hot oven is key to getting that crispy, blistered crust we all love. While the oven heats, use your fingers to gently press and stretch each disc into a 12-inch circle. Don’t force it—just coax it into shape with a little muscle and a lot of patience.
Bake to Golden Perfection
Slide your stretched dough onto the preheated pizza stone or baking sheet. Bake for 8-10 minutes until the crust is golden brown and slightly puffed in spots. The edges should look crispy, and the center should still feel slightly soft to the touch. If your oven runs hot, start checking at the 7-minute mark—every oven is different, and you don’t want to burn the dough before it’s ready.
Once baked, remove the pizza from the oven and let it cool for 2 minutes before adding toppings. This brief rest prevents a soggy crust. Now you’re ready to load it up with your favorite sauce, cheese, and toppings. The beauty of this dough is that it’s forgiving—whether you’re making a classic margherita or a loaded meat lover’s, it’ll hold up beautifully. And the best part? You did it all with just 4 ingredients and zero kneading.
Pro Tips For Making 4 Ingredients Pizza Dough
- Measure Water by Weight: The recipe probably calls for “1 cup” of water, but that’s a guess—flour absorbs moisture differently based on humidity. Weigh it instead: 240 grams of lukewarm water (about 100°F/38°C) guarantees consistent dough. I learned this the hard way when my dough turned out sticky one day and rock-hard the next—same recipe, different water amounts.
- Dissolve Yeast First: Don’t just sprinkle yeast on water and hope. Mix it with 1 teaspoon of sugar (or a pinch of flour) first, then add lukewarm water. This ensures it activates fully before hitting the flour—no more waiting 10 minutes wondering if your dough’s ever going to rise. (Yes, even if you’re impatient like me.)
- Knead Until Silky: After mixing, knead by hand for 8–10 minutes until the dough is smooth and springs back when poked. If it’s still shaggy, you’re not done—under-kneaded dough tears when stretching and bakes unevenly. I used to skimp here, but the difference in texture is night and day. (Your future self will thank you.)
- Let It Rest Longer: The recipe might say “1 hour,” but 2 hours at room temp (or overnight in the fridge) develops deeper flavor and easier stretching. Cold slows fermentation, so if you’re short on time, pop it in the fridge for at least 12 hours—it’ll taste like a pizzeria crust. (Sounds weird, but it works.)
Creative variations of this recipe
Gluten-Free Adaptation
For gluten-free pizza lovers, swap the all-purpose flour for a 1:1 gluten-free flour blend like Bob’s Red Mill or King Arthur. Add 2 tbsp vital wheat gluten per cup of flour to mimic the chewy texture.
The dough will be stickier, so use extra flour on your surface when shaping. Let it rest 10 minutes longer than regular dough to develop gluten-like structure. 🌾
Vegan Version
Replace the yeast with 1 tbsp nutritional yeast plus 1 tsp baking powder for a vegan-friendly dough. Use vegan butter (like Miyoko’s) instead of water for a richer flavor, or stick with water but add 1 tbsp olive oil.
The texture will be slightly denser but still delicious. For extra flavor, add 1 tsp garlic powder or dried oregano to the dough. 🍄
Whole Wheat Boost
Replace 1 cup of all-purpose flour with whole wheat flour for a nuttier, heartier crust. The dough will be denser, so add 1 extra tbsp water to compensate.
Let it rest 15 minutes longer to ensure proper rise. Whole wheat dough pairs perfectly with tomato-based sauces and mozzarella, balancing the earthy flavors. 🌾
Herb-Infused Dough
Add 1 tbsp fresh rosemary or thyme to the dough for a fragrant twist. Finely chop the herbs and mix them in during the 1-hour rest. The aroma infuses the dough, creating a subtle herbal note that pairs beautifully with garlic butter or pesto.
For extra flavor, add ½ tsp red pepper flakes if you love a little heat. 🌿
No-Yeast Flatbread
Skip the yeast entirely and make a quick flatbread using 1 tbsp baking powder instead. Mix 2 cups flour, ½ tsp salt, and ½ cup water with the baking powder.
Roll out the dough ¼-inch thick and bake at 425°F for 8-10 minutes. Perfect for breakfast wraps or quick lunches—no waiting required! 🌯
Sweet Twist: Pizza Bread
Add 2 tbsp sugar and ½ tsp cinnamon to the dough for a sweet, dessert-style pizza bread. Top with powdered sugar and berries after baking for a fun breakfast treat.
The dough will be slightly sweeter but still sturdy enough to hold toppings. Great for brunch or a sweet snack! 🍰
Nutrition facts
Frequently asked questions
Why does my dough look too sticky after mixing?
This is completely normal! The dough should be sticky but manageable. If it’s too wet, simply add 1 tablespoon of flour at a time until it holds together when pressed. The key is finding that perfect balance—just enough to make it workable without making it dry. Remember, the dough will become easier to handle after its 1-hour rest.
Can I make this dough without a stand mixer?
This recipe is designed for simplicity—no stand mixer required. Just use a large mixing bowl and your hands to combine the ingredients. The no-knead method means you only need to gently fold the dough a few times, making it perfect for beginners or anyone without special equipment. A wooden spoon works great for initial mixing!
What if my dough doesn’t rise after an hour?
Check your yeast first—it might be expired or not activated properly. If the water wasn’t lukewarm (105-110°F), try again with fresh yeast and properly heated water. Place the bowl in a slightly warmer spot (like near the oven with the light on) and give it another 30-60 minutes. If it still doesn’t rise, your yeast is likely dead—start over with a new packet.
How do I prevent my pizza crust from getting soggy?
Always let your baked crust cool for 2 minutes before adding toppings. Pre-bake the dough for 3-4 minutes before adding sauce and cheese if you’re using watery toppings like fresh tomatoes. For extra insurance, bake the pizza with toppings at a slightly lower temperature (475°F) for 10-12 minutes instead of high heat.
Can I make this dough ahead of time?
Yes! Shape the dough into balls, wrap tightly in plastic, and refrigerate for up to 48 hours. For longer storage, freeze the shaped dough balls for up to 3 months. Thaw in the fridge overnight before using. The dough keeps its texture perfectly—just let it sit at room temperature for 30 minutes before shaping to make it more pliable.

- Pea Soup Instant Pot Recipe: Velvety Green Smoothness in 20 Minutes - November 1, 2026
- Pork Loin Pulled Pork Crock Pot Recipe: Slow-Smoked Tenderness With Zero Dryness - November 1, 2026
- Baked Potatoes in Crock Pot Recipe: Buttery Interiors and Crispy Top Magic - November 1, 2026