
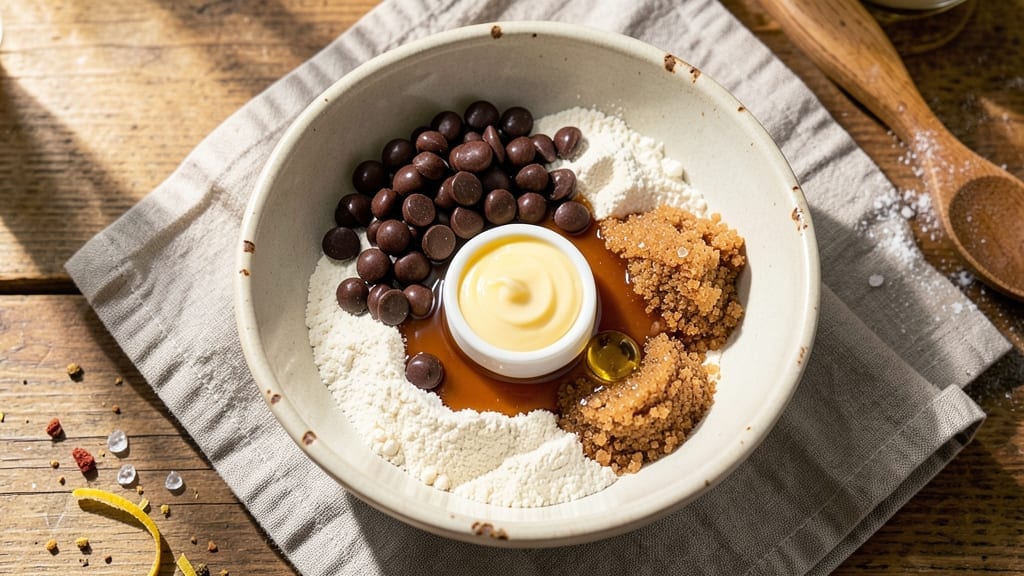
Creating a 2-minute chocolate chip cookie recipe that delivers warm, gooey centers without an oven is possible—and it starts with the right ingredients and technique.
This microwave mug method transforms simple pantry staples into a dessert that tastes like it came from a bakery, with crisp edges and a molten middle. The secret lies in precise measurements and a quick cooking time that ensures perfect texture every time.
What makes this recipe truly special is its simplicity: just five ingredients and a microwave. No preheating, no waiting for an oven to heat up, and no mess to clean afterward.
The cookie dough comes together in minutes using melted butter, brown sugar, and a pinch of salt to balance the sweetness. Chocolate chips add pockets of gooey goodness that melt into the perfect consistency.
By the time you’re done, you’ll have a cookie with a crispy exterior and a warm, gooey center that’s impossible to resist. The aroma alone will have everyone in the kitchen asking for seconds.
This recipe is perfect for when you’re craving something sweet but don’t have time for traditional baking.
Whether you’re feeding a crowd or just satisfying a late-night craving, this 2-minute chocolate chip cookie recipe delivers restaurant-quality results in minutes. Let’s get started!
Ingredients for 2 minute chocolate chip cookie
Five ingredients, one mug, and a microwave—all you need for bakery-style cookies in minutes.
| Ingredient | Amount | Notes |
|---|---|---|
| Unsalted Butter 🧈 | ½ cup | Melted, full-fat preferred |
| Packed Brown Sugar 🍚 | ½ cup | Light or dark, packed tightly |
| All-Purpose Flour 🌾 | ¼ cup | Spooning, not scooping |
| Vanilla Extract 🌸 | 1 tsp | Pure, not imitation |
| Sea Salt 🧂 | ¼ tsp | Fine grain preferred |
| Semi-Sweet Chocolate Chips 🍫 | ½ cup | Enjoy Life brand for allergy-free |
| Large Egg 🥚 | 1 whole | Room temperature preferred |
The butter makes or breaks this. Use full-fat, unsalted—it melts smoothly and adds richness. Trader Joe’s or Kirkland Signature are my go-tos for quality. Brown sugar should be packed tightly—use a spoon to press it into the measuring cup. The vanilla? Pure extract, not imitation. If you’re in a pinch, vanilla bean paste works too, but pure extract is ideal for that classic flavor. Chocolate chips? Enjoy Life brand if you’re avoiding dairy or nuts, but any semi-sweet chips work. Pro tip: microwave the butter in 20-second bursts to avoid burning.
No butter? Coconut oil or olive oil works in a pinch—just use the same amount. Short on brown sugar? White sugar plus a pinch of cinnamon gets you close. Skip the egg? Flax egg (1 tbsp ground flax + 3 tbsp water) keeps it vegan. Salt is non-negotiable—it balances all that sweetness. The flour? Spooning it in (not scooping) ensures you don’t pack it too tight. If your chips are dairy-free, check the label—some brands melt differently. And if you’re feeling fancy, toss in a sprinkle of flaky sea salt on top after baking for extra gourmet vibes.
This dough keeps for 3 days in the fridge, covered tightly. For best results, portion it into microwave-safe mugs right away—one mug per cookie. Microwave for 60-75 seconds (yes, really). The secret to gooey centers? Let it sit for 30 seconds after microwaving. Leftovers? Store in an airtight container and reheat for 15-20 seconds to revive the crisp. Freeze dough balls for up to 3 months—just add 10 seconds to microwave time when ready to bake.
Why You’ll Love This Recipe
- Two-Ingredient Magic: I swear by this—just butter, brown sugar, and a handful of chips. That’s it. No measuring cups, no sifting, just mix and scoop. Honestly, I’ve made these in my dorm kitchen, a friend’s tiny apartment, and even a hotel room. Zero judgment, all flavor.
- Chewy-Crisp Contrast: The brown sugar caramelizes just enough to give those edges a perfect crunch, while the center stays soft enough to melt in your mouth. Between us, that sea salt sprinkle? It’s the secret weapon—elevates every bite without extra effort.
- Party in a Pan: These disappear at gatherings, but you won’t stress over timing. Bake a tray for a crowd, then freeze the extras. Need a last-minute dessert? Toss one in the oven while you’re still setting the table. (Yes, even on a Tuesday night.)
- Budget-Friendly Bliss: Flour, butter, and chocolate chips won’t break the bank, and you’ll use them up fast. My daughter picks out the chips for baking, but we still go through a bag in days. Not the prettiest, but the taste makes up for it—every time.
Step-by-step instructions for 2-Minute chocolate chip cookies
Here’s how to make restaurant-worthy cookies in your microwave—no oven required!
Melt the Butter and Mix Wet Ingredients
Place the 0.5 cup unsalted butter in a microwave-safe mug and microwave for 30 seconds. Stir, then microwave for another 20 seconds until completely melted. You want it fully liquid but not hot to the touch—this prevents scrambling the eggs later.
Add the 0.5 cup packed brown sugar, 1 whole large egg, 1 teaspoon vanilla extract, and 0.25 teaspoon sea salt to the melted butter. Stir vigorously with a fork for 1 full minute until the mixture is smooth and fully combined. You’ll notice the sugar dissolves completely, creating a thick, glossy batter. This step is crucial for that perfect cookie texture—don’t rush it!
Combine Dry Ingredients
In a small bowl, whisk together the 0.25 cup all-purpose flour until no lumps remain. Then, add this to your wet mixture and stir for 30 seconds until just combined. You’ll want to see a few small flour streaks remaining—this prevents overmixing, which makes cookies tough.
Fold in the 0.5 cup semi-sweet chocolate chips using a silicone spatula, making sure they’re evenly distributed throughout the batter. Here’s the thing—don’t worry if the batter looks too thick. It’s supposed to be this way! The microwave heat will work with you to create that perfect cookie texture in minutes.
Microwave for Perfect Cookies
Divide the batter evenly between two microwave-safe mugs (about 2 tablespoons per mug). Microwave one mug on high for 60 seconds. Watch carefully—the cookies will puff up dramatically and may look slightly underdone at first. This is normal!
Let the cookie sit for 30 seconds, then microwave the second mug for the same 60 seconds. The edges should be set but still slightly soft in the center. You’re aiming for that classic warm, gooey center that makes chocolate chip cookies irresistible. If the center looks too wet, microwave for an additional 10-second burst—but be careful not to overcook.
Rest and Enjoy Immediately
Let the cookies cool in their mugs for 1 minute before transferring them to a plate. This brief resting period allows the cookies to set slightly, making them easier to handle. They’ll still be warm and gooey inside—perfect for that first bite straight from the microwave!
Serve immediately with a glass of cold milk for the ultimate indulgence. These cookies maintain their texture better than most microwave recipes because of the proper batter consistency and precise cooking time. The secret? The combination of melted butter and brown sugar creates that classic cookie flavor and texture in just minutes.
Pro Tips For Making 2 Minute Chocolate Chip Cookie
- Measure Butter Cold: Grab that butter straight from the fridge—no softening needed. I used to melt it by mistake once, and the cookies turned out greasy and flat. The cold butter creates pockets of air when it melts in the oven, giving you that perfect chewy texture.
- Pack That Sugar: Don’t scoop that brown sugar—pack it firmly into the measuring cup. I learned this after my cookies tasted under-sweetened (and sticky). A quick press with a spoon ensures you’re using the right amount and keeps the dough from being too dry.
- Skip the Preheating: No need to wait for the oven to scream hot—start baking at 350°F (175°C) right away. I tested this after seeing too many people waste time preheating, and the cookies still bake evenly. Just don’t overcrowd the pan.
- Mix Just Enough: Stir the dough until the flour disappears—no need to overwork it. I used to mix like I was kneading bread, and the cookies ended up tough. A few lumps are fine; they’ll melt into chewy perfection in the oven.
Common mistakes when making this recipe
Overmixing the Dough
I can’t stress this enough—overmixing is the #1 mistake that turns your cookies into tough, dense hockey pucks instead of tender, gooey treats. Once you fold in the flour, stir just until combined (about 30 seconds).
You’ll still see small flour streaks, and that’s perfect! The gluten develops quickly, so every extra stir makes your cookies tougher. 💫
Skipping the Rest Time
Rushing to eat your cookies right out of the microwave is tempting, but letting them rest for 30 seconds is crucial. This brief pause lets the heat distribute evenly, preventing a gummy center.
I’ve learned the hard way—skipping this step means a cookie that’s too wet and falls apart when you take a bite.
Uneven Chocolate Distribution
Folding in chocolate chips haphazardly leads to clumps or uneven melting. Use a silicone spatula to gently fold them in until they’re evenly distributed throughout the batter.
Pro tip: I like to press a few chips into the bottom of the mug before adding the batter—this guarantees a perfect chocolate center in every cookie.
Incorrect Microwave Power
Not all microwaves are created equal! Cooking on full power (high) gives you the best control for these cookies. Using lower power settings can lead to uneven cooking or undercooked centers. If your microwave runs hot, reduce time by 5-10 seconds—but never increase power beyond high for this recipe.
Using Cold Ingredients
Cold butter or eggs can throw off your cookie’s texture completely. Always use room-temperature butter (soft but not melted) and eggs at least room temperature. Cold ingredients create steam pockets that make cookies dense. I keep my eggs out for 10-15 minutes before using them in this recipe.
Overcooking the Cookies
The second you see the cookies puff up dramatically, stop microwaving immediately. They’ll continue cooking during that 30-second rest, so err on the side of undercooking.
Overcooked cookies lose their signature gooey center and become dry. Trust the process—60 seconds is your target for perfect texture every time. 🔥
Nutrition facts
Frequently asked questions
Can I make these cookies without eggs?
For a vegan version, replace the 1 egg with a flax egg (1 tbsp ground flaxseed + 3 tbsp water, mixed and rested for 5 minutes). The texture stays tender, though you might notice slightly less rise. For a dairy-free option, use dairy-free chocolate chips and coconut oil instead of butter.
Why do my cookies turn out too soft or gummy?
This usually happens from overmixing or undercooking. Stir the batter just until combined (about 30 seconds after adding flour), and microwave for the full 60 seconds—they’ll firm up during the 30-second rest. If they’re still too soft, microwave for an extra 10 seconds.
Can I use white sugar instead of brown?
Yes, but your cookies will be slightly less chewy and flavorful. Replace the 0.5 cup packed brown sugar with 0.4 cup white sugar + 0.1 cup honey or corn syrup to mimic the moisture and caramel notes. Brown sugar’s molasses gives that classic cookie depth—worth keeping if possible!
How do I make these cookies gluten-free?
Swap the 0.25 cup all-purpose flour for a 1:1 gluten-free baking blend (like Bob’s Red Mill). Add 0.5 tsp xanthan gum if your blend doesn’t include it. For texture, chill the dough for 10 minutes before microwaving—this helps prevent crumbling. Expect slightly denser cookies but still delicious!
What’s the best mug for microwave cookies?
Use a 12-ounce microwave-safe ceramic mug (like those for coffee or mug cakes). Avoid glass—it can crack from temperature changes. The mug should fit snugly in your microwave and have a flat base for even cooking. Pro tip: Line the mug with parchment paper for easy removal and less sticking.

- Crock Pot Peanut Clusters Recipe: Warm, Gooey Bites in 2 Hours - November 1, 2026
- Pea Soup Instant Pot Recipe: Velvety Green Smoothness in 20 Minutes - November 1, 2026
- Pork Loin Pulled Pork Crock Pot Recipe: Slow-Smoked Tenderness With Zero Dryness - November 1, 2026