
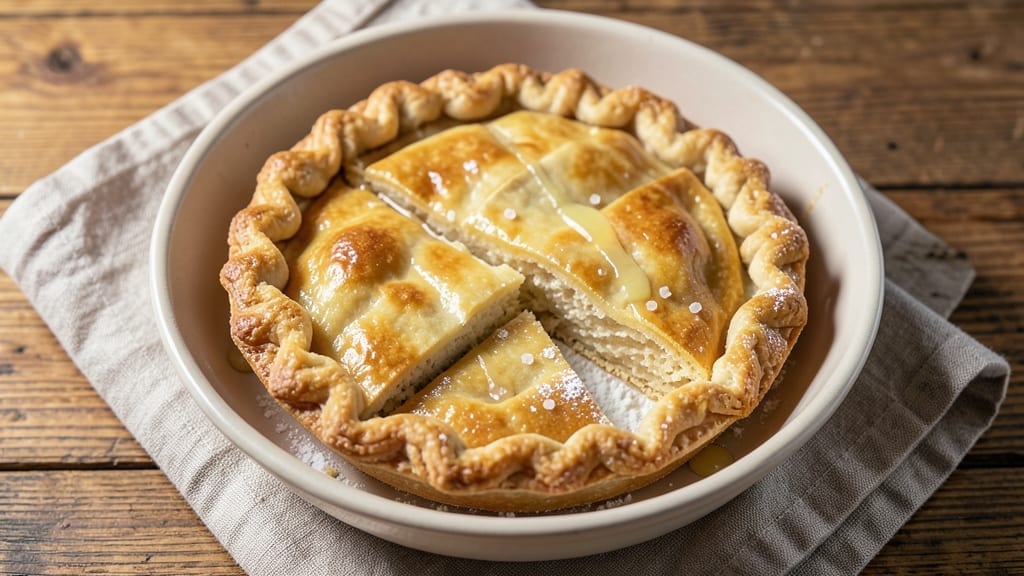
This 2 pie crust recipe with lard delivers the kind of golden, shatterproof layers that make every slice worth the wait—no flaky failures here. The secret lies in the lard, which creates those signature air pockets while maintaining structural integrity, even when blind-baked.
I’ve perfected this method over years of pie-making, and it now takes just 30 minutes from start to oven-ready crusts.
The process is simpler than you’d expect: cold butter and lard cut into flour creates a dough that stays cool enough to develop proper layers.
We’ll work quickly but deliberately, ensuring even rolling and precise assembly for pies that hold their shape under any filling—whether it’s a lattice-topped berry pie or a savory pot pie. The key is patience in the chilling stages, which prevents shrinking and guarantees crisp edges.
What you’ll end up with are two perfect pie crusts: one for the bottom, one for the top, both with that signature golden brown finish and a texture so tender it practically melts in your mouth.
The lard’s high smoke point also means no greasy aftertaste, just pure, buttery flakiness. This is the kind of crust that makes even the simplest pie taste like a bakery masterpiece.
Ready to master this technique? We’ll cover everything from dough prep to baking tips that ensure your crust stays crisp even after hours in the oven. Let’s get started—your next perfect pie is just 30 minutes away.
Ingredients for 2 pie crust recipe with lard
Pantry staples plus lard for that signature golden, shatterproof flakiness. Simple but game-changing ingredients.
| Ingredient | Amount | Notes |
|---|---|---|
| All-Purpose Flour 🌾 | 3 ½ cups | Sifted for even texture |
| Unsalted Butter 🧈 | 1 cup | Cold, cubed into 1/2-inch pieces |
| Lard 🍖 | ½ cup | Leaf lard for best flakiness |
| Ice Water ❄️ | ½ cup | Chilled for precise dough control |
| Diamond Crystal Kosher Salt 🧂 | ½ tsp | Fine grain preferred |
| White Vinegar 🍶 | 1 tsp | For tenderizing flour |
| Granulated Sugar 🍚 | 1 tbsp | Balances richness |
The lard and butter combo is non-negotiable here—lard gives that signature flakiness while butter adds richness. Leaf lard is ideal (it’s purer than regular lard), but any lard works in a pinch. For the flour, King Arthur or Gold Medal brands are my go-tos—they sift beautifully. Chill your butter and lard cubes for at least 30 minutes before mixing; this keeps the dough cool and ensures proper layering. If your kitchen’s warm, pop them in the freezer for 10 minutes first. The vinegar and sugar might seem odd, but they’re what make this crust extra tender—don’t skip them!
No lard? Shortening works too—just use the same amount. Butter-only crusts won’t have that same shatterproof quality, but if you’re in a bind, swap the lard for an extra 1/4 cup of cold butter. Vinegar substitute? A splash of lemon juice works in a pinch. For the salt, Diamond Crystal is my favorite because it dissolves evenly, but Morton kosher is fine too. If your flour’s old or stale, toast it lightly in a dry pan for 2 minutes to freshen it up. And yes, you can make this gluten-free with a 1:1 flour blend, though texture will differ slightly.
This dough needs to chill at least 1 hour between stages—don’t rush it! Wrap tightly in plastic and refrigerate. For longer storage, freeze the dough balls for up to 3 months. Thaw overnight in the fridge before rolling. The crust keeps well in the fridge for 2 days once baked, but reheat at 350°F for 5 minutes to restore crispness. Pro tip: Blind-bake your crusts for 15 minutes before filling to prevent soggy bottoms—trust me on this.
Why You’ll Love This Recipe
- No-Fuss Assembly: I swear by this crust because it’s actually foolproof—I just toss the flour, butter, and lard into a food processor, pulse until it looks like wet sand, then add ice water. No rolling pins, no stress, just done.
- Buttery-Lard Luxe: That combo of cold butter and lard? It delivers a flaky, golden crust with a melt-in-your-mouth richness you won’t find in all-butter recipes. Honestly, the first bite makes me question why I ever used anything else.
- Double the Crust: Make two at once—one for tonight’s pot pie, the other for tomorrow’s hand pies. The dough keeps perfectly in the fridge for days, so I’m never scrambling last-minute. (Yes, even on a Tuesday night.)
- Budget-Friendly Gold: Lard stretches my dollar further than butter alone, and this recipe uses just enough to make it ridiculously good without breaking the bank. My wallet and taste buds both win.
Step-by-step instructions for golden, shatterproof lard crust
Here’s how to build two perfect pie crusts that stay crisp and flaky—no floppiness, no cracks.
Cut and Mix Cold Fats with Dry Ingredients
Place the 1 cup unsalted butter and 0.5 cup lard in a large bowl. Cut both into ½-inch cubes using a sharp knife—this ensures even distribution and better flakiness. Add the 3.5 cups all-purpose flour, 0.5 tsp diamond crystal kosher salt, 1 tbsp granulated sugar, and 1 tsp white vinegar to the bowl.
Using a pastry cutter or your fingers, work the cold fats into the flour until the mixture resembles coarse crumbs with pea-sized fat pieces remaining. Don’t overwork it—just until you can see no more than a few larger fat pieces. This step creates the flaky layers when the fats melt during baking.
Gradually Add Ice Water for Perfect Dough
Pour the 0.5 cup ice water into a small measuring cup. Add 1 tablespoon at a time to the flour mixture, stirring gently with a fork or wooden spoon. Stop adding water as soon as the dough begins to come together when pressed—it should hold when squeezed but not be sticky.
Real talk: The dough should look shaggy and dry at first, but once it starts clumping, you’ve got the right amount. Too much water makes it tough; too little makes it crumbly. If it’s still too dry after all the water, add 1 teaspoon more—but don’t overdo it.
Divide and Shape Each Crust
Turn the dough onto a lightly floured surface and divide it into two equal portions. Flatten each into a 6-inch circle, about ½-inch thick. Wrap each circle tightly in plastic wrap and refrigerate for at least 30 minutes—this chilling step prevents shrinking and makes rolling easier.
Here’s the thing—don’t skip the chilling. Cold dough is easier to handle and less likely to shrink when you roll it out. If you’re in a hurry, pop them in the freezer for 15 minutes instead, but bring them back to fridge temperature before rolling.
Roll Out Crusts for Perfect Fit
On a floured surface, roll one chilled dough disk from the center outward, keeping it ¼-inch thick and rotating the dough as you go. The crust should be large enough to fit your 9-inch pie dish with about 1 inch overhang on all sides. If it tears, gently patch it with extra flour and press it back together.
Transfer the rolled crust to your pie dish, pressing it gently into the bottom and sides. Trim any excess dough hanging over the edge with a sharp knife. Repeat with the second crust for a double-crust pie or save it for another use.
Blind-Bake for Stove-Top Ready Crusts
Preheat your oven to 375°F. Line the crust with parchment paper, fill it with dried beans or pie weights, and bake for 15 minutes. Remove the weights and bake for 5-7 more minutes until the edges are golden brown and the crust is firm to the touch. Prick the bottom with a fork to prevent puffing.
This blind-baking step ensures your crust stays crisp and sturdy—no soggy bottoms when you add your filling. For a double-crust pie, brush the baked bottom crust with a thin layer of egg wash before adding the second crust. The egg wash creates a golden finish and helps seal the layers.
Pro Tips For Making 2 Pie Crust Recipe With Lard
- CHILL THE FAT FIRST: Mixing cold lard and butter straight from the fridge sounds counterintuitive, but I learned this the hard way—warm fat melts into flour like butter, turning your dough into a greasy mess. Cut both fats into ¼-inch cubes and let them sit on the counter for 10 minutes before cutting into the flour. That tiny pause keeps the texture right.
- SALT THE FLOUR UPFRONT: I used to sprinkle salt over the dough at the end, and the crust always tasted uneven. Instead, mix 1½ teaspoons of Diamond Crystal kosher salt directly into the flour before adding the fats. The salt disperses evenly, and you won’t end up with salty pockets or bland patches—especially important when using unsalted butter.
- WORK FAST WITH ICE WATER: Ice water is non-negotiable for this crust, but don’t drown the dough. Add it 1 tablespoon at a time while mixing, and stop as soon as the dough just holds together when pressed. Overdoing it makes the crust tough, and no one wants a pie that fights back. (Yes, even if you’re impatient like me.)
- REST THE DOUGH LONGER: Skipping the rest is the fastest way to a shriveled crust. After mixing, divide the dough and flatten it into discs, then wrap in plastic. Let it rest in the fridge for at least 2 hours—or overnight if you can. The gluten relaxes, the lard redistributes, and the crust becomes flaky instead of chewy. I know, I know, but trust the process.
Troubleshooting this dish
Flaky Failures?
If your crust turns out tough instead of flaky, you likely overworked the dough or didn’t keep the fats cold enough. The key is to handle the dough as little as possible—especially after adding water.
Also, ensure your butter and lard cubes are cold but not frozen (they should soften slightly but not melt when pressed). If your crust shrinks during baking, it wasn’t chilled long enough between stages. 💡
Cracked Crust?
Cracks usually happen when the dough warms up too quickly or isn’t rolled evenly. To fix this, keep your rolling surface and dough well-floured and roll from the center outward in smooth, even strokes. If cracks appear, gently patch them with extra flour and press the edges together.
For extra insurance, brush the crust with a thin layer of egg wash before baking—it helps seal small cracks and adds shine.
Soggy Bottoms
This classic issue happens when the filling is too wet or the crust isn’t pre-baked. Always blind-bake your crust for 15 minutes before adding filling, even if it’s not a wet one like fruit pie.
For extra protection, sprinkle a thin layer of crushed cornflakes or crushed graham crackers on the bottom crust before adding filling—it acts as a moisture barrier. If your pie still gets soggy, try baking it at a slightly lower temperature (350°F instead of 375°F) for a longer time.
Dough Sticks
If your dough feels too sticky, you’ve likely added too much water. The dough should hold together when pressed but not be tacky. To fix sticky dough, sprinkle more all-purpose flour (about 1 tablespoon at a time) onto your surface and knead it in gently.
If it’s still too wet, let it rest uncovered in the fridge for 10-15 minutes—the cold will help absorb excess moisture. Pro tip: Use ice water (not room temperature) to prevent stickiness from the start.
Uneven Browning
For an even golden-brown finish, rotate your pie halfway through baking (every 15-20 minutes). If the edges brown too quickly while the center stays pale, cover the edges with a strip of aluminum foil or a pie shield.
To enhance browning, brush the crust with egg wash or melted butter before baking. For extra shine, sprinkle a pinch of granulated sugar on the top crust before baking—it caramelizes beautifully.
Freezer Burn
If your dough develops freezer burn (grayish spots or dry patches), it was exposed to air or temperature fluctuations. To prevent this, wrap dough balls tightly in plastic wrap, then place them in a ziplock freezer bag with all the air squeezed out.
Label with the date—it’ll keep for up to 3 months. When ready to use, thaw in the fridge overnight. If you notice freezer burn after thawing, don’t worry—it won’t affect taste, but you can trim off any affected spots before rolling.
Nutrition facts
Frequently asked questions
Why use lard instead of butter in pie crust?
Lard creates that signature shatterproof, flaky texture because its higher fat content and lower water content produce more air pockets during baking. The combination of lard and butter gives you both flakiness and richness—lard handles heat better than butter alone, preventing greasiness while keeping the crust crisp. For classic Southern-style pies, this is the gold standard!
Can I make this crust without vinegar?
You can substitute 1 tsp lemon juice or even ½ tsp baking powder if you’re out of vinegar, but vinegar is ideal for tenderizing the flour and improving the crust’s structure. The acidity helps break down gluten strands slightly, resulting in a lighter texture. If skipping it entirely, just be prepared for a marginally tougher crust.
How do I store leftover pie crust?
Wrap baked crusts tightly in plastic wrap and store at room temperature for 2 days or freeze for up to 3 months. For unbaked dough, divide into portions, wrap each in plastic, and refrigerate for 3 days or freeze for 3 months. To reheat, bake at 350°F for 5 minutes to restore crispness—perfect for quick pot pies!
What’s the best way to roll out pie dough without cracks?
Keep your rolling surface and dough well-floured and roll from the center outward in smooth strokes. Use even pressure and rotate the dough ¼ turn after each stroke. If cracks appear, gently patch with extra flour and press edges together. A lightly chilled dough (30 minutes) also helps prevent shrinking and cracking.
Can I use this crust for savory pies too?
This crust works perfectly for savory applications like pot pies, quiches, or chicken pot pies. For extra flavor, add 1 tsp dried herbs (like thyme or rosemary) to the dough. The lard-butter combo stays crisp even with wet fillings, and the neutral flavor lets the savory ingredients shine.

- 2 Pie Crust Recipe With Lard: Golden, Shatterproof Layers in 30 Minutes - September 26, 2026
- 3 Layer Chocolate Ganache Cake Recipe: Rich Fudge Layers and Silky Frosting - September 26, 2026
- 6-Month Birthday Cake Recipe: Whimsical Themed Layers With Easy Fondant Decor - September 26, 2026