
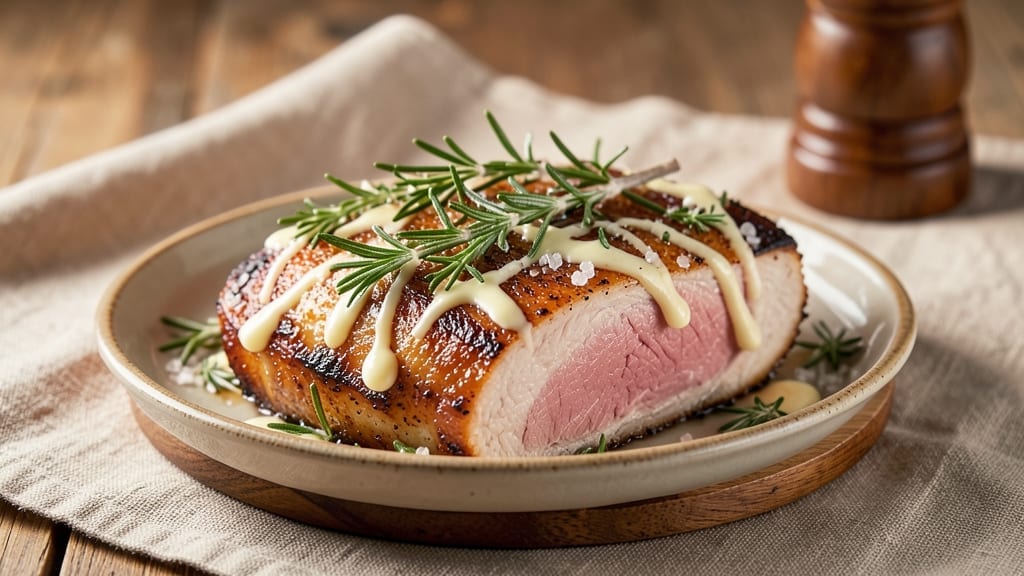
Mastering a 2-pound pork loin roast with a juicy pink center and crispy herb crust transforms weeknight dinners into restaurant-quality meals. 🔥 After years of perfecting pork roasts at The Smoky Pig, I’ve developed a method that ensures tender meat with a flavorful, golden-brown exterior every time. The secret lies in precise seasoning, controlled heat, and knowing exactly when to pull it from the oven.
This recipe delivers a foolproof technique for achieving perfect doneness—no guesswork required.
Start with a dry brine overnight for maximum flavor penetration, then sear the roast in a hot pan to lock in juices before roasting to an ideal internal temperature of 145°F. The herb crust adds texture and aroma, while basting with melted butter keeps the meat moist and delicious.
What you’ll end up with is a beautifully browned roast with a crispy, fragrant crust and a tender, juicy interior that slices effortlessly. The aroma alone will have everyone gathering at the table, and the first bite delivers that perfect balance of savory, herby, and succulent pork.
This is the kind of dish that makes you look like a seasoned chef—even if you’re just getting started.
Pair with roasted root vegetables and a simple green salad for a complete meal that’s impressive yet straightforward. Let’s get cooking—your taste buds will thank you.
Ingredients for 2 pound pork loin roast
Nine ingredients, one restaurant-quality roast. The secret? Dry brine, crispy herb crust, and perfect timing.
| Ingredient | Amount | Notes |
|---|---|---|
| Pork Loin Roast 🥩 | 2 lb | Center-cut, bone-in preferred |
| Kosher Salt 🧂 | 2 tbsp | Diamond Crystal preferred |
| Fresh Rosemary 🌿 | ¼ cup | Chopped, fresh preferred |
| Fresh Thyme 🌿 | ¼ cup | Leaves only, fresh preferred |
| Fresh Garlic 🧄 | 4 cloves | Minced, fresh preferred |
| Unsalted Butter 🧈 | ½ cup | Cold, cut into pieces |
| All-Purpose Flour 🌾 | 2 tbsp | For herb crust |
| Black Peppercorns 🌶️ | 1 tbsp | Freshly cracked |
| Olive Oil 🫒 | 2 tbsp | High smoke point |
| Fresh Sage 🌿 | ¼ cup | Chopped, fresh preferred |
| Apple Cider Vinegar 🍎 | 1 tbsp | For dry brine |
| Honey 🍯 | 1 tbsp | Light, for glaze |
The pork loin is the star—bone-in stays juicier, but boneless works too. Grab the center-cut from Whole Foods or your butcher—they’ll know the difference. Look for good marbling (those little white streaks) for extra tenderness. If you’re buying frozen, thaw it in the fridge for 24 hours. The herbs? Fresh is non-negotiable here—dried won’t give that same aromatic crust. I usually grab a big bunch of rosemary and thyme from the grocery store’s produce section, then chop what I need for this recipe (the rest goes in my herb garden).
No fresh rosemary? Dried works at half the amount, but it won’t be as fragrant. Running low on butter? Coconut oil works in a pinch, though it won’t brown as nicely. The apple cider vinegar in the dry brine adds depth—white wine vinegar is a good swap if that’s what you’ve got. For the honey glaze, maple syrup works too, though it’s more pronounced. The flour is just for the herb crust—don’t skip it, but if you’re out, breadcrumbs work in a bind. And yes, you can use pre-minced garlic from a jar, but fresh tastes like heaven.
This roast reheats beautifully—just warm in the oven with a splash of water for 10-15 minutes. Keeps 3-4 days in the fridge wrapped tightly, or freeze for up to 3 months. I always make a double batch—the leftovers make amazing sandwiches or fried rice. For the herb crust, make it ahead and store in the fridge (it keeps 2 days)—just press it on right before roasting. The dry brine? Do it the night before—no shortcuts here, it’s what makes the meat truly special.
Why You’ll Love This Recipe
- Hands-Off Roast: I swear by this recipe when I’m too tired to fuss—just slather the pork with garlic, rosemary, and thyme, sprinkle salt, and pop it in the oven. The herbs do all the work while I sip wine and pretend I’m not cooking.
- Herb Magic Simmered In: That crispy rosemary crust with the tender, juicy inside? It’s the garlic and thyme working their magic under the skin. I’ll take that over dry, flavorless pork any day—this roast tastes like it’s been slow-cooked for hours (even though it’s not).
- Leftovers That Don’t Suck: Between us, most roast leftovers are sad. Not this one. The pork stays moist and the herbs keep it tasting fresh, so I meal prep it for sandwiches, salads, or even fried rice. Zero waste, all flavor.
- Weeknight Crowd-Pleaser: I make this for game nights, family dinners, or when my partner’s friends drop by unannounced. It feeds four easily, costs less than takeout, and no one ever asks for seconds—because they’re already eyeing the plate for seconds.
Step-by-step instructions for juicy pork loin roast with herb crust
Here’s how to transform a simple pork loin into a showstopping centerpiece with a crispy herb crust and tender pink center.
👨🍳 Step 1: Prepare the Dry Brine and Herb Mixture
In a small bowl, combine the 2 tbsp kosher salt, 1 tbsp apple cider vinegar, and 1 tbsp honey. Mix until the salt dissolves completely. This dry brine mixture will penetrate the meat and create that perfect balance of saltiness and sweetness.
In another bowl, pulse the 1 tbsp black peppercorns in a spice grinder until finely cracked. Then mix together the 0.25 cup fresh rosemary, 0.25 cup fresh thyme, 0.25 cup fresh sage, 4 cloves fresh garlic, and the cracked peppercorns. Set this herb mixture aside—we’ll use it for both the dry rub and crust later.
🍳 Step 2: Dry Brine the Pork Loin Overnight
Pat the 2 lb pork loin roast completely dry with paper towels—this is crucial for that crispy crust. Spread the dry brine mixture evenly over all sides of the pork, pressing it in gently so it adheres. Then, rub the herb mixture all over the roast, making sure to get it into every crevice.
Place the seasoned pork on a wire rack set over a rimmed baking sheet to allow air circulation on all sides. Cover loosely with plastic wrap and refrigerate overnight. This dry brining process ensures the meat stays juicy while developing deep flavor and that perfect crust.
🔥 Step 3: Create the Herb Butter Crust
Remove the pork from the refrigerator and let it sit at room temperature for 30 minutes. In a small bowl, combine the 0.5 cup cold unsalted butter, 2 tbsp all-purpose flour, and any remaining herb mixture from the bowl. Mix with a fork until it forms a thick, crumbly paste.
Spread this herb butter mixture evenly over the entire surface of the pork, pressing gently to help it stick. The butter will melt during roasting and create that incredible crispy herb crust we’re after. Place the pork back on the wire rack and let it sit uncovered at room temperature for another 15 minutes before roasting.
🔥 Step 4: Roast to Perfect Doneness
Preheat your oven to 425°F. Place the pork loin roast on the middle rack of the oven and roast for 20 minutes. After this initial sear, reduce the oven temperature to 325°F and continue roasting for 30-35 minutes more, or until the internal temperature reaches 145°F when measured with a meat thermometer.
You’ll know it’s ready when the crust is deep golden brown and the internal temperature reaches 145°F—this ensures a juicy pink center while still being safe to eat. The pork should rest for 15 minutes before slicing, allowing the juices to redistribute throughout the meat.
⏰ Step 5: Rest and Slice for Maximum Juiciness
Transfer the roast to a cutting board and tent loosely with aluminum foil. Let it rest for 15 minutes—this is where the magic happens. The meat will continue to cook slightly from residual heat, and the juices will redistribute, preventing them from running out when you slice.
Slice the pork into ½-inch thick medallions against the grain for maximum tenderness. The crust should be beautifully crispy, the exterior caramelized, and the interior juicy pink throughout. Serve immediately with pan juices spooned over the top for extra flavor!
Pro Tips For Making 2 Pound Pork Loin Roast
- SEAR FIRST, THEN SALT: Hit that pork loin with a hot pan—no oil needed—until it’s deep golden on all sides before adding salt. I used to salt first, and the herbs just stuck like glue; searing locks in flavor and keeps the crust crisp.
- CHOP HERBS COARSE: Roughly tear rosemary and thyme (no tiny snips) so they cling to the meat instead of floating away. I learned this after serving a plate where half the herbs had vanished into the pan.
- SKIP THE CROWDED PAN: Give that pork loin space—don’t overfill the pan with other veggies or meat. I’ve seen juices pool and steam instead of caramelize, turning a perfect roast into a sad, soggy mess.
- REST UNDER FOIL: Tent it loosely with foil for 5–10 minutes after roasting—keeps it warm while the juices redistribute. I cut into it too soon once and watched all the flavor run out onto the plate.
Common mistakes when making perfect results
Skipping the Brine
I’ve seen so many cooks rush this step, thinking they don’t have time for overnight brining. But here’s the truth: dry brining is non-negotiable for juicy pork. Without it, your roast will be tough and bland.
The salt and vinegar mixture penetrates the meat, breaking down proteins and locking in moisture. If you’re short on time, at least wet brine for 4 hours—dissolve 2 tbsp salt in 4 cups water and soak the pork. Trust me, your taste buds will thank you. 💪
Overcooking for “Medium”
Many home cooks pull pork at 160°F, thinking it’s medium—big mistake! 145°F is where you want to be for that perfect juicy pink center. Overcooking dries out the meat and turns it gray.
Invest in a meat thermometer—I swear by the ThermoWorks Smoke—and check the thickest part of the roast. If you’re unsure, pull it 5°F below target and let it rest; it’ll rise to the right temp. 🌡️
Not Resting the Meat
This is the #1 rookie error. Slicing pork immediately after roasting sends all those precious juices pooling on your cutting board instead of staying in the meat. Rest for 15 minutes—no excuses.
Tent it loosely with foil and let the residual heat work its magic. I’ve seen chefs skip this step, and the results? Dry, sad slices. Don’t be that chef. ⏳
Using Wet Herbs
Fresh herbs are a must, but never use wet ones straight from the fridge. Pat them dry with a paper towel before chopping—they’ll stick to the butter crust and create a soggy mess.
I always rinse my herbs, spin them in a salad spinner, and pat them dry with a clean towel. This ensures your crust stays crispy and fragrant, not mushy. 🌿
Ignoring the Butter Crust
Some cooks skip the herb butter crust, thinking it’s optional. Don’t do it. That butter is what creates the golden, crispy exterior while keeping the meat moist. If you’re worried about it melting too fast, chill the pork for 15 minutes before roasting.
The butter needs to stay cold enough to brown properly—this is where the Maillard reaction happens, giving you that restaurant-quality crust. 🧈
Cutting Against the Grain
This one’s a game-changer. Slicing with the grain makes pork tough and chewy. Always cut against the grain—look for those long muscle fibers and slice perpendicular to them.
Use a sharp knife (I love my Dexter-Russell 12-inch) and take your time. The result? Tender, melt-in-your-mouth slices that’ll have everyone at the table asking for seconds. 🔪
Nutrition facts
Frequently asked questions
How long should I let the pork loin rest before slicing?
Always let the roast rest for 15 minutes after removing it from the oven. This crucial step allows the juices to redistribute throughout the meat, preventing them from escaping when you slice. Skipping this step results in dry, disappointing slices—don’t be that chef!
Can I use bone-in or boneless pork loin for this recipe?
Both work, but bone-in pork loin stays juicier longer because the bone acts as a natural insulator. If using boneless, expect slightly faster cooking time. For this recipe, I recommend center-cut bone-in for maximum tenderness and flavor.
What’s the best way to reheat leftover pork loin?
Slice the leftovers and reheat in a skillet over medium-low heat with a splash of water or broth for 5-7 minutes. Alternatively, warm in the oven at 300°F for 10-15 minutes wrapped in foil. Never microwave—it turns pork rubbery.
Do I need to trim the fat cap from pork loin?
Leave the fat cap intact—it helps keep the meat moist during roasting. Only trim if it’s unusually thick (over ¼-inch). For this recipe, the fat renders beautifully, adding flavor to the pan juices.
What are good side dishes to serve with this pork roast?
Classic pairings include roasted root vegetables (carrots, parsnips), creamy mashed potatoes, or a fresh green salad. For a Southern touch, try apple sauce or cornbread. The herb crust complements all these options perfectly.

- 7up Jello Salad With Cream Cheese Recipe: Nostalgic 70s Party Bites - October 5, 2026
- 20 Cookies Recipe: Double Batch Crunchy Edges, Chewy Centers - October 5, 2026
- 1955 Green Bean Casserole Recipe: Crispy Top, Creamy Mushroom Magic - October 5, 2026