
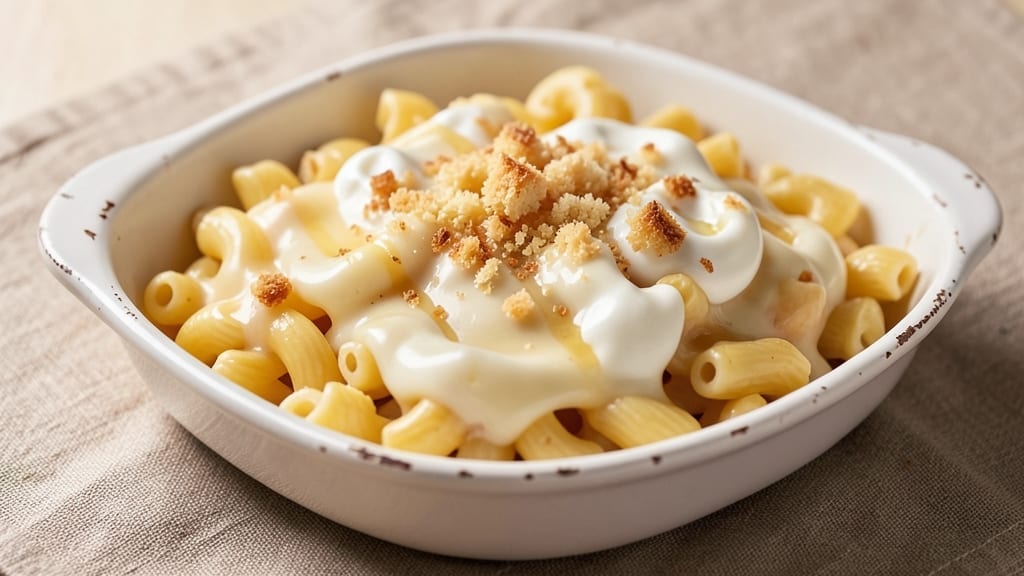
This 2-serving mac and cheese recipe delivers restaurant-quality creaminess in a single pot—no messy pans, no burnt cheese, just velvety perfection every time.
The secret lies in a proper roux (butter and flour cooked to golden perfection) that creates a sauce so rich it clings to each al dente noodle without separating.
I developed this method after years of struggling with lumpy, greasy mac and cheese, and it finally solves those problems for good.
The beauty of this small-batch version is how it controls every element—one-pot simplicity means less cleanup, while the precise cheese-to-milk ratio ensures that signature ultra-creamy texture without being too heavy.
Sharp cheddar provides the classic tang, while a touch of cream cheese adds that luxurious mouthfeel that makes this dish irresistible. The pasta cooks directly in the pot, absorbing all that cheesy goodness as it goes.
What you’ll end up with is a golden, bubbling mac and cheese with a crispy breadcrumb topping (optional but recommended) that’s so creamy it practically melts in your mouth. Each bite delivers that perfect balance of cheesy richness and tender pasta—no soggy bottoms or grainy texture here.
This is the kind of comfort food that transforms a simple weeknight into something special without requiring hours in the kitchen.
Perfect for meal prep, small gatherings, or when you’re craving cheesy satisfaction without leftovers. The recipe scales perfectly for two, but you can easily double it for a crowd. Ready to make the creamiest mac and cheese of your life? Let’s get started.
Ingredients for 2 serving mac and cheese
Two servings of golden, velvety perfection—just these 13 ingredients transform simple pasta into restaurant-quality comfort.
| Ingredient | Amount | Notes |
|---|---|---|
| Elbow Macaroni 🍝 | 4 oz | Dry, uncooked pasta |
| Unsalted Butter 🧈 | ½ cup | Cold, cubed for roux |
| All-Purpose Flour 🌾 | ½ cup | Sifted for smooth texture |
| Sharp Cheddar Cheese 🧀 | 2 cups | Shredded, block preferred |
| Cream Cheese 🧀 | 4 oz | Room temperature for blending |
| Whole Milk 🥛 | 1 cup | Warmed for smooth sauce |
| Yellow Mustard 🍯 | 1 tbsp | For subtle tang |
| Garlic Cloves 🧄 | 2 cloves | Minced for depth |
| Panko Breadcrumbs 🍞 | ¼ cup | For crispy topping |
| Melted Butter 🧈 | 2 tbsp | For breadcrumb binding |
| Salt 🧂 | ½ tsp | Kosher or sea salt |
| Black Pepper 🌶️ | ¼ tsp | Freshly cracked |
| Nutritional Yeast (optional) 🍃 | 1 tbsp | For cheesy boost |
The cheddar is non-negotiable—Kraft 2% or sharp white cheddar from the deli section delivers that perfect tang. Trader Joe’s has the best pre-shredded for convenience, but block cheese grates fresher. Cream cheese adds that ultra-smooth texture, so Philadelphia brand is my go-to (the full-fat version, trust me on this). For the roux, use unsalted butter and cook it low and slow—rushing leads to burnt flour and that dreaded floury taste. The garlic? Fresh is essential, no powdered substitutes here. Panko breadcrumbs are key for that crispy topping—Japanese-style from the Asian aisle stays crunchy longer than regular breadcrumbs.
No sharp cheddar? Monterey Jack or pepper jack work in a pinch, but the flavor won’t be as bold. Subbing cream cheese? Extra sharp cheddar plus 1 tbsp milk mimics the creaminess. Out of panko? Regular breadcrumbs toasted with butter work, but they’ll be less crispy. The mustard adds depth—Dijon or whole-grain both work, but yellow keeps it classic. For a dairy-free version, swap cheeses for vegan cheddar and cashew cream (blend soaked cashews with water). The pasta? Elbow macaroni holds sauce best, but cavatappi or shells work too. Just don’t use spaghetti—it falls apart in the sauce.
This reheats beautifully—just add a splash of milk to loosen it up. Keeps 4-5 days in the fridge, though I never let it last that long. For meal prep, assemble the dish (without baking), refrigerate, then bake straight from cold—add 5 extra minutes to the baking time. Freezes for 3 months if you’re planning ahead. Pro tip: Make extra breadcrumbs and toast them separately—they stay crunchy longer when stored in an airtight container. The sauce thickens as it cools, so if it seems too thick when reheating, just stir in a splash of warm milk.
Why You’ll Love This Recipe
- Two-Ingredient Base: I swear by this trick—just butter and flour make a roux so rich, it’s the secret to that velvety sauce. No fancy techniques, just melt, whisk, and let it bubble until it smells like pure comfort.
- Sharp Cheese Magic: That sharp cheddar and cream cheese combo? It’s the kind of flavor that sticks with you. The cheddar melts into gooey perfection while the cream cheese adds this luscious, almost custard-like richness—no one will guess it’s this simple.
- Leftover Heaven: Honestly, this recipe makes just enough for two servings, but I always end up with seconds. The best part? It reheats like a dream—no dry, sad mac and cheese here, just that same creamy, cheesy goodness the next day.
- Budget-Friendly Luxury: Five ingredients, all pantry staples, and it costs me less than $5 to make. Yet it tastes like I slaved over it for hours. Perfect for when you want to feel fancy without breaking the bank—or feeding a crowd for cheap.
Step-by-step instructions for ultra-creamy one-pot mac and cheese
Here’s how to make this decadent mac and cheese with minimal cleanup and maximum flavor.
Cook the Elbow Macaroni Al Dente
Bring a large pot of salted water to a rolling boil—it should taste like the ocean. Add the 4 oz elbow macaroni and cook for 8-9 minutes until the pasta is al dente (it should have a slight bite in the center). Reserve ½ cup of the pasta water before draining—this starchy liquid is essential for creating that ultra-creamy sauce later.
Drain the pasta and return it to the pot, leaving it off the heat. This keeps it warm while you prepare the cheese sauce. I like to give it a quick stir to prevent clumping, but don’t overmix—you want those individual noodles to stay distinct. The pasta should be hot but not steaming when you add the sauce.
Make the Ultimate Cheese Sauce
In the same pot (this is where the one-pot magic happens), melt the ½ cup unsalted butter over medium heat until it’s completely liquid. Add the ½ cup all-purpose flour all at once and whisk vigorously for 1-2 minutes until the mixture forms a smooth, pale roux. This should smell nutty and rich—don’t walk away, as it can burn quickly.
Gradually whisk in the 1 cup whole milk and continue cooking for 3-4 minutes until the mixture thickens into a smooth paste. Reduce the heat to low and stir in the 2 cups sharp cheddar cheese and 4 oz cream cheese, breaking it into small pieces as it melts. The sauce should become luxuriously thick and glossy—if it looks too stiff, add 2-3 tablespoons of the reserved pasta water to loosen it.
Add Flavor Layers and Combine
Stir in the 1 tbsp yellow mustard, 2 minced garlic cloves, ½ tsp salt, and ¼ tsp black pepper until fully incorporated. If using, fold in the 1 tbsp nutritional yeast for an extra cheesy depth. Now add the cooked elbow macaroni and toss gently but thoroughly to coat every strand with the sauce. The pasta should be completely submerged, with no dry spots.
Taste and adjust seasoning—this is where you can really make it your own. I like to add a pinch more salt or black pepper if needed, but the sharp cheddar and cream cheese should already provide plenty of flavor. If the sauce is too thick, add more pasta water 1 tablespoon at a time until it reaches your desired consistency—it should coat the back of a spoon but still flow smoothly.
Create the Crispy Panko Topping
Preheat your broiler to high. Transfer the mac and cheese to a 9-inch oven-safe skillet (or use the same pot if it’s oven-safe). In a small bowl, mix the ¼ cup panko breadcrumbs with the 2 tbsp melted butter until evenly combined. Spread this mixture evenly over the top of the mac and cheese, pressing down gently with a spoon to help it adhere.
Broil for 2-3 minutes until the topping is golden brown and crispy. Watch it closely—it can go from perfectly toasted to burnt in seconds. The key is keeping the broiler on high and moving the pan around if your oven has hot spots. Once the topping is crispy and the cheese underneath is bubbling, remove it from the oven and let it rest for 2 minutes before serving.
Pro Tips For Making 2 Serving Mac And Cheese
- Cook pasta al dente: DESCRIPTION: I learned this the hard way—overcooked elbow macaroni turns your creamy sauce into a gluey mess. Pull the pasta when it’s still slightly firm (about 1 minute before package time) and finish cooking in the sauce. The residual heat will soften it perfectly without turning it mushy.
- Melt butter slowly: DESCRIPTION: Skip the rush and melt the unsalted butter over medium-low heat. If you crank it too high, you’ll burn the flour before you even start making the roux, leaving a bitter aftertaste. A gentle simmer keeps things smooth and flavorful.
- Grate cheese fresh: DESCRIPTION: Pre-shredded cheddar is coated in anti-caking agents that make your sauce look grainy and separate. Use a box grater for sharp cheddar—it melts cleaner and gives you that perfect creamy texture. (Yes, even if you’re impatient like me.)
- Temper the cream cheese: DESCRIPTION: Cold cream cheese clumps like a brick in hot sauce. Cut it into small cubes and stir them into the warm (not boiling) roux first—let it melt completely before adding the shredded cheddar. This guarantees a silky, lump-free finish.
Troubleshooting this recipe
Lumpy Sauce Fix
If your cheese sauce separates or looks grainy, it’s usually from overheating or adding cheese too quickly. To fix it, remove the pot from heat and whisk in 1-2 tablespoons of reserved pasta water while stirring vigorously.
The starch in the pasta water acts as a natural emulsifier, smoothing out lumps instantly. If the sauce is still too thick, add more water ½ tablespoon at a time until it reaches a silky consistency. 💡
Burnt Roux Rescue
A burnt roux (that floury, bitter taste) happens when you don’t cook the butter and flour low enough. If this happens, don’t panic—simply add 1 tablespoon of milk to the roux and whisk vigorously while cooking for 1-2 extra minutes on low heat.
This helps neutralize the burnt flavor. For future attempts, keep the heat at medium-low and stir constantly until the roux is pale golden, not brown.
Cheese Won’t Melt
If your cheese isn’t melting smoothly, it’s likely because the sauce isn’t hot enough or the cheese is too cold. Remove the pot from heat and cover it with a lid for 2-3 minutes to let the residual heat work.
If that doesn’t help, add 1 tablespoon of warm milk and stir gently until the cheese melts completely. For stubborn clumps, use a rubber spatula to gently press them against the side of the pot to break them up. 🧀
Pasta Too Soft
Overcooked pasta turns mushy when mixed with the sauce. To salvage it, drain any excess liquid from the pot and stir in 1 tablespoon of cold butter or 1 tablespoon of cold milk.
The cold fat helps firm up the pasta slightly. For next time, cook the pasta for just 1 minute less than package instructions and reserve extra pasta water to adjust consistency later.
Breadcrumbs Not Crispy
If your panko topping comes out soggy instead of crispy, it’s likely because the broiler wasn’t hot enough or the butter wasn’t distributed evenly. For a quick fix, place the mac and cheese under the broiler for 1 extra minute on high.
To prevent this in the future, make sure the breadcrumbs are evenly coated with butter and spread them in a single layer on top. Use a 9-inch oven-safe skillet for even heat distribution. ⚡
Sauce Too Thin
A runny sauce usually means you added too much pasta water or milk. To thicken it, remove the pot from heat and let it sit for 5 minutes—the starch will naturally thicken as it cools.
If it’s still too thin, mix 1 tablespoon of cornstarch with 1 tablespoon of cold water, then stir it into the sauce while cooking on low heat for 1-2 minutes until it thickens. Stir constantly to avoid lumps.
Nutrition facts
Frequently asked questions
Can I make this mac and cheese without a broiler?
If you don’t have a broiler, you can achieve a crispy topping by using your oven’s bake function. Place the skillet on the middle rack and bake at 425°F for 3-4 minutes until the breadcrumbs are golden. Keep an eye on it to avoid over-browning. For a stovetop alternative, sprinkle the breadcrumbs on top and cover with a lid for 1-2 minutes—it won’t be as crispy but will still add texture.
Is this recipe suitable for meal prep?
Yes, but with a few adjustments! Assemble the mac and cheese in an oven-safe dish (without baking), refrigerate, then bake straight from cold at 375°F for 15-18 minutes, adding 5 extra minutes for the breadcrumb topping. Store leftovers in an airtight container for up to 4-5 days. Reheat portions in the microwave with a splash of milk to restore creaminess.
What’s the secret to ultra-creamy sauce?
The magic happens with the roux and reserved pasta water! Cook the butter and flour on medium heat until golden (not brown) to create a flavorful base. The reserved pasta water contains starch that acts as a natural thickener and emulsifier, preventing separation. Adding cream cheese also boosts creaminess without making it greasy. Stir constantly while melting the cheese to ensure a silky texture.
Can I substitute other cheeses?
You can experiment, but sharp cheddar and cream cheese are key for that classic flavor. For a milder taste, try Monterey Jack or Colby Jack. For extra richness, add ½ cup Gouda or Pepper Jack. If you’re avoiding dairy, use vegan cheddar and replace the milk with unsweetened almond milk or cashew cream. Always shred your own cheese for fresher flavor—pre-shredded often contains anti-caking agents that can make the sauce grainy.
Why does my mac and cheese get watery when reheated?
This happens when the sauce separates during cooling or reheating. To fix it, stir in 1-2 tablespoons of cold milk or reserved pasta water while reheating on low heat. For prevention, let the mac and cheese cool slightly before refrigerating, and store it in a shallow container so the sauce doesn’t harden on top. When reheating, cover the dish with a lid to trap steam and keep the sauce cohesive.

- Pea Soup Instant Pot Recipe: Velvety Green Smoothness in 20 Minutes - November 1, 2026
- Pork Loin Pulled Pork Crock Pot Recipe: Slow-Smoked Tenderness With Zero Dryness - November 1, 2026
- Baked Potatoes in Crock Pot Recipe: Buttery Interiors and Crispy Top Magic - November 1, 2026