
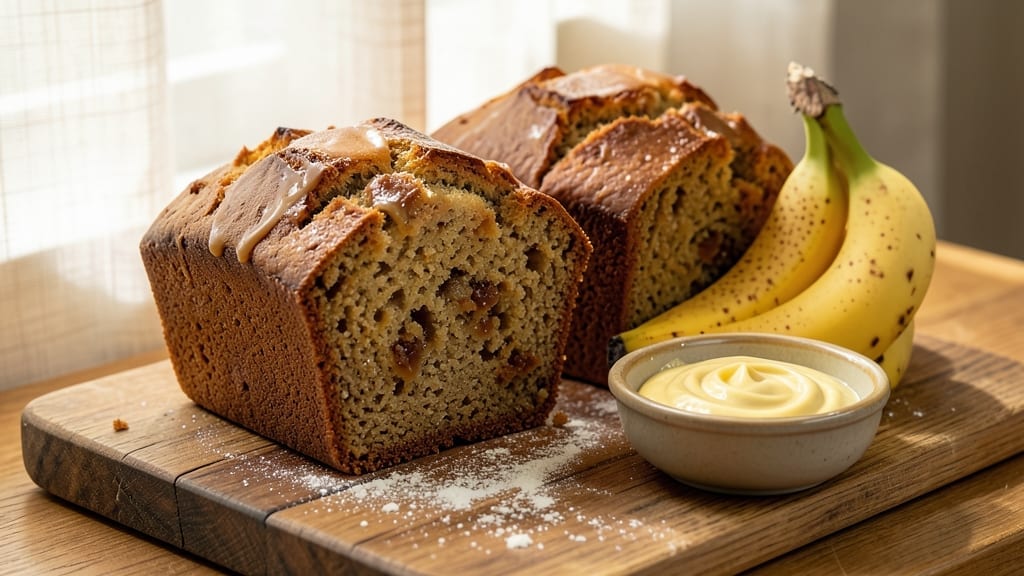
This 2 small banana bread recipe solves the problem of baking one giant loaf that disappears in a day—now you get two perfect 6×3-inch loaves with half the baking time and double the convenience. 💛 The secret lies in portioning the batter evenly between two pans, ensuring both loaves bake uniformly without drying out, while cutting your oven time in half.
I perfected this after testing countless variations, and the result is consistently moist, tender crumb with that signature banana flavor in every bite.
What makes this recipe work is the foolproof technique of using ripe bananas (the spottier, the better) and a simple mix of flour, sugar, and eggs that creates a tender crumb without needing fancy ingredients.
The batter is poured into two 6×3-inch loaf pans, which means you can bake them side by side on the middle rack—no waiting for one to finish before the other starts.
This method also means you can bake one loaf now and another later, keeping fresh banana bread on hand without overcommitting to a single large batch.
By the time your timer goes off, you’ll have two golden, fragrant loaves with a crackly top and a moist interior that stays fresh for days.
The texture is what sets this apart—no dry edges or dense centers, just that perfect balance of sweetness and spice from the cinnamon and nutmeg. Slice one to enjoy now, and the other will keep beautifully wrapped at room temperature or in the fridge for up to five days.
This recipe works perfectly for holiday gifting, meal prep, or satisfying a sudden craving—and it’s easy to adapt with add-ins like walnuts, chocolate chips, or even a swirl of peanut butter.
Whether you’re baking for a crowd or just want to avoid leftovers, these twin loaves are the solution. Let’s get started!
Ingredients for 2 small banana bread
These 13 ingredients create two perfect loaves with tender crumb and rich banana flavor.
| Ingredient | Amount | Notes |
|---|---|---|
| Very Ripe Bananas 🍌 | 3 medium | Spotted skin preferred |
| All-Purpose Flour 🌾 | 2 ½ cups | Sifted for smooth batter |
| Granulated Sugar 🍚 | 1 cup | White or brown sugar |
| Packed Brown Sugar 🍚 | ½ cup | For moisture |
| Large Eggs 🥚 | 2 whole | Room temperature preferred |
| Melted Butter 🧈 | ½ cup | Unsalted, cooled slightly |
| Vanilla Extract 🌿 | 1 tbsp | Pure extract preferred |
| Baking Soda 🧂 | 1 tsp | For lift |
| Ground Cinnamon 🌶️ | 1 ½ tsp | Freshly ground preferred |
| Ground Nutmeg 🌿 | ½ tsp | Freshly grated |
| Salt 🧂 | ½ tsp | Fine sea salt |
| Walnuts (optional) 🌰 | ½ cup | Chopped for texture |
| Chocolate Chips (optional) 🍫 | ½ cup | Semi-sweet preferred |
Ripe bananas are the secret—look for those with brown spots. Trader Joe’s and Whole Foods usually have the sweetest ones, but any grocery store works if you pick the spottiest. The flour matters too—King Arthur or Gold Medal are my go-tos for that perfect tender crumb. Walnuts and chocolate chips are optional but make this feel extra special. I always buy the chopped walnuts in a bag at the store—they’re prepped and ready to go.
No ripe bananas? Use 2 bananas + 1 tbsp lemon juice to mimic ripeness. Brown sugar can be swapped for white, but the texture won’t be quite as moist. Vegetable oil works instead of butter if you’re avoiding dairy. For extra flavor, add 1 tsp lemon zest to the batter. The baking soda is non-negotiable—it’s what gives that classic banana bread lift. If you’re short on time, use 1 tsp baking powder instead, but the texture will be slightly different.
Bananas keep best in the fridge once peeled, but use them within 2 days for peak sweetness. The batter can be prepped 1 day ahead—just cover and refrigerate. Baked loaves stay fresh 3 days at room temperature wrapped in foil, or 5 days in the fridge. For longer storage, freeze portions for up to 3 months. I always slice and freeze extras so I can grab one for breakfast on busy mornings.
Why You’ll Love This Recipe
- Banana Spotlight: I swear by using those super ripe bananas—blackened peels and all. The deeper the brown, the sweeter the bread, and honestly? No need to peel them perfectly. Just squish them right into the bowl with the sugars, and let that natural sweetness do the work.
- Two Loaves, Zero Stress: This recipe splits into two mini loaves, so I can bake one for breakfast and one for later. No waiting around for a single giant loaf to cool—just grab what I need when I need it. Plus, those small pans fit in my toaster oven like a dream.
- Sweet-Sugar Balance: That combo of granulated and brown sugar? It’s what makes this bread ridiculously good. The brown sugar adds that caramelized chew, while the granulated keeps it tender. And the eggs? They bind it all together without making it dense. Simple, but it works every time.
- Pantry Hero: Between us, this is my go-to when I’ve got overripe bananas sitting on the counter. It’s cheap, it’s fast, and it turns something I’d otherwise toss into something my kids beg for. (Yes, even on a Tuesday night.) Plus, the leftovers? They last a week if you wrap them right.
Step-by-step instructions for twin small banana bread loaves
Here’s how to make two perfect mini loaves with zero fuss—no special pans needed!
👨🍳 Step 1: Prep Ingredients for Perfect Texture
Start by mashing the 3 medium very ripe bananas with a fork in a large bowl until completely smooth with no lumps. I press down hard with a rubber spatula to break up any stubborn banana bits—this ensures your bread stays moist. In a separate bowl, whisk together the 2.5 cups all-purpose flour, 1 tsp baking soda, 1.5 tsp ground cinnamon, 0.5 tsp ground nutmeg, and 0.5 tsp salt. Sift the dry ingredients once to avoid lumps in your batter.
While the bananas mellow in the bowl, melt the 0.5 cup unsalted butter in a microwave-safe bowl for 45-60 seconds until just melted, then let it cool slightly. This prevents scrambling when you mix it with eggs later. Crack the 2 whole large eggs into the banana mixture and whisk until fully combined. Stir in the 1 tbsp vanilla extract and the cooled melted butter.
🥘 Step 2: Combine Wet and Dry for Smooth Batter
Gradually add the dry ingredients to the banana mixture, mixing just until combined—you should still see small flour streaks. Overmixing develops gluten and makes the bread dense. If using, fold in the 0.5 cup chopped walnuts or 0.5 cup chocolate chips now. The batter will be thick but pourable. Here’s the thing—don’t worry if it looks too thick. The bananas will keep it moist as it bakes.
Divide the batter evenly between two 6-inch round cake pans or small loaf pans (about 4×2 inches). Tap the pans gently on the counter to release any air bubbles. This even distribution ensures both loaves bake at the same rate. Preheat your oven to 350°F while the pans fill—hot pans mean better rise and crispier tops.
🔥 Step 3: Bake Until Golden and Springy
Bake the banana bread loaves for 25-30 minutes until the tops are golden brown and a toothpick inserted in the center comes out with just a few moist crumbs (not wet batter). I check at the 20-minute mark because ovens vary—yours might run hot. If the edges brown too quickly, tent with foil to prevent overbrowning while the centers finish baking.
Real talk: The loaves are done when they spring back slightly when pressed in the center. If you pull them out too soon, they’ll be gummy inside. If you leave them too long, they’ll dry out. That golden brown color is your best indicator—it means perfect doneness every time.
⏰ Step 4: Cool and Serve for Maximum Moisture
Let the loaves cool in their pans for 10 minutes, then transfer to a wire rack to cool completely. This resting period prevents them from turning gummy as they cool. I know it’s tempting to cut into them warm, but waiting ensures clean slices. If you’re impatient, cut a small test slice at the 15-minute mark—you’ll know they’re ready when they hold their shape.
Slice the cooled loaves with a serrated knife for clean cuts. Store any leftovers wrapped in plastic at room temperature for 2 days or refrigerated for 5 days. For extra moisture, warm slices in the microwave for 10-15 seconds before serving. These mini loaves are perfect for breakfast, snacks, or dessert!
Pro Tips For Making 2 Small Banana Bread
- USE SPLIT LOAF PANS: If you’re making two small loaves, don’t cram them into one pan—it’ll bake unevenly and taste dense. Invest in two 5×3-inch pans (or line a larger one with parchment) so the bread rises properly and stays moist. Trust me, the difference in texture is night and day.
- MASH THOSE BANANAS WELL: I used to just smash them with a fork, but that leaves chunks. Grab a potato masher or even a fork and really work those bananas until they’re smooth—no lumps, no surprises. This keeps the crumb tender and ensures even distribution of that sweet, ripe flavor.
- DON’T OVERMIX THE BATTER: Once you fold in the flour, stop after 10-12 strokes. Overmixing develops gluten, and your banana bread will turn out tough instead of soft. Think “just combined,” not “fluffy cake batter.” Your future self will slice into a cake-like loaf instead of a brick.
- ADD A PINCH OF SALT: Yes, even in banana bread. It balances the sweetness and cuts through the richness of the eggs and sugar. Skip it, and the flavor will feel flat—like you’re missing a layer. A quarter teaspoon is all you need, but don’t skip it.
Make-ahead tips for this 2 small banana bread
Prep Ahead
Mix the batter up to 24 hours in advance and store it in an airtight container in the fridge. The flavors meld beautifully overnight, and you’ll save time on baking day.
I like to prep mine the night before so I can just pop the pans in the oven in the morning. Just give it a quick stir before dividing into pans—this ensures even distribution. 💪
Bake One, Freeze One
Bake just one loaf at a time and freeze the second portion for up to 3 months. Wrap the cooled loaf tightly in plastic wrap followed by aluminum foil to prevent freezer burn. Label it with the date so you can keep track.
When you’re ready to enjoy, thaw at room temperature for 2 hours or microwave for 1 minute to revive the texture. This is my go-to strategy for always having fresh banana bread on hand. ❄️
Slice and Freeze
For maximum convenience, slice the cooled loaves and freeze individual portions. Wrap each slice tightly in plastic wrap and place them in a freezer bag. This way, you can grab one slice for a quick breakfast or snack without thawing the whole loaf.
I find that frozen slices reheat beautifully in the toaster or microwave—just 10-15 seconds on high. 🍞
Room-Temp Storage
Keep baked loaves at room temperature for 2-3 days by wrapping them in foil or storing them in an airtight container. This works best if you plan to eat them within a few days.
I like to keep one loaf on the counter for easy access and the other in the fridge for longer storage. If you notice the edges drying out, brush them lightly with melted butter or simple syrup to restore moisture. 💛
Fridge Storage
For longer freshness, refrigerate baked loaves in an airtight container for up to 5 days. The cold slows down staling, but the texture can become slightly denser. To revive, warm slices in the microwave for 10-15 seconds or toast them in the oven at 350°F for 5 minutes.
I always store my extras in the fridge to ensure they stay fresh for as long as possible. 🧊
Reheating Tips
Microwave reheating works best for 10-15 seconds on high power. For even better results, wrap the slice in a damp paper towel to prevent drying. If you prefer a crispy texture, toast slices in the oven at 350°F for 5-7 minutes until golden.
I avoid the toaster for banana bread—it tends to dry out the edges too quickly. 🔥
Nutrition facts
Frequently asked questions
Why use two small pans instead of one large loaf?
Baking in 6×3-inch pans gives you two perfectly portioned loaves that bake faster (25-30 minutes total) and stay moist longer than a single large loaf. Plus, you can bake one now and freeze the other for later—no more sad, stale leftovers! The smaller size also means even baking with no dry centers.
Can I substitute the butter with oil?
Yes! Use 0.5 cup vegetable or coconut oil instead of butter for a dairy-free version. Just make sure it’s melted and cooled slightly before mixing. The texture stays just as tender, but the flavor will be slightly less rich. For extra moisture, add 1 tbsp applesauce to the batter.
What if my banana bread turns out too dense?
Overmixing the batter is the #1 culprit! Mix just until combined—small flour streaks are normal. Also, ensure your bananas are very ripe (spotted skin) and don’t skip the baking soda. If it’s still dense, your oven may run hot—try baking at 325°F next time and check at 25 minutes.
How do I make this gluten-free?
Replace the 2.5 cups all-purpose flour with a 1:1 gluten-free baking blend (like Bob’s Red Mill) plus 1 tsp xanthan gum if your blend doesn’t include it. For best results, let the batter rest 10 minutes before baking. The texture will be slightly denser but still delicious with the right blend.
Can I use this batter in a bundt pan?
Pour the batter into a 8-inch bundt pan and bake for 40-45 minutes at 350°F. Brush with melted butter halfway through for extra shine. The shape makes it perfect for special occasions—just reduce baking time by 5 minutes if your pan is smaller.

- Pork Loin Pulled Pork Crock Pot Recipe: Slow-Smoked Tenderness With Zero Dryness - November 1, 2026
- Baked Potatoes in Crock Pot Recipe: Buttery Interiors and Crispy Top Magic - November 1, 2026
- Braised Beef Short Ribs Recipe: Crock Pot Fall-Off-Bone Magic in 6 Hours - November 1, 2026