
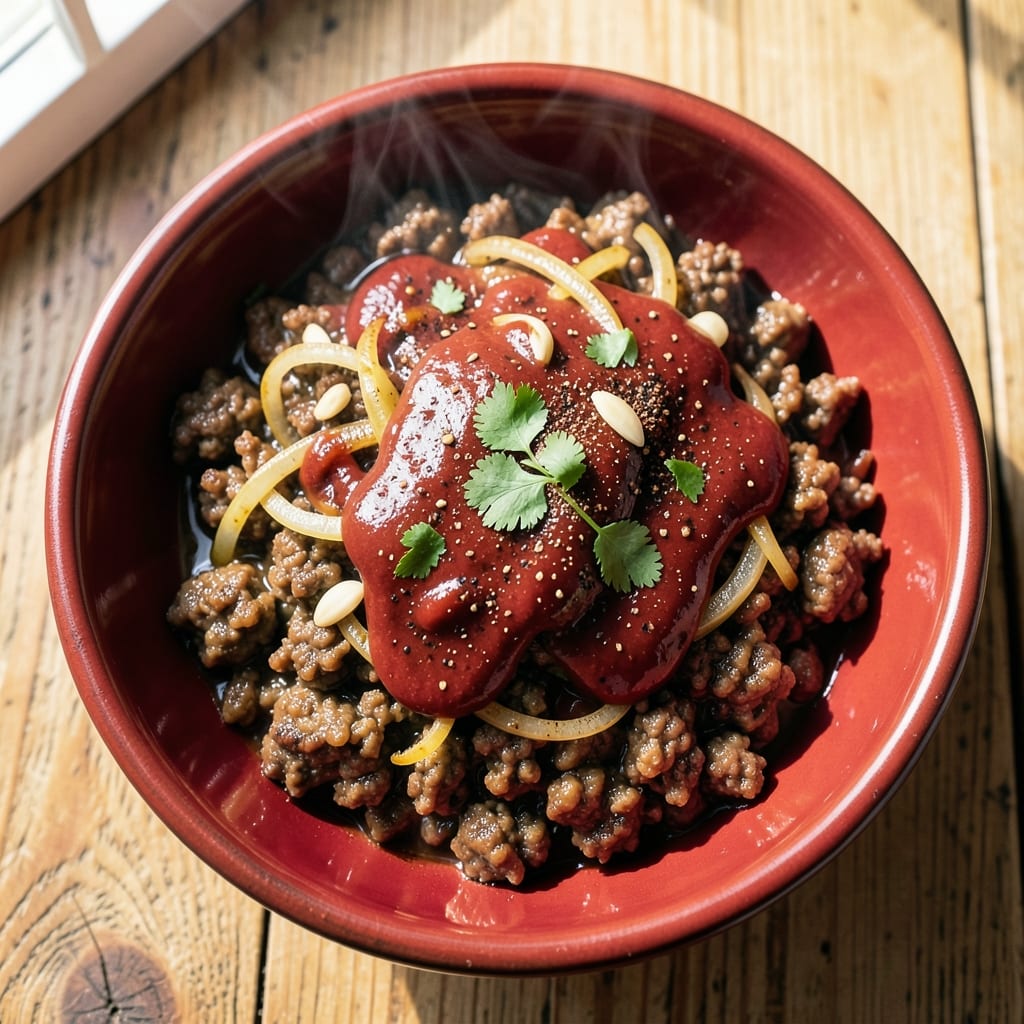
A 20-minute chili recipe transforms weeknight dinners from mundane to mouthwatering without sacrificing flavor or texture. This isn’t your grandmother’s slow-cooked version—it’s a bold, spiced-up one-pot meal packed with heat and depth in just a fraction of the time.
The secret lies in layering spices while browning the meat, creating a rich, smoky base that simmers into perfection in under 20 minutes.
What makes this recipe work is the balance of protein, vegetables, and spices—ground beef or plant-based crumbles, diced tomatoes, beans, and a blend of chili powder, cumin, and smoked paprika. The key technique?
Browning the meat first to develop deep flavor before adding everything to the pot. This method ensures every bite delivers that restaurant-quality taste without the hours of simmering.
By the time you’re done, you’ll have a chili that’s thick, hearty, and full of complex flavors—just like a slow cooker, but ready in minutes. The texture is perfect: tender meat, slightly charred edges on the beans, and a sauce that’s rich enough to coat every spoonful.
Serve it up with shredded cheese, sour cream, or fresh cilantro for a garnish that adds brightness and freshness.
This chili is versatile enough for meal prep, hearty enough for a family dinner, and quick enough for a busy weeknight. The best part? It scales easily, so you can double or triple the batch without changing the flavor profile. Let’s get cooking—your taste buds will thank you.
Ingredients for 20 minute chili
Quick protein, bold spices, and pantry staples—this chili comes together faster than you can say ‘heat it up’.
| Ingredient | Amount | Notes |
|---|---|---|
| Ground Beef 🥩 | 1 lb | 80/20 fat ratio preferred |
| Yellow Onion 🧅 | 1 medium | Diced, about 1 cup |
| Garlic Cloves 🧄 | 3 cloves | Minced, about 1 tbsp |
| Chili Powder 🌶️ | 2 tbsp | Medium heat preferred |
| Ground Cumin 🌿 | 1 tbsp | Toasted for deeper flavor |
| Smoked Paprika 🌶️ | 1 tbsp | For smoky depth |
| Diced Tomatoes 🍅 | 1 can (15 oz) | Fire-roasted preferred |
| Black Beans 🫘 | 1 can (15 oz) | Drained and rinsed |
| Kidney Beans 🫘 | 1 can (15 oz) | Drained and rinsed |
| Chicken Broth 💧 | 1 cup | Low-sodium preferred |
| Tomato Paste 🍅 | 1 tbsp | Squeeze tube works |
| Salt 🧂 | 1 tsp | Kosher or sea salt |
| Black Pepper 🌶️ | ½ tsp | Freshly ground preferred |
| Cayenne Pepper 🔥 | ¼ tsp | Adjust for heat preference |
| Olive Oil 🫒 | 1 tbsp | For browning meat |
The ground beef is where the magic starts. 80/20 fat ratio gives you that rich, smoky flavor—skip the lean stuff. Most grocery stores carry it pre-ground, but if you’re buying a chuck roast, ask the butcher to grind it fresh. The onions and garlic? Yellow onions add sweetness, but red onions work too if you want a sharper bite. I always grab the fire-roasted diced tomatoes from Trader Joe’s—they’ve got this perfect charred flavor that cuts through the richness. For the beans, the canned kind is fine, but if you’re feeling fancy, soak and cook your own for better texture.
No chili powder? Mix 1 tbsp cumin, 1 tbsp smoked paprika, and 1 tsp cayenne—it’s basically the same thing. Fresh out of smoked paprika? Regular paprika plus a pinch of liquid smoke gets you close. The tomato paste can be a squeeze tube from Trader Joe’s—no mess, lasts forever. Chicken broth is non-negotiable here (beef broth works too), but low-sodium is key so you control the salt. If you’re watching calories, swap half the beef for lentils or extra beans. The cayenne is optional, but trust me—start with less and add more if you’re sensitive to heat.
This chili reheats like a dream—honestly, it tastes even better the next day. Keeps for 4-5 days in the fridge, freezes for 3 months. I always make a double batch because it’s perfect for meal prep. Store it in glass containers—plastic can absorb odors. Need to cool it fast? Spread it across a baking sheet before transferring to containers. Leftovers? Just reheat with a splash of water or broth to loosen it up.
Why You’ll Love This Recipe
- Ready in 20: I swear, this isn’t one of those “set it and forget it” dishes—it’s actually done before your favorite show’s first commercial. Brown the beef and onions in the same pot you’ll serve it in, dump in the spices, and simmer. No chopping, no fuss, just done.
- Spice Without Effort: That toasted cumin and chili powder? They hit different. The garlic cloves get crushed right in the pan with the onions, so you’re not just tasting spices—you’re getting that deep, smoky aroma that makes your kitchen smell like a food truck. (Yes, even on a Tuesday night.)
- Leftover Goldmine: Between us, this chili begs to be made in bulk. It reheats like a dream—no soggy beans or weird textures—and tastes even better the next day. I freeze half immediately because, honestly, I’ll eat it for breakfast if I have to.
- Budget-Friendly Powerhouse: Ground beef and pantry spices? That’s a meal for four for under $10. No fancy ingredients, no overpriced shortcuts—just reliable, hearty flavor that won’t break the bank. My college self would’ve cried happy tears.
Step-by-step instructions for a quick and flavorful chili
Here’s how to make a bold, spicy chili in just 20 minutes—no shortcuts on flavor.
Brown the Ground Beef
Heat the 1 tablespoon olive oil in a large pot over medium-high heat. Add the 1 pound ground beef and break it apart with a wooden spoon. Cook for 5-6 minutes until the meat loses its raw color and turns deep brown—this step builds deep flavor. Drain any excess fat if needed, but leave about 1 tablespoon in the pot for cooking.
Here’s the thing—don’t rush this. You want the beef to develop a nice crust, which adds richness to the chili. If it starts sticking, just give it a little nudge with the spoon. Once it’s fully browned, push it to one side of the pot and add the diced yellow onion and minced garlic cloves.
Sauté the Aromatics and Spices
Cook the onion and garlic for 3-4 minutes until the onion softens and becomes translucent. You’ll smell the garlic releasing its aroma—that’s when you know it’s ready. Reduce the heat to medium and add the 2 tablespoons chili powder, 1 tablespoon ground cumin, 1 tablespoon smoked paprika, 1 teaspoon salt, 0.5 teaspoon black pepper, and 0.25 teaspoon cayenne pepper.
Stir everything together and let the spices toast for 30 seconds—this wakes up their flavors. You’ll see the spices release their oils and smell that rich, earthy aroma. Don’t let them burn, or they’ll turn bitter. This is the moment that matters: the spices should be fragrant and slightly darker than when you added them.
Build the Chili Base
Pour in the 1 can diced tomatoes (with juices), 1 cup chicken broth, and 1 tablespoon tomato paste. Stir everything together and bring the mixture to a gentle boil. Once boiling, reduce the heat to medium-low and let it simmer for 5 minutes to develop the flavors. You’ll notice the mixture thicken slightly as the starches from the tomato paste activate.
Now add the 1 can black beans and 1 can kidney beans (drained and rinsed). Stir them in gently so you don’t break the beans. Let the chili cook for another 5 minutes to let all the flavors meld together. The beans will absorb the rich, spiced broth, and the chili will start to thicken into a hearty consistency.
Adjust and Serve
Taste the chili and adjust the seasoning if needed. If it’s too mild, add a pinch more salt or cayenne pepper. If it’s too thick, stir in a splash of water or broth. The chili is ready when it’s thick but still spoonable, with a deep, smoky, spicy flavor that coats your tongue.
Serve the chili hot, straight from the pot. It’s perfect over rice or with a dollop of sour cream and chopped green onions. The beauty of this recipe is that it delivers restaurant-quality chili in just 20 minutes, with no compromises on flavor. Enjoy it while it’s warm—this chili tastes even better the next day, but it won’t last that long!
Pro Tips For Making 20 Minute Chili
- CRANK THE HEAT FIRST: Your ground beef will release fat like a fountain if you start slow—high heat for the first 2 minutes sears it properly before you even add onions. I used to let it simmer gently, and the beef stayed greasy and bland. Now I watch for a deep brown crust before backing off.
- MINCE THAT ONION: Tiny onion pieces disappear faster and sweeten the chili without overpowering it. I used to chop roughly, and chunks lingered like sad, undercooked ghosts. A quick pulse in a food processor (or knife work) ensures even cooking and better flavor distribution.
- TOAST THE SPICES: Dry-toast your chili powder and cumin in the same pan for 30 seconds before adding liquid—it wakes up their aroma. I skipped this once and the chili tasted flat, like someone forgot to season it. The spices need a little char to sing.
- SALT THE BEAN WATER: If you’re adding beans (even canned ones), salt the cooking liquid before mixing it in. The chili absorbs flavor better this way, and you won’t end up with bland, waterlogged beans. I learned this after tasting a bowl that tasted like it was swimming in unsalted broth.
Essential equipment for this recipe
Large Pot or Dutch Oven
A 5-6 quart heavy-bottomed pot or Dutch oven is essential for this chili. I use my All-Clad stainless steel Dutch oven because it distributes heat evenly and prevents hot spots that can burn your chili.
If you don’t have one, a deep, heavy pot with sloped sides (like a Calphalon or Le Creuset) works perfectly. Avoid thin, lightweight pots—they won’t handle the heat well and can cause uneven cooking. 🔥
Wooden Spoon
A long-handled wooden spoon is a game-changer for stirring and scraping the bottom of the pot without damaging it. I swear by my Oxo Good Grips wooden spoon—it’s sturdy, heat-resistant, and the angled handle makes it easy to reach all corners.
Avoid metal spoons when browning the beef to prevent sticking and potential scratches on non-stick surfaces.
Measuring Spoons
Precision matters with spices, so invest in a set of stainless steel measuring spoons. I keep my OXO Good Grips set on the counter for quick access. These spoons are durable, easy to read, and won’t rust like plastic ones.
For the chili powder, cumin, and smoked paprika, use the 1-tablespoon and ½-teaspoon measures—these are the most critical for balancing flavor.
Cutting Board and Knife
A sharp chef’s knife and a large cutting board are non-negotiable for dicing onions and mincing garlic efficiently. I use my Victorinox 8-inch chef’s knife and a maple cutting board—the knife glides through onions like butter, and the board is gentle on the knife’s edge.
If you’re short on time, a mandoline can speed up onion dicing, but be cautious with the garlic to avoid over-mincing.
Can Opener
Don’t overlook a good can opener—it’s the unsung hero of quick chili prep. My OXO Good Grips can opener is my go-to because it opens cans smoothly without crushing the beans or tomatoes.
If you’re using fire-roasted diced tomatoes from a can, make sure to drain them well but save the juices—they add depth to the chili. A manual can opener also works, but it requires a bit more effort.
Optional: Immersion Blender
For an ultra-smooth chili, an immersion blender (like the Ninja PN600) lets you blend right in the pot without transferring to a separate container. Pulse for 10-15 seconds if you prefer a slightly chunkier texture or 30 seconds for a completely smooth finish.
This step is optional but elevates the chili to a restaurant-worthy consistency. Just be careful not to over-blend—the beans should still hold their shape slightly. ✨
Nutrition facts
Frequently asked questions
Can I make this chili vegetarian?
Swap the ground beef for 1 lb plant-based crumbles (like Beyond Meat or soy-based) or 1 cup cooked lentils. For extra protein, add 1 can extra beans (like pinto or white beans). The spices and tomato base will still give you that rich, smoky flavor—just make sure to brown the plant-based meat first for depth.
Why does my chili taste bland after 20 minutes?
Quick chili relies on proper browning and spice toasting—don’t skip these steps! If it’s bland, try adding 1 extra tbsp smoked paprika or a pinch of MSG (if you like umami). For next time, let the spices toast for 45 seconds and brown the meat until deeply caramelized. The tomato paste also adds depth, so don’t omit it.
Can I use frozen beans instead of canned?
Yes, but thaw them first! Use 1.5 cups frozen beans (about 1 cup drained) and add them with the broth. They’ll need 2 extra minutes to heat through. For best texture, don’t overcook—frozen beans get mushy faster than canned. If using, rinse them well after thawing to remove excess starch.
What’s the best way to reheat leftovers?
Reheat gently in a pot over low-medium heat with 2 tbsp water or broth to prevent drying. Stir frequently and cook for 5-7 minutes until hot. Microwaving works too—cover with a damp paper towel and heat in 1-minute intervals, stirring between each. Never reheat to 165°F? Just until steaming hot.
How can I make this chili spicier?
Double the cayenne pepper to 0.5 tsp or add 1 tsp chipotle powder with the spices. For heat with depth, stir in 1 tbsp hot sauce at the end or top with diced jalapeños before serving. Want smoky heat? Add ½ tsp chipotle in adobo sauce when building the base.

- 3 Layer Eggnog Cake Recipe: Spiced Rum-Infused Frosting and Boozy Swirls - October 6, 2026
- 1800 Ultimate Margarita Mix Recipe: Frozen or On-The-Rocks Versatility - October 6, 2026
- 3 Eggs and Cabbage Recipe: Savory Scramble With Crispy Edges - October 6, 2026