
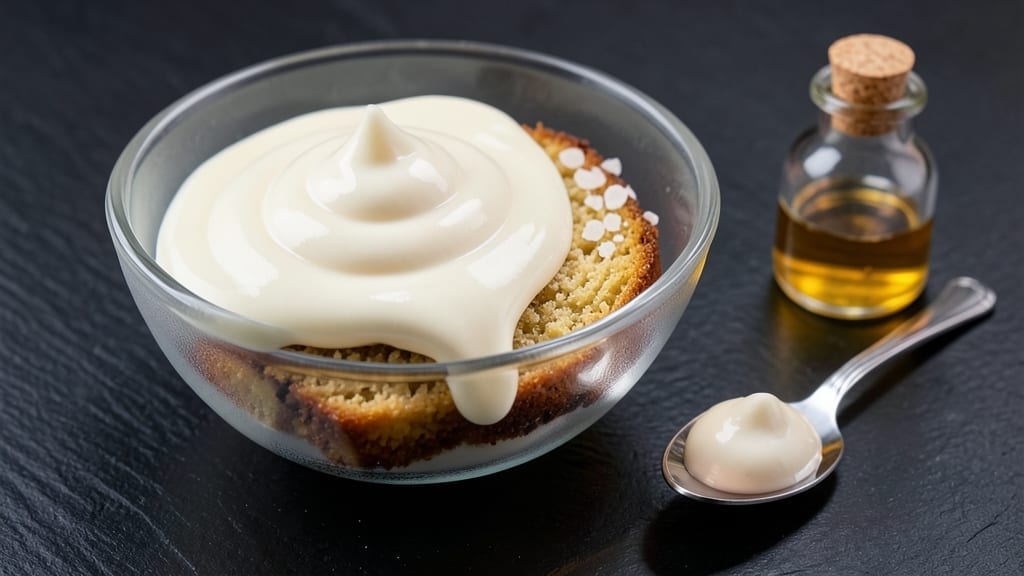
Creating a velvety smooth icing in just 20 seconds transforms any cake or dessert from ordinary to extraordinary—no fancy equipment or complicated steps required. This recipe relies on a simple, foolproof technique that delivers professional-quality results with just three ingredients and minimal effort.
The key lies in the right ratio of butter and powdered sugar, combined with a splash of liquid to achieve that signature silky texture.
What sets this icing apart is its versatility—it works equally well for cakes, cupcakes, or even cookies, and can be customized with extracts, food coloring, or citrus zest to match any flavor profile.
The process is effortless: melt the butter slightly, then whisk in the powdered sugar and liquid until smooth. No stand mixer or electric beaters needed—just a spatula and a bowl. This method ensures a consistent, lump-free finish every time, even for beginners.
The result is a light, airy icing that spreads effortlessly and sets beautifully, creating a glossy finish that elevates any baked good. It’s stable enough to pipe for decorative borders or simply spread for a quick, elegant touch.
Whether you’re decorating a birthday cake or adding a finishing flourish to homemade cookies, this icing delivers restaurant-quality results in a fraction of the time.
Store any leftovers in an airtight container in the refrigerator for up to a week, or freeze for longer storage. For added flexibility, experiment with flavors like vanilla, almond, or even spiced options using cinnamon or nutmeg. Let’s make decorating your desserts faster, easier, and more professional than ever before.
Ingredients for 20 second icing
Three core ingredients, one technique—transform any dessert with this ultra-smooth icing.
| Ingredient | Amount | Notes |
|---|---|---|
| Unsalted Butter 🧈 | ½ cup | Cold, cut into small cubes |
| Powdered Sugar 🍚 | 2 cups | Sifted for smooth texture |
| Heavy Cream 🥛 | ¼ cup | Cold for easier incorporation |
| Vanilla Extract 🌿 | ½ tsp | Pure vanilla for authentic flavor |
| Food Coloring (optional) 🎨 | ¼ tsp | Gel-based for vibrant color |
| Salt 🧂 | ⅛ tsp | Fine sea salt for balance |
The butter is non-negotiable here—unsalted ensures you control the flavor profile, and cold cubes melt just enough to create that signature velvety texture without overworking. European-style butter like Plugrá or President has a higher fat content, which yields a richer finish. If you’re in a pinch, regular unsalted butter works fine, but avoid salted as it disrupts the delicate balance. The powdered sugar should be sifted beforehand to eliminate any lumps—this is your secret weapon for that flawless, cloud-like consistency. Domino or C&H brands are reliable for this purpose, but avoid any that contain cornstarch as a filler.
No heavy cream? Whole milk or half-and-half work in a bind, though the texture will be slightly less stable. The vanilla extract can be swapped for almond extract (¼ tsp) or lemon juice (1 tsp)** for a different flavor profile, but pure vanilla delivers that classic cake-shop taste. For color customization, gel-based food coloring is your best bet—it mixes seamlessly without altering the texture. If you’re using liquid coloring, reduce the heavy cream by ¼ cup to maintain consistency. The salt is subtle but essential—it rounds out the sweetness and enhances the overall flavor, so don’t skip it even if the butter is unsalted.
This icing sets beautifully at room temperature, making it perfect for decorating cakes or cupcakes that will be served immediately. For longer storage, refrigerate in an airtight container for up to 1 week, or freeze for 3 months. To reheat, let it sit at room temperature for 10-15 minutes—it will regain its smooth, spreadable consistency. For best results, portion into small containers so you can grab exactly what you need without thawing the entire batch. If the icing thickens when refrigerated, simply whisk in a teaspoon of warm water to restore its silky texture.
Why You’ll Love This Recipe
- No Mixer Needed: I’ll be real—this icing comes together with a fork and a bowl. Melt the butter, whisk in powdered sugar, add a splash of heavy cream, and boom. No standing over a stand mixer, no sticky hands, just smooth perfection in under a minute.
- Velvet Smooth Magic: That butter-cream ratio? Chef’s kiss. The heavy cream keeps it luscious without being greasy, and the vanilla? It’s not just flavor—it’s the kind that makes you pause mid-bite. Honestly, I’ve used this on cupcakes, cookies, and even toasted cinnamon rolls, and every time, it’s the star.
- Birthday to Bake Sale: I’ve dyed this pink for a kid’s party, left it plain for a quick batch of cookies to take to work, and even used it to jazz up store-bought donuts when I was desperate for dessert. It’s the ultimate crowd-pleaser—no one questions the icing, and no one walks away disappointed.
- Pantry Goldmine: Between us, this recipe uses stuff you already have. Butter? Check. Sugar? Check. Heavy cream? Probably in your fridge right now. No weird ingredients, no last-minute grocery runs—just pure, reliable frosting that won’t break the bank or the clock. Leftovers? Store them in the fridge for up to a week.
Step-by-step instructions for velvety smooth cake icing
Here’s how to create this dreamy, ultra-smooth frosting in record time.
Prepare Your Tools and Ingredients
Gather a stand mixer fitted with the paddle attachment or a hand mixer. Measure out all ingredients exactly as listed—precision matters here. The 0.5 cup unsalted butter should be cold and cut into small cubes, while the 2 cups powdered sugar must be sifted to prevent graininess in the final icing.
Place the cold 0.25 cup heavy cream in the refrigerator until you’re ready to use it. This chilled state ensures it incorporates smoothly without creating lumps. Have your 0.5 teaspoon vanilla extract and 0.125 teaspoon salt ready, along with any optional 0.25 teaspoon food coloring you plan to use.
Cream the Butter and Sugar
In your mixer bowl, combine the 0.5 cup cold butter cubes with the 2 cups sifted powdered sugar. Beat on medium speed for 2-3 minutes until the mixture is light and fluffy. You’ll notice the butter softens and blends completely with the sugar, creating a smooth base.
This step is crucial for achieving that signature velvety texture. The butter must be fully incorporated but not melted—you should still see small butter pieces at this stage. If the mixture seems too thick, don’t add liquid yet. The heavy cream will be incorporated in the next step.
Add Cream and Flavorings
Remove the bowl from the mixer and add the 0.25 cup cold heavy cream, 0.5 teaspoon vanilla extract, and 0.125 teaspoon salt. Mix on low speed for 30 seconds just to combine these ingredients. If using, add the 0.25 teaspoon food coloring now and mix until evenly distributed.
Return the bowl to the mixer and beat on medium-high speed for 1-2 minutes until the icing is completely smooth and glossy. You’ll know it’s ready when it leaves a clean streak on the back of a spoon and holds its shape when piped. The cold cream helps create that professional-grade consistency without making the icing too runny.
Test and Adjust Consistency
For a perfect test, pipe a small amount of icing onto a piece of parchment paper. If it spreads too much, beat in 1 tablespoon additional powdered sugar at a time until it holds its shape better. If it’s too thick, add 1 teaspoon heavy cream and mix until smooth.
The ideal consistency should be thick enough to hold peaks when piped but still spreadable with a knife. This icing works beautifully for both piping decorations and spreading on sheet cakes. Use immediately or store in an airtight container in the refrigerator for up to 3 days, bringing to room temperature before use.
Pro Tips For Making 20 Second Icing
- MELT BUTTER FIRST: DESCRIPTION: Take that butter out of the fridge 10 minutes before you start—room temp butter blends smoother and cuts through powdered sugar without clumping. I used to rush this and ended up with a grainy mess that looked like I’d used sand instead of sugar.
- WEIGH THE SUGAR: DESCRIPTION: Powdered sugar packs differently in cups, so grab a small scale if you can. For every 1 cup you’re measuring, that’s actually about 120 grams—don’t eyeball it. My first batch of pink icing was cloyingly sweet because I overestimated the volume.
- WHISK FAST AND HARD: DESCRIPTION: You can’t just stir this—use a hand mixer or stand mixer on medium-high for 30 seconds. The goal is to break up any lumps and get the sugar fully dissolved. I learned this after my icing separated into butter and sugar sludge (yes, it happens).
- ADD CREAM SLOWLY: DESCRIPTION: Drizzle the heavy cream in while mixing—don’t pour it all at once. Start with half, then add more if it’s too thick. My grandmother’s trick: if it’s still stubborn, chill the bowl for 2 minutes before adding the rest. Works every time.
Wine and beer pairings for this dish
Wine Pairings
For this velvety icing, opt for a dry sparkling wine like Prosecco or Cava—their crisp acidity and light bubbles cleanse your palate between bites of richly frosted desserts. The effervescence also mimics the airy texture of the icing itself, creating a delightful sensory match. 🍷
A light Moscato d’Asti from Italy offers a slightly sweeter option that complements vanilla and citrus notes beautifully. Choose one with 10-12% alcohol to avoid overpowering the delicate flavors.
For a more sophisticated pairing, try a Vin Santo from Tuscany—its honeyed, nutty profile enhances the icing’s richness when paired with almond or spiced variations.
Beer Pairings
A Belgian Witbier like Hoegaarden or Stella Artois works surprisingly well—their citrusy, coriander notes bridge the sweetness of the icing with a refreshing contrast. The subtle spice in these beers also pairs wonderfully with cinnamon or nutmeg-infused icing variations. 🍺
For a richer option, try a light German Hefeweizen—the banana and clove undertones harmonize with vanilla while cutting through the fat in the butter. Avoid heavy stouts or IPAs, as their bold flavors can clash with the delicate texture of the icing.
Coffee Pairings
If you prefer coffee over alcohol, a lightly roasted espresso or cortado (equal parts espresso and steamed milk) balances the sweetness without overwhelming it. The crema on top adds a luxurious texture that mirrors the icing’s smooth finish.
For a dessert-focused pairing, try a caramel macchiato—the vanilla syrup enhances the icing’s flavor while the foam adds a light, airy contrast.
Non-Alcoholic Options
For a refreshing non-alcoholic match, serve with sparkling apple cider—its tartness and effervescence complement the icing’s sweetness perfectly. Chill it thoroughly to enhance the contrast. A vanilla chai latte also works beautifully, especially with vanilla or spiced icing variations. 💛
For a tropical twist, try a pineapple-mango smoothie—the bright, fruity flavors create a delightful contrast to the creamy icing. The acidity in the fruit helps reset your palate between bites, making it an ideal pairing for richly frosted desserts.
Nutrition facts
Frequently asked questions
Can I make this icing without a mixer?
Use a sturdy whisk or even a fork in a bowl. Start by rubbing the cold butter cubes with the powdered sugar using your fingers until crumbly, then gradually add the heavy cream while whisking vigorously. It takes about 3-4 minutes of consistent whisking to achieve that silky texture—just keep going until smooth!
Why does my icing look grainy?
Graininess usually means unsifted powdered sugar or butter that melted too quickly. Sift your powdered sugar first, and ensure your butter stays cold (not room temperature) during mixing. If it happens, blend in 1 tablespoon milk or cream and whisk vigorously for 1 minute—this often dissolves any remaining grit.
How can I make this icing dairy-free?
Swap the butter for ½ cup dairy-free margarine (like Earth Balance) and use ½ cup coconut cream instead of heavy cream. For extra richness, add 1 tablespoon coconut oil to the butter substitute. The texture will be slightly softer but still spreadable—test consistency and adjust with more powdered sugar if needed.
Can I use this icing for cookies?
Yes! This icing works perfectly for cookies too—just adjust the consistency slightly. For dipping, make it thinner by adding 1-2 teaspoons extra heavy cream. For decorating, keep it thicker and use a piping bag with a small round tip. The icing sets beautifully at room temperature, making it ideal for cookie decorating.
What’s the secret to getting that professional glossy finish?
The gloss comes from three things: cold ingredients, proper mixing time, and a smooth bowl. Use a clean, dry mixing bowl (no residue), beat the butter and sugar until fully emulsified (no visible butter pieces), and finish by whipping on high speed for 1-2 minutes—this incorporates air for that signature shine.

- 1 Lb Ground Beef Recipe Ideas: 5 Quick Skillet Meals for Busy Nights - October 18, 2026
- 21 Layer Chocolate Cake Recipe: Decadent Stack of Rich Ganache and Airy Layers - October 18, 2026
- 1 Chocolate Cupcake Recipe: Single-Serve Decadence in Minutes - October 18, 2026