
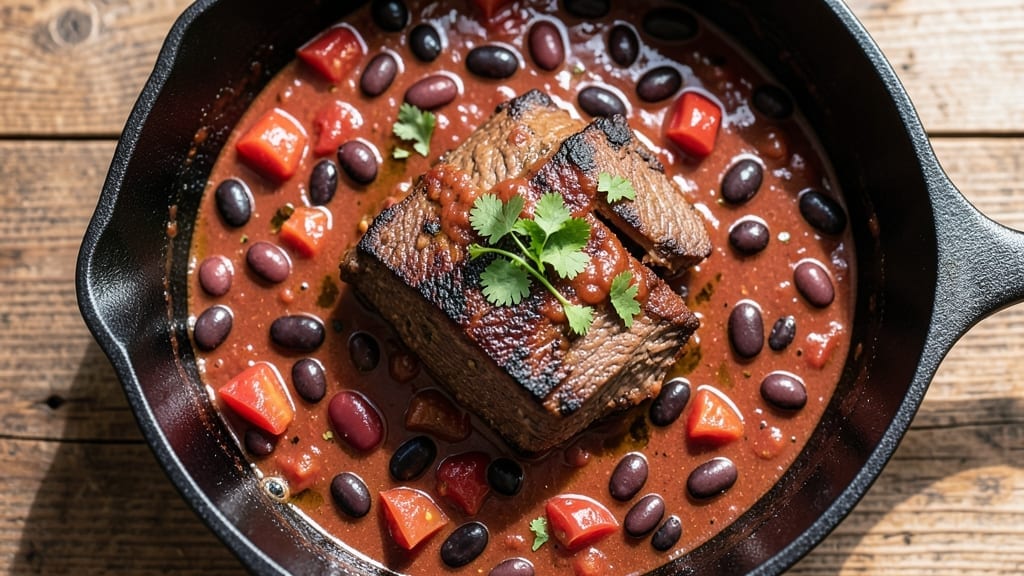
A 24-hour chili recipe transforms tough cuts of meat into melt-in-your-mouth perfection while developing complex, layered flavors that stovetop methods simply can’t match.
This isn’t just chili—it’s a slow-cooked masterpiece where time works in your favor, breaking down meat and melding spices into a harmonious blend that deepens with every hour.
The key lies in patience: letting the ingredients simmer gently over an extended period creates a texture and depth you won’t find in quick recipes.
What sets this chili apart is its balance of simplicity and sophistication. You’ll start with a basic framework—beef, beans, tomatoes, and spices—but the magic happens during that 24-hour slow cook.
The meat becomes fork-tender without drying out, while the broth reduces to a rich, concentrated flavor that coats every spoonful. Unlike rushed versions, this chili develops a caramelized depth that makes it unforgettable.
The result is a chili that’s rich, hearty, and deeply satisfying, with a texture that’s neither too thick nor too thin.
The beans stay tender but hold their shape, the meat falls apart at the touch of a spoon, and the spices create a symphony of warmth that lingers on your palate. This isn’t just dinner—it’s an experience that turns a simple pot of chili into a centerpiece for gatherings.
Whether you’re feeding a crowd or meal prepping for the week, this chili delivers restaurant-quality results with minimal effort after the initial setup. The beauty of the 24-hour method is that it requires almost no attention—just let it work its magic while you go about your day.
Serve it with all the classic toppings, or let the chili shine on its own as the star of the meal.
Ingredients for 24 hour chili
Six ingredients make the base, but time transforms them into restaurant-quality chili.
| Ingredient | Amount | Notes |
|---|---|---|
| Chuck Roast 🥩 | 3 lb | Pre-cubed or cut into 1-inch pieces |
| Kidney Beans 🌿 | 1 lb | Dry or canned (2 15-oz cans, drained) |
| Black Beans 🌿 | 1 lb | Dry or canned (2 15-oz cans, drained) |
| Tomato Paste 🍅 | ½ cup | High-quality, smooth variety |
| Diced Tomatoes 🍅 | 2 cups | San Marzano preferred, no sugar added |
| Beef Broth 💧 | 4 cups | Low-sodium preferred, homemade if possible |
| Chili Powder 🌶️ | 2 tbsp | Smoked paprika blend preferred |
| Ground Cumin 🌿 | 1 ½ tbsp | Toasted for deeper flavor |
| Garlic Cloves 🧄 | 6 cloves | Minced, fresh preferred |
| Onion 🧅 | 1 whole | Yellow or red, diced |
| Bay Leaves 🍃 | 2 whole | Fresh preferred, remove before serving |
| Black Peppercorns 🌶️ | 1 tsp | Freshly cracked preferred |
| Salt 🧂 | 1 ½ tsp | Kosher or sea salt, adjust to taste |
| Olive Oil 🫒 | 2 tbsp | Extra-virgin for richness |
| Dark Chocolate 🍫 | ¼ oz | 70% cacao, finely chopped (optional) |
The chuck roast is your secret weapon—it’s tough enough to benefit from the long cook but breaks down into melt-in-your-mouth pieces. Costco usually has it pre-cubed, which saves time, but if you’re buying a whole roast, cut it into 1-inch chunks before starting. The beans? Dry beans are ideal—soak overnight for best texture, but canned works in a pinch. For the tomatoes, San Marzano cans from the Italian section are worth the splurge—they’re sweeter and less acidic. The beef broth should be low-sodium; homemade is best, but even the good store-bought stuff like Pacific Foods works fine.
No chuck roast? Brisket or short ribs work beautifully—just increase cook time slightly. Swapping canned beans for dry? Soak them first. The tomato paste can be substituted with crushed tomatoes plus a pinch of sugar if you’re avoiding it, but trust me on the paste—it’s what gives that deep, caramelized flavor. Running low on cumin? Smoked paprika at double the amount gets you close. The dark chocolate is optional but adds a surprising depth—70% cacao or higher for the best balance of richness and bitterness. If you skip it, just add an extra pinch of salt at the end.
This chili only gets better with time, so make it the night before. Store in an airtight container in the fridge for up to 5 days—the flavors meld even more overnight. For freezing, portion into meal-sized containers and it keeps for 6 months. Reheat gently on the stove or microwave until steaming. The beans will hold their shape if you reheat with a splash of broth. Serve with all the fixings—sour cream, shredded cheese, pickled jalapeños—but let the chili shine on its own first.
Why You’ll Love This Recipe
- Deep, Smoky Richness: That 24-hour simmer transforms tough chuck into melt-in-your-mouth perfection, while the tomato paste and beans create a thick, velvety base with just the right kick. Honestly, the first bite always makes me pause mid-spoonful.
- Leftovers That Beg for More: This chili actually improves the next day—yes, really. The flavors meld into something even deeper, and it reheats like a dream. I’ve sent this to potlucks, game days, and even my in-laws’ house, and no one’s ever sent it back.
- Budget-Friendly Feast: A pound of chuck roast, a can of beans, and a few pantry staples feed a crowd for less than $10. Between us, this is my go-to when I need to stretch groceries without sacrificing flavor—especially when my kids’ friends show up hungry.
Step-by-step instructions for 24 hour chili recipe
Let’s build chili that develops layers of flavor without overcooking the meat.
Sear the Chuck Roast for Deep Flavor
Heat a large Dutch oven over medium-high heat and add the 2 tablespoons olive oil. Working in batches if needed, sear the 3 lb chuck roast pieces for 3-4 minutes per side until they develop a deep brown crust. This step creates the Maillard reaction, which builds the foundation for rich, complex flavors.
Don’t crowd the pan—give each piece room to brown properly. If the pan gets too full, work in two batches. Once all pieces are browned, transfer them to a plate and set aside. You’ll notice the kitchen fills with an incredible aroma, a sign you’re on the right track.
Build the Chili Base with Aromatics
In the same Dutch oven, add the 1 whole onion and 6 cloves garlic (minced). Cook for 5 minutes until the onions soften and the garlic becomes fragrant. This step develops the aromatic foundation that will infuse the entire chili.
Stir occasionally to prevent burning, especially the garlic which can turn bitter quickly. Add the 0.5 cup tomato paste and cook for another 2 minutes, stirring constantly. This creates a rich, slightly caramelized base that will thicken the chili beautifully as it cooks.
Combine All Ingredients and Simmer
Return the seared chuck roast to the Dutch oven. Add the 2 cups diced tomatoes, 4 cups beef broth, 2 tbsp chili powder, 1.5 tbsp ground cumin, 1.5 tsp salt, 1 tsp black peppercorns, and 2 whole bay leaves. Stir everything together until well combined.
Bring the mixture to a gentle boil, then reduce heat to low. Cover and let it simmer for 2 hours. This initial cooking time allows the meat to become tender while developing the chili’s flavor profile. You’ll want to stir occasionally to prevent sticking, but don’t worry about overcooking yet.
Add Beans and Continue Slow Cooking
After the initial 2 hours, add the 1 lb kidney beans and 1 lb black beans. Stir well to distribute them throughout the chili. The beans will absorb the rich flavors as they cook, becoming an integral part of the dish.
Continue simmering on low heat for another 22 hours, maintaining a gentle simmer. This extended cooking time is what creates the deep, complex flavors without overcooking the meat. The chili should be thick and rich, with the meat falling apart easily when tested with a fork.
Finish with Dark Chocolate and Adjust Seasoning
In the final 30 minutes of cooking, add the 0.25 oz dark chocolate (finely chopped). Stir well to incorporate it completely. The chocolate adds a subtle depth of flavor that rounds out the chili beautifully. Taste and adjust seasoning with additional salt if needed.
Remove the 2 whole bay leaves before serving. The chili should have a thick, velvety consistency with tender meat and beans. Serve hot with your favorite toppings like shredded cheese, sour cream, or fresh cilantro. This chili tastes even better the next day as the flavors continue to meld.
Pro Tips For Making 24 Hour Chili
- Brown the Chuck: DESCRIPTION: That chuck roast won’t tenderize properly if you toss it straight into the pot. Sear it first—cut into 1-inch chunks, then cook in batches over medium-high heat until deep brown on all sides. I learned this the hard way when my chili came out chewy, no matter how long I simmered it.
- Rinse Those Beans: DESCRIPTION: Drain and rinse the kidney and black beans before adding them to the pot. The canned liquid is salty and tinny—skip it. I used to ignore this, and the beans always tasted like they were swimming in brine.
- Simmer Low and Slow: DESCRIPTION: After the first 30 minutes of active cooking, drop the heat to a bare simmer—just tiny bubbles breaking the surface. Too much heat = mushy beans and a watery chili. I now use a thermometer to keep it at 190°F (88°C) for the last 20 hours.
- Stir in Paste Last: DESCRIPTION: Add the tomato paste in the final hour, not at the start. It burns easily and can make the chili taste bitter if cooked too long. Stir it in with a splash of broth or water to help it disperse smoothly.
Best sauces and condiments for this recipe
Classic Toppings
Start with the timeless trio: shredded sharp cheddar (about ½ cup) adds a creamy, tangy contrast to the rich chili. A dollop of sour cream (about ¼ cup) cools the heat while adding luxurious texture.
For a fresh finish, sprinkle chopped cilantro (about 2 tbsp) right before serving—it brightens the dish with its citrusy notes. 🌿
Spicy Kick
If you love heat, add pickled jalapeños (2-3 slices) for tangy, fiery crunch. For a smoky option, top with diced avocado (about ½ avocado) mixed with a squeeze of lime.
For extra depth, try crumbled cotija cheese (about 2 tbsp)—it adds a salty, nutty complexity that pairs perfectly with the chocolate notes in the chili.
Crunchy Textures
For texture lovers, toast pumpkin seeds (about 2 tbsp) in a dry pan until golden, then sprinkle on top. Crushed tortilla chips (about ¼ cup) add a satisfying crunch without overpowering the dish.
If you’re feeling fancy, try quick-pickled red onions (thinly sliced, marinated in vinegar and sugar for 10 minutes)—they add a sharp, sweet contrast.
Creamy Finishes
Drizzle with Mexican crema (about 2 tbsp) for a lighter alternative to sour cream. For a smoky-sweet touch, add caramelized onions (about ¼ cup)—simmer 1 large onion in 1 tbsp olive oil for 20 minutes until deep brown and jammy.
A sprinkle of smoked paprika (about ½ tsp) right before serving adds warmth and depth without altering the chili’s flavor.
Herb Infusions
Fresh cilantro isn’t the only herb that works—try chopped parsley (about 2 tbsp) for a brighter, more delicate flavor. For a Southwestern twist, add diced scallions (about 2 tbsp) and a pinch of fresh lime zest.
If you’re using dried herbs, oregano (about ½ tsp) or thyme (about 1 tsp) can add earthy notes that complement the chili’s depth.
Nutrition facts
Frequently asked questions
Why does this chili need 24 hours to cook?
The extended time is what creates that restaurant-quality depth. The slow simmer breaks down the tough chuck roast into melt-in-your-mouth pieces while allowing all the spices and aromatics to meld together. This isn’t just about cooking—it’s about flavor development that happens over time, creating a complexity you won’t get with quick methods.
Can I use a slow cooker instead of a Dutch oven?
For a slow cooker version, sear the meat first then transfer everything to your slow cooker. Cook on low for 24 hours or high for 12 hours. The key is maintaining that gentle simmer—just add ½ cup water if it gets too thick during cooking. The slow cooker actually works even better for this recipe since it maintains consistent low heat.
What if my chili gets too thick after 24 hours?
This happens when the broth reduces too much. Simply stir in ½ cup beef broth or water and let it simmer for another 15-20 minutes. If it’s still too thick, add more liquid gradually until you reach your desired consistency. The beauty of this recipe is you can adjust it at the end—just don’t add too much at once or you’ll dilute those hard-earned flavors.
Is the dark chocolate really necessary?
While it’s optional, that 0.25 oz dark chocolate adds a surprising depth that rounds out all the spices beautifully. It creates a subtle bittersweet note that complements the smoky chili powder and cumin. If you skip it, just add an extra pinch of salt at the end to balance the flavors—you’ll still get an amazing chili, just with a slightly different profile.
How can I make this vegetarian?
Swap the beef for 2 cups portobello mushrooms (sliced) or 1 lb extra-firm tofu (pressed and cubed). Use vegetable broth instead of beef broth and add 1 tbsp soy sauce for umami depth. The cooking time remains the same—just make sure your meat substitute is fully tender. For extra protein, add 1 cup lentils along with the beans.

- Baked Potatoes in Crock Pot Recipe: Buttery Interiors and Crispy Top Magic - November 1, 2026
- Braised Beef Short Ribs Recipe: Crock Pot Fall-Off-Bone Magic in 6 Hours - November 1, 2026
- Crock Pot Cocoa Recipe: Velvety Warmth With Hidden Spice Magic - November 1, 2026