
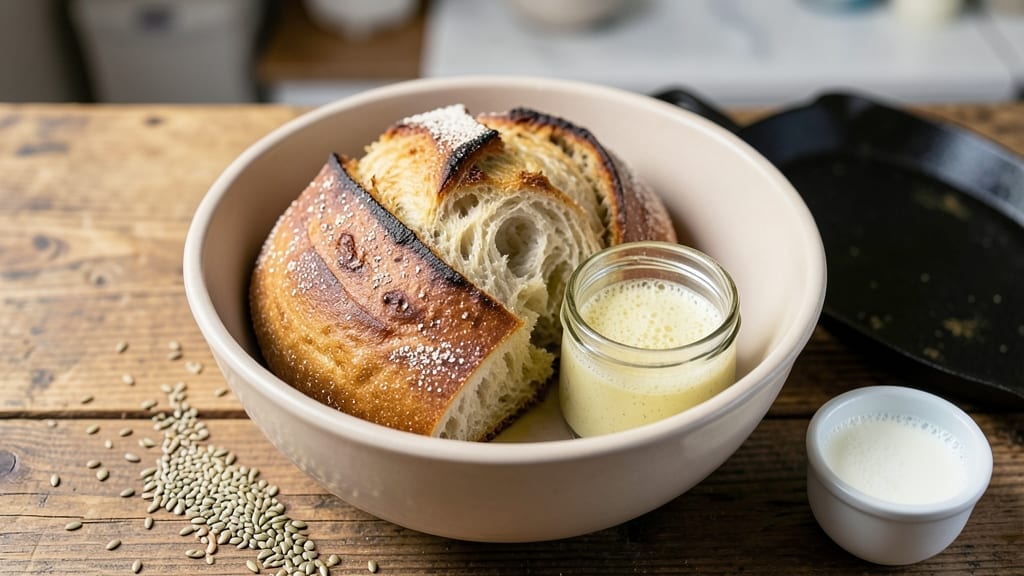
Mastering a 7-day bread recipe transforms simple flour and water into an artisan loaf with deep flavor and airy crumb—no kneading required. This no-knead method builds flavor through slow fermentation, creating a rustic loaf that rivals professional bakeries.
The beauty lies in its patience: each day strengthens the dough, while the jar technique simplifies shaping without the mess.
The process begins with a starter, which you’ll nurture over three days before mixing your dough. From there, it’s a matter of daily folds and proofing, with the dough resting in a jar for easy handling.
By day 7, you’ll shape, bake, and emerge with a crusty, golden loaf that smells like a French bakery. The key? Consistency in temperature and timing—your dough will thank you.
This method delivers restaurant-quality bread at home, perfect for toast, sandwiches, or serving alongside soups. The slow fermentation develops complex flavors, while the no-knead approach saves time without sacrificing texture. Whether you’re a beginner or seasoned baker, this recipe builds confidence with every fold.
Ready to bake? Here’s how to transform basic ingredients into a loaf so good, it’ll have everyone asking for seconds. Let’s get started with the full step-by-step process.
Ingredients for 7 day bread
Transform basic pantry staples into restaurant-quality bread with this 7-day artisan loaf.
| Ingredient | Amount | Notes |
|---|---|---|
| All-Purpose Flour 🌾 | 7 cups | Unbleached, high-protein preferred |
| Active Dry Yeast 🍞 | ¼ oz | Fresh yeast works too |
| Granulated Sugar 🍚 | ¼ cup | Feeds yeast for activation |
| Salt 🧂 | 1 ½ tsp | Kosher or sea salt |
| Warm Water 💧 | 1 ½ cups | 105-110°F for yeast activation |
| Whole Milk 🥛 | ½ cup | For enriched flavor |
| Olive Oil 🫒 | 2 tbsp | Extra-virgin for richness |
| Honey 🍯 | 1 tbsp | Optional for sweetness |
| Cornmeal 🌽 | ¼ cup | For dusting jar and baking sheet |
| Coarse Sea Salt 🧂 | 1 tbsp | For crust enhancement |
| Ice Water ❄️ | ½ cup | For final dough adjustment |
| Large Mixing Bowl 🍶 | 1 whole | For starter development |
| Glass Jar 🥫 | 1 whole | 2-quart size for dough |
| Plastic Wrap 🎀 | 1 sheet | For dough covering |
| Digital Kitchen Scale ⚖️ | 1 whole | For precise measurements |
The flour is where all the magic happens. King Arthur or Caputo are my go-to brands for their high gluten content, but any unbleached all-purpose will work. The yeast needs to be fresh—if it smells stale or has lost its aroma, toss it. For the starter, use a 2-quart glass jar with a loose lid to allow fermentation gases to escape. The jar technique simplifies shaping and prevents sticking, which is especially helpful for beginners. If you’re using a different jar size, adjust the dough quantity proportionally—this recipe assumes a 2-quart capacity for perfect proofing.
No honey? Maple syrup or agave works in a pinch, though honey adds subtle depth. The milk can be swapped for water if you’re avoiding dairy, but the richness is worth it. For the yeast activation, warm water between 105-110°F is critical—too hot and it kills the yeast, too cold and it won’t activate. If your kitchen runs warm, place the jar in a cooler spot like a pantry. The olive oil can be substituted with melted butter for extra flavor, but keep it cold until mixing. For the folds, use wet hands or a dough scraper to prevent sticking—this is where the dough’s strength builds over seven days.
Store the starter in the fridge between uses, and it’ll keep for up to 2 weeks. The dough itself thrives in a cool, dark place—the jar method makes this effortless. Once baked, the loaf stays fresh for 3-4 days at room temperature, wrapped in a clean kitchen towel. For longer storage, slice and freeze portions—3 months is standard. The crust develops best when cooled completely on a wire rack. If you’re making this weekly, the jar and tools become your bread-making sanctuaries—keep them dedicated to this process for consistency.
Why You’ll Love This Recipe
- Pantry Staples Only: I swear by this recipe because it uses exactly what’s already in my cabinet—no weird specialty flours or yeast substitutes. The yeast blooms in warm water like clockwork, and the sugar just enough to feed it without overpowering. Honestly, I’ve made this at 3 AM when I forgot to buy bread.
- Golden Crust Secret: That crispy, caramelized crust? It’s all in the sugar-to-water ratio and a 10-minute rise before baking. The outside shatters like a perfect cracker, while the inside stays soft enough to sop up jam or butter. My kids fight over the last slice—no exaggeration.
- Meal Prep MVP: Bake a loaf on Sunday, and you’ve got breakfast, lunch, or snack covered all week. It stays fresh in the fridge for days (I’ve tested this) and freezes like a dream—just thaw and toast. Between us, this is how I survive busy mornings without skipping breakfast.
- Budget Bread Wins: For under $2, I get a loaf that feeds my family of four for days. The flour and yeast stretch farther than store-bought, and the salt-sugar balance makes it taste like artisanal—even when I’m too tired to care. (Yes, even on a Tuesday night.)
Step-by-step instructions for 7-Day no-knead artisan loaf
This method transforms simple ingredients into a rustic, flavorful loaf with minimal effort.
Activate the Yeast and Mix the Starter
In the large mixing bowl, combine the 0.25 oz active dry yeast, 0.25 cup granulated sugar, and 1.5 cups warm water (test temperature by sprinkling a few drops on your wrist—it should feel warm but not hot). Let this mixture sit for 5-10 minutes until it becomes frothy and bubbly. This confirms the yeast is alive and ready to work.
Next, add the 7 cups all-purpose flour, 1.5 tsp salt, 0.5 cup whole milk, 2 tbsp olive oil, and 1 tbsp honey to the bowl. Using a wooden spoon or rubber spatula, stir vigorously for 3-4 minutes until all ingredients are fully incorporated. The dough will be shaggy but cohesive. Scrape down the sides of the bowl as needed to ensure even mixing.
Develop the Dough Over Seven Days
Transfer the dough to the glass jar and cover it tightly with the plastic wrap. Store the jar at room temperature for 24 hours, allowing the dough to ferment and develop flavor. After the first day, check the dough—it should have risen slightly and may have small bubbles forming on the surface. This indicates fermentation is active.
Each subsequent day, remove the dough from the jar and perform a “stretch and fold” to strengthen the gluten. Using lightly floured hands, wet your fingers and gently press down on the dough to deflate it slightly. Then, fold one side of the dough over itself, rotate the jar 90 degrees, and repeat. Perform this fold 4 times per day for the remaining 6 days, always returning the dough to the jar and covering it with plastic wrap. This daily manipulation builds structure and flavor, resulting in a well-textured loaf.
Shape and Rest the Dough
On the seventh day, remove the dough from the jar and place it on a lightly floured surface. Gently shape it into a round loaf by folding the edges toward the center and tucking them under. The dough should be smooth but still slightly sticky—this is normal. Place the shaped dough seam-side down in the jar and cover it again with plastic wrap. Let it rest at room temperature for 1-2 hours to relax and rise slightly.
While the dough rests, preheat your oven to 425°F and place a baking sheet on the middle rack. Sprinkle 0.25 cup cornmeal evenly on the baking sheet to create a dusting surface for the loaf. This will prevent sticking and add a subtle crunch to the bottom of the bread.
Bake the Loaf to Perfection
Carefully transfer the dough to the prepared baking sheet, seam-side up. Sprinkle the 1 tbsp coarse sea salt evenly over the top of the loaf. Bake for 30-35 minutes until the crust is deep golden brown and the internal temperature reaches 190-200°F when measured with an instant-read thermometer. The bread should sound hollow when tapped on the bottom.
For extra crispiness, place the baked loaf on a wire rack and pour 0.5 cup ice water into the hot baking sheet. Return the loaf to the oven for 2-3 minutes to steam the crust. This technique creates a crackly, artisan-style exterior. Let the bread cool on the rack for at least 1 hour before slicing—this ensures clean cuts and maximum flavor development.
Pro Tips For Making 7 Day Bread
- Test Yeast First: Mix 1 packet of yeast, 1 tsp sugar, and ¼ cup warm water (110°F) in a small bowl. If it bubbles in 5–10 minutes, your yeast is alive—skip the guesswork. I learned this the hard way after baking stale loaves from dead yeast in my fridge.
- Weigh Your Flour: Ditch the scoop-and-sweep method—use a kitchen scale for 4 cups (450g) of flour. Packing or lightening the flour changes hydration and rise. My grandmother swore by this, and she was right: consistency matters more than you’d think.
- Let Water Sit: Fill a measuring cup with warm water (not hot—yeast hates heat) and let it sit for 5 minutes. The temperature stabilizes, making it easier to hit the 110°F mark. Sounds weird, but it works: no more waiting for water to cool down mid-recipe.
- Shape Tightly: After the first rise, punch down the dough and fold it into a tight rectangle before shaping. This traps gas and gives a cleaner crumb. I skip this when I’m lazy, but the bread is noticeably better when I don’t—promise.
Regional styles of 7 day bread
French Baguette Twist
Transform your loaf into a rustic French baguette by shaping the dough into a long oval on day 7. Use a bench scraper to create deep seams along the top before baking. Brush the crust with melted butter after baking for that classic Parisian touch.
The jar method still works—just roll the dough onto a floured surface and transfer it to a baking sheet lined with parchment paper. 🥖
Italian Ciabatta Style
For a lighter, airier loaf inspired by Italian ciabatta, increase the olive oil to 4 tbsp and reduce the water by ¼ cup. Shape the dough into an oval with deep dimples pressed into the surface using your fingers.
Bake at 400°F for 25-30 minutes until golden. The result? A soft, open crumb perfect for dipping in olive oil. 🇮🇹
German Pretzel Adaptation
Add a pretzel twist by boiling the shaped dough in water with 2 tbsp baking soda for 30 seconds before baking. Sprinkle with coarse salt and top with black malt syrup (or honey) for that classic pretzel flavor.
The jar method still applies—just shape the dough into a round before boiling. Bake at 425°F for 20-25 minutes for a crispy crust. 🥨
Swedish Cardamom Bread
Infuse your loaf with Swedish cardamom by adding 1 tbsp ground cardamom to the dough during mixing. Shape the loaf into a round and bake as usual. The warm spices pair beautifully with the slow-fermented flavor.
For extra flair, brush the crust with buttermilk after baking. This variation is perfect for breakfast or as a side with herbed butter. 🌟
Japanese Milk Bread
Create a softer, sweeter loaf by replacing ½ cup of water with ½ cup whole milk and adding 2 tbsp sugar to the dough. Shape the loaf into a round and bake at 375°F for 35-40 minutes.
The slow fermentation enhances the milk’s richness, resulting in a tender crumb. This version is ideal for sandwiches or toasted with jam. 🍡
Mexican Cornbread Fusion
Add a Mexican twist by replacing 2 cups of flour with 2 cups fine cornmeal and adding ½ cup cotija cheese to the dough. Shape into a round and bake as usual.
The cornmeal gives it a slightly sweet, crumbly texture, while the cheese adds a salty kick. Serve with chili or as a side for tacos. 🌶️
Nutrition facts
Frequently asked questions
Why does this recipe take 7 days?
The extended fermentation develops complex flavors and a superior texture. Each day of folding strengthens the gluten while allowing wild yeast to create depth—resulting in a loaf with restaurant-quality taste. The slow process also makes the dough easier to handle and shape.
Can I skip days if I’m short on time?
Not recommended! The 7-day process is key for flavor development. If you must rush, try a 3-day version by doing 2-3 folds per day instead of 1. However, the longer fermentation creates a more flavorful, open crumb that’s worth the wait.
What if my dough smells bad or has mold?
Discard it immediately! Bad smells (rotten, sour) or mold mean fermentation went wrong. Always use clean tools, store dough in a cool place, and check daily. If your kitchen is too warm (>75°F), refrigerate the dough between folds.
How do I store leftover bread?
Wrap cooled loaves in a clean kitchen towel and store at room temperature for 3-4 days. For longer storage, slice and freeze portions for up to 3 months. Toast frozen slices directly from the freezer for crispy results.
Can I use whole wheat flour instead?
Yes, but replace up to 25% of the all-purpose flour with whole wheat. The dough will be denser and stickier—add 1 extra tbsp olive oil and increase water by 1 tbsp. Expect a heartier flavor and slightly shorter shelf life.

- Baked Potatoes in Crock Pot Recipe: Buttery Interiors and Crispy Top Magic - November 1, 2026
- Braised Beef Short Ribs Recipe: Crock Pot Fall-Off-Bone Magic in 6 Hours - November 1, 2026
- Crock Pot Cocoa Recipe: Velvety Warmth With Hidden Spice Magic - November 1, 2026