
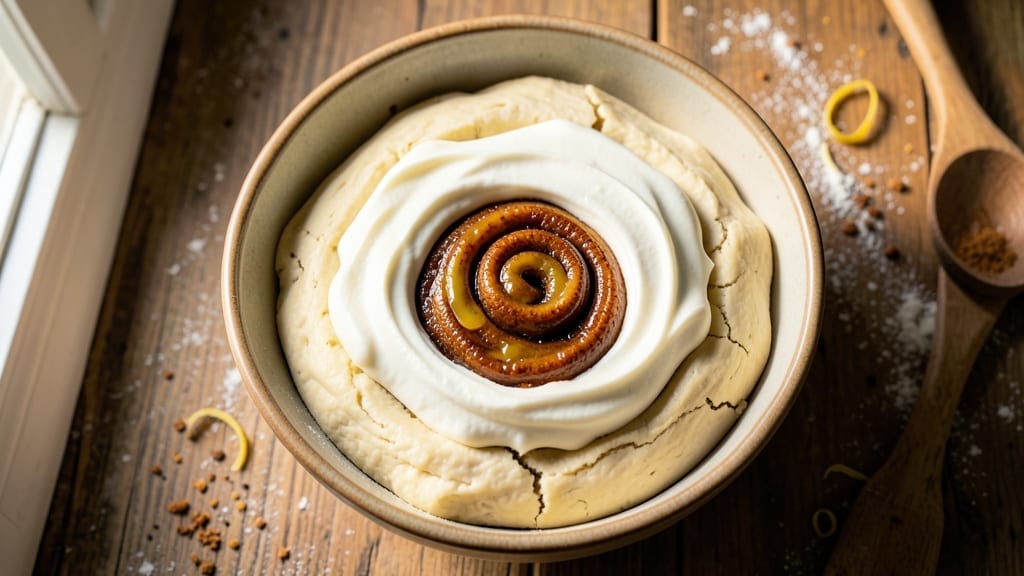
This 24-hour cinnamon roll recipe transforms your kitchen into a bakery with minimal effort—just mix, refrigerate, and bake. The secret lies in the overnight rise, which develops deep flavor and creates those signature pillowy layers that separate effortlessly.
I’ve perfected this method after years of trial and error, ensuring every bite delivers melt-in-your-mouth softness with a perfect caramelized crust.
The process is simpler than it sounds: you’ll make a basic dough, let it rest overnight in the fridge, then roll it out and fill it with a rich cinnamon-sugar mixture before baking. No yeast proofing required—just set it and forget it until morning.
The dough’s slow fermentation enhances its tenderness, while the cinnamon filling adds warmth and sweetness that pairs beautifully with a buttery cream cheese glaze or a drizzle of honey.
By the time you pull these golden rolls from the oven, your kitchen will smell like a bakery, and every forkful will be fluffy, fragrant, and irresistibly gooey.
The overnight prep means you wake up to fresh-baked rolls ready to serve, whether it’s a weekend brunch or a cozy weeknight treat. This recipe delivers restaurant-quality results without the fuss.
For extra indulgence, add a swirl of cream cheese or a sprinkle of pecans to the filling, or brush the tops with melted butter before baking for a crispy, golden finish. The possibilities are endless, but the technique remains foolproof. Let’s get started on creating your perfect batch.
Ingredients for 24 hour cinnamon roll
Pantry staples plus a few key ingredients transform your kitchen into a bakery overnight.
| Ingredient | Amount | Notes |
|---|---|---|
| All-Purpose Flour 🌾 | 5 cups | Sifted for light texture |
| Granulated Sugar 🍚 | ¼ cup | For dough sweetness |
| Instant Yeast 🍞 | 2 ¼ tsp | Active dry works too |
| Unsalted Butter 🧈 | ½ cup | Cold, cubed for dough |
| Whole Milk 🥛 | 1 cup | Warm for activation |
| Large Eggs 🥚 | 1 whole | Room temperature |
| Salt 🧂 | ½ tsp | Kosher preferred |
| Cinnamon 🌿 | ½ cup | Ground, not cassia |
| Granulated Sugar 🍚 | 1 cup | For cinnamon filling |
| Unsalted Butter 🧈 | ½ cup | Melted for filling |
| Vanilla Extract 🥄 | 1 tsp | Pure extract preferred |
| Cream Cheese 🧀 | 8 oz | Room temperature, optional |
| Honey 🍯 | ¼ cup | For glaze or drizzle |
The flour is your foundation—use King Arthur or Gold Medal for best results. Bulk bins at Whole Foods often have fresher flour than grocery store bags. The yeast? Fresh is ideal, but active dry works if you’re in a pinch—just dissolve it in the warm milk first. For the butter, Land O’Lakes or Plugrá melt beautifully, but don’t use salted. The cinnamon should be ground, not cassia—it’s sweeter and more aromatic. If you’re feeling fancy, Trader Joe’s carries a fantastic organic cinnamon that’s perfect for this recipe.
No instant yeast? Active dry works at the same amount, just dissolve it in warm milk first. Short on cream cheese? Substitute extra butter in the filling—it won’t be quite as rich, but still delicious. The vanilla extract can be imitation if that’s what you’ve got, but pure extract makes a noticeable difference. For the honey glaze, local raw honey adds extra depth of flavor. If you’re making this ahead, store the dough in the fridge for up to 3 days before rolling and baking. The cinnamon filling? Make it the night before and keep it chilled—it’s easier to work with cold.
The dough keeps beautifully in the fridge for 3 days—perfect for meal prep. Once rolled and filled, cover tightly with plastic wrap and refrigerate overnight. The filling can be prepped 2 days ahead and stored in an airtight container. For the glaze, mix honey with a splash of warm water if it’s too thick. These reheat wonderfully—wrap in foil and warm at 300°F for 10 minutes. Freeze unbaked rolls for up to 1 month—bake straight from frozen, adding 5-10 minutes to the time.
Why You’ll Love This Recipe
- No-Knead Magic: I swear by this dough—just mix, let it rise overnight, and wake up to something actually risen. The instant yeast in warm milk does all the work while you sleep, so no standing around waiting for puffiness.
- Warm Spice Bomb: That buttery, gooey center with cinnamon-sugar swirls? It’s the kind of flavor that makes people pause mid-bite. The whole milk keeps it tender, while the sugar caramelizes into a crispy edge—like a hug in dessert form.
- Weeknight Hero: Between us, this is my go-to for lazy Sundays or when I need something impressive with zero effort. Make the dough the night before, bake in the morning, and suddenly you’re the host who always has dessert ready.
- Budget Breakfast Win: A single batch stretches into four breakfasts (or two for me, honestly). The ingredients are pantry staples—no fancy stuff—and the leftovers reheat beautifully. Plus, it’s cheaper than buying a single cinnamon roll from the bakery.
Step-by-step instructions for 24 hour cinnamon rolls
Here’s how to craft restaurant-quality cinnamon rolls with a 24-hour rise for maximum tenderness.
Mix the Dough and Let It Rise Overnight
In a large bowl, combine the 5 cups all-purpose flour, 0.25 cup granulated sugar, 2.25 tsp instant yeast, and 0.5 tsp salt. Whisk gently to distribute the dry ingredients evenly. Create a well in the center and add the 0.5 cup cold unsalted butter, 1 cup warm whole milk, and 1 whole large egg. Mix with a wooden spoon until a shaggy dough forms.
Transfer the dough to a lightly floured surface and knead for 8-10 minutes until smooth and elastic. The dough should be slightly tacky but not sticky. Place it back in the bowl, cover with a damp towel, and let rise at room temperature for 1 hour. After the initial rise, refrigerate the dough for 22-24 hours. This slow fermentation develops deep flavor and a tender crumb. You’ll know it’s ready when the dough has nearly doubled in size and springs back slowly when poked.
Prepare the Cinnamon Filling and Roll Out the Dough
In a small bowl, mix together 1 cup granulated sugar, 0.5 cup cinnamon, and 1 tsp vanilla extract. Set aside. On a lightly floured surface, roll out the chilled dough into a 12×18-inch rectangle about ¼-inch thick. Brush the entire surface with melted 0.5 cup unsalted butter (save a little for later).
Spread the cinnamon mixture evenly over the buttered dough, leaving a ½-inch border around the edges. This border prevents the filling from leaking out during baking. Starting from the long side, tightly roll the dough into a log, pinching the seam to seal. The filling will ooze slightly as you roll—this is normal. Wrap the log in plastic wrap and refrigerate for 1 hour to firm up before slicing.
Slice and Shape the Cinnamon Rolls
Unwrap the dough log and slice it into 12 equal rolls using a sharp knife or dental floss (for cleaner cuts). Gently lift each roll and place it in a greased 9×13-inch baking dish, spacing them evenly. Cover the dish loosely with plastic wrap and let the rolls rise at room temperature for 30-45 minutes until puffy. They should look slightly domed but not doubled in size.
For extra richness, brush the tops of the rolls with melted butter reserved earlier. If using, spread the 8 oz cream cheese softened with 0.25 cup honey over the top for a decadent glaze. Bake at 350°F for 25-30 minutes until golden brown and the internal temperature reaches 190°F. The rolls should pull away slightly from the edges of the pan and smell deeply cinnamon-scented.
Serve Warm with Glaze (Optional)
Remove the cinnamon rolls from the oven and let them cool for 5 minutes before serving. The centers should be soft and gooey, with a crisp exterior. For the glaze, mix 0.25 cup honey with 1 tablespoon milk and brush over the warm rolls. The heat will make the glaze run slightly, creating a sticky, sweet finish.
Serve immediately with a dusting of powdered sugar or a scoop of vanilla ice cream. The overnight rise makes these rolls incredibly tender, with a perfect balance of sweetness and spice. Each bite should be soft, pillowy, and packed with cinnamon flavor. Store leftovers in an airtight container for up to 3 days, though they rarely last that long!
Pro Tips For Making 24 Hour Cinnamon Roll
- Chill the Dough Properly: After the first rise, pop the dough in the fridge for exactly 12 hours—not the freezer, not the counter. I learned this the hard way when my rolls turned out dense and chewy; cold slows fermentation just enough to develop flavor without overproofing. Use a timer so you don’t forget—yes, even if you’re impatient like me.
- Soften Butter Correctly: For the filling, take the butter out of the fridge just until it’s soft enough to press with your finger—not melted, not rock-hard. Melted butter will make your rolls greasy, and cold butter won’t mix smoothly. Room temp is key—about 10 minutes at room temperature works every time.
- Don’t Overfill the Rolls: When rolling out the dough, keep the cinnamon-sugar mixture light—about 1/4 cup per roll max. I used to go heavy, and the filling would ooze out during baking, making a mess. Spread it evenly but thinly, then roll tightly so the filling stays put.
- Bake in a Preheated Pan: Pour 1/2 cup of water into your baking pan before adding the rolls, then bake at 350°F. The steam keeps the bottoms soft and the tops from drying out. I skip this sometimes, and the rolls turn out flat and tough—don’t be that person.
Pro cooking tips for 24 hour cinnamon roll
Dough Temperature Control
The cold butter in your dough is non-negotiable—it creates those signature flaky layers. Keep your butter cubed and cold (not melted) when mixing, and chill the dough after its initial rise. I like to press it into a bowl, cover with plastic wrap, and refrigerate for 24 hours.
This slow fermentation enhances flavor and texture. If your kitchen runs warm, nestle the dough in a cool spot like the back of the fridge or a basement. 🌡️
Perfect Rolling Technique
Rolling the dough too thin is the fastest way to ruin your rolls. Aim for a ¼-inch thickness—use a rolling pin with measurements if yours doesn’t have them. Press gently but firmly, and rotate the dough as you roll to maintain even thickness.
I find a marble rolling surface (or a chilled baking sheet) prevents sticking. If the dough resists, let it sit at room temp for 10 minutes before rolling again.
Filling Distribution
Spread the cinnamon-sugar mixture evenly, but leave that ½-inch border—it’s your secret weapon against messy leaks. Use a pastry brush to melt the butter over the dough first, then sprinkle the filling. For extra flair, add dollops of cream cheese between layers of cinnamon sugar.
When rolling, pinch the seam tightly to seal in all that gooey goodness. If the filling oozes out, just scoop it back in—it’s part of the magic! 🧈
Baking Time Mastery
Your oven’s hot spots are your enemy. Rotate the pan halfway through baking (after 15 minutes) for even browning. The rolls are done when they’re golden brown and reach 190°F internally.
If the tops brown too quickly, tent with foil. For extra crispiness, brush with melted butter in the final 5 minutes. I swear by a digital thermometer—no more guessing!
Glaze Like a Pro
Honey glaze is simple but transformative. Mix ¼ cup honey with 1 tbsp milk (or cream) and warm it slightly—this makes it silky smooth. Brush it over rolls while still warm so it drizzles beautifully.
For a cream cheese glaze, blend softened cream cheese with 2 tbsp powdered sugar and 1 tsp vanilla. The heat from the rolls will make it melt into a luscious coating. 🍯
Make-Ahead Magic
This recipe is a meal prep dream. Shape the rolls, cover tightly, and refrigerate for up to 24 hours before baking. For freezing, bake them first, cool completely, then wrap individually in plastic. Reheat in a 350°F oven for 10 minutes—they’ll taste almost as good as fresh!
The dough itself keeps in the fridge for 3 days, so you can prep ahead for weekend mornings. Just slice, shape, and bake when ready. ✨
Nutrition facts
Frequently asked questions
Why does the dough need 24 hours to rise?
The overnight rise creates pillowy, tender layers through slow fermentation. This method develops deeper flavor and a lighter texture than quick-rise doughs. The cold fridge also prevents overproofing, giving you perfect rolls every time. Think of it as a flavor and texture upgrade!
Can I make this recipe without cream cheese?
Skip the cream cheese in the filling and use extra butter instead. For the glaze, substitute powdered sugar mixed with milk or maple syrup> for honey. The rolls will still be delicious—just slightly less rich. The key is keeping that cinnamon-sugar filling intact!
How do I prevent the filling from leaking out?
Leave a ½-inch border around the edges when spreading the filling. Also, chill the dough log for 1 hour before slicing to firm it up. If filling oozes during baking, just scoop it back in—it’s part of the fun! For extra security, use a thin layer of melted butter as a barrier between dough and filling.
What’s the best way to reheat leftover cinnamon rolls?
Wrap leftovers in foil and warm at 350°F for 10-15 minutes until heated through. For a crispy texture, broil for 1-2 minutes> at the end. Microwaving works in a pinch (30 seconds), but it makes them gummy. The oven method preserves that perfect pull-apart texture!
Can I make these rolls without a rolling pin?
Yes! Use a bottle or wine glass with a flat bottom to roll out the dough. Press firmly and rotate the container to create even thickness. Work in sections and keep the dough chilled between rolls. A chilled baking sheet also works well—just press the dough flat with your hands. The key is patience and even pressure!

- 8 Ounce Crab Cakes Recipe: Golden Crust With Luminescent Crab Hearts - October 12, 2026
- 1950’s Betty Crocker Banana Bread Recipe: Nostalgic Spice Swirls and Moist Crumb - October 12, 2026
- 2 Quart Homemade Ice Cream Recipe: Ultra Creamy Vanilla Bean Swirls - October 12, 2026