
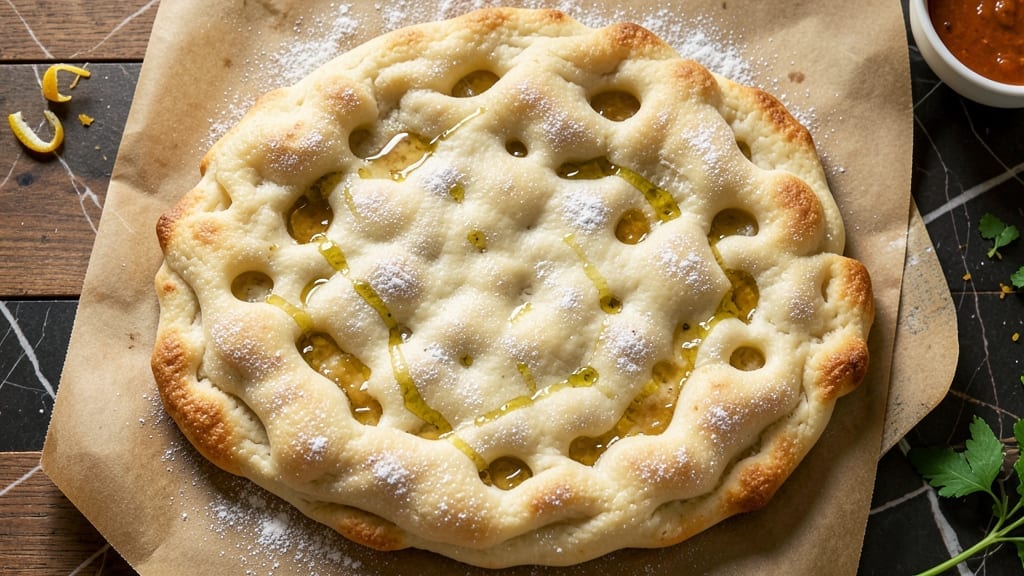
Mastering 24-hour puffy pizza dough transforms your kitchen into a pizzeria—where every slice boasts a cloud-like crust that’s crisp yet airy. The secret lies in a slow, cold fermentation that develops gluten and flavor without overproofing.
I’ve perfected this method after years of trial and error, ensuring your dough rises to restaurant-quality heights without requiring a professional oven.
This recipe demands patience but rewards you with a dough so light it practically floats. You’ll mix, knead, and let it rest overnight in the fridge—where the magic happens. The long fermentation breaks down gluten strands, creating that signature puffy texture while deepening flavor.
No yeast overkill or soggy centers here; just a foolproof method for a crust that’s crisp on the outside and pillowy inside.
By the time you roll out this dough, you’ll have a surface so tender it barely needs sauce to shine. Top with your favorite ingredients—classic pepperoni, fresh basil and mozzarella, or even a gourmet veggie medley—and bake until the edges are golden.
The result? A pizza that looks like it belongs in a high-end trattoria, not your backyard grill.
Perfect for weekend projects or meal prep ahead, this dough keeps well for up to 3 days in the fridge. Once you try it, store-bought crusts will never satisfy again. Let’s get started—your next pizza night just got an upgrade.
Ingredients for 24 hour puffy pizza dough
Pantry staples plus a little patience. This dough transforms ordinary ingredients into restaurant-quality pizza crust.
| Ingredient | Amount | Notes |
|---|---|---|
| All-Purpose Flour 🌾 | 3 ½ cups | High-protein for better gluten development |
| Active Dry Yeast 🍞 | ¼ tsp | Instant yeast works too |
| Granulated Sugar 🍚 | ½ tsp | Feeds yeast for activation |
| Salt 🧂 | 1 tsp | Kosher or sea salt preferred |
| Extra-Virgin Olive Oil 🫒 | ½ cup | High-quality for flavor |
| Warm Water 💧 | 1 ¼ cups | 105-110°F for yeast activation |
| Semolina Flour 🌾 | ¼ cup | For dusting and rolling |
| Cornmeal 🌽 | ¼ cup | For pizza peel or baking sheet |
Flour is the MVP here—King Arthur or Caputo Tipo 00 if you want to splurge, but regular all-purpose works in a pinch. The yeast needs to be fresh (check the date—it expires fast), and Wegmans or Whole Foods usually have the best selection. Warm water is key: too hot kills the yeast, too cold slows it down. I grab a thermometer from Amazon for accuracy, but a quick finger test works too (should feel like bathwater). The olive oil? Don’t cheap out—California Olive Ranch or Bertolli are solid mid-range options. If you’re in a rush, instant yeast cuts prep time by 10 minutes, but active dry works just fine if you let it proof longer.
No semolina? All-purpose flour works too, but it won’t give that crispy texture. Cornmeal can be swapped for more flour if needed—just add it to your rolling surface. Running low on olive oil? Avocado oil or melted coconut oil are great substitutes, though they won’t have the same flavor. The sugar is non-negotiable for yeast activation, but if you’re watching carbs, half the amount works (flavor might be slightly less developed). For the water, filtered or bottled is best—tap water with strong chlorine can inhibit yeast growth. And if your kitchen’s cold, let the water sit for 5 minutes to reach the right temp.
This dough is a fridge staple—3 days max in the fridge, 3 months frozen. I portion it into gallon-sized ziplock bags with parchment paper between layers to prevent sticking. Thaw overnight in the fridge before using. Pro tip: Roll it out on parchment so you can slide it straight onto your pizza stone or peel. The longer it rests, the better it gets—48 hours in the fridge is ideal if you can wait. And if you’re prepping for a party, make two batches—trust me, you’ll want seconds.
Why You’ll Love This Recipe
- This dough handles anything: classic Margherita, breakfast pizza with eggs, or even a dessert version with Nutella. I’ve used it for game day snacks, last-minute dinners, and even a fancy dinner party—no one guessed it was the same base.
- Set-and-Forget Magic: I mix this dough in 10 minutes, pop it in the fridge overnight, and wake up to crispy, airy perfection—no kneading, no fuss. The yeast works its magic while I sleep, so I’m not stuck in the kitchen.
- Crispy-Creamy Dream: That olive oil infusion? It’s what makes the edges blister and the center pillowy—like a cloud with a golden crust. Honestly, the texture alone makes me want to eat it plain.
- Party in a Pan: This dough handles anything: classic Margherita, breakfast pizza with eggs, or even a dessert version with Nutella. I’ve used it for game day snacks, last-minute dinners, and even a fancy dinner party—no one guessed it was the same base.
Step-by-step instructions for 24-Hour puffy pizza dough
Here’s how to transform simple ingredients into a light, airy pizza crust that’s worth the wait.
Activate the Yeast for Maximum Rise
In a small bowl, combine the 1.25 cups warm water, 0.5 tsp granulated sugar, and 0.25 tsp active dry yeast. Let it sit for 5-10 minutes until it becomes foamy and bubbly. This tells you your yeast is alive and ready to work its magic.
I like to test the water temperature with my finger—it should feel warm like bathwater, around 105-110°F. Too hot and you’ll kill the yeast; too cold and it won’t activate properly. If it doesn’t foam after 10 minutes, your yeast might be dead, and you’ll need to start over.
Mix the Dough Until Just Combined
In a large bowl, whisk together the 3.5 cups all-purpose flour and 1 tsp salt. Make a well in the center and pour in the yeast mixture along with the 0.5 cup extra-virgin olive oil. Using a wooden spoon or dough whisk, gently mix everything until just combined—you should still see dry flour patches.
This is where the gluten starts developing. I avoid using a stand mixer at this stage because overmixing creates tough dough. Once the dough comes together when pressed, it’s ready for the next step. If it’s too sticky, add 1 tablespoon more flour, but don’t go overboard or your crust will be dense.
Knead by Hand for Perfect Texture
Lightly flour a clean surface and turn out the dough. Knead for 8-10 minutes until smooth and elastic. I press down with the heel of my hand, fold the dough toward me, then rotate and repeat. This builds gluten strands that will trap gas during the long rise, creating that signature puffy texture.
You’ll know it’s ready when it springs back slowly when poked and feels smooth to the touch. If it’s still sticky, knead in a little more of the all-purpose flour—just enough to make it manageable. Shape into a ball, place in a lightly oiled bowl, cover with plastic wrap, and let rise at room temperature for 1 hour.
Cold Ferment for 24 Hours of Flavor
After the initial rise, transfer the dough to a clean bowl, cover tightly with plastic wrap, and refrigerate for 24 hours. This cold fermentation is what creates the incredible flavor and texture. The dough will rise slowly in the fridge, developing complex flavors and a light, airy crumb.
I like to give the dough a gentle shake every 8 hours to redistribute the gluten. If you forget, no worries—it’ll still work. The cold slows yeast activity, which prevents overproofing. After 24 hours, the dough should have roughly doubled in size and feel light and airy when pressed.
Shape and Rest Before Baking
Turn the chilled dough onto a lightly floured surface and divide it into 4 equal portions (about 1 pound each). I like to use a bench scraper to cut cleanly through the dough. Shape each portion into a ball by cupping your hands and gently rolling it between your palms. Let them rest, covered, for 15 minutes before shaping into pizza crusts.
This resting period relaxes the gluten, making the dough easier to stretch without tearing. When ready, roll or stretch each ball into your desired pizza shape. Dust your work surface and rolling pin with semolina flour to prevent sticking. The dough should be thin at the edges and slightly thicker in the center for that classic pizza look.
Pre-Bake for Perfect Crispiness
Preheat your oven to 500°F with a pizza stone or baking sheet inside for at least 30 minutes. While it heats, transfer your shaped dough onto a floured pizza peel or parchment paper dusted with cornmeal. This creates that crispy bottom crust we all love.
Bake the untopped crust for 4-5 minutes until the edges are golden brown and the surface looks dry. The dough should puff up noticeably as it bakes. This pre-baking step is crucial—it prevents a soggy crust when you add your toppings. Once golden, remove from the oven and quickly add your sauce, cheese, and toppings before returning to finish baking.
Pro Tips For Making 24 Hour Puffy Pizza Dough
- Use Warm Water: The yeast needs a kickstart, and lukewarm water (around 105-110°F) is non-negotiable—cold water kills it, hot water shocks it. I learned this the hard way when my dough took 48 hours to rise instead of 24. Stick to this temp, and your dough will wake up fast.
- Oil the Bowl First: Dough sticks like glue to plastic, and nothing ruins a lazy 24-hour rise like scraping it off later. Toss 1-2 tablespoons of that extra-virgin olive oil into the bowl before adding the dough—it creates a slick barrier that lets you dump it in, cover it, and forget it without drama.
- Skip the Sugar Shortcut: That granulated sugar isn’t just for flavor—it’s the yeast’s fuel. Cutting it in half to “save time” means your dough will rise slower and puff less dramatically. If you’re in a rush, use the full amount and let the yeast work its magic overnight; the result is worth the wait.
- Cover Tightly, Then Twice: Plastic wrap + a kitchen towel + a loose lid (or a second layer of wrap) is the trifecta for humidity. I used to just slap on plastic, and my dough would dry out by morning. This setup keeps it moist, stretchy, and ready to roll—no sad, cracked crusts here.
Storing and reheating this recipe
Fridge Storage Tips
Your freshly made 24-hour pizza dough keeps beautifully in the fridge for up to 3 days when stored properly. I wrap mine tightly in plastic wrap or place it in an airtight container to prevent drying.
The longer it rests in the fridge (up to 48 hours), the better the flavor develops—think of it as a slow-cooked pizza flavor bomb. Just remember to bring it to room temperature for 30-60 minutes before shaping to make it more pliable. 💪
Freezer Prep Guide
For longer storage, freeze your dough in gallon-sized ziplock bags with parchment paper between layers to prevent sticking. It stays fresh for up to 3 months—perfect for pizza nights on busy weeks. When ready to use, transfer the frozen dough to the fridge to thaw overnight.
I like to portion it into 1-pound balls before freezing so I can grab exactly what I need without defrosting the whole batch. 🧊
Reheating Dough Balls
If you’ve shaped your dough into balls but haven’t stretched it yet, reheating is a breeze. Place the dough balls in a lightly oiled bowl, cover with a damp towel, and let sit at room temperature for 1-2 hours.
For a quicker fix, microwave them for 10-15 seconds on low power to soften—just be careful not to overheat or the yeast will wake up too much. This method works great if you’re prepping dough for a party or meal prep. ✨
Reviving Stale Dough
Ever forgotten your dough in the fridge too long? No problem! If it feels dry or stiff, simply knead in 1-2 tablespoons of water or olive oil until it becomes smooth and elastic again. The dough will spring back when poked, and you can proceed with shaping as usual.
This trick saves me from scrapping dough all the time—just give it a little love and it’s good to go. 🔄
Pre-Baked Crust Storage
Pre-baked pizza crusts (without toppings) can be stored in an airtight container at room temperature for 2-3 days or in the fridge for up to 5 days. To reheat, pop them in a 375°F oven for 5-7 minutes until crispy again.
I love using this method for quick weeknight pizzas—just add fresh toppings and bake until melted and bubbly. It’s like having a pizza ready to go at a moment’s notice! 🍕
Freezing Shaped Dough
For the ultimate convenience, shape your dough and freeze it on a parchment-lined tray before transferring to a bag. This prevents sticking and makes it easy to grab just one pizza at a time.
When ready to bake, thaw the shaped dough in the fridge overnight, then proceed with your usual pre-bake and topping steps. Pro tip: Label your bags with the date so you can keep track of freshness. This is my go-to for lazy Sundays! 📅
Nutrition facts
Frequently asked questions
Why does this dough need 24 hours in the fridge?
The cold fermentation is what creates that signature puffy texture and deep flavor. The slow rise in the fridge breaks down gluten strands, allowing them to relax and develop properly. This also prevents overproofing, which would make your crust dense instead of airy. Think of it like slow-cooking your pizza dough—patience pays off with a restaurant-quality result!
Can I use this dough for deep-dish pizza?
This recipe is designed for thin-crust or classic-style pizzas, but you can absolutely adapt it! For deep-dish, shape the dough into a thick round and bake it in a pan. You may need to add 10-15 extra minutes at 475°F to ensure the center cooks through. The long fermentation still works wonders for flavor, but expect a denser texture than traditional deep-dish recipes.
What if my dough doesn’t rise much after 24 hours?
Don’t panic! Cold fridges or old yeast can slow things down. Give it 1-2 extra hours if possible, or try placing it in a slightly warmer spot (like near the oven with it off). If it’s still flat, the dough will still bake fine—just expect a slightly denser crust. For next time, check your yeast expiration date and ensure your fridge is at 40°F or below.
How do I know when the dough is ready to shape?
Press the dough gently with your finger—if it springs back slowly (not immediately) and feels light, it’s ready! The surface should look slightly puffy with small bubbles. If it’s too sticky, let it sit uncovered for 10 minutes to dry out a bit. Pro tip: Work with one portion at a time to keep the rest covered while you shape. The dough should be cool but pliable, not icy cold.
Can I make this dough without a stand mixer?
This recipe is designed for hand-kneading. Use a lightly floured surface and knead for 8-10 minutes by pressing, folding, and rotating the dough. The hand method actually gives you better control over gluten development. If your arms get tired, take breaks—this dough can wait! Just make sure to knead until it’s smooth and elastic.

- Pea Soup Instant Pot Recipe: Velvety Green Smoothness in 20 Minutes - November 1, 2026
- Pork Loin Pulled Pork Crock Pot Recipe: Slow-Smoked Tenderness With Zero Dryness - November 1, 2026
- Baked Potatoes in Crock Pot Recipe: Buttery Interiors and Crispy Top Magic - November 1, 2026