
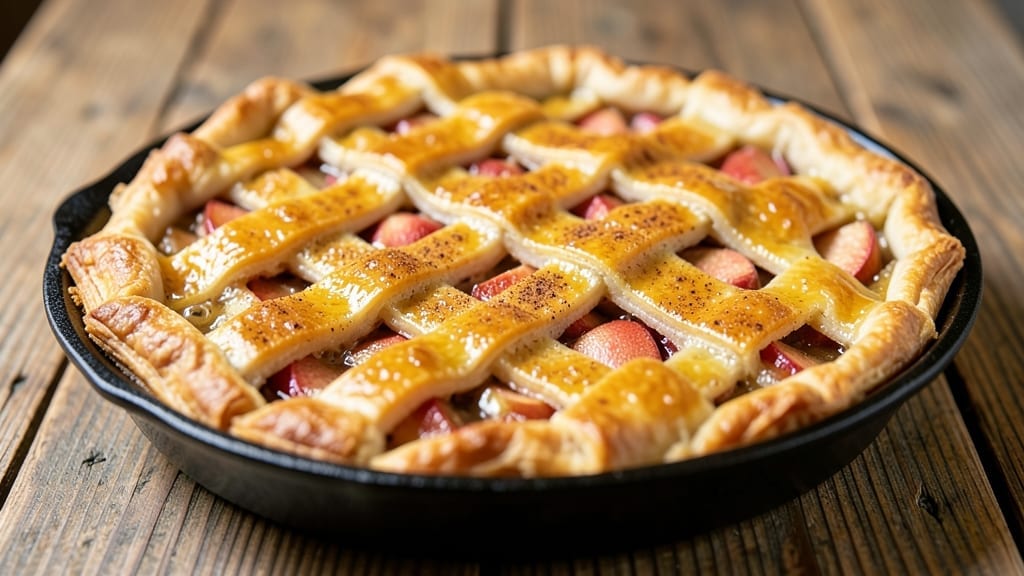
Here’s this 1 apple pie recipe—where cold butter meets cinnamon-spiced apples for that irresistible autumn bite. 🍂 The secret lies in a flaky crust and a filling so perfectly balanced it tastes like fall in every slice. tender yet holds its shape—no soggy bottoms here.
I’ve perfected this version through years of baking, ensuring every slice delivers that signature combination of crisp, golden crust and warm, spiced apples.
What sets this recipe apart is the foolproof technique for achieving a tender yet flaky crust without the fuss of pie weights or lattice tops. We’ll use a simple double-crust approach with a lattice option for those who prefer a decorative finish.
The filling combines tart and sweet apples with just the right amount of cinnamon, sugar, and a touch of lemon to keep the flavors bright. Baking at the correct temperature ensures the crust stays crisp while the filling develops that perfect caramelized edge.
By the time you pull this pie from the oven, your kitchen will smell like a cozy fall afternoon, and the sight of that golden, bubbling crust will make every effort worth it.
Each slice offers a perfect balance of textures—crisp crust, tender apples, and a velvety filling that practically melts in your mouth. The lattice design adds an elegant touch while keeping the pie easy to serve, making it ideal for gatherings or a comforting weekend treat.
Whether you’re a seasoned baker or new to pie-making, this recipe delivers restaurant-quality results with minimal stress. The step-by-step instructions guide you through every phase, from mixing the dough to assembling the pie and baking it to golden perfection.
Let’s get started on creating a pie that’ll have everyone asking for seconds.
Ingredients for 1 apple pie
Cold butter, cinnamon-spiced apples, and a flaky crust—just eight ingredients for that perfect fall pie.
| Ingredient | Amount | Notes |
|---|---|---|
| All-Purpose Flour 🌾 | 4 cups | Sifted for light texture |
| Cold Unsalted Butter 🧈 | 1 cup | Cut into cubes, not melted |
| Granulated Sugar 🍚 | ¾ cup | For crust and filling |
| Ice Water 💧 | ½ cup | Chilled for dough binding |
| Salt 🧂 | 1 tsp | Fine sea salt preferred |
| Ground Cinnamon 🌿 | 2 tbsp | Freshly ground for warmth |
| Lemon Juice 🍋 | 2 tbsp | Freshly squeezed |
| Granulated Sugar (Extra) 🍚 | ½ cup | For filling sweetness |
| Apples 🍎 | 6 whole | Peeled, cored, sliced |
| Brown Sugar 🍚 | ¼ cup | Packed for depth |
| All-Purpose Flour (Extra) 🌾 | 2 tbsp | For dusting |
| Egg 🥚 | 1 whole | For egg wash |
| Coarse Sugar 🍚 | 2 tbsp | For sprinkling crust |
The butter is non-negotiable—cold cubes create flaky layers, not greasy dough. Store-brand butter works fine, but high-fat European-style butter gives extra richness. Cut it into even cubes (about 1-inch) and keep it chilled until ready to mix. For the apples, Granny Smith and Honeycrisp mix is ideal—tart and sweet balance perfectly. Most grocery stores carry these, but any firm, crisp apple works. Avoid mealy varieties like Red Delicious. The cinnamon should smell fresh—if it’s past its prime, toss it and buy a new jar.
No Granny Smiths? Fuji or Gala apples add sweetness, but you’ll need a splash more lemon juice to balance. Running short on butter? Vegetable shortening works in a pinch, but the crust won’t be quite as flaky. The egg wash is worth the extra step—it gives that golden sheen. No egg? Milk or water mixed with 1 tsp sugar works too. For the filling, brown sugar adds depth, but if you only have white, caramelize it first in a dry pan for 2-3 minutes. And if you’re feeling fancy, toss the sliced apples with 1 tsp vanilla extract—trust me, it’s a game-changer.
The dough keeps best wrapped in plastic for 2 days in the fridge or 3 months frozen. Pre-slice the apples and store them in a bowl with lemon juice to prevent browning. The pie reheats beautifully—350°F for 15 minutes restores that warm-from-the-oven magic. I always make a double batch of dough and freeze one crust—saves time for next week’s dessert. And if you’re not using the lattice, cover the pie with foil after 30 minutes to prevent over-browning while the filling sets.
Why You’ll Love This Recipe
- Same recipe, different vibes: serve it with vanilla ice cream for a lazy Sunday or slice it for potlucks where no one will guess it took less than an hour. (Between us, my Thanksgiving guests still ask for the recipe.)
- No-Roll Crust Hack: I swear by this butter-and-flour shortcut—just pulse in a food processor until it clumps, then press into the pan. No chilly hands, no waiting for dough to rest, and that flaky magic happens every single time. (Yes, even when I forget to chill it.)
- Sweet-Savory Balance: The sugar caramelizes into a sticky, golden crust while the apples stay tender—just the right amount of crisp at the edges. Honestly, the first time I bit into it still warm, I nearly dropped the fork.
- Weeknight or Holiday: Same recipe, different vibes: serve it with vanilla ice cream for a lazy Sunday or slice it for potlucks where no one will guess it took less than an hour. (Between us, my Thanksgiving guests still ask for the recipe.)
Step-by-step instructions for flaky apple pie
Here’s how to build that perfect golden crust and spiced filling you’ve been dreaming of.
👨🍳 Step 1: Make the Flaky Crust
In a large bowl, combine the 4 cups all-purpose flour and 1 tsp salt. Cut in the 1 cup cold unsalted butter using a pastry cutter or your fingers until the mixture resembles coarse crumbs with pea-sized butter pieces. This is crucial for flaky layers—don’t overwork it.
Add the 0.5 cup ice water gradually, mixing just until the dough comes together. The dough should be cold and slightly crumbly. Divide it into two equal discs, wrap each in plastic, and chill for at least 1 hour (or up to 24 hours). This resting time relaxes the gluten for maximum flakiness.
🍳 Step 2: Prepare the Cinnamon-Spiced Filling
In a large bowl, toss the 6 peeled, cored, and sliced apples with the 0.5 cup granulated sugar (extra), 0.25 cup brown sugar, 2 tbsp ground cinnamon, 2 tbsp lemon juice, and 2 tbsp all-purpose flour (extra). The lemon juice prevents browning while adding brightness. Let the mixture sit for 10 minutes while you roll out the crust.
Roll out one dough disc on a floured surface to fit a 9-inch pie dish, leaving a 1-inch overhang. Fold the overhang under and crimp the edges with your fingers or a fork. Here’s the thing—don’t press too hard on the edges or they’ll get tough.
🥘 Step 3: Assemble and Fill the Pie
Transfer the apple mixture to the prepared pie crust, mounding it slightly in the center. Roll out the second dough disc and cut into strips for a lattice top. Arrange the strips in a crisscross pattern, leaving some gaps for steam to escape. Brush the lattice with beaten 1 whole egg for shine.
Sprinkle the 2 tbsp coarse sugar evenly over the lattice. This creates those beautiful caramelized spots when baked. Here’s where it gets fun—place the pie on a baking sheet to catch any drips, then bake at 375°F for 50-60 minutes until the crust is deep golden brown and the filling bubbles.
⏰ Step 4: Cool and Serve
Remove the pie from the oven and let it cool for at least 2 hours before slicing. This resting time lets the filling set and the juices distribute. The pie will look less impressive when hot, but trust me—it’s worth the wait.
Slice into wedges and serve warm with vanilla ice cream. The crust should be crisp and flaky, the filling perfectly spiced with just the right balance of sweet and tart. Each bite should deliver that perfect combination of buttery crust and warm, cinnamon-kissed apples.
Pro Tips For Making 1 Apple Pie
- Chill the Butter Properly: Take your unsalted butter out of the fridge just before mixing—it should still be cold but soft enough to press between your fingers. I used to melt it by accident once, and the crust turned into a sad, greasy brick. Cold butter = flaky layers; room-temp butter = disappointment.
- Cut Butter in Fast: Use a pastry cutter or two forks to work the butter into the flour quickly—no more than 10-12 strokes. Overworking it heats up the fat and makes the crust tough. Think “roughly chop” rather than “perfectly blend.” (Yes, it’ll look lumpy. That’s the point.)
- Dough Rest Matters: Wrap the dough and let it rest in the fridge for at least 1 hour—this relaxes the gluten so it doesn’t shrink in the oven. I skipped this once and ended up with a pie crust that looked like it was trying to crawl back into the bowl. Patience here = golden, crisp edges.
- Salt the Dough Twice: Sprinkle half the salt into the flour mix, then fold in the butter. Save the rest to sprinkle on the work surface before rolling. The extra salt on the bottom prevents sticking and adds a subtle crunch. (Trust me, your pie’s crust will taste like it was made by someone who actually reads instructions.)
Dietary considerations for these flavors
Gluten-Free Adaptation
For a gluten-free version, swap the all-purpose flour in the crust for a 1:1 gluten-free flour blend like Bob’s Red Mill or King Arthur. Use 3 cups instead of 4, as gluten-free flours absorb more liquid. Add ½ tsp xanthan gum to improve texture.
The filling stays the same, but toss the apples with 1 extra tbsp cornstarch to thicken. Chill the dough longer—2 hours minimum—since gluten-free dough is more fragile. 🍂
Dairy-Free Option
Skip the butter in the crust and use 1 cup dairy-free margarine (like Earth Balance) or vegetable shortening instead. For richness, add 1 tbsp coconut oil to the filling.
The egg wash can be replaced with 1 tbsp plant-based milk mixed with 1 tsp sugar. Test brands carefully—some dairy-free butters can make the crust greasy. 🥥
Lower-Sugar Version
Reduce the sugar in both crust and filling by ⅓ (use ½ cup granulated sugar total). Boost flavor with 1 tsp vanilla extract and ½ tsp ground cardamom in the filling.
Use tart apples (like Granny Smith) to balance sweetness. The crust will still taste buttery—just less sweet. For extra depth, add 1 tbsp maple syrup to the filling. 🍁
Nut-Free Allergy Safe
This recipe is naturally nut-free, but always check labels on pre-made gluten-free flours or dairy-free substitutes. Use store-brand butter (like Land O’Lakes) to avoid cross-contamination risks.
When handling dough, clean surfaces thoroughly. For extra safety, bake the pie on a parchment-lined tray to prevent crumbs from falling into the oven. 🧼
Vegan-Friendly Twist
Replace butter with 1 cup vegan butter (like Miyoko’s) or coconut oil for the crust. Use flax eggs (1 tbsp ground flax + 3 tbsp water) for the wash. The filling stays the same, but add 1 tsp apple cider vinegar to enhance apple flavor.
Chill the dough 3 hours—vegan dough needs extra time to firm up. 🌱
Nutrition facts
Frequently asked questions
Why is chilling the dough so important?
Chilling the dough for at least 1 hour (or overnight) is what creates those perfect flaky layers. Cold butter stays solid during baking, creating steam pockets that give the crust its signature texture. Skipping this step makes the crust tough instead of tender. Think of it as giving the gluten time to relax—just like a good rest before a big day!
Can I use frozen apples instead of fresh?
Frozen apples work perfectly—just thaw them first and pat them dry to prevent excess moisture in the filling. They’re convenient and often cheaper than fresh. The texture will be slightly softer, but the flavor stays bright when paired with the cinnamon-spice blend. Just avoid pre-sliced frozen apples—they can get mushy.
What if my pie crust turns out too thick?
If your crust feels too thick after rolling, don’t panic! The dough should be 1/8-inch thick when placed in the pie dish. If it’s thicker, gently roll it out again or let it rest 10 minutes in the fridge to relax. For extra flakiness, press the dough into the pan with your fingertips instead of rolling it directly. A slightly uneven edge is actually charming—it adds rustic appeal!
How do I fix a soggy bottom crust?
Prevent soggy bottoms by pre-baking the crust for 10 minutes at 375°F before adding filling (called “blind baking”). For a no-fuss method, sprinkle ½ cup quick-cooking oats or dry breadcrumbs on the bottom crust before filling—they’ll absorb moisture during baking. Another trick? Brush the bottom crust with a thin layer of apricot jam before adding the apples.
Can I make this pie ahead of time?
This pie actually tastes better the next day! Assemble it completely, then refrigerate overnight before baking. The flavors meld beautifully, and the crust holds its shape better. For a make-ahead dessert, bake it 1 day ahead, cool completely, wrap tightly in plastic, and store at room temperature. Reheat slices at 350°F for 10 minutes to restore that warm-from-the-oven magic.

- Pea Soup Instant Pot Recipe: Velvety Green Smoothness in 20 Minutes - November 1, 2026
- Pork Loin Pulled Pork Crock Pot Recipe: Slow-Smoked Tenderness With Zero Dryness - November 1, 2026
- Baked Potatoes in Crock Pot Recipe: Buttery Interiors and Crispy Top Magic - November 1, 2026