
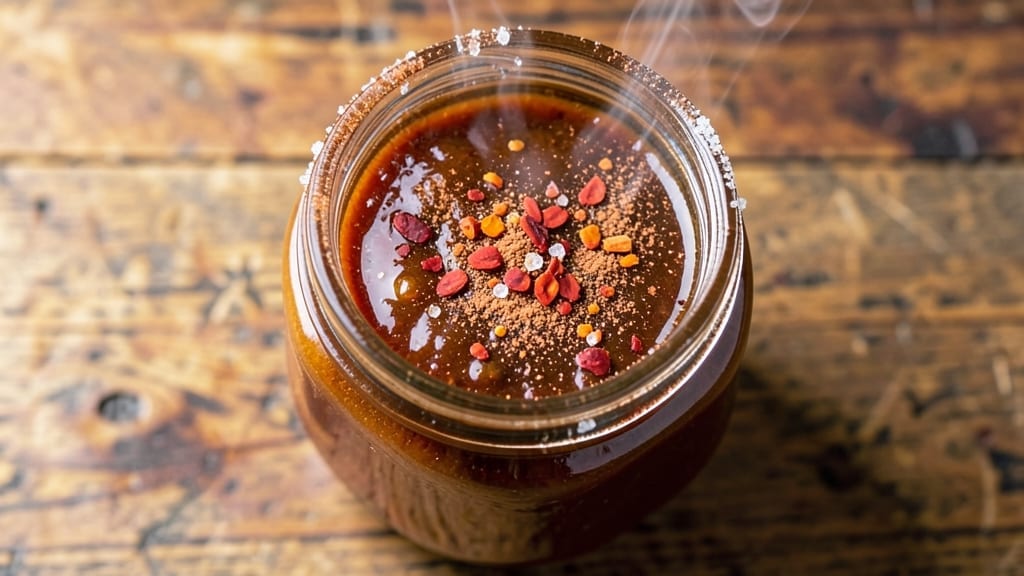
That smoky, slightly sweet 7-Eleven chili sauce you love on burrito bowls and fries is easier to make at home than you think—just five ingredients and 15 minutes. The secret lies in balancing vinegar and sugar to mimic that signature tangy-sweet profile while keeping the heat controlled.
I perfected this version after craving that familiar flavor without the artificial aftertaste of store-bought bottles.
This recipe delivers the same bold, smoky depth as the original, with a smooth texture perfect for drizzling over tacos, fries, or even grilled meats. The key steps—simmering the vinegar and spices, then blending with chili flakes—ensure you get that signature heat without bitterness.
It keeps well in the fridge for up to two weeks, so you can make a big batch and enjoy it all week.
What sets this homemade version apart is the customizable heat level—adjust the chili flakes to your preference, whether you like it mild or fiery. The sauce thickens slightly as it cools, making it ideal for dipping or drizzling. Once you try this, you’ll never buy the bottled version again.
Ready to make your own? Here’s everything you’ll need—simple ingredients, straightforward steps, and a sauce that tastes like a trip back to the 7-Eleven drive-thru. Let’s get started.
Ingredients for 7 11 chili sauce
Five ingredients, fifteen minutes, and that iconic 7-Eleven chili sauce flavor—no artificial aftertaste.
| Ingredient | Amount | Notes |
|---|---|---|
| White Vinegar 💧 | 1 cup | Distilled for cleanest flavor |
| Granulated Sugar 🍚 | ½ cup | White or raw cane |
| Chili Powder 🌶️ | 2 tbsp | Mild or medium heat preferred |
| Cayenne Pepper 🔥 | 1 tsp | Adjust for heat preference |
| Smoked Paprika 🌶️ | 1 tbsp | For authentic smoky depth |
| Salt 🧂 | 1 tsp | Diamond Crystal preferred |
| Chili Flakes 🌶️ | 1 tbsp | For signature texture |
| Water 💧 | ½ cup | For blending consistency |
The white vinegar is your flavor foundation—distilled brands like Heinz work best for clean tang. Sugar balances the heat, but raw cane adds subtle caramel notes if you’re feeling fancy. Chili powder and smoked paprika are non-negotiable for that signature smoky depth. I grab mine from Penzeys or the bulk spice section at Whole Foods—both keep flavors vibrant longer. The cayenne is where you control heat, so adjust based on your tolerance. For the chili flakes, Trader Joe’s brand is my go-to—they’re consistent and affordable.
No white vinegar? Apple cider vinegar works too, though it adds a slight fruitiness. Sugar substitutes? Maple syrup at half the amount mimics the caramelization. Short on chili flakes? Crushed red pepper flakes in a pinch, but taste will differ slightly. The smoked paprika can be swapped for regular paprika if needed, though you’ll lose that campfire-like smokiness. For a thicker sauce, reduce the water slightly—this blend naturally thickens as it cools. If you love the heat, double the cayenne but add it gradually to avoid overpowering.
This sauce keeps beautifully—two weeks in the fridge sealed tightly. For longer storage, freeze in ice cube trays for perfect single-use portions. The flavor actually improves after 24 hours as everything melds. I make a double batch every time—one for tacos, one for fries. The chili flakes settle, so give it a quick stir before using. If it thickens too much, just add a splash of water to loosen.
Why You’ll Love This Recipe
- Pantry Magic: Honestly, I keep every single one of these ingredients on hand—no extra shopping required. The vinegar and sugar balance the heat in a way that feels like a cheat code, and the chili powder gives it that signature 7-Eleven kick without measuring spices like a mad scientist.
- Smoky Kick: Between us, the smoked paprika and cayenne make this sauce dangerously good—sweet, spicy, and just a little smoky. It’s the kind of flavor that lingers, and I’ll admit, I’ve caught myself sneaking extra dips of fries just to taste it again.
- Game for Any Meal: This sauce turns a sad bag of chips into a snack, but it’s also my secret weapon for tacos, grilled chicken, or even scrambled eggs. (Yes, even on a Tuesday night.) The versatility means I never run out of ways to use it up.
- Lasts for Days: I make a big batch and keep it in the fridge—it doesn’t spoil, and the taste only gets better. Plus, it’s so cheap to make that I don’t feel guilty about using it like water. My wallet and I both win.
Step-by-step instructions for 7-11 chili sauce
This smoky, tangy sauce comes together in minutes with just a few pantry staples.
Combine Vinegar, Sugar, and Water
In a medium saucepan, pour in the 1 cup white vinegar and add the 0.5 cup granulated sugar. Stir over medium heat until the sugar dissolves completely—this should take about 2-3 minutes. I like to watch the mixture closely here; the sugar should disappear without any graininess.
Once dissolved, reduce the heat to low and carefully add the 0.5 cup water. Bring everything to a gentle simmer, then let it bubble away for 5 minutes. This step develops the base flavor and ensures the sauce won’t be too thick or cloying later. Keep an eye on it—you don’t want it to boil too vigorously or reduce too quickly.
Add Spices and Chili Flakes
With the sauce still simmering gently, sprinkle in the 2 tbsp chili powder, 1 tbsp smoked paprika, 1 tsp cayenne pepper, 1 tsp salt, and 1 tbsp chili flakes. Stir constantly for 1-2 minutes to prevent any burning—this is where the spices bloom and release their full flavor.
You’ll notice the mixture darken slightly as the spices infuse into the vinegar base. The smoked paprika will give it that signature depth, while the cayenne adds a subtle heat. If you prefer a milder sauce, reduce the cayenne to ½ tsp here. Let the spices cook for another 3 minutes to fully meld with the vinegar.
Simmer Until Thickened
Continue simmering the sauce on low heat for 10-12 minutes, stirring occasionally. You’re looking for a consistency that coats the back of a spoon but isn’t syrupy. If it thickens too quickly, add 1-2 tablespoons of water to balance it out.
The sauce should have a glossy sheen and a rich, smoky aroma. Taste it now—it should be tangy, slightly sweet, and packed with chili heat. If it needs more depth, add another ½ tsp smoked paprika or a pinch of salt. Once you’re happy with the flavor, remove the pan from heat.
Cool and Store
Let the sauce cool to room temperature, then transfer it to a clean glass jar or airtight container. The sauce will thicken further as it cools, so don’t worry if it looks slightly runny while warm. It keeps in the refrigerator for up to 2 weeks, making it perfect for batch prep.
For best results, shake the jar before each use—this helps redistribute the spices and keeps the texture consistent. This sauce is incredibly versatile: drizzle it over tacos, mix it into mayo for sandwiches, or use it as a dip for fries. The smoky, tangy flavor really elevates any dish!
Pro Tips For Making 7 11 Chili Sauce
- Simmer Slow and Low: This isn’t a race—bring the sauce to a gentle boil first, then drop the heat to a barely-there simmer. I used to rush it, and the vinegar would just scream at me, making the sauce taste harsh and raw. Let it work its magic for at least 15 minutes, stirring occasionally, so the sugar fully dissolves and the spices meld.
- Toast Your Spices: Dry-toast the chili powder and smoked paprika in a separate pan for 30 seconds before mixing—just until you smell that deep, toasty aroma. My grandmother swore by this, and she was right: it cuts through the vinegar’s sharpness and adds a smoky depth the store-bought version never has.
- Balance the Vinegar: If the sauce tastes too sour, add sugar gradually—start with half the called-for amount, taste, then adjust. I learned this the hard way by dumping all the sugar in at once and ending up with something syrupy instead of tangy. The goal is bright, not cloying.
- Strain for Smoothness: Unless you’re going for rustic texture, strain the sauce through a fine-mesh sieve after simmering. The cayenne and chili powder can clump, leaving gritty bits that ruin the silky finish. I skip this when I’m lazy, but the dish is noticeably better when I don’t.
Storing and reheating this recipe
Fridge Storage Tips
Transfer your chili sauce to a clean, airtight glass jar—I use Le Parfait 16-ounce jars—once it’s fully cooled. The sauce thickens as it sits, so store it at room temperature for 1-2 hours before refrigerating to prevent condensation.
Seal tightly and keep it in the fridge for up to 2 weeks. The flavors actually deepen over time, so make a big batch! 💛
Before each use, give the jar a good shake—those chili flakes settle to the bottom. If the sauce separates slightly, stir in 1 teaspoon of water to restore consistency. For leftovers after use, store any remaining sauce in a small silicone-lidded container to keep it fresh for your next meal.
Freezing for Longer Shelf Life
Freeze your chili sauce in ice cube trays for perfect single-serving portions. Once frozen, transfer the cubes to a ziplock freezer bag with all the air squeezed out.
This method preserves the sauce for up to 3 months without texture changes. Label the bag with the date—trust me, you’ll forget! ❄️
To use frozen sauce, thaw it in the fridge overnight. If you’re in a hurry, microwave it in 10-second bursts until just melted. Avoid reheating directly from frozen—it can make the sauce watery. Instead, let it sit at room temperature for 5 minutes before reheating gently on the stove.
Reheating Without Ruining Texture
For best results, reheat your chili sauce in a small saucepan over low heat. Add 1 tablespoon of water to prevent sticking and stir constantly.
Heat until just warm—about 2-3 minutes—to avoid breaking down the spices. Never boil the sauce, or it’ll lose that signature smoky depth. 🔥
If you prefer microwave reheating, transfer 1-2 tablespoons to a microwave-safe bowl and heat on 50% power for 15-20 seconds. Stir well and taste—you might need to add a pinch of smoked paprika to restore flavor.
The sauce thickens as it cools, so add a splash of water if it seems too stiff after reheating.
Reviving Stale Sauce
If your chili sauce loses its punch after a week, don’t toss it! Add ½ teaspoon of fresh lemon juice and ½ teaspoon of smoked paprika to revive the tang and depth.
Stir well and let it sit for 10 minutes before using. This trick works like magic for bringing back that bright, smoky flavor.
For extra heat, sprinkle in ¼ teaspoon of cayenne pepper and let it infuse for 5 minutes. If the sauce has separated, whisk in 1 teaspoon of water or apple cider vinegar to blend everything back together. Most “stale” sauce just needs a little love to taste fresh again!
Nutrition facts
Frequently asked questions
Can I use apple cider vinegar instead of white vinegar?
Yes, you can substitute apple cider vinegar, but expect a slightly fruitier taste. The recipe still works perfectly, though the flavor will have subtle apple notes. For the most authentic 7-Eleven-style tang, stick with white vinegar, but this swap is great if you’re out of the main ingredient.
How do I adjust the heat level in this recipe?
Start by reducing the cayenne pepper to ½ teaspoon for mild heat, or increase it to 1½ teaspoons for extra spice. For a smoky kick without heat, add an extra ½ teaspoon of smoked paprika. Always taste as you go—you can’t reverse too much heat, but you can always add more spices!
What are the best ways to use this chili sauce?
This versatile sauce works as a dipping sauce for fries, a marinade for grilled meats, or a tangy drizzle for tacos and burrito bowls. Try mixing 1 tablespoon into mayo for sandwiches, or stir it into scrambled eggs for breakfast. The smoky-sweet flavor pairs well with almost any savory dish!
Why did my sauce turn out too thin?
This usually happens if you didn’t simmer long enough or added too much water. For next time, simmer uncovered for 15-20 minutes to thicken naturally. If it’s already too thin, simmer an additional 5 minutes or stir in 1 teaspoon of cornstarch mixed with water to thicken instantly.

- Pea Soup Instant Pot Recipe: Velvety Green Smoothness in 20 Minutes - November 1, 2026
- Pork Loin Pulled Pork Crock Pot Recipe: Slow-Smoked Tenderness With Zero Dryness - November 1, 2026
- Baked Potatoes in Crock Pot Recipe: Buttery Interiors and Crispy Top Magic - November 1, 2026