
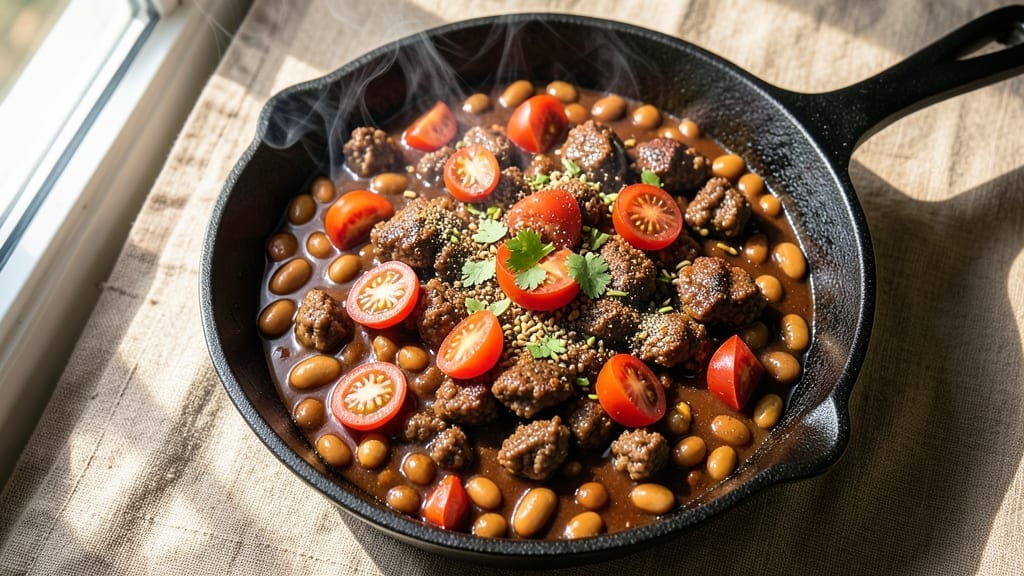
This 3-can chili recipe delivers deep, smoky flavor with minimal effort—perfect for weeknights when you crave hearty comfort without the cleanup. The secret lies in balancing canned beans, tomatoes, and meat with a blend of spices that simmer into rich, complex layers of taste.
I developed this version after years of testing, ensuring every spoonful delivers that satisfying, restaurant-quality depth without requiring hours at the stove.
The beauty of this recipe is its simplicity: just three cans (beans, tomatoes, and meat) form the base, while chili powder, cumin, and garlic powder create the signature smoky warmth. Unlike traditional chili recipes that demand chopping and prepping, this version lets you open cans and stir—no fancy techniques required.
The result? A thick, hearty chili that’s tender, flavorful, and ready in under an hour, leaving your kitchen clean and your taste buds happy.
What sets this chili apart is its adaptability. Swap the beef for lentils or mushrooms for a vegetarian twist, or keep it classic with kidney beans and ground beef. Top it with shredded cheese, sour cream, or fresh green onions for a customizable finish that feels both rustic and refined.
The slow simmer develops flavors that only get better with time, making it ideal for meal prep or feeding a crowd.
Whether you’re a chili purist or a busy home cook, this recipe delivers restaurant-quality results with minimal fuss. The spices meld into a harmonious blend, the beans soften just enough, and the meat stays tender—no tough, overcooked chunks here.
Serve it up with cornbread or crusty bread to soak up every last drop of that smoky, savory goodness. Let’s get cooking!
Ingredients for 3 can chili
Three cans, one pot, restaurant-quality chili with zero chopping—just open, stir, and simmer.
| Ingredient | Amount | Notes |
|---|---|---|
| Kidney Beans 🥫 | 1 can | Drained, rinsed (15 oz size) |
| Diced Tomatoes 🍅 | 1 can | Fire-roasted, undrained (15 oz size) |
| Ground Beef 🥩 | 1 ½ lb | 80/20 fat ratio for juiciness |
| Chili Powder 🌶️ | 2 tbsp | Smoked variety for depth (🌶️) |
| Ground Cumin 🌿 | 1 ½ tbsp | Toasted for richer flavor |
| Garlic Powder 🧄 | 1 tbsp | Freshly ground preferred |
| Onion Powder 🧅 | 1 tbsp | No need for fresh onion |
| Salt 🧂 | 1 tsp | Kosher or sea salt |
| Black Pepper 🌶️ | ½ tsp | Freshly cracked for heat |
| Beef Broth 💧 | 1 cup | Low-sodium preferred |
| Dark Brown Sugar 🍬 | 1 tbsp | Balances acidity |
| Olive Oil 🫒 | 1 tbsp | For browning beef |
| Fresh Cilantro 🌿 | ¼ cup | Chopped, for garnish (optional) |
| Lime 🍋 | 1 whole | Juiced, for brightness |
The cans are where this chili wins. Trader Joe’s has the best fire-roasted diced tomatoes—no canned taste here. For beans, Goya kidney beans are my go-to (they’re pre-cooked and tender), but any canned bean works. The beef? 80/20 fat ratio is key—it keeps the meat juicy while browning. I grab ground beef from the meat counter instead of pre-packaged; it’s fresher and the fat distribution is better. If you’re short on time, Costco’s pre-ground chuck is a great shortcut. Look for good marbling in the beef—it’s what makes chili rich and tender.
No chili powder? Substitute smoked paprika plus cayenne at half the amount. Fresh cumin seeds? Toast them in a dry pan for 30 seconds first—they’ll smell amazing. The fire-roasted tomatoes are non-negotiable for that smoky depth, but in a pinch, regular diced tomatoes with an extra pinch of smoked paprika work. The brown sugar might seem odd, but it balances the acidity from the tomatoes and lime. Coconut sugar works too if you’re avoiding refined sugar. For the broth, low-sodium is a must—you can always add more salt at the end. And if you’re feeling fancy, swap the ground beef for pre-cooked chorizo for a Spanish-inspired twist.
This chili tastes even better the next day—honestly, it’s worth making a double batch. Store leftovers in the fridge for 5-6 days or freeze for up to 3 months. I portion mine into glass jars so it’s ready for lunches. The flavors meld beautifully overnight, so if you’re short on time, make it in the morning and reheat for dinner. The lime should be juiced fresh right before serving—it brightens everything up. And if you’re serving a crowd, double the spices but keep the liquid ratio the same; it’s the secret to keeping it thick and flavorful.
Why You’ll Love This Recipe
- Canned Pantry Magic: I swear by this recipe—three cans, a bag of beef, and a handful of spices. No chopping, no fuss, just dump-and-simmer perfection. Honestly, it’s the kind of meal that makes me feel like I actually cooked something when I didn’t.
- Deep, Smoky Richness: That ground cumin and chili powder? They’re the secret weapons here. The beef browns just enough to caramelize, while the tomatoes and beans soak up the heat, giving you that slow-cooked depth without the wait. Between us, it’s the kind of chili that makes people ask for seconds before you even finish serving.
- Game for Any Day: This isn’t just a weeknight dinner—it’s tailgate fuel, potluck gold, or the ultimate lazy Sunday leftovers. I’ve served it in bowls, over rice, even stuffed in tortillas, and it never lets me down. (Yes, even on a Tuesday night.)
- Budget-Friendly Powerhouse: Three cans of beans, a pound of beef, and spices you probably already have? That’s a meal for six for under $10. And the best part? It tastes like you spent hours on it, but you didn’t. My wallet and my family’s taste buds both win.
Step-by-step instructions for 3-Can chili recipe
Here’s how to build deep, smoky chili that tastes like it simmered all day—with minimal cleanup.
Brown the Ground Beef Perfectly
Heat the 1 tablespoon olive oil in a large Dutch oven over medium-high heat until shimmering. Add the 1.5 lb ground beef, breaking it apart with a wooden spoon as it cooks. Let it brown undisturbed for 3-4 minutes—this builds rich flavor through the Maillard reaction. Once the beef loses its raw color and starts to crisp at the edges, break it up further and cook for another 2-3 minutes until fully browned.
Here’s the thing—don’t drain the fat. That rendered beef fat carries incredible flavor and helps create a velvety chili. If the pan gets too greasy, use a paper towel to blot just a little excess, but leave most of it behind. You’ll want to keep the heat steady; if it gets too hot, the spices will burn before they release their aroma.
Toast the Spices and Add Aromatics
Reduce heat to medium and add the 2 tablespoons chili powder, 1.5 tablespoons ground cumin, 1 tablespoon garlic powder, 1 tablespoon onion powder, 1 teaspoon salt, and 0.5 teaspoon black pepper. Stir constantly for 1-2 minutes until the spices are fragrant and toasted—you’ll smell that deep, earthy aroma developing. This step is crucial; it wakes up the spices and prevents them from tasting raw.
Next, pour in the 1 cup beef broth and scrape up all those delicious browned bits from the bottom of the pot with a wooden spoon. These bits, called fond, are packed with flavor. Let the mixture simmer for 3-4 minutes until slightly reduced. This creates a rich base that will carry the chili’s depth of flavor throughout the cooking process.
Combine All Ingredients and Simmer
Add the 1 can diced tomatoes (with juices), 1 can kidney beans (drained and rinsed), and 1 tablespoon dark brown sugar. Stir everything together until well combined. Bring the chili to a gentle boil, then reduce heat to low and let it simmer uncovered for 45-60 minutes, stirring occasionally. You’re looking for a thick, stew-like consistency with flavors melding together beautifully.
I like to taste the chili after 30 minutes of simmering. At this point, you can adjust seasoning if needed—add more salt if it’s bland, or a pinch of sugar if the tomatoes are too acidic. The chili should be thick enough to coat the back of a spoon by the end of the simmering time. If it’s too thin, simmer uncovered for another 10-15 minutes to reduce it further.
Finish with Fresh Herbs and Brightness
Once the chili reaches your desired thickness and flavor, remove it from heat. Stir in the juice of 1 whole lime—this brightens the flavors and cuts through the richness. Let the chili sit off the heat for 5 minutes to allow the lime juice to fully integrate. Finally, stir in the 0.25 cup chopped fresh cilantro just before serving. This adds a fresh, herbal note that balances the deep, smoky flavors.
Here’s a pro tip: If you’re serving the chili right away, garnish each bowl with an extra sprinkle of cilantro and a wedge of lime. For even better flavor, let the chili rest for 15-30 minutes before serving—this allows all the components to meld together perfectly. The chili will taste even more complex after resting, as the flavors continue to develop and deepen.
Pro Tips For Making 3 Can Chili
- Brown the Beef Properly: Dump that raw ground beef straight into the pot and you’re just making mushy chili. Break it into small chunks first, then cook it over medium-high heat until it loses its pink color—about 5-7 minutes. Stir occasionally, or those chunks will turn into a single, sad, gray lump. (Yes, I’ve learned this the hard way.)
- Drain and Rinse Beans: Those canned kidney beans come packed in saltwater, and skipping the rinse just makes your chili taste like a sad, briny soup. Drain them well, give them a quick rinse under cold water, and pat them dry if you’re feeling extra. Trust me, your chili will thank you—no one wants a mouthful of salty beans drowning out the spices.
- Simmer, Don’t Boil: After everything’s in the pot, resist the urge to crank the heat and let it roar. A slow, steady simmer (just bubbles now and then) lets the flavors meld without turning the tomatoes into mush or the beans into paste. I used to rush it, and the texture always suffered. Now? I let it hum along for at least 20 minutes—patience pays off.
- Toast the Spices First: Dump the chili powder and cumin straight into the pot, and you’re missing out on depth. Instead, dry-toast them in the pot over medium heat for 30 seconds—just until you smell that earthy, toasty aroma. It’s a tiny step, but it makes the spices pop way more than if you just stir them in cold. (And yes, even if you’re impatient like me.)
Serving suggestions for this dish
Classic Toppings
Start with the classics: shredded cheddar cheese (about ¼ cup) melts beautifully over hot chili, adding richness. A dollop of sour cream (about 2 tablespoons) cools the heat and adds creaminess. Fresh green onions (about 2 tbsp chopped) provide a crisp, fresh contrast to the smoky depth.
I like to sprinkle crushed red pepper flakes (about ½ tsp) for a little kick if you want extra heat. 🌶️
Crunchy Additions
For texture lovers, toast tortilla strips (about ½ cup) in a dry skillet until golden, then sprinkle on top. Crushed Fritos (about ¼ cup) add a salty, crunchy element that pairs perfectly with the chili’s heartiness.
If you’re feeling adventurous, try pickled jalapeños (about 2 tbsp sliced) for a tangy, spicy punch. These toppings should be added right before serving to keep them crisp.
Bread Pairings
Serve your chili with warm cornbread—it’s the ultimate match.
I love making a simple batch using 1 box Jiffy cornbread mix (prepared as directed) or a homemade cornbread with 1 cup cornmeal, 1 cup flour, and 1 cup buttermilk. Crusty bread like sourdough or a baguette also works well for dipping.
The bread soaks up the chili beautifully, making it a satisfying meal.
Vegetarian Twists
For a vegetarian version, swap the beef for spiced lentils (about 1.5 cups cooked) or mushrooms (about 1 lb sliced). Top with avocado slices (about ½ avocado) for creaminess and vegan sour cream (about 2 tbsp).
A sprinkle of pumpkin seeds (about 2 tbsp) adds a nutty crunch. These toppings keep the dish hearty and flavorful while making it plant-based. 🥑
Presentation Tips
For a restaurant-worthy look, serve the chili in individual cast-iron skillets or deep bowls with a side of toppings in small ramekins. Garnish with a lime wedge and a sprig of cilantro for freshness.
If you’re serving a crowd, use a chafing dish to keep the chili warm and inviting. The presentation should feel rustic yet intentional—think warm, hearty, and inviting. ✨
Nutrition facts
Frequently asked questions
Can I use different types of beans in this chili?
While kidney beans are classic, try black beans, pinto beans, or even a mix for variety. For extra texture, add 1 can of corn (drained) or ½ cup of diced bell peppers. Just adjust the liquid slightly—beans absorb differently. The key is keeping the total bean volume similar to maintain thickness.
How can I make this chili spicier?
Add ½ teaspoon cayenne pepper or 1 teaspoon hot sauce when toasting the spices. For smoky heat, swap ½ tablespoon of the chili powder for chipotle powder. Always taste as you go—you can adjust after simmering, but you can’t take out what’s already in there!
What’s the best way to reheat leftover chili?
Use the stovetop on low heat with a splash of water or broth to prevent drying out. For microwave reheating, cover with a damp paper towel and heat in 1-minute intervals, stirring between each. Never reheat above 165°F—chili reheats best when it’s just warmed through, not boiling.
Can I make this chili in a slow cooker?
Yes! Brown the beef as directed, then transfer everything to your slow cooker. Cook on low for 6-8 hours or high for 3-4 hours. The slow cooker’s gentle heat enhances the spices beautifully. Just add ¼ cup water if it gets too thick during cooking.
Why did my chili turn out too thin?
This usually happens when using low-fat meat or not enough beans. Next time, try 1 tablespoon cornstarch mixed with water as a thickener, or simmer uncovered for 10-15 extra minutes to reduce. The fat from the beef helps create body—never drain it completely!

- 12 Bean Chili Recipe: Hearty Slow-Cooked Depth With 12 Legumes - October 17, 2026
- 5 Seed Bread Recipe: Nutty Crunch and Artisan Flavor in One Loaf - October 17, 2026
- 1 Lb Macaroni Salad Recipe: Bold, Crunchy, and Crowd-Pleasing - October 17, 2026