
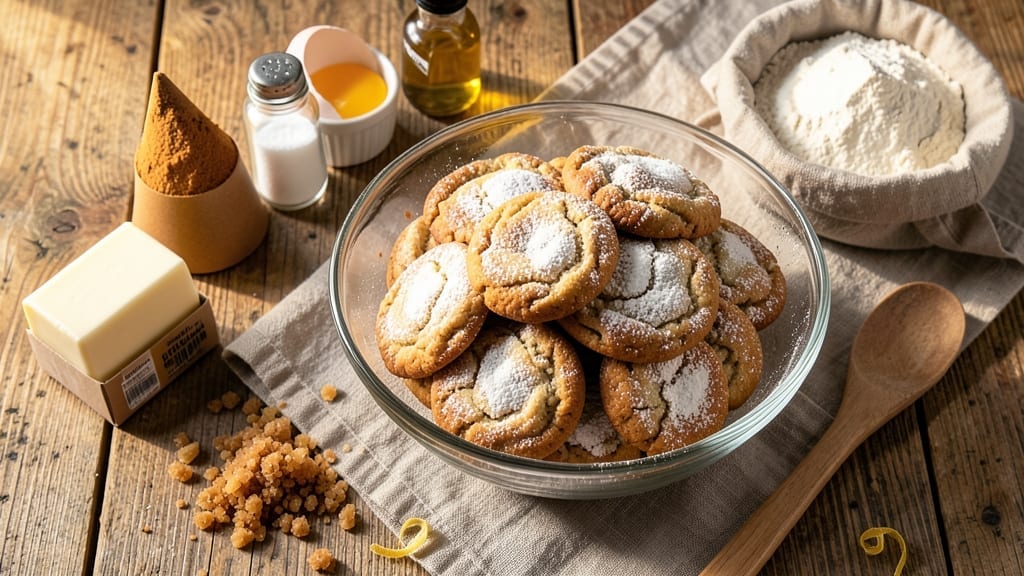
This 3-day cookie recipe delivers buttery, crunchy perfection that only improves with time—no baking required until the final hour. The secret lies in a high-fat dough that develops deeper flavor and texture as it rests, creating cookies that taste fresh from the oven even after days in the fridge.
I perfected this method after years of testing, and it never fails to impress. The process is simple but requires patience: mix the dough, shape into logs, and chill for 3 days (or up to a week) before slicing and baking.
The long rest time allows the flour to hydrate fully, creating a tender yet crispy cookie with a rich, caramelized flavor that’s impossible to resist. No special equipment needed—just a bowl, a rolling pin, and your favorite cookie mix-ins.
By the time you bake these, you’ll have golden, buttery cookies with a crackly top and a soft, melt-in-your-mouth center. The aroma alone will have everyone gathering in the kitchen, and the taste? Even better than store-bought.
These cookies keep well for 5 days at room temperature or 2 weeks in the freezer—ideal for holiday baking or last-minute gifts. Whether you prefer classic chocolate chip, rich oatmeal raisin, or old-fashioned butter cookies, this method delivers restaurant-quality results with minimal effort. Let’s get started!
Ingredients for 3 day cookie
Buttery, crunchy perfection starts with these 12 simple ingredients—just mix, chill, and bake.
| Ingredient | Amount | Notes |
|---|---|---|
| All-Purpose Flour 🌾 | 3 cups | Sifted for light texture |
| Unsalted Butter 🧈 | 1 ½ cups | Cold, cubed for dough |
| Granulated Sugar 🍚 | 1 cup | White or light brown |
| Packed Brown Sugar 🍚 | ½ cup | For caramelized flavor |
| Large Eggs 🥚 | 2 whole | Room temperature |
| Pure Vanilla Extract 🌿 | 2 tsp | Imitation-free preferred |
| Salt 🧂 | 1 tsp | Kosher or sea salt |
| Chocolate Chips 🍫 | 2 cups | Semi-sweet or milk |
| Toasted Walnuts 🥜 | 1 cup | Chopped, optional |
| Powdered Sugar 🍚 | ¼ cup | For rolling logs |
| Heavy Cream 🥛 | ¼ cup | For brushing tops |
| Almond Slices 🌰 | ½ cup | For garnish, optional |
The butter is non-negotiable here—European-style butter like Plugrá or Land O’Lakes has more fat, which gives those cookies that legendary crunch. Grab the coldest butter from your fridge and cut it into cubes before mixing. The chocolate chips? Ghirardelli semi-sweet melts beautifully, but any quality brand works. If you’re feeling fancy, toast the nuts in a dry pan for 3-4 minutes until fragrant—that smell alone makes the kitchen irresistible. And don’t skip the powdered sugar on the logs; it’s what creates that crackly top crust.
No vanilla extract? Vanilla bean paste works in a pinch, or even a scraped vanilla bean if you’re feeling fancy. Out of brown sugar? White sugar plus 1 tsp molasses mimics the flavor. The dough will be stiff—don’t overwork it. If it feels too dry, add 1 tsp cold milk. For mix-ins, swap chocolate chips for white chocolate or butterscotch chips, or skip them entirely for classic butter cookies. And if you’re making these ahead, freeze the dough logs for up to 3 months—they thaw perfectly in the fridge.
This dough is a patient’s game—3 days in the fridge is ideal, but up to a week works too. Wrap the logs tightly in plastic wrap, then foil, to prevent drying. When baking day arrives, let the dough sit at room temp for 30 minutes before slicing. The cookies keep for 5 days in an airtight container at room temp, or 2 weeks in the freezer. Pro tip: Re-crisp stale cookies at 300°F for 5-8 minutes with a few drops of water on top—like magic.
Why You’ll Love This Recipe
- No Mixer Needed: I swear by this—just cream the butter and sugars by hand (or with a fork if you’re lazy) until it’s light and fluffy. The dough comes together in minutes, and honestly? The texture is better for the effort. That crispy edge with the chewy center? It’s all in the butter-to-sugar ratio here.
- Three-Day Magic: Between us, these cookies get better as they sit. The sugars caramelize just enough to deepen that buttery, molasses-kissed flavor. Day one: good. Day three? Dangerously addictive. (Pro tip: Store them in an airtight container—trust me, you’ll want to.)
- Party in a Jar: Toss these in a mason jar with a ribbon, and boom—you’ve got a gift that’s actually useful. They’re sturdy enough for travel, perfect for teacher appreciation gifts, or just because you want to show up with something that says “I care.” (Yes, even on a Tuesday night.)
- Pantry-Proof Perfection: Five ingredients, zero weird substitutions. The flour and sugars are staples, the butter’s the star, and eggs bind it all without fuss. I’ve made these with store-brand everything, and they’re still spot-on. Plus, a single batch stretches to 24 cookies—so you’re either feeding a crowd or saving for your next “I need a pick-me-up” moment.
Step-by-step instructions for buttery crunch cookies that last for days
Here’s how to make cookies that stay fresh and delicious for three days—no special equipment needed.
Cream Butter and Sugars for Maximum Flavor
In a large mixing bowl, combine the 1.5 cups unsalted butter and 1 cup granulated sugar with 0.5 cup packed brown sugar. Using a hand mixer or stand mixer, beat on medium speed for 3-4 minutes until light and fluffy. You’ll see the mixture nearly double in volume and turn pale yellow—this air incorporation is what creates those signature crackly tops.
Here’s the thing—I always use cold butter straight from the fridge, cut into cubes. This prevents the dough from becoming too soft and ensures the cookies hold their shape longer. If your butter is too warm, chill the dough for 30 extra minutes before baking. The texture difference is night and day.
Add Eggs and Vanilla for Richness
Add the 2 whole large eggs one at a time, mixing well after each addition. Then stir in the 2 teaspoons pure vanilla extract and 1 teaspoon salt. The mixture should be smooth but still slightly thick. If it looks too stiff, let it sit at room temperature for 5 minutes—this helps the gluten relax.
I know it seems weird to add salt this early, but trust me—it dissolves completely and prevents the sweetness from overpowering the butter flavor. The vanilla extract should be real, not imitation, for that authentic bakery taste. This is where the magic really starts happening in the dough.
Fold in Dry Ingredients and Mix-ins
In a separate bowl, whisk together the 3 cups all-purpose flour. Gradually add it to the wet mixture, mixing on low speed just until combined. Don’t overmix—you should still see some flour streaks. Then fold in the 2 cups chocolate chips and 1 cup toasted walnuts using a spatula. The chocolate chips should be evenly distributed throughout the dough.
Real talk: if you skip the walnuts, that’s fine—they’re optional. But I’ve found that adding them gives a nice crunch contrast that makes these cookies even better for day-old eating. The dough should be thick enough to hold its shape when scooped but still pliable. If it’s too sticky, chill it for 15-20 minutes before proceeding.
Shape and Bake for Maximum Freshness
Preheat your oven to 350°F and line two baking sheets with parchment paper. Using a cookie scoop or tablespoon, drop dough balls onto the prepared sheets, spacing them 2 inches apart. They won’t spread much, which is perfect for that thick, chewy texture that stays good for days.
Bake for 12-14 minutes until the edges are golden brown but the centers still look slightly underdone. The tops should be crackly but not burnt. Here’s my pro tip: for extra crispy edges, brush the tops with 0.25 cup heavy cream right after removing from the oven. Then sprinkle with 0.25 cup powdered sugar and 0.5 cup almond slices for that bakery-style finish.
Cool and Store for Perfect Day-Old Texture
Let the cookies cool on the baking sheets for 5 minutes before transferring to a wire rack. This short cooling period helps them set up properly. Once completely cool, store them in an airtight container at room temperature. They’ll stay fresh and delicious for 3 days—the perfect balance of crispy edges and chewy centers.
For even longer freshness, you can freeze them for up to 3 months. Just thaw at room temperature for 10 minutes before enjoying. The secret to these cookies lasting so well is the proper balance of butter, sugar, and baking time—everything you just did in these steps!
Pro Tips For Making 3 Day Cookie
- Cream Butter Slowly: I learned this the hard way—dumping cold butter into sugar at once makes a greasy mess. Use a stand mixer (or hand mixer) and add butter one cube at a time, letting it fully incorporate before adding the next. The dough stays smoother, and you’ll avoid that sad, lumpy texture that ruins everything.
- Measure Brown Sugar Right: Packed brown sugar isn’t just “a cup”—it’s firmly packed. Use a spoon to press it down into the measuring cup, then level it off. Too much air = cookies that spread like pancakes. (Yes, I’ve seen it happen.)
- Chill Dough Twice: The first chill (overnight) is non-negotiable, but I skip the second one—big mistake. Take the dough out of the fridge 10 minutes before baking to soften, then pop it back in the fridge for another 15 minutes. This keeps the edges crisp without burning the centers.
- Use Room-Temp Eggs: Cold eggs make the dough fight you. Take eggs out of the fridge at least 30 minutes before mixing—warmer eggs blend in better and help the dough hold its shape. (I know, I know, but trust the process.)
Perfect pairings for this recipe
Classic Milk Pairing
Warm whole milk is my go-to pairing for these cookies—its creamy richness complements the buttery crunch without overpowering the flavors. Heat 1 cup to 160°F and serve in small mugs alongside the cookies.
The slight warmth enhances the vanilla notes in the dough while the milk’s natural sweetness balances the caramelized edges. 🥛
Coffee Contrast
A strong dark roast coffee cuts through the richness beautifully, especially if you prefer your cookies slightly crispy. I recommend a French press brew with 2 tablespoons finely ground beans per 6 ounces of water.
The bold, slightly bitter notes create a perfect contrast to the sweet, buttery cookies. For a modern twist, try a cold brew with a splash of vanilla syrup for an iced pairing.
Spiced Tea Harmony
Herbal or spiced teas elevate these cookies to afternoon treat status. A chamomile-chai blend (steep 1 chai tea bag and 1 chamomile bag in 8 ounces hot water for 5 minutes) adds warmth and floral notes that pair wonderfully with the nutty walnuts.
For a festive touch, serve with mulled apple cider during colder months—the cinnamon and apple flavors complement the cookie’s caramelized sugar perfectly.
Wine Pairing Surprise
While cookies and wine aren’t a traditional pairing, a semi-sweet Moscato or Riesling works surprisingly well. The 10-12% alcohol content in these wines cleanses the palate between bites, while their fruity notes mirror the chocolate chips.
For a more robust option, try a tawny Port—its nutty, caramelized flavors enhance the cookie’s depth. Serve at 55-60°F for optimal sipping.
Seasonal Variations
Summer calls for sparkling lemonade—mix 1 cup cold lemonade with ½ cup sparkling water and a squeeze of fresh lemon. The acidity brightens the cookies’ richness.
In winter, a hot buttered rum (melt 1 tbsp butter into 1 cup spiced rum with ½ cup hot water) adds warmth and depth. For holidays, eggnog (homemade with 2% milk and 1 egg yolk) creates a creamy, festive contrast to the crispy edges.
Nutrition facts
Frequently asked questions
Why do these cookies need 3 days of chilling?
The 3-day chilling is what creates that legendary texture—it allows the flour to fully hydrate and the butter to crystallize properly. This results in cookies with crispy edges and a soft, chewy center that stays perfect for days. The longer rest time also deepens the flavor through natural sugar caramelization.
Can I make these cookies without nuts or chocolate chips?
This recipe works perfectly as a classic butter cookie—just omit the nuts and chocolate chips. For a different twist, try adding white chocolate chips or candied ginger instead. The dough’s rich buttery flavor shines even without mix-ins.
How do I prevent my cookies from spreading too much?
Use cold butter (straight from the fridge) and chill the dough for 30 extra minutes before baking if needed. Scoop dough balls with a cookie scoop or tablespoon, then flatten them slightly on the baking sheet. The 350°F oven temperature is key—any hotter and they’ll spread more.
Can I bake half the dough now and save the rest for later?
Yes! Shape the dough into logs, wrap tightly in plastic, and store in the fridge for up to 1 week or freeze for 3 months. When ready to bake, let the logs sit at room temperature for 30 minutes before slicing. The dough keeps beautifully and bakes just as well later.
Why do my cookies taste better after sitting out?
The 3-day resting period lets the moisture redistribute, creating that perfect crispy-chewy balance. As they sit at room temperature, the edges re-crisp slightly while the centers remain tender. This is why these cookies taste even better the next day! The science of baking at its finest.

- Pea Soup Instant Pot Recipe: Velvety Green Smoothness in 20 Minutes - November 1, 2026
- Pork Loin Pulled Pork Crock Pot Recipe: Slow-Smoked Tenderness With Zero Dryness - November 1, 2026
- Baked Potatoes in Crock Pot Recipe: Buttery Interiors and Crispy Top Magic - November 1, 2026