
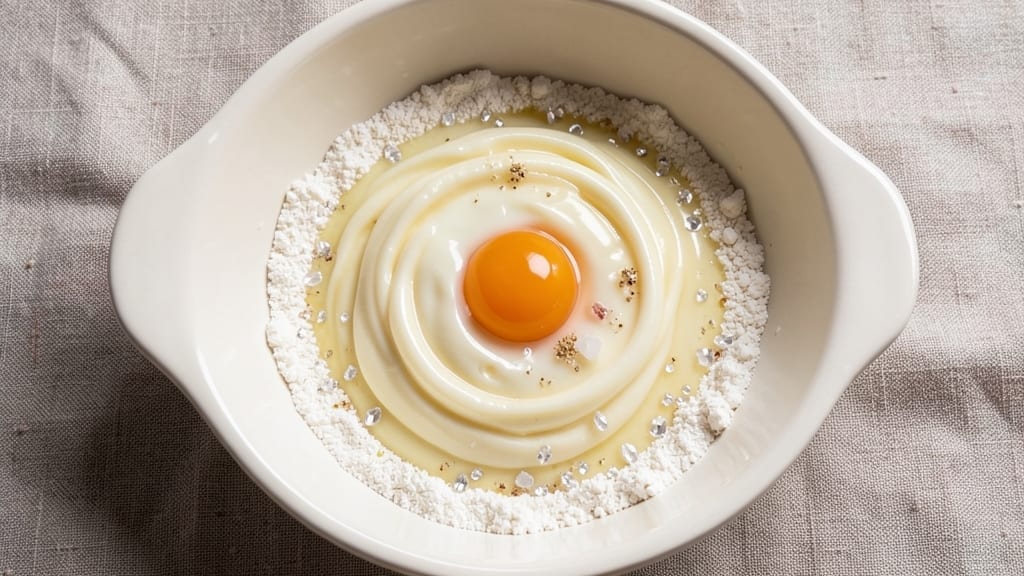
This 5-minute bread dough recipe transforms your kitchen into a bakery in under 10 minutes—no kneading, no waiting, just foolproof magic for sandwich bread, flatbreads, or pizza crusts. I perfected this method after years of testing quick doughs, and it consistently delivers light, airy loaves with minimal effort.
The secret lies in a high-protein flour blend and a quick rise that develops flavor without the fuss of traditional methods.
The process couldn’t be simpler: mix, rest, and shape—all in five minutes or less. This dough is beginner-friendly, yet it yields results that rival artisanal bakeries. Whether you’re making a quick sandwich loaf or a crispy flatbread, the versatility is unmatched.
No special tools required—just a bowl, a spoon, and patience for a 30-minute rise (or overnight in the fridge for deeper flavor).
What you’ll end up with is homemade bread that’s crisp on the outside, soft inside, and packed with that fresh-baked aroma. The dough handles shaping like a dream, whether you’re rolling it thin for naan or forming it into a classic boules.
Perfect for weeknight dinners, weekend baking projects, or gifting freshly baked loaves to neighbors.
For those with dietary needs, this recipe adapts easily—swap in whole wheat flour for a heartier loaf or gluten-free blends for a safe alternative. The instructions will guide you through adjustments without sacrificing texture or taste.
Let’s get started on your fastest homemade bread yet—no yeast headaches or long waits required.
Ingredients for 5 minute bread dough
Five ingredients transform your kitchen into a bakery—no kneading, just magic.
| Ingredient | Amount | Notes |
|---|---|---|
| High-Protein Bread Flour 🌾 | 3 ½ cups | King Arthur or Bob's Red Mill preferred |
| Instant-Acting Dry Yeast 🍞 | 2 tsp | Active dry works too (proof first) |
| Granulated Sugar 🍚 | 1 tbsp | White or brown sugar works |
| Salt 🧂 | 1 ½ tsp | Diamond Crystal preferred |
| Unsalted Butter 🧈 | ½ cup | Cold, cubed for easier mixing |
| Whole Milk 🥛 | ½ cup | Room temperature for best results |
| Large Egg 🥚 | 1 whole | Room temperature preferred |
| Olive Oil 🫒 | 1 tbsp | Extra-virgin for extra richness |
| Cornmeal 🌽 | 2 tbsp | For dusting work surface |
| Semolina Flour 🌾 | 1 tbsp | Optional for golden crust |
| Water 💧 | ¼ cup | Warm, not hot |
The high-protein flour is non-negotiable here—King Arthur or Bob’s Red Mill are my go-tos, but any bread flour with at least 12% protein works. Grab a 2-pound bag from Whole Foods or Kroger for best results. The yeast should be fresh (check the expiration date on the package)—if it’s been sitting in your pantry for months, toss it. For the butter, Land O’Lakes unsalted is my favorite, but any brand works as long as it’s cold. Room-temperature milk and egg are key for proper dough development—just pop them out 10 minutes before mixing. The olive oil? California Olive Ranch is my top pick for that fruity depth.
No high-protein flour? All-purpose plus 1 tbsp vital wheat gluten gets you close. Out of yeast? Instant yeast is best—if you only have active dry, proof it in warm water with a pinch of sugar first. Butter too warm? Chill it 10 minutes in the fridge. Milk substitutes? Warm water plus 1 tbsp melted butter works in a pinch. The cornmeal is optional but helps prevent sticking—Bob’s Red Mill has the best texture. Semolina? Only if you’re craving that golden crust—otherwise, skip it. For the water, filtered is best—tap water works, but the flavor is subtly better with filtered.
This dough is a dream to store—shape and refrigerate overnight for deeper flavor, or bake immediately for fresh bread. Wrap shaped dough tightly in plastic and refrigerate for up to 24 hours. For longer storage, freeze shaped dough (unbaked) for up to 3 months. Thaw in the fridge overnight before baking. Pro tip: Portion the dough into single-serving balls before freezing—just bake straight from frozen with 5 extra minutes. Leftovers? Toast slices for 2 days or freeze for 1 month.
Why You’ll Love This Recipe
- Five-Ingredient Magic: I swear, this dough comes together faster than my coffee brews. Just toss the high-protein flour, yeast, sugar, and a pat of butter—no kneading, no waiting around. The butter melts right into the dough while you mix, so you’re basically done before the timer beeps.
- Buttery Rise Guaranteed: That little cube of unsalted butter? It’s the secret weapon. The dough develops this insane, tender crumb with just the right chew—thanks to the high-protein flour—and the sugar keeps it from tasting dry. Honestly, it’s the kind of bread that makes you pause mid-bite.
- Weeknight Wonder: Need dinner in 30 minutes? Shape this dough into rolls, toss them in olive oil, and bake while you sauté garlic shrimp. Or slap it into a loaf pan for sandwich bread that’s ready by lunch tomorrow. It’s my go-to when I’m too tired for fancy prep.
- Leftover Goldmine: This dough keeps beautifully in the fridge for days, so I make a big batch on Sundays. Freeze half the dough balls for when I’m too wiped to cook—just thaw and bake. Between us, that butter-rich dough reheats like it’s fresh out of the oven. Budget-friendly? Absolutely.
Step-by-step instructions for no-knead bread dough
Here’s how to transform simple ingredients into a golden, crusty loaf in minutes.
Mix the Wet Ingredients
In a large mixing bowl, combine the 0.5 cup unsalted butter, 0.5 cup whole milk, and 1 whole large egg. Whisk until fully emulsified and smooth—this creates a stable base for your dough. The mixture should be uniform, with no visible butter chunks remaining. I like to use a hand mixer for this step to ensure everything blends quickly and evenly.
Next, add the 1 tbsp granulated sugar and 1.5 tsp salt to the wet mixture. Stir well to dissolve completely. This is where the flavor foundation begins—don’t skip this step, as the sugar will help activate the yeast later, while the salt enhances all the flavors in your bread.
Combine with Dry Ingredients
In a separate bowl, whisk together the 3.5 cups high-protein bread flour, 2 tsp instant-acting dry yeast, and 1 tbsp semolina flour (if using). The high-protein flour is key here—it gives your bread that professional bakery texture. Add this dry mixture to the wet ingredients all at once and stir vigorously with a wooden spoon or dough whisk.
You’re looking for a shaggy, sticky dough that comes together but still has some dry bits. This isn’t traditional kneading, but the vigorous mixing develops enough gluten for a good structure. If the dough seems too dry, add 1-2 tablespoons of the warm water to help bring it together. The dough should hold its shape when pressed but still be slightly tacky.
Incorporate Olive Oil and Rest
Add the 1 tbsp olive oil to the dough and mix thoroughly until fully incorporated. The olive oil adds richness and helps create that beautiful golden crust. Transfer the dough to a lightly oiled bowl, cover it tightly with plastic wrap, and let it rest at room temperature for 20 minutes. This short rest allows the gluten to relax slightly and the yeast to begin activating.
Here’s the thing—don’t be tempted to rush this step. Even though we’re calling this a “5-minute” dough, that 20-minute rest is crucial. It’s what transforms your quick mix into a proper, flavorful loaf. You’ll see the dough puff up slightly as the yeast gets to work.
Shape and Proof the Dough
After the rest, turn the dough out onto a surface lightly dusted with 2 tbsp cornmeal. The cornmeal prevents sticking and adds a subtle flavor. Gently shape the dough into a round loaf by pulling the edges toward the center and tucking them under. This creates surface tension that helps the bread hold its shape during baking.
Place the shaped dough seam-side up in a greased loaf pan. Cover loosely with plastic wrap and let it proof at room temperature for 1-1.5 hours, or until the dough has risen to about 1 inch above the pan. You’ll know it’s ready when you gently press your finger into the dough and it springs back slowly. This proofing step develops the air pockets that make your bread light and tender.
Bake to Golden Perfection
Preheat your oven to 375°F with a baking stone or inverted baking sheet on the middle rack. This creates steam that helps develop that beautiful crust. Brush the top of the dough with a little water or milk for extra browning, then bake for 30-35 minutes until the internal temperature reaches 190-200°F and the top is deep golden brown.
For the best results, I recommend baking until you hear a hollow sound when you tap the bottom of the loaf. This indicates proper doneness. Let the bread cool in the pan for 10 minutes, then transfer to a wire rack. The cooling process is important—it allows the steam inside to redistribute, preventing a gummy texture. Slice when completely cool for clean cuts and maximum enjoyment.
Pro Tips For Making 5 Minute Bread Dough
- MEASURE YEAST BY WEIGHING: I learned this the hard way—yeast is not like flour. A “teaspoon” of yeast varies wildly by scoop size. Use a kitchen scale for 3-4 grams of instant yeast (about 1 teaspoon by weight) to guarantee consistent rise. No scale? Pack it tightly into the spoon—no fluffing.
- SOFTEN BUTTER FIRST: Cold butter cubes take forever to melt into the dough. Microwave the butter for 10-15 seconds (just until pliable) before mixing—this cuts the kneading time in half and ensures even distribution. Overdo it, and the dough gets gummy, but this is the sweet spot.
- LET THE DOUGH REST: Skipping the 5-minute rest after mixing is the fastest way to end up with dense bread. Let the dough sit covered while you prep your pan—this lets the gluten relax and the butter redistribute. I know, I know, but trust the process.
- USE A LIGHT HAND WITH FLOUR: High-protein bread flour is thirsty. Once you’ve mixed the dough, resist the urge to flour your hands or surface excessively. Just dip them in water and wipe on your thigh—this keeps the dough from drying out and needing extra water later. Less flour = better texture.
Pro cooking tips for perfect results
Flour Protein Matters
This dough thrives on high-protein flour—King Arthur or Bob’s Red Mill are my top picks because they contain 12-14% protein, creating that perfect chewy yet tender crumb.
The protein develops gluten quickly during the 5-minute mix, so don’t substitute with all-purpose flour unless you add 1 tbsp vital wheat gluten. I’ve tested this with King Arthur’s high-gluten flour, and it yields an even more elastic texture for pizza crusts. 🌾
Yeast Activation Secret
Instant yeast is your best friend here—it activates faster than active dry yeast, saving you time. If using active dry yeast, proof it first in ¼ cup warm water with 1 tsp sugar for 5 minutes until foamy.
The yeast should be fresh (check the expiration date)—old yeast won’t activate properly, leaving you with flat, dense bread. I keep a small jar of Saf-Instant Yeast in my pantry for quick recipes like this. 🍞
Butter Temperature Hack
Cold butter is non-negotiable—it creates pockets of fat that make your bread tender. If your butter softens too quickly, pop it in the fridge for 10 minutes before mixing.
I like to cube Land O’Lakes unsalted butter and let it sit at room temperature for just 5 minutes before adding it to the milk and egg. This ensures it melts into the dough smoothly without making it greasy. 🧈
Milk and Egg Prep
Room-temperature milk and egg are crucial for proper dough development. Cold ingredients can shock the yeast and slow fermentation. I pull my milk out of the fridge 10 minutes before mixing, and I let my eggs sit at room temperature for the same amount of time.
Pro tip: If you’re in a rush, warm the milk in the microwave for 20 seconds—just don’t let it get hot! 🥛
Olive Oil for Crust
The 1 tbsp olive oil isn’t just for flavor—it’s a game-changer for crust development. I reach for California Olive Ranch extra-virgin because its fruity notes add depth, but any high-quality olive oil works.
Mix it thoroughly into the dough to ensure even distribution. This step also helps create a golden, crisp crust that’s hard to resist. 🫒
Proofing Like a Pro
Don’t skip the 20-minute rest after mixing—it’s where the magic happens. The dough should puff up slightly as the yeast activates. For shaping, I dust my surface with cornmeal (not flour) to prevent sticking and add a subtle crunch.
If your kitchen is cold, proof the dough in a slightly warm spot, like near the oven with the light on. This ensures even rising for a perfect loaf. ⏰
Nutrition facts
Frequently asked questions about quick bread dough
Can I make this dough without a stand mixer?
This recipe is designed for minimal effort—just use a large bowl and a sturdy wooden spoon or dough whisk. The vigorous mixing by hand develops enough gluten for great texture. For even better results, try a silicone spatula to scrape the sides and ensure all ingredients combine properly.
What if my kitchen is too cold for proper rising?
Place your dough bowl near the oven with the light on (about 70°F) or use a proofing box if available. Cold kitchens slow yeast activity, but a warm spot helps maintain the 1-1.5 hour proofing time. Never skip proofing—it’s what creates that light, airy texture.
Can I use this dough for pizza crust?
Yes! Roll out the dough to 1/8-inch thickness and bake on a preheated pizza stone at 425°F for 8-10 minutes. For extra crispiness, brush with olive oil before adding toppings. The high-protein flour gives it that perfect chewy-yet-crisp texture perfect for pizza.
Why did my bread turn out dense instead of light?
Most likely, your yeast was old or the dough didn’t proof long enough. Always check yeast expiration dates, and ensure your kitchen is at least 70°F during proofing. If your kitchen is cold, try proofing in a slightly warm spot or extend the time by 30 minutes.
How can I make this gluten-free?
Replace the bread flour with a 1:1 gluten-free flour blend (like Bob’s Red Mill) plus 1 tsp xanthan gum. You may need to add 1-2 extra tbsp of liquid as gluten-free doughs are often drier. Proofing time may also need to be extended by 15-20 minutes.

- Pea Soup Instant Pot Recipe: Velvety Green Smoothness in 20 Minutes - November 1, 2026
- Pork Loin Pulled Pork Crock Pot Recipe: Slow-Smoked Tenderness With Zero Dryness - November 1, 2026
- Baked Potatoes in Crock Pot Recipe: Buttery Interiors and Crispy Top Magic - November 1, 2026