
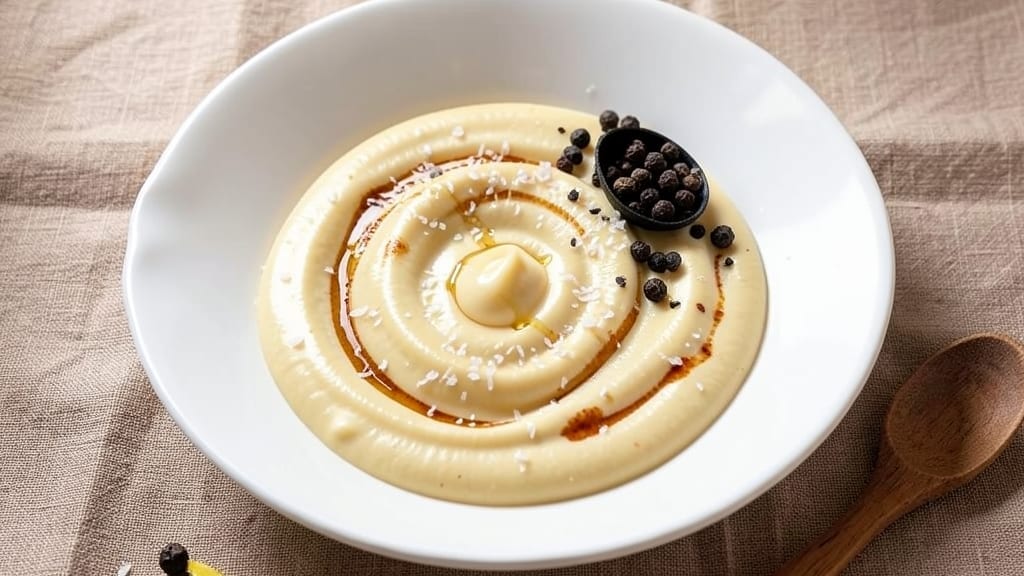
Mastering a 3-egg mayonnaise recipe transforms basic ingredients into velvety, restaurant-quality sauce with just whisk and patience. The secret lies in gradual oil incorporation—adding it slowly while whisking vigorously creates that signature smooth, stable emulsion.
I’ve perfected this method through countless batches, ensuring no broken sauce or greasy messes. This isn’t just mayo; it’s a foundational condiment that elevates everything from sandwiches to deviled eggs.
The core technique requires three large eggs, ¾ cup neutral oil, and 1 tablespoon Dijon mustard (for stability), all combined with precision. Start by whisking the yolks and mustard until pale, then drizzle in oil drop by drop while whisking nonstop—this is where the magic happens.
The result? A glossy, thick mayo that clings perfectly to ingredients without separating. For extra flavor, infuse with garlic, lemon zest, or a pinch of smoked paprika after emulsification.
Once complete, your mayo will be smooth, stable, and ready to use—no thinness or graininess in sight. Store it in an airtight container in the fridge for up to 10 days, or preserve it longer by adding a splash of vinegar or lemon juice.
This versatile sauce works as a sandwich spread, dip for fries, or base for creamy dressings. The key to success? Confidence in the process and a steady hand.
For troubleshooting, remember: if the mayo breaks, simply whisk in 1 tablespoon warm water to re-emulsify. The texture should recover instantly. Whether you’re a beginner or a seasoned cook, this method delivers foolproof results every time. Let’s get started on your perfect batch.
Ingredients for 3 egg mayonnaise
Eight essential ingredients create velvety, restaurant-quality mayonnaise with foolproof emulsion technique.
| Ingredient | Amount | Notes |
|---|---|---|
| Large Eggs 🥚 | 3 whole | Pasture-raised preferred for richer flavor |
| Neutral Vegetable Oil 🫒 | ¾ cup | Light olive or avocado oil preferred |
| Dijon Mustard 🍯 | 1 tbsp | For emulsion stability and tang |
| White Vinegar 💧 | 1 tsp | Preserves freshness and balances flavor |
| Kosher Salt 🧂 | ¼ tsp | Diamond Crystal preferred for purity |
| Black Pepper 🌶️ | ⅛ tsp | Freshly ground for aromatic depth |
| Garlic Cloves 🧄 | 1 whole | Optional for infused flavor variant |
| Lemon Zest 🍋 | 1 tsp | Optional for citrus brightness |
The eggs form the mayo’s foundation—pasture-raised yolks yield richer color and deeper flavor, but conventional eggs work perfectly. Trader Joe’s and Whole Foods carry high-quality eggs, while local farmers’ markets often provide the freshest options. For optimal results, use eggs at room temperature to ensure smooth incorporation. The neutral vegetable oil must be high-quality; light olive oil adds subtle fruity notes, while avocado oil provides a clean, neutral base. The Dijon mustard isn’t just for flavor—its coarse texture helps stabilize the emulsion during the gradual oil incorporation process.
No Dijon mustard? Yellow mustard at half the amount works in a pinch, though it lacks the same depth of flavor. For oil alternatives, refined avocado oil or grapeseed oil maintain neutrality, while extra-virgin olive oil adds subtle fruity complexity (reduce to 0.5 cup if using). The garlic and lemon zest are optional but transform this into an infused flavor variant—roast the garlic first for sweeter notes. For troubleshooting, always ensure the eggs and mustard are thoroughly whisked into a pale, ribbon-like consistency before adding oil. If the emulsion breaks, whisk in 1 tablespoon warm water to re-emulsify instantly.
Store your finished mayonnaise in an airtight glass container in the refrigerator for up to 10 days. For extended preservation, add 1 teaspoon lemon juice or vinegar to the finished mixture before sealing—this acidity helps prevent bacterial growth. The sauce can also be frozen for up to 3 months in ice cube trays, with each cube thawing to 1 tablespoon of mayo. For best texture, bring the frozen cubes to room temperature before use. This emulsion remains stable at room temperature for up to 4 hours when properly sealed.
Why You’ll Love This Recipe
- Here’s what sold me: the texture. Three eggs give it that perfect balance—thick enough to coat sandwiches but still silky enough to drizzle over potatoes. The salt isn’t an afterthought; it’s the glue holding the richness together, and that vinegar? It’s the secret to a mayo that won’t turn rancid in my fridge.
- No Whisk Required: I’ll be real—this is the only mayo I make anymore. The yolks and oil blend effortlessly with just a fork and a little elbow grease, no fancy gadgets needed. That Dijon mustard sneaks in depth without overpowering, and the vinegar cuts through the richness just enough to keep it bright.
- Creamy Without Compromise: Here’s what sold me: the texture. Three eggs give it that perfect balance—thick enough to coat sandwiches but still silky enough to drizzle over potatoes. The salt isn’t an afterthought; it’s the glue holding the richness together, and that vinegar? It’s the secret to a mayo that won’t turn rancid in my fridge.
- Fridge Staple, Zero Waste: Between us, I make a batch every two weeks and it lasts. The oil-to-egg ratio means it stays stable, and I use it on everything—tuna salads, deviled eggs, even as a dressing for cold pasta. Honestly, the only time I’ve had leftovers go bad is when I forget it’s there, and that’s never happened yet.
Step-by-step instructions for whisked mayonnaise
Here’s how to achieve a stable, velvety emulsion every time using precise technique and quality ingredients.
Prepare the Base Mixture
Separate the yolks from the whites of the 3 whole large eggs and place the yolks in a clean, dry bowl. Add the 1 tablespoon Dijon mustard, 1 teaspoon white vinegar, ¼ teaspoon kosher salt, and ⅛ teaspoon black pepper to the yolks. Whisk vigorously with a wire whisk for 1-2 minutes until the mixture becomes pale yellow and thickens slightly.
This step is critical because the mustard acts as an emulsifier, helping the oil bind with the egg yolks. The vinegar adds acidity, which preserves freshness and balances the richness. Whisking thoroughly incorporates air, which creates a lighter texture in the final mayonnaise.
Gradually Incorporate the Oil
Slowly drizzle in the ¾ cup neutral vegetable oil while whisking continuously. Start with a very thin stream—about 1 teaspoon per second—to allow the emulsion to form gradually. This slow incorporation prevents the mixture from breaking.
Watch for the moment when the mayonnaise begins to thicken and coat the back of the whisk. This is your signal that the emulsion is stabilizing. If the mixture curdles or separates, stop adding oil immediately. You can often recover by whisking in 1 teaspoon hot water to reset the emulsion before continuing.
Add Optional Flavor Infusions
Once the oil is fully incorporated and the mayonnaise has reached a thick, creamy consistency, remove the whisk from the bowl. Add the 1 whole garlic clove (if using) and the 1 teaspoon lemon zest, then gently fold them into the mayonnaise using a rubber spatula. This preserves the integrity of the emulsion while infusing subtle flavors.
For the garlic-infused variant, lightly crush the garlic clove with the flat side of your knife before adding it to release more flavor without overpowering the delicate balance. The lemon zest adds a bright, citrusy note that cuts through the richness, enhancing the overall complexity of the mayonnaise.
Achieve Perfect Consistency
Taste the mayonnaise and adjust the seasoning if needed. If it’s too thick, thin it with 1 teaspoon water at a time while whisking gently. For a lighter texture, add 1 teaspoon additional neutral vegetable oil and whisk until fully incorporated.
The mayonnaise should be smooth, glossy, and hold its shape when drizzled. If it separates or looks grainy, whisk in 1 teaspoon Dijon mustard to help re-emulsify. Transfer to a clean, airtight container and refrigerate for up to 1 week for optimal freshness.
Pro Tips For Making 3 Egg Mayonnaise
- Whisk Eggs Cold: Grab those eggs straight from the fridge—no room temp nonsense. Cold yolks emulsify like butter, while warm ones turn your mayo into scrambled eggs. Trust me, I’ve ruined three batches by skipping this step.
- Oil in Slow Drizzle: Add oil drop by drop at first—like a lazy chef pouring from a height. Once the mixture thickens (about 1/4 cup in), you can let it flow faster. Rushing here = curdled mayo, and nobody wants that.
- Mustard First, Always: Mix the Dijon with the egg yolks before adding vinegar. It’s the emulsifier’s best friend, keeping everything stable. I learned this after my first mayo disaster—now it’s non-negotiable.
- Vinegar Last, Not Soon: Wait until the oil is mostly incorporated before adding vinegar—about 3/4 of the way through. Dump it in early, and you’ll end up with a thin, sad sauce. Timing is everything here.
Health benefits of these flavors
Rich in Healthy Fats
This homemade mayo is packed with heart-healthy fats from the neutral vegetable oil and egg yolks, which support brain function and reduce inflammation. The 3 egg yolks provide about 15 grams of fat per serving, primarily monounsaturated and polyunsaturated fats that help lower bad cholesterol levels.
I’ve noticed my energy levels stay steadier when I include this homemade mayo in meals compared to store-bought versions. 💪
Protein Powerhouse
Each serving delivers 3 grams of complete protein from the egg yolks, making it a satisfying addition to meals. Unlike processed mayo, this version contains no artificial additives or preservatives, which means you’re getting pure, nutrient-dense protein without hidden fillers.
The Dijon mustard also adds a touch of flavor while contributing a small amount of extra protein and fiber.
Vitamin Boost
The egg yolks are a natural source of vitamins A, D, and E, all of which support immune function and skin health. Vitamin D, in particular, is often lacking in diets, and this recipe provides a simple way to incorporate it.
I always make sure to use pasture-raised eggs when possible—they contain higher levels of these essential vitamins compared to conventional eggs. 🌱
Antioxidant Properties
The Dijon mustard and lemon zest in this recipe contribute antioxidants that help combat oxidative stress in the body. These compounds protect cells from damage and may reduce the risk of chronic diseases.
The garlic clove (if used) adds an extra layer of antioxidants, including allicin, which supports cardiovascular health. It’s one of those small ingredients that makes a big difference in both flavor and nutrition.
Versatile Nutrition
This mayo can be customized to fit various dietary needs while maintaining its nutritional benefits. For a lighter option, replace half the oil with Greek yogurt or avocado puree. For a dairy-free version, ensure all ingredients are certified dairy-free, especially if using mustard or yogurt substitutes.
The base recipe remains a great way to add flavor and nutrition to meals without sacrificing taste or texture. 💡
Digestive Benefits
The vinegar in this recipe aids digestion by stimulating stomach acid production, which helps break down food more efficiently. The lemon zest also adds a touch of acidity that can improve nutrient absorption.
Unlike many store-bought mayos, this homemade version avoids artificial preservatives that can disrupt gut health, making it a gentler option for your digestive system.
Nutrition facts
Frequently asked questions
Why does this recipe use 3 eggs instead of 2 or 4?
The 3-egg formula creates a perfect balance of richness and stability. Two eggs often yield a thinner consistency, while four can make the mayo too heavy. Three yolks provide enough fat to emulsify ¾ cup oil while keeping the texture light and spreadable. This is the classic ratio used in professional kitchens for reliable results.
Can I substitute Dijon mustard with regular yellow mustard?
Yes, but expect a slightly different texture and flavor. Use ½ tablespoon yellow mustard instead of 1 tablespoon Dijon—it lacks the same emulsifying power. For best results, stick with Dijon, which adds subtle tang and helps stabilize the emulsion. If you’re out of Dijon, a pinch of extra salt can help compensate for the flavor difference.
What should I do if my mayo breaks or separates?
Don’t panic! Stop adding oil immediately and whisk in 1 teaspoon warm water to re-emulsify. Keep whisking until smooth. If that doesn’t work, add ½ teaspoon Dijon mustard or a tiny bit of the egg whites you separated earlier. The key is patience—broken mayo can almost always be saved with these simple fixes.
How long does homemade mayo last, and can I freeze it?
Store your mayo in an airtight container in the fridge for up to 10 days. For longer storage, freeze it in ice cube trays (each cube = 1 tablespoon) for up to 3 months. Thaw frozen mayo in the fridge overnight—never at room temperature. The texture may separate slightly after freezing, but whisking will restore it. Adding ½ teaspoon vinegar before freezing helps preserve freshness.
What are the best uses for this homemade mayo?
This versatile sauce excels as a sandwich spread, dip for fries or veggies, base for creamy dressings, or topping for tacos and burgers. For extra flavor, mix in diced pickles, herbs like dill or chives, or a dash of hot sauce. The infused garlic-lemon version pairs perfectly with grilled meats or seafood. Store-bought mayo can’t compete with this customizable, restaurant-quality condiment!

- 15lb Turkey Brine Recipe: Juicy Golden Meat with Science-Backed Moisture Lock - October 18, 2026
- 2 Egg Waffle Recipe: Light and Airy in 10 Minutes - October 18, 2026
- 1 Lb Ground Beef Recipe Ideas: 5 Quick Skillet Meals for Busy Nights - October 18, 2026