
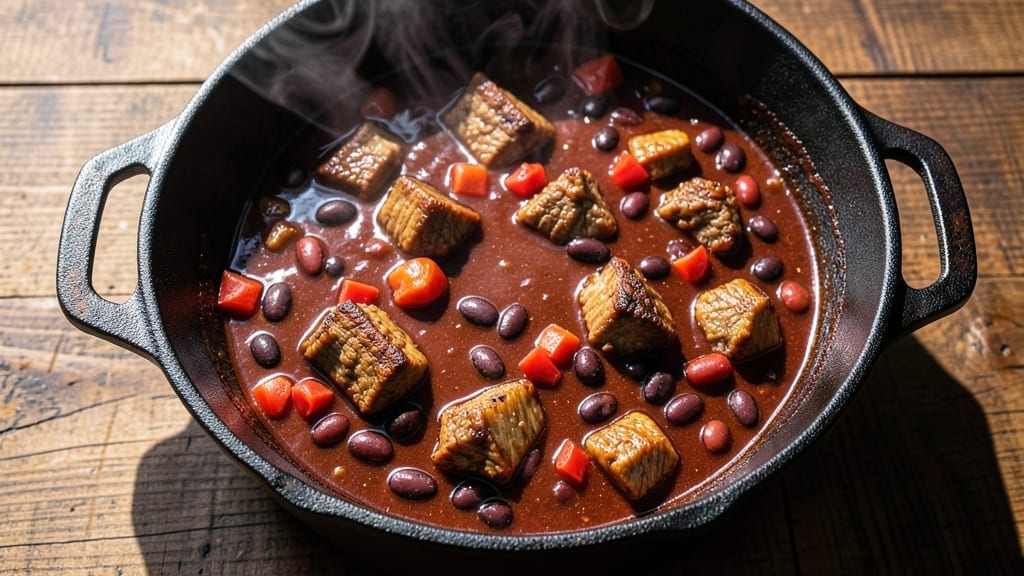
This 3-gallon chili recipe delivers the perfect balance of smoky, spicy, and hearty flavors that feed a crowd without sacrificing depth. The secret lies in slow-simmered beef, rich broth, and a carefully layered spice blend that develops complex flavors over time.
I’ve perfected this recipe for gatherings where one pot becomes the centerpiece of the meal.
What sets this chili apart is the technique of browning the meat in batches to create a deep, caramelized foundation before adding beans and tomatoes. This step transforms ordinary chili into something restaurant-quality, with layers of flavor that build as it simmers.
The recipe scales effortlessly to exactly 3 gallons, ensuring every spoonful is packed with tender beef, hearty beans, and aromatic spices.
By the time you serve this chili, you’ll have a pot of rich, velvety goodness that’s perfect for game day, family dinners, or community events. The slow cooking process allows flavors to meld beautifully, while the large batch ensures everyone gets seconds.
This isn’t just chili—it’s a comforting, crowd-pleasing masterpiece that comes together in one pot.
The beauty of this recipe is its versatility—adjust the spice level to suit your crowd, or add toppings like shredded cheese, sour cream, or fresh jalapeños for extra flair.
Whether you’re feeding a hungry football team or hosting a potluck, this chili delivers the perfect combination of hearty satisfaction and bold flavor.
Ingredients for 3 gallon chili
Six pounds of beef, three gallons of flavor—this is your crowd-pleasing chili starter kit.
| Ingredient | Amount | Notes |
|---|---|---|
| Chuck Roast 🥩 | 6 lb | Trimmed of excess fat, cut into chunks |
| Yellow Onions 🧅 | 3 whole | Medium size, diced |
| Garlic Cloves 🧄 | 12 cloves | Fresh, minced |
| Canned Kidney Beans 🫘 | 6 cans | 15 oz each, drained |
| Canned Black Beans 🫘 | 6 cans | 15 oz each, drained |
| Canned Diced Tomatoes 🍅 | 8 cans | 14.5 oz each, fire-roasted preferred |
| Beef Broth 💧 | 8 cups | Low-sodium preferred |
| Tomato Paste 🍅 | 1 cup | Squeeze tube or canned |
| Chili Powder 🌶️ | ½ cup | Medium heat preferred |
| Ground Cumin 🌿 | ¼ cup | Toasted for depth |
| Dried Oregano 🍃 | 2 tbsp | Mexican oregano if available |
| Smoked Paprika 🌶️ | 2 tbsp | For smoky depth |
| Cayenne Pepper 🔥 | 1 tbsp | Adjust for heat preference |
| Dark Brown Sugar 🍚 | ¼ cup | Enhances caramelization |
| Salt 🧂 | 2 tbsp | Kosher or sea salt |
| Black Pepper 🌶️ | 1 tbsp | Freshly ground preferred |
| Olive Oil 🫒 | ½ cup | For browning meat |
The beef is non-negotiable here. Chuck roast from the butcher counter (not pre-cut) gives you the best marbling, but Costco’s pre-cubed chuck works in a pinch. Look for bright red, not grayish meat—Trader Joe’s usually has good quality. If you’re buying a whole roast, cut it into 1.5-inch chunks yourself. The onions? Yellow or red both work, but yellow adds a touch more sweetness. Garlic? Fresh is a must—jarred loses its punch fast. For the beans, low-sodium brands like Great Value save you from extra salt later.
No chuck roast? Brisket or short ribs work too—just cut them smaller. Short on canned tomatoes? Fresh tomatoes blended with their juice (about 8 cups) will do, but fire-roasted canned is the secret weapon. The tomato paste can be the squeeze tube kind—Trader Joe’s carries them, and they’re perfect for this scale. Running low on chili powder? Mix smoked paprika + cumin + cayenne in a 3:1:1 ratio. The spices are where the magic happens, so don’t skimp—Penzeys or Spicewalla if you want to splurge, but bulk bins work too.
This chili tastes even better the next day—plan ahead. Store in a large stockpot or Dutch oven (6-8 quart minimum) in the fridge for up to 5 days. For freezing, portion into 2-gallon containers—thaws perfectly in the fridge overnight. The beans and tomatoes can be prepped ahead too—drain and rinse them first to save space. Want to make it even easier? Brown the meat and prep the spices the night before, then just dump everything in the morning. Game day just got a whole lot simpler.
Why You’ll Love This Recipe
- One-Pot Wonder: I swear by this chili because it’s literally dump-and-go after the initial sear. Chuck roast breaks down into tender shreds while onions caramelize—no stirring every five minutes like some recipes demand.
- Deep, Slow-Braised Richness: That long simmer? Magic. The chuck roast melts into the broth, soaking up the garlic and spices until every spoonful has layers of savory, smoky, and just a hint of sweet from the onions. Honestly, the beans are just the perfect soft contrast.
- Leftovers That Don’t Suck: Between us, most chili gets sad after day two. Not this one. The flavors actually deepened after three days in the fridge—perfect for quick lunches or freezing in portions. My kids beg for it cold straight from the jar.
- Budget Crowd-Pleaser: Three gallons for a fraction of the cost of takeout? Yes, please. Chuck roast stretches for miles, beans add bulk without breaking the bank, and it feeds a dozen without stress. (Yes, even on a Tuesday night.)
Step-by-step instructions for 3-Gallon chili
Here’s how to build a chili so rich and flavorful it’ll disappear faster than you can say “second serving.”
Brown the Chuck Roast for Deep Flavor
Heat a large stockpot or Dutch oven over medium-high heat. Add the 0.5 cup olive oil and let it shimmer for 30 seconds. Working in batches if needed, add the 6 lb chuck roast cut into chunks and brown on all sides—this takes about 10-12 minutes total. You want deep golden-brown color and crispy edges on each piece.
Don’t rush this step. The Maillard reaction happening here creates the foundation of your chili’s flavor. If the pot gets too crowded, reduce to medium heat to prevent steaming instead of browning. Transfer the browned meat to a plate and set aside.
Build the Spice Base with Onions and Garlic
In the same pot, add the 3 whole yellow onions that have been diced. Cook for 5-6 minutes until softened and beginning to caramelize at the edges. Stir occasionally to prevent sticking. Add the 12 cloves minced garlic and cook for another 30 seconds until fragrant—this is where the aromatic magic happens.
I like to press the garlic cloves with the back of a spoon first to release their oils before mincing. This ensures you get maximum flavor from every clove. If the onions start to brown too quickly, reduce heat to medium to prevent burning.
Toast the Spices for Complex Flavor
Add the 0.5 cup chili powder, 0.25 cup ground cumin, 2 tbsp dried oregano, 2 tbsp smoked paprika, and 1 tbsp cayenne pepper. Stir constantly for 1-2 minutes until the spices are fragrant and the mixture darkens slightly—this toasting step deepens their flavor significantly.
Watch carefully as spices burn quickly. You want them aromatic but not charred. The dark brown sugar will come in next, so don’t worry if it looks like too much spice now. The sugar will help balance the heat and add a subtle caramel note.
Combine Everything for Simmering Perfection
Return the browned chuck roast to the pot. Add the 8 cans diced tomatoes, 1 cup tomato paste, 8 cups beef broth, 0.25 cup dark brown sugar, 2 tbsp salt, and 1 tbsp black pepper. Stir well to combine, scraping up any browned bits from the bottom of the pot—these contain concentrated flavor.
Bring the mixture to a boil, then reduce heat to low. Add the 6 cans kidney beans and 6 cans black beans, stirring to distribute evenly. The chili should simmer gently—you want small bubbles breaking the surface occasionally. Cover and let it cook for 3 hours, stirring occasionally to prevent sticking.
Finish with Tender Meat and Rich Texture
After 3 hours, use two forks to shred the chuck roast directly in the pot. This distributes the meat evenly and creates that signature chili texture. Taste and adjust seasoning—you might need a little more salt or cayenne depending on your preferences.
Let the chili sit uncovered for 15-20 minutes before serving. This resting period allows the flavors to meld and the texture to thicken slightly. Serve with cornbread, tortilla chips, or crusty bread—just be prepared for requests for the recipe!
Pro Tips For Making 3 Gallon Chili
- Sear the Chuck First: That chuck roast won’t break apart cleanly if you toss it in raw—high heat for 5-6 minutes per side builds flavor and texture. I used to skip this with big batches, but the difference in mouthfeel is noticeable, especially when you’re serving 15+ people.
- Drain and Rinse Beans: The liquid in canned beans adds watery thinness to chili—drain them first, then rinse under cold water to remove excess starch. My first batch turned out like soup because I forgot this step; now I do it automatically.
- Simmer Slow and Low: Three hours on high heat = mushy beans and tough meat. Keep it at a gentle bubble (180°F-200°F) after the initial sear, and stir occasionally to prevent scorching. I learned this after a chili pot exploded on my stove—yes, it was messy.
- Char the Onions: Slice onions thick (½-inch) and let them caramelize until edges turn black before adding other ingredients. The deeper flavor carries through the whole pot, and it takes less than 10 minutes of attention. (No, you don’t need to babysit them constantly.)
Dietary considerations for this 3 gallon chili
Gluten-Free Adaptations
This chili recipe is naturally gluten-free, but always double-check labels on canned beans, broth, and spices for hidden gluten. I recommend Great Value or Bush’s gluten-free beans and Imagine or Pacific Foods gluten-free beef broth to ensure safety.
The chili powder and cumin from bulk bins are typically safe, but brands like Penzeys offer certified gluten-free options if you prefer extra caution. 🌱
Low-Carb Modifications
For a lower-carb version, reduce the beans to 4 cans each of kidney and black beans and add 2 cups diced zucchini or mushrooms for bulk. The tomato paste and fire-roasted tomatoes provide natural sweetness without added carbs.
If you’re strict keto, omit the beans entirely and increase the beef to 8 lbs for hearty texture. Use Sugar Twin or erythritol instead of brown sugar to keep it under 5g net carbs per serving.
Vegetarian Swaps
Replace the beef with 3 lbs extra-firm tofu or tempeh, pressed and cubed, then pan-fried until crispy. Add 1 can lentils (drained) for extra protein and texture. Use vegetable broth and 1 tbsp liquid smoke to mimic the smoky depth.
For a meatier texture, seitan works beautifully when browned first. The spices remain the same, but reduce cayenne to ½ tbsp—vegetarian chili can be spicier since there’s no fat to balance the heat.
Dairy-Free Considerations
This recipe is already dairy-free, but if serving with toppings, swap sour cream for coconut yogurt or cashew cream. For extra richness, stir ¼ cup nutritional yeast into the chili during the last 30 minutes of cooking.
The smoked paprika and chili powder already provide depth, so no dairy substitutes are needed in the chili itself. Just avoid cheese toppings if dairy-free is required. ✨
Allergen-Friendly Adjustments
For nut allergies, ensure all spices are processed in nut-free facilities—Spicewalla offers allergen-friendly blends. If soy is a concern, use pea protein crumbles instead of beans for texture. For egg allergies, no adjustments are needed as this recipe contains none.
Always check canned goods for cross-contamination warnings, especially with beans and broth. I keep Great Value or Muir Glen brands on hand for their strict allergen controls.
Nutrition facts
Frequently asked questions
Can I make this chili in a slow cooker instead of a stockpot?
Use a 6-8 quart slow cooker on low for 8-10 hours or high for 5-6 hours. The meat will become even more tender from the extended cooking time. Just brown the meat in a separate skillet first to maintain that deep flavor foundation.
How do I adjust the spice level for kids or sensitive eaters?
Reduce the cayenne to ½ teaspoon or omit it entirely. For extra mildness, reserve ¼ cup of the cooked chili before adding spices, then mix it back in at the end. You can also serve mild chili on the side with regular toppings for those who prefer less heat.
What’s the best way to reheat leftover chili?
Reheat gently in a pot over medium-low heat, stirring occasionally, until warmed through (10-15 minutes). For best texture, add ¼ cup broth or water per gallon to prevent drying out. Microwaving works in a pinch, but it can make the beans mushy—so use the stovetop whenever possible.
Can I substitute ground beef for chuck roast?
Yes, but with adjustments! Use 5 lbs ground beef (80/20 blend) and brown it thoroughly in batches to render the fat. Add 1 extra cup of tomato paste to balance the extra fat, and reduce the broth to 7 cups. The texture will be slightly different but still delicious.
How do I prevent my chili from being too thin or too thick?
For thicker chili, simmer uncovered for the last 15 minutes to reduce. If it’s too thick, stir in ½ cup broth or water at a time until reaching your desired consistency. The key is balancing the liquid-to-meat ratio—this recipe’s 8 cups broth to 6 lbs meat gives perfect body.

- 6 Oz Chocolate Chip Cookie Recipe: Perfectly Balanced Crispy Edges and Chewy Hearts - September 25, 2026
- 6-Inch Coffee Cake Recipe: Vanilla Bean Swirls and Buttery Streusel Topping - September 25, 2026
- 1 Hour Soup Recipe: Velvety Richness Without the Wait - September 25, 2026