
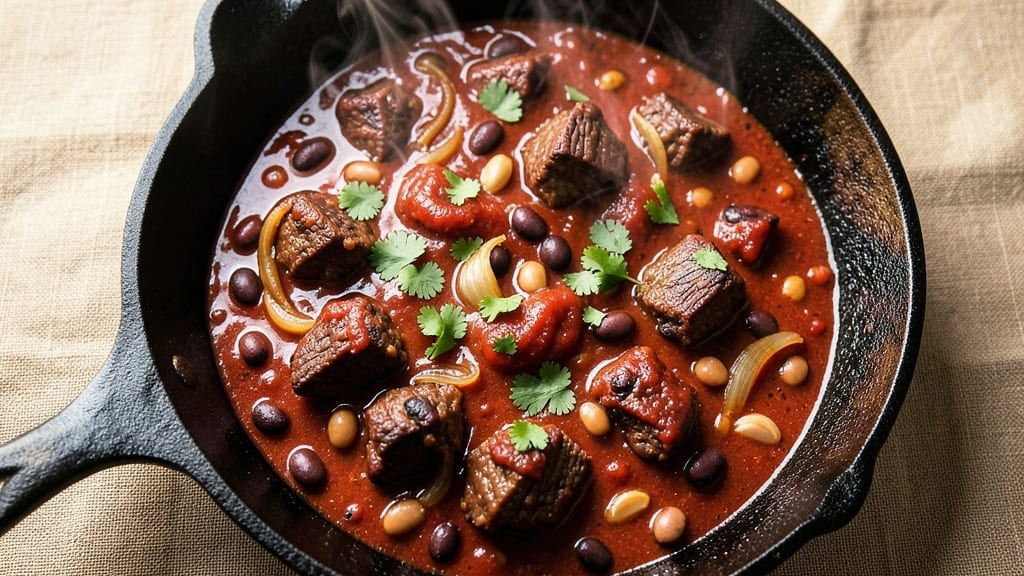
A 3-hour chili recipe transforms simple ingredients into a deeply flavorful stew that improves overnight—this is the secret to restaurant-quality chili at home. The slow simmer allows spices to meld and meat to tenderize, creating a rich, hearty dish perfect for cold evenings or game day gatherings.
What starts as a basic combination of beans, ground beef, and broth evolves into something complex and satisfying through time and technique.
The key to success lies in the three-hour cooking time, which develops layers of smoky, savory depth you can’t achieve with quick methods. Browned meat forms a flavorful crust, while spices like cumin and chili powder infuse the broth with warmth.
A touch of cocoa powder adds richness, while tomatoes provide acidity to balance the flavors. This isn’t just chili—it’s a foolproof method for a meal that gets better with each passing hour.
By the time you’re ready to serve, you’ll have a thick, hearty chili with tender meat, perfectly cooked beans, and a broth so flavorful it coats every spoonful. The slow cooking ensures no tough pieces remain, while the spices create a perfect harmony of heat and depth.
Serve it with cornbread or crusty rolls to soak up every last bit of that rich, smoky goodness.
This recipe is adaptable to dietary preferences—swap beef for turkey or plant-based crumbles, and adjust spices to taste. The beauty of chili lies in its flexibility, but the foundation remains the same: time, patience, and the right balance of ingredients. Let’s get cooking!
Ingredients for 3 hour chili
Sixteen ingredients, three hours, and a flavor transformation that makes chili taste like a restaurant masterpiece.
| Ingredient | Amount | Notes |
|---|---|---|
| Ground Beef (85% lean) 🥩 | 2 lb | Chuck roast ground preferred |
| Kidney Beans (dried) 🌱 | 1 ½ cups | Soaked overnight for tenderness |
| Black Beans (dried) 🌱 | 1 cup | Soaked overnight for tenderness |
| Onion (yellow) 🧅 | 1 whole | Diced into 1/4-inch pieces |
| Garlic Cloves 🧄 | 6 cloves | Minced for aromatic base |
| Tomato Paste 🍅 | ½ cup | High-quality canned preferred |
| Beef Broth (low-sodium) 💧 | 4 cups | Homemade or high-quality store-bought |
| Chili Powder 🌶️ | 2 tbsp | Smoked or mild variety |
| Ground Cumin 🌿 | 1 tbsp | Toasted for deeper flavor |
| Dried Oregano 🍃 | 1 tsp | Mexican oregano preferred |
| Cocoa Powder (unsweetened) 🍫 | 1 tbsp | Natural, not Dutch-processed |
| Salt 🧂 | 1 ½ tsp | Adjust to taste at the end |
| Black Pepper 🌶️ | ½ tsp | Freshly ground preferred |
| Bay Leaves 🌿 | 2 whole | Removed before serving |
| Olive Oil 🫒 | 1 tbsp | Extra-virgin for browning |
The beef is non-negotiable here—chuck roast ground gives you that deep, meaty flavor sirloin can’t match. Look for 85% lean at the meat counter, where they’ll often grind it fresh for you. If you’re buying pre-ground, check the label for no fillers—some store brands add fat that can make your chili greasy. For the beans, dried is a must—they hold up better during the long simmer and taste richer than canned. Soak them overnight in plenty of water, then drain before adding to the pot. The kidney and black beans combo gives you both texture and heartiness, but if you’re short on time, pre-soaked beans from the canning aisle work in a pinch (just rinse well).
No chili powder? Smoked paprika plus a pinch of cayenne gets you close, though the flavor won’t be identical. The cocoa powder might seem odd, but it adds a subtle richness that balances the heat—Dutch-processed won’t work here, as it’s alkaline and can alter the texture. For the tomato paste, Rao’s or Muir Glen are my go-tos, but any high-quality canned paste will do. If you’re avoiding beef, ground turkey or plant-based crumbles work well, though the cooking time may need adjustment. The onion and garlic should be finely diced—food processor for speed, but a sharp knife works too. And don’t skip the bay leaves; they add an earthy depth that disappears once removed.
This chili tastes even better the next day, so double the batch if you’re feeding a crowd. Store in an airtight container in the fridge for up to 5 days, or freeze portions for 3 months. For serving, I like to top with shredded cheese, sour cream, or fresh cilantro—whatever you’ve got. The broth reduces as it cooks, so if it’s too thick after three hours, add a splash of water or broth. And if you’re really ambitious, make it a day ahead—the flavors will have fully melded by then, giving you that restaurant-quality result the intro promised.
Why You’ll Love This Recipe
- Set-and-Forget Simplicity: I swear by this recipe because once the beans are soaking and the beef’s browning, it’s hands-off magic. No stir-frying every 10 minutes—just let it simmer while you tackle emails, fold laundry, or watch one episode of your favorite show. The dried beans soften perfectly over three hours, so you’re not left with mushy or undercooked results.
- Deep, Smoky Richness: Between the 85% lean beef (which caramelizes beautifully) and the garlic cloves roasted right in the pot, this chili develops layers of flavor you won’t find in quick versions. The kidney and black beans add that earthy backbone, but the real star? The slow melding of spices—like a hug in a bowl.
- Meal Prep MVP: This chili tastes better the next day, which is perfect for busy weeks. I make a double batch on Sundays, portion it into containers, and freeze half—no weird reheating texture, just hearty, satisfying meals ready in minutes. (Yes, even on a Tuesday night.)
- Budget-Friendly Powerhouse: Using dried beans cuts costs dramatically, and ground beef is cheaper than steak cuts while still packing flavor. Honestly, I’ve fed six people for under $15 with this recipe, and no one complains about seconds. That’s a win for my wallet and my reputation as the host who always brings the good stuff.
Step-by-step instructions for deep, smoky beans and meat chili
Here’s the method for chili that develops richer flavors with each passing hour.
Brown the Ground Beef Thoroughly
Heat a large Dutch oven over medium-high heat and add the 1 tablespoon olive oil. Once shimmering, add the 2 pounds ground beef (85% lean) and break it apart with a wooden spoon. Cook undisturbed for 3-4 minutes until the meat loses its raw color and begins to brown deeply.
This initial browning creates the Maillard reaction, which builds deep, complex flavors. Only stir occasionally to avoid breaking the meat into small pieces. Once the beef is fully browned, drain most of the fat (leave about 1 tablespoon for flavor) and set the meat aside in a bowl.
Sauté Aromatics and Build the Base
In the same Dutch oven, reduce heat to medium and add the diced yellow onion. Cook for 5-6 minutes until softened and translucent. Add the 6 minced garlic cloves and cook for another 30 seconds until fragrant—don’t let it burn.
Stir in the 0.5 cup tomato paste and cook for 2 minutes until it darkens slightly. This step develops the chili’s rich, concentrated flavor. Add the 2 tablespoons chili powder, 1 tablespoon ground cumin, and 1 teaspoon dried oregano, stirring to coat everything evenly.
Combine All Ingredients and Simmer
Return the browned beef to the pot and add the 1.5 cups soaked kidney beans, 1 cup soaked black beans, 4 cups low-sodium beef broth, and the 2 whole bay leaves. Stir well to combine, then bring to a gentle boil over medium-high heat for 5 minutes to sterilize the beans.
Reduce heat to low and let the chili simmer uncovered for 2.5 hours. Stir occasionally to prevent sticking, and add water if it becomes too thick. The beans will soften and the flavors will meld beautifully during this time.
Finish with Cocoa and Season to Perfection
After 2.5 hours, stir in the 1 tablespoon unsweetened cocoa powder, 1.5 teaspoons salt, and 0.5 teaspoon black pepper. Simmer uncovered for another 30 minutes to allow the cocoa to deepen the chili’s complexity and the flavors to fully develop.
Remove the bay leaves before serving. Taste and adjust seasoning if needed—this chili tastes even better the next day as the flavors continue to meld and intensify. Serve with crusty bread or over rice for a hearty meal.
Pro Tips For Making 3 Hour Chili
- CRACK THE BEANS FIRST: Soak your dried kidney and black beans overnight—yes, even if the recipe says “add them raw.” I used to skip this and ended up with beans that stayed rock-hard no matter how long I simmered. An 8-hour soak (or quick 2-hour soak with boiling water) guarantees they’ll break down into that creamy texture you actually want in chili.
- BROWN THE BEEF RIGHT: Don’t just cook the beef—sear it in batches until the edges are dark brown, almost crispy. That’s where the flavor lives. If your pan’s too crowded, the meat just steams instead of developing that crust. A hot pan and 2 minutes per batch makes a real difference.
- SAVE THE GARLIC: Smash your garlic cloves with the flat side of your knife before adding them to the pot. This releases more flavor without burning. I learned this the hard way—whole cloves just sit there like tiny flavorless pebbles, while smashed ones melt into the chili like a dream.
- SIMMER LOW AND LONG: After the first hour of active cooking, drop the heat to a bare simmer—just enough to keep tiny bubbles breaking the surface. Too much heat and your chili will turn gluey or split. I used to walk away and come back to a sad, thickened mess. A lid helps, but check it occasionally to avoid a stewpan.
Wine and beer pairings for this dish
Red Wine Pairings
For this rich, smoky chili, I reach for a Zinfandel from California—its bold berry notes and peppery finish stand up to the deep flavors without overpowering. A Cabernet Sauvignon with 12-14% ABV also works beautifully, especially if your chili has a touch of heat.
Look for oaked examples like Apothic Red or Louis M. Martini Cabernet for that velvety texture that complements the cocoa and spices. 🍷
If you prefer something lighter, a Syrah from Washington State offers vibrant blackberry and smoke accents that mirror the chili’s profile. I love pairing it with Chateau Ste.
Michelle—it’s approachable but still packs enough structure to handle the meal. Avoid heavy tannins unless you’re serving with a side of creamy cornbread to soften them.
Beer Pairings
A Mexican lager like Modelo Especial or Pacifico is my go-to beer pairing—its crisp, clean finish cuts through the richness while letting the chili’s spices shine.
For a craft option, try a hazy IPA with citrus and tropical notes (like Hazy Little Thing from New Belgium), which balances the smokiness with bright acidity. 🍺
If you’re serving this chili at a casual gathering, a dark amber ale with caramel and roasted malt flavors (such as Fat Tire) works wonders.
The malt sweetness echoes the cocoa in the chili, while the hop bitterness keeps things lively. Avoid overly hoppy IPAs—they can clash with the earthy spices.
Non-Alcoholic Options
For those skipping alcohol, a sparkling ginger beer like Feather’s adds a refreshing zing that cleanses the palate between bites. I also love Mexican soda (like Jarritos Tamarind or Lime)—its sweet-tart profile enhances the chili’s depth without competing.
For a more robust option, try a smoked tea (such as Lapsang Souchong) served over ice—it mirrors the chili’s smoky notes beautifully. ✨
If you’re serving chili at a family dinner, a sparkling apple cider (like Martinelli’s) with a hint of cinnamon adds warmth and pairs surprisingly well with the cocoa.
The effervescence also helps balance the meal’s heartiness, making it feel lighter. Don’t underestimate the power of a well-chilled sparkling water with lime—it’s simple but effective.
Nutrition facts
Frequently asked questions
Why does this chili need 3 hours to cook?
The 3-hour simmer is key to developing deep, restaurant-quality flavor. This slow cooking time allows the spices to infuse fully, the meat to tenderize completely, and the beans to soften without falling apart. The cocoa powder and tomato paste also need time to meld into the broth, creating that rich, complex taste that improves overnight.
Can I use canned beans instead of dried?
Yes, but with adjustments! Use 2 (15 oz) cans each of kidney and black beans (drained and rinsed) instead of the dried versions. Since canned beans are already cooked, reduce the simmering time to 1.5 hours total instead of 3. The texture will be slightly softer, but still delicious.
What if my chili gets too thick?
Simply add ¼ to ½ cup of water or broth while simmering and stir well. The chili should reach a thick but spoonable consistency by the end. If it’s still too thick after 3 hours, it means the beans absorbed more liquid than expected—just serve it as-is with extra toppings like sour cream or shredded cheese to balance the texture.
Is this recipe spicy?
The heat level is mild to medium, thanks to the 2 tbsp chili powder and ½ tsp black pepper. For more heat, add ½ tsp cayenne pepper or 1 tbsp hot sauce at the end. If you prefer it milder, reduce the chili powder to 1.5 tbsp and omit the cayenne. Always taste as you go!
Can I make this chili in a slow cooker?
Brown the meat as directed, then transfer everything (except cocoa powder) to a 6-quart slow cooker. Cook on low for 6-7 hours or high for 3-4 hours. Stir in the cocoa powder during the last 30 minutes of cooking. The slow cooker version will be even more tender and flavorful!

- 12 Bean Chili Recipe: Hearty Slow-Cooked Depth With 12 Legumes - October 17, 2026
- 5 Seed Bread Recipe: Nutty Crunch and Artisan Flavor in One Loaf - October 17, 2026
- 1 Lb Macaroni Salad Recipe: Bold, Crunchy, and Crowd-Pleasing - October 17, 2026