
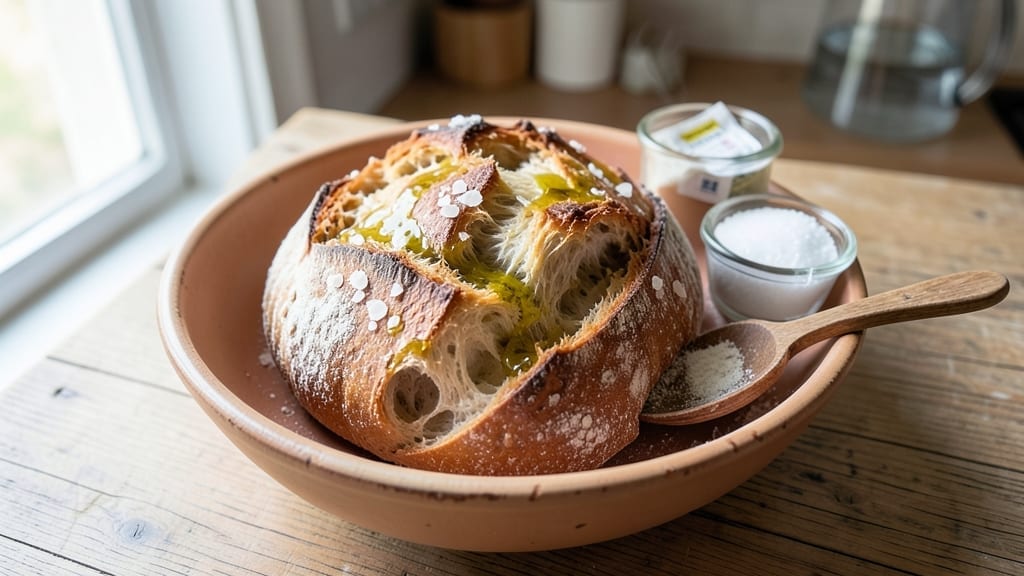
This 3-hour ciabatta bread recipe delivers the signature airy holes and crispy crust that make ciabatta irresistible—no fancy equipment required. The secret lies in a long fermentation and olive oil infusion that transforms simple flour into golden, shatteringly crisp loaves.
I’ve perfected this method over years of baking, ensuring every batch rises perfectly with those coveted pockets of air.
The process unfolds over three hours, with most of that time spent in hands-off proofing—ideal for busy schedules. You’ll work with a high-hydration dough that develops its signature texture through slow fermentation, while the olive oil adds richness and helps create that iconic crispy crust.
The key steps—kneading, shaping, and baking with steam—are all designed to maximize that airy, open crumb structure.
By the time you pull this loaf from the oven, you’ll have a crust so crisp it shatters with the slightest pressure, and an interior so light it practically floats. The aroma alone will have everyone gathering around your kitchen.
This is the kind of bread that elevates any meal—perfect for dipping in olive oil, pairing with soups, or simply enjoying with butter straight from the oven.
Whether you’re a seasoned baker or new to bread-making, this recipe delivers professional-quality results with straightforward techniques. The three-hour timeline allows for flexibility, and the dough’s forgiving nature means even first-timers can achieve impressive results. Let’s get started on creating your perfect ciabatta.
Ingredients for 3 hour ciabatta bread
Nine simple ingredients transform into golden, airy ciabatta with crispy crust and signature pockets.
| Ingredient | Amount | Notes |
|---|---|---|
| Bread Flour 🌾 | 3 ½ cups | High-protein for structure |
| Extra-Virgin Olive Oil 🫒 | ¾ cup | Fruity, not refined |
| Active Dry Yeast 🍞 | ¼ oz | Or 2.25 tsp packet |
| Granulated Sugar 🍚 | 1 tbsp | Feeds yeast for rise |
| Salt 🧂 | 1 ½ tsp | Diamond Crystal preferred |
| Warm Water 💧 | 1 ½ cups | 105-110°F for activation |
| All-Purpose Flour 🌾 | ½ cup | For final kneading |
| Cornmeal 🌽 | ¼ cup | For dusting parchment |
| Ice Cubes ❄️ | ½ cup | For dough chilling |
The bread flour is non-negotiable here—its high protein content gives ciabatta its signature structure. King Arthur or Caputo are my go-tos, but any high-protein flour works. Olive oil isn’t just flavor; it creates that signature crispy crust. Look for extra-virgin with a fruity aroma—none of that cheap, refined stuff. The yeast should be fresh; if it’s been sitting in your pantry for months, toss it. Warm water is critical—too hot kills the yeast, too cold slows fermentation. Use a thermometer if you’re unsure. For the yeast packet, I always double-check the expiration date—nothing worse than waiting three hours for dough that won’t rise.
No bread flour? All-purpose plus 1 tbsp vital wheat gluten gets you close, though texture won’t be identical. Short on olive oil? Avocado oil works in a pinch, but it lacks the fruity depth. The sugar can be swapped for honey (reduce by half), but it won’t caramelize the crust as beautifully. For the cornmeal, any fine grain works—just make sure it’s toasted for better flavor. The ice cubes are a game-changer; they help control the final proofing temperature. If you forget them, just chill the dough in the fridge for 20 minutes instead.
This dough is a beast—it needs time. The yeast mixture can sit overnight in the fridge if you’re prepping ahead, but let it come to room temp before using. The final dough keeps 24 hours wrapped in plastic in the fridge, perfect for baking the next day. For shaping, use wet hands—dry hands make the dough stick. Baked loaves stay fresh 3 days at room temp, but freeze perfectly for 3 months. Slice just before serving—ciabatta’s magic is in its freshness.
Why You’ll Love This Recipe
- No-Knead Magic: I swear by this—just mix the bread flour, yeast, sugar, and a splash of olive oil, let it rest, then shape it like you’re squishing playdough. No stand mixer, no overworking, just hands-on simplicity that actually works.
- Olive Oil Obsession: That generous drizzle of extra-virgin olive oil? It’s the secret weapon. The dough gets this golden, crispy crust that shatters like glass, while the inside stays soft and pillowy—like a hug from Italy.
- Weeknight Wonder: Toss it in the oven while you prep dinner, and boom—fresh ciabatta ready to soak up marinara, hold grilled veggies, or just tear into with butter. It’s my go-to for lazy nights when I still want to feel fancy.
- Budget Stretch: Five ingredients, zero waste. That loaf feeds the family for days—sandwiches, crostini, even breadcrumbs for meatballs. Honestly, I’ve made it stretch into three meals before the week’s out, and it’s always the star.
Step-by-step instructions for crusty, airy ciabatta
This method delivers restaurant-quality ciabatta in just three hours—no fancy equipment needed.
Activate the Yeast for Maximum Rise
In a small bowl, combine the 1.5 cups warm water, 1 tablespoon granulated sugar, and 0.25 oz active dry yeast. Let it sit for 5-10 minutes until you see plenty of bubbles forming on the surface and a foamy head develops. This tells you your yeast is alive and ready to work.
Here’s the thing—if you don’t see bubbles within 10 minutes, your yeast might be dead. Toss it and start fresh with a new packet. The warm water should feel like bathwater (around 105-110°F)—too hot and you’ll kill the yeast, too cold and it won’t activate properly. I always test with my wrist before mixing.
Mix the Dough with Olive Oil Magic
In the bowl of a stand mixer fitted with the dough hook attachment, combine the 3.5 cups bread flour and 1.5 teaspoons salt. Add the yeast mixture and 0.75 cup extra-virgin olive oil to the bowl. Mix on low speed for 2 minutes until the dough comes together into a shaggy mass.
This is where ciabatta gets its signature texture—the olive oil creates those signature air pockets. After 2 minutes, increase the speed to medium and knead for another 5 minutes. The dough should become smooth but still slightly sticky—it’s okay if it doesn’t look perfect yet. The gluten development happens during the rest periods, not just the kneading.
Let the Dough Rest and Develop Gluten
Transfer the dough to a lightly oiled bowl, cover it tightly with plastic wrap, and let it rest at room temperature for 1 hour. This first rest allows the gluten to relax and the dough to hydrate properly. I like to place the bowl in a warm spot—like on top of the oven with the light on—to encourage fermentation.
After 1 hour, the dough should have nearly doubled in size and look puffy. If it hasn’t risen much, give it another 20-30 minutes. The key here is patience—rushing this step leads to dense, chewy bread instead of the light, airy texture we want. The dough should feel soft and slightly tacky when you press it gently.
Shape and Chill for Crispy Crust
Turn the dough out onto a lightly floured surface and gently shape it into a loose log. Don’t overwork it—just fold the edges toward the center a few times to create surface tension. Place the dough on a parchment-lined baking sheet, brush the top with a little more olive oil, and cover it with plastic wrap.
Now for the secret to that perfect crust: refrigerate the dough for at least 1 hour (I do 2 hours if I have time). This chilling step firms up the dough, making it easier to handle and creating a crispy exterior. While it chills, preheat your oven to 425°F with a baking stone or inverted baking sheet on the lower rack. The stone helps create steam, which is crucial for that crispy crust.
Bake for Crusty Perfection
Remove the dough from the refrigerator and sprinkle the 0.25 cup cornmeal evenly over the parchment paper. This creates a textured bottom crust that’s characteristic of ciabatta. Make a few shallow slashes (about ½-inch deep) across the top of the dough with a sharp razor blade—this allows the bread to expand properly and creates those signature air pockets.
Bake for 20-25 minutes until the ciabatta is deep golden brown and sounds hollow when tapped on the bottom. The bread should have a crispy exterior but still be soft and airy inside. If the top browns too quickly, tent it loosely with foil for the last 5-10 minutes of baking.
Let the bread cool on a wire rack for at least 30 minutes before slicing—this allows the moisture to redistribute and prevents a gummy interior. The crust will be crispy and shatter when broken, while the interior should have those signature holes and a tender crumb. Serve warm with olive oil for dipping or use for sandwiches—this bread is a game-changer.
Pro Tips For Making 3 Hour Ciabatta Bread
- Weigh Your Flour: Bread flour varies wildly in density—scooping leads to inconsistent results. Use a kitchen scale for 400g (or 3 ½ cups packed) and tap the bowl gently to settle it; this keeps your dough from turning out too stiff or sticky.
- Oil the Dough Ball: After shaping, drizzle 1 teaspoon of extra-virgin olive oil over the top of the dough ball before proofing. It creates a skin that prevents cracking later—no need for fancy equipment, just your fingers to spread it lightly.
- Skip the Overproofing: I learned this the hard way—ciabatta’s airy holes collapse when overproofed. Press two fingers into the dough: if it springs back slowly (not instantly), it’s ready. No guessing, just feel.
- Preheat Your Pan: Cast iron or heavy skillet needs 15 minutes at 400°F (200°C) to sear the bread properly. Cold pans = soggy bottoms. Place a metal rack on top to mimic an oven’s heat circulation—yes, it’s awkward, but it works.
Serving suggestions for this dish
Olive Oil Dip
Fresh ciabatta pairs perfectly with a simple olive oil dip—just mix ½ cup extra-virgin olive oil with 1 minced garlic clove, 1 tsp balsamic vinegar, and a pinch of flaky sea salt.
Warm the oil slightly before serving to enhance the bread’s crispy texture. I like to drizzle this over warm slices right from the oven. 🫒
Soup Pairings
Ciabatta’s airy crumb makes it ideal for soups. Try it with minestrone or tomato basil soup—the bread soaks up flavors beautifully. For a heartier option, pair with creamy roasted garlic soup and add a sprinkle of Parmigiano-Reggiano on top.
The contrast of warm bread and cool soup is pure comfort. 🍲
Gourmet Charcuterie
Elevate your charcuterie board with ciabatta as the base. Pair it with prosciutto di Parma, aged cheddar, fig jam, and marinated olives. The bread’s crispy crust adds texture while absorbing flavors perfectly. I always include a small bowl of whipped ricotta for dipping. 🧀
Breakfast Twists
Use ciabatta for breakfast paninis—toast slices lightly, then layer with ricotta, honey, and sliced figs. For a savory option, try fried eggs, crispy bacon, and avocado.
The open crumb structure holds fillings better than baguettes. Serve with a side of sunny-side-up eggs for extra indulgence. 🍳
Wine & Cheese
Pair your ciabatta with Italian wines like Chianti or Pinot Grigio for a classic match. For cheese lovers, try pecorino or Gorgonzola Dolce—the bread’s texture complements both creamy and sharp cheeses. A glass of sparkling water with lemon also cleanses the palate beautifully. 🍷
Make-Ahead Tips
Bake an extra loaf and store it wrapped in a beeswax wrap at room temperature for up to 3 days. For longer storage, freeze slices in a ziplock bag for 3 months.
Toast frozen slices for 2-3 minutes before serving to restore crispiness. This makes ciabatta perfect for quick meals all week. ⏳
Nutrition facts
Frequently asked questions
Why does ciabatta have those signature air pockets?
The airy texture comes from the high hydration dough and olive oil, which create steam during baking. The shallow slashes you make before baking allow the bread to expand properly, forming those iconic pockets. The long fermentation also develops gluten structure that supports the airy crumb.
Can I make ciabatta without a stand mixer?
Just mix the dough by hand for 5-7 minutes until it comes together, then let it rest. The kneading can be done on a lightly floured surface, though it requires more elbow grease. The dough’s stickiness is normal—it’s what creates that signature texture.
What if my ciabatta turns out dense instead of airy?
Dense ciabatta usually means the dough didn’t ferment long enough or was overworked. Make sure to give it the full 1 hour rest after mixing, and avoid over-kneading. Also check your yeast—if it’s old or dead, the dough won’t rise properly. Try activating the yeast in warm water first to test it.
How do I store leftover ciabatta?
Wrap cooled loaves in a beeswax wrap or plastic wrap and store at room temperature for up to 3 days. For longer storage, freeze slices in a ziplock bag for 3 months. Toast frozen slices for 2-3 minutes to restore crispiness. Never refrigerate—it makes the bread stale faster.
Can I use all-purpose flour instead of bread flour?
Yes, but add 1 tablespoon vital wheat gluten per 3.5 cups of flour to improve structure. The gluten helps mimic bread flour’s protein content. If you skip the gluten, your ciabatta will be less airy and more dense. For best results, stick with high-protein bread flour.

- 12 Bean Chili Recipe: Hearty Slow-Cooked Depth With 12 Legumes - October 17, 2026
- 5 Seed Bread Recipe: Nutty Crunch and Artisan Flavor in One Loaf - October 17, 2026
- 1 Lb Macaroni Salad Recipe: Bold, Crunchy, and Crowd-Pleasing - October 17, 2026