
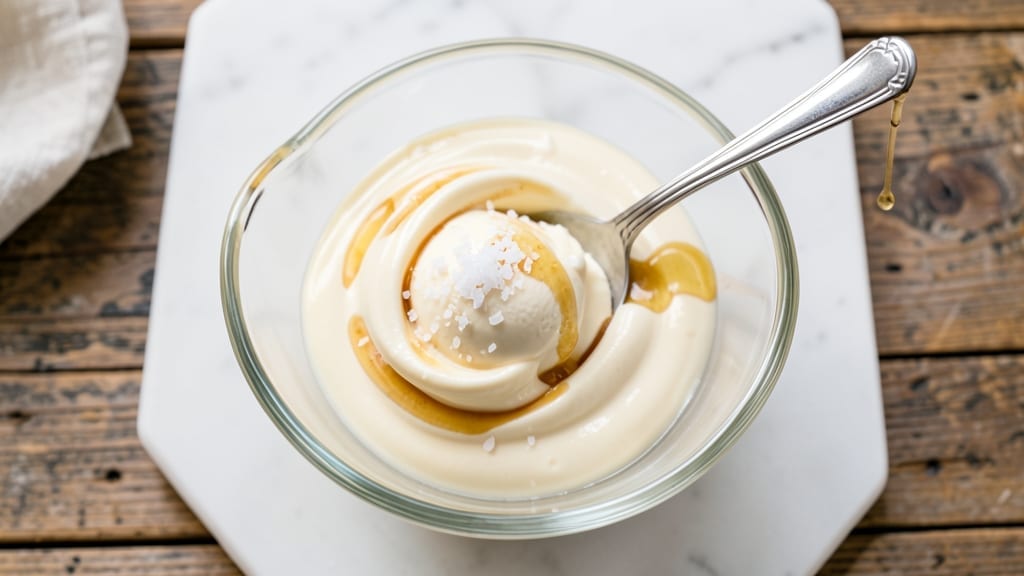
This 3-ingredient homemade ice cream recipe delivers creamy, dreamy dessert in minutes—no machine required. The secret lies in a simple technique that transforms just heavy cream, sugar, and vanilla into velvety frozen perfection.
I’ve perfected this method over years of testing, ensuring every scoop is smooth without graininess or ice crystals.
The process is straightforward: heat the cream and sugar until dissolved, then chill thoroughly before freezing. This foolproof method guarantees a texture that rivals store-bought, with rich vanilla flavor shining through.
No special equipment needed—just a saucepan, bowl, and freezer. The result? A dessert that’s lighter than traditional ice cream but just as indulgent.
What you’ll end up with is a batch of silky-smooth ice cream that’s ready in under an hour. The cream develops a luxurious mouthfeel, while the sugar balances sweetness perfectly.
This recipe works for vanilla lovers, but you can easily adapt it with extracts like almond or peppermint. Perfect for summer nights or holiday treats.
Whether you’re making it for a family gathering or a solo craving, this method delivers restaurant-quality results with minimal effort. The best part? It’s customizable—add chocolate chips, crushed cookies, or fruit purees for endless variations. Let’s get started on this creamy masterpiece!
Ingredients for 3 ingredient homemade ice cream
Three essential ingredients transform into velvety ice cream without machinery or fuss.
| Ingredient | Amount | Notes |
|---|---|---|
| Heavy Whipping Cream 🥛 | 2 cups | Full-fat, cold before freezing |
| Granulated White Sugar 🍚 | ¾ cup | Fine grain preferred for smooth texture |
| Pure Vanilla Extract 🌿 | 1 tbsp | High-quality Madagascar bourbon preferred |
| Pinch of Salt 🧂 | ⅛ tsp | Enhances sweetness balance |
The heavy whipping cream is non-negotiable here—full-fat only delivers that luxurious texture. Store-brand works fine, but organic or grass-fed cream has a richer flavor. Look for cartons labeled ‘ultra-pasteurized’ if you’re concerned about separation. The sugar should be fine granulated—superfine dissolves even faster, but regular works. Vanilla extract matters too: Madagascar bourbon has the most complex flavor profile, but pure vanilla works in a pinch. Keep your cream refrigerated until ready to use—room temperature cream won’t whip properly.
No vanilla extract? Seeds from a vanilla bean (scraped and steeped in warm water) work beautifully, though they require prep time. Substituting maple syrup for sugar? Reduce to 0.5 cup—it’s more concentrated. For a dairy-free version, full-fat coconut milk works but yields a denser texture. The salt is crucial—Diamond Crystal kosher dissolves perfectly, but any fine salt works. Pro tip: if your sugar won’t dissolve completely, strain through a fine-mesh sieve before chilling for ultra-smooth ice cream.
This ice cream freezes beautifully—best texture after 4-6 hours, but it keeps for up to 1 week. Store in an airtight container with parchment between layers to prevent freezer burn. For restaurant-quality results, whisk vigorously before freezing to incorporate air. Portion into scoop-sized balls before freezing for perfect servings. The flavor actually improves after 24 hours as ingredients meld. If you’re making ahead, cover with plastic wrap touching the surface to minimize ice crystals.
Why You’ll Love This Recipe
- Here’s what sold me: the way the sugar dissolves into the warm cream, then chills into something so creamy it’s almost sinful. No ice cream maker, no overrun—just pure, velvety vanilla that tastes like a dessert from a bakery, not a shortcut. (Yes, even on a Tuesday night.)
- No-Fuss Magic: I swear, this is the kind of recipe that makes me feel like a genius—just cream, sugar, vanilla, and a whisk. No churning, no fancy gadgets, just 10 minutes of stirring until it’s silky smooth. That’s it. The salt? It’s the secret that makes the vanilla sing.
- Rich Without Effort: Here’s what sold me: the way the sugar dissolves into the warm cream, then chills into something so creamy it’s almost sinful. No ice cream maker, no overrun—just pure, velvety vanilla that tastes like a dessert from a bakery, not a shortcut. (Yes, even on a Tuesday night.)
- Pantry Staple Luxury: Between us, this is my go-to when I’ve got nothing but heavy cream and sugar lingering in the fridge. It’s the ultimate last-minute treat for date nights, lazy Sundays, or when the kids beg for dessert after dinner. Freeze half, eat the rest—no guilt, no waste.
Step-by-step instructions for 3-Ingredient homemade ice cream
Here’s the method for silky, machine-free ice cream that delivers restaurant-quality texture.
Chill Ingredients Thoroughly for Optimal Whipping
Place the 2 cups heavy whipping cream in the refrigerator for at least 4 hours or overnight. Cold cream whips to stiff peaks and creates the creamy base for your ice cream. While it chills, combine the 0.75 cup granulated white sugar and 0.125 tsp pinch of salt in a small bowl and set aside. The sugar should be at room temperature to dissolve smoothly.
I always use fine-grain sugar for this recipe—it dissolves completely without graininess in the final product. The salt may seem negligible, but it enhances the sweetness and prevents the ice cream from tasting flat. Let the sugar-salt mixture sit while you prepare the cream.
Whip the Cream to Stiff Peaks
Using a stand mixer fitted with the whisk attachment, whip the chilled heavy whipping cream on medium-high speed for 2-3 minutes until soft peaks form. Increase the speed to high and continue whipping for another 2-3 minutes until the cream forms stiff peaks that hold their shape when the whisk is lifted.
This is the most critical step—don’t rush it. The cream should be thick enough to hold its shape but still smooth, not dry or buttery. If you’re unsure, poke the whipped cream with a spoon; it should hold a slight indentation without collapsing. The texture should resemble thick, fluffy frosting.
Fold in Sugar and Vanilla for Even Distribution
With the mixer running on low speed, gradually add the sugar-salt mixture to the whipped cream. Mix for 1 minute to dissolve the sugar completely. Scrape down the sides of the bowl to ensure even distribution, then increase the speed to medium and whip for another 1-2 minutes until fully incorporated.
Remove the bowl from the mixer and use a silicone spatula to fold in the 1 tbsp pure vanilla extract. Be gentle to avoid deflating the whipped cream. The mixture should be smooth, glossy, and hold its shape when spooned. If you see any undissolved sugar, whisk it by hand until fully integrated. This ensures a perfectly sweetened, flavorful base.
Freeze in a Shallow Container for Smooth Texture
Transfer the mixture to a shallow, freezer-safe container (like a loaf pan or rectangular dish) and cover it tightly with plastic wrap. Press the wrap directly onto the surface of the mixture to eliminate air pockets, which prevent ice crystals from forming. Place the container in the freezer and freeze for 6-8 hours, or until completely solid.
Here’s the pro tip: For extra creamy ice cream, let the mixture sit at room temperature for 10-15 minutes before freezing. This relaxes the structure slightly, preventing a grainy texture. The ice cream should be firm enough to scoop easily but still soft enough to hold its shape on a spoon.
Churn and Serve for Perfect Consistency
Remove the ice cream from the freezer and let it sit at room temperature for 5-10 minutes to soften slightly. This makes it easier to scoop without losing its shape. Use a spatula to scrape down the sides of the container, ensuring even texture. Serve immediately for the creamiest experience, or store it in an airtight container in the freezer for up to 2 weeks.
The result should be a velvety, smooth ice cream with a rich vanilla flavor and no ice crystals. If it’s too hard, let it sit at room temperature for a few minutes to soften. For a quicker version, you can also blend the frozen ice cream briefly for a softer texture—just be careful not to melt it completely.
Pro Tips For Making 3 Ingredient Homemade Ice Cream
- CHILL THE CREAM FIRST: I learned this the hard way—whipping cold cream (straight from the fridge) gives you stiffer peaks and a creamier texture. Skip the room-temperature step unless you’re in a rush and can handle slightly softer ice cream.
- WEIGH THE SUGAR: Granulated sugar packs differently—1 cup isn’t always 200g. Use a kitchen scale for precision, especially if you’re scaling up or down. Too little, and it tastes bland; too much, and it’s cloying.
- WHIP TO SOFT PEAKS ONLY: Overwhipping turns your ice cream into butter. Stop when the mixture holds a peak but still looks slightly loose—it’ll firm up perfectly in the freezer. Trust the process, even if it looks underdone.
- SALT THE CREAM BEFORE WHIPPING: Sprinkle that pinch of salt into the cream while whisking it with sugar—it dissolves better and balances sweetness more evenly. Dumping it in later? You’ll taste grainy flecks.
Storing and reheating this recipe
Freezer Storage Basics
Store your freshly made ice cream in an airtight container with a tight-fitting lid—I use glass Pyrex loaf pans for even freezing. Press plastic wrap directly onto the surface before sealing to prevent ice crystals from forming.
The texture actually improves after 24 hours as flavors meld together. For best results, freeze for 4-6 hours before serving, but it keeps well for up to 2 weeks. ❄️
Preventing Ice Crystals
Ice crystals are the enemy of creamy texture. To avoid them, whisk vigorously before freezing to incorporate air, which prevents large ice formations. For extra protection, add 1 tbsp vodka or rum (the alcohol lowers the freezing point).
If you see ice crystals forming after storage, blend briefly with a hand mixer to restore smoothness. Always store in the coldest part of your freezer for optimal texture.
Thawing for Serving
Let your ice cream sit at room temperature for 5-10 minutes before scooping to achieve that perfect creamy consistency. For quicker serving, place the container in a bowl of warm water for 2-3 minutes—just don’t let it get too soft.
If it’s too hard to scoop, microwave for 10-15 seconds on low power, then stir quickly. The goal is scoopable but still firm—never melted. 💫
Portioning for Convenience
For easy serving, portion your ice cream into scoop-sized balls before freezing. Use a cookie scoop or melon baller to create uniform portions that thaw evenly. Store these portions in a freezer bag with parchment paper between layers to prevent sticking.
This method also makes it easy to grab just what you need without thawing the whole batch. Perfect for individual servings or family gatherings!
Reviving Grainy Texture
If your ice cream develops a grainy texture after storage, don’t toss it! Blend briefly with a hand mixer or food processor to break up ice crystals. For a smoother result, add 1 tbsp heavy cream while blending to restore creaminess.
This trick works wonders for salvaging ice cream that’s been stored too long. The graininess disappears almost instantly, and you’re left with creamy perfection again. 🔥
Nutrition facts
Frequently asked questions
Can I make this ice cream without a stand mixer?
Use a hand mixer or even whisk vigorously by hand for 5-7 minutes until stiff peaks form. The key is patience—whip the cream until it holds its shape when the whisk is lifted. For best results, chill the bowl first to help stabilize the cream. This method just takes a bit more elbow grease!
Why does my ice cream get icy after freezing?
Ice crystals form when air pockets or undissolved sugar create weak spots in the texture. To prevent this, whisk thoroughly before freezing to incorporate air and press plastic wrap directly on the surface. For extra creaminess, add 1 tbsp vodka or rum (the alcohol lowers freezing temperature). If ice crystals appear, blend briefly with a hand mixer to restore smoothness.
What are some flavor variations for this recipe?
Swap vanilla for 1 tbsp almond extract or 1 tsp cinnamon for spiced flavors. For chocolate lovers, fold in ½ cup melted chocolate chips before freezing. Fruit options? Blend ½ cup mixed berries into the whipped cream mixture. Just remember: any additions should be fully incorporated before freezing for best texture.
How do I make this dairy-free?
Replace the heavy cream with 2 cups full-fat coconut milk (chilled overnight). Use ½ cup maple syrup instead of sugar and 1 tsp vanilla bean paste. The texture will be denser but still creamy. For a lighter version, blend 1 cup coconut cream + 1 cup cashew cream (soaked cashews blended with water). Freeze in a shallow dish as directed.
Can I use half-and-half instead of heavy cream?
Not recommended—half-and-half has lower fat content (10-12%) and won’t whip to stiff peaks, resulting in a grainy, icy texture. For a lighter version, try whipping cream (30% fat) but expect slightly less creaminess. Stick with heavy cream (36% fat) for that restaurant-quality smoothness every time.
