
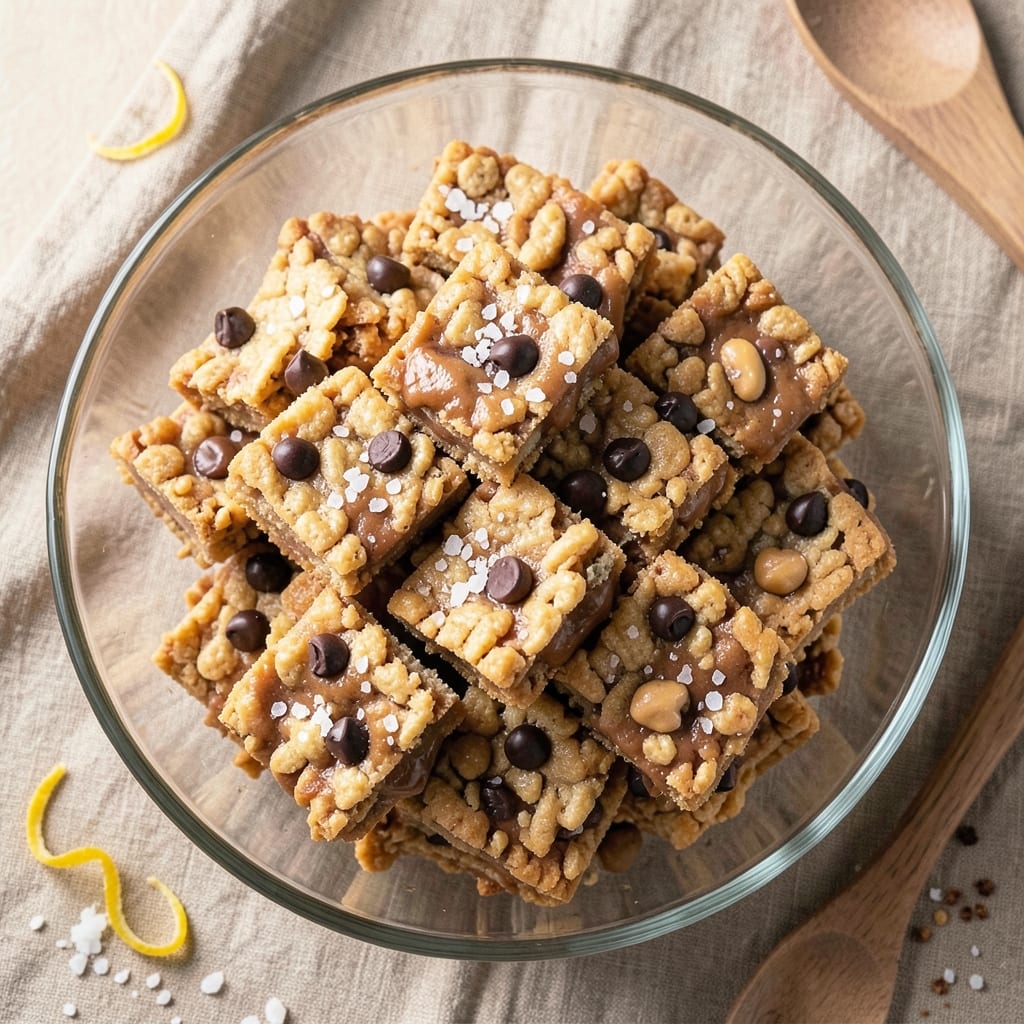
This 3-ingredient peanut butter Rice Krispie treats recipe delivers no-bake dessert perfection in just 10 minutes—no oven, no fuss, and no compromise on flavor.
The secret lies in the perfect ratio of creamy peanut butter, melted butter, and crispy Rice Krispies, creating a chewy, crunchy, and irresistibly rich treat that’s as easy as it is delicious. I developed this version after testing countless combinations, and it never fails to disappear quickly.
The beauty of this recipe is its simplicity—no baking required, just melting, mixing, and pressing. Using oil-based peanut butter ensures a vegan-friendly option that still delivers that classic peanut butter taste, while the melted butter binds everything together for a firm yet tender texture.
This is the kind of dessert that’s perfect for potlucks, last-minute cravings, or when you need something sweet without the effort.
What you’ll end up with is a golden, crisp-edged bar with a melt-in-your-mouth peanut butter center and just the right amount of crunch from the Rice Krispies. The flavor is bold, nutty, and satisfying, with no aftertaste or artificial ingredients—just pure, simple goodness.
It’s the kind of treat that tastes like it came from a bakery, even though it’s made with just three ingredients.
Best of all, this recipe scales effortlessly—double or triple the batch for parties or meal prep. The no-bake method means no oven heating, no cleanup, and no waiting. Whether you’re vegan, gluten-free, or just looking for an easy dessert, this is the recipe that delivers every time. Let’s get started!
Ingredients for 3 ingredient peanut butter rice krispie treats
Three core ingredients plus optional upgrades—no-bake magic with zero compromise on flavor.
| Ingredient | Amount | Notes |
|---|---|---|
| Creamy Oil-Based Peanut Butter 🥜 | 2 cups | Natural, unsweetened, no added sugar |
| Vegan Butter 🧈 | ½ cup | Melted, full-fat for binding |
| Rice Krispies Cereal 🍚 | 6 cups | Original, not honey-roasted |
| Flaky Sea Salt 🧂 | ½ tsp | For finishing, optional but recommended |
| Dark Chocolate Chips 🍫 | ¼ cup | Vegan, 70% cocoa or higher |
| Pure Vanilla Extract 🌿 | ½ tsp | Enhances peanut butter flavor |
The peanut butter is non-negotiable—oil-based, natural brands like Smucker’s Natural or Jif Natural work best. Avoid powdered peanut butter (it’s a flavor crime). For the vegan butter, Miyoko’s or Earth Balance melt beautifully without separating. The Rice Krispies? Original flavor only—honey-roasted adds unwanted sweetness. Pro tip: Toast your cereal lightly in a dry pan for 3-4 minutes to enhance crunch before mixing. And yes, those chocolate chips and vanilla extract are optional, but they take this from ‘good’ to ‘I-need-another-one’ in one bite.
No oil-based peanut butter? Crunchy natural peanut butter works in a pinch—just blend it until smooth first. Out of vegan butter? Coconut oil (melted) is a 1:1 swap, but it adds a slight coconut note. No chocolate chips? Mini vegan marshmallows add a fun twist. The vanilla extract is purely for flavor depth—skip it if you’re in a rush, but trust me, it’s worth it. For extra richness, add 1 tbsp coconut oil to the melted butter mixture. And if you’re feeling fancy, swap half the peanut butter for almond butter—it’s a delicious variation that still holds together perfectly.
This mix sets up in 15 minutes at room temperature, but if you’re in a hurry, pop it in the fridge for 10 minutes to speed things up. Once set, wrap tightly in parchment paper and store in an airtight container for up to 2 weeks. For parties, cut into squares and roll the edges in extra chocolate chips or crushed nuts. These treats reheat beautifully—microwave for 10 seconds to soften if they’ve gotten too firm. And if you make extras? Freeze them for up to 3 months—they’re perfect for last-minute cravings or potlucks.
Why You’ll Love This Recipe
- No-Fuss Magic: I swear, this is the kind of recipe where you can measure ingredients while watching a show. Melt peanut butter and vegan butter together—boom, done. No eggs, no baking, no waiting. Just three main ingredients (plus chocolate and salt for the real magic) tossed into a pot, then folded into crispy cereal.
- Rich & Crunchy: That creamy oil-based peanut butter? It’s the star—smooth, slightly sweet, and packed with flavor. Add a pinch of flaky sea salt and dark chocolate chips, and suddenly you’ve got a treat with texture that’s dangerously satisfying. The first bite is always the best.
- Party-Ready Snack: Between us, these disappear at gatherings. They’re easy to cut into squares, pack in containers, or even roll into balls for a no-bake twist. Honestly, they work for potlucks, kids’ lunches, or just when you need a quick dessert fix—no one will guess they’re this simple.
- Budget Win: Peanut butter, cereal, and chocolate? Check. Affordable, shelf-stable, and makes enough to share. I’ve made these for under $5 and still had leftovers. Plus, they keep for days, so you’re not scrambling for last-minute treats. My wallet (and my taste buds) thank me.
Step-by-step instructions for 3-Ingredient peanut butter Rice Krispie treats
Here’s how to transform simple pantry staples into decadent, no-bake treats in record time.
Melt the Peanut Butter and Vegan Butter Together
In a large microwave-safe bowl, combine the 2 cups creamy oil-based peanut butter and 0.5 cup melted vegan butter. Microwave in 20-second bursts, stirring vigorously between each interval, until the mixture reaches a smooth, pourable consistency—about 1 minute total. You’re aiming for a temperature around 160°F, where the peanut butter melts completely without scorching.
This step is crucial for binding the cereal together. If the mixture seems too thick, add 1 teaspoon of hot water at a time until it flows like thin honey. The peanut butter should be completely smooth, with no graininess remaining. If you notice any separation, stir vigorously to re-emulsify it—this ensures a uniform texture in your treats.
Infuse with Vanilla and Fold in Chocolate Chips
Remove the melted peanut butter mixture from the microwave and let it cool slightly for 1 minute. Stir in the 0.5 teaspoon pure vanilla extract and 0.25 cup dark chocolate chips, mixing until the chocolate is evenly distributed. The vanilla enhances the peanut butter’s natural sweetness while the chocolate adds rich, deep flavor pockets throughout.
Work quickly but carefully—you want the chocolate chips to stay intact rather than melting completely. If the mixture starts to thicken as it cools, microwave it again for 10-second bursts until it returns to a pourable consistency. This ensures the cereal will be fully coated and bound together.
Combine with Rice Krispies Cereal
Transfer the peanut butter mixture to a medium bowl and add the 6 cups Rice Krispies cereal all at once. Using a wooden spoon or rubber spatula, gently fold the cereal into the peanut butter until every piece is fully coated. Avoid overmixing—just enough to distribute the peanut butter evenly. You’ll see some cereal pieces clump together, and that’s perfect.
Here’s the thing—don’t worry if it looks messy at first. The peanut butter will bind everything together as it cools. If you’re concerned about uneven distribution, press the cereal into the peanut butter mixture rather than stirring. The goal is to ensure the cereal absorbs the peanut butter without breaking into crumbs.
Press into a Pan and Chill
Lightly grease an 8×8-inch baking dish with vegan butter or line it with parchment paper for easy removal. Press the peanut butter-cereal mixture firmly and evenly into the pan using a spatula or your hands. You want a smooth, even surface—press down gently but firmly to compact the cereal and create a solid base. This step is what gives those classic Rice Krispie treats their signature texture.
Sprinkle the 0.5 teaspoon flaky sea salt evenly over the top for a sophisticated finish. Then, cover the pan with plastic wrap and refrigerate for at least 2 hours, or until the treats are completely firm. This chilling time is non-negotiable—it allows the peanut butter to fully set and bind the cereal together, resulting in treats that hold their shape and have clean breaks when cut.
Cut and Serve
Once fully chilled, remove the treats from the refrigerator and let them sit at room temperature for 5 minutes to soften slightly. Using a sharp knife, cut the treats into 16 equal squares—this matches the serving size perfectly. For clean cuts, dip the knife in hot water, wipe it dry, and press straight down without sawing. The treats should hold their shape without crumbling.
Serve immediately or store in an airtight container in the refrigerator for up to 5 days. These treats are best enjoyed at room temperature, so let them sit for 10 minutes before serving if they’ve been refrigerated. The contrast of the creamy peanut butter, crispy cereal, and salty chocolate creates a perfect balance in every bite—simple ingredients, extraordinary results.
Pro Tips For Making 3 Ingredient Peanut Butter Rice Krispie Treats
- Heat the Pan First: I learned this the hard way—cold peanut butter and butter mix won’t coat the pan evenly, leading to sticky messes. Pop your 9×13-inch pan in the oven at 350°F for 3-5 minutes before adding the mixture, then grease it with vegan butter while it’s still warm. The heat helps the peanut butter spread smoothly and prevents clumping.
- Use Room-Temp Peanut Butter: Cold peanut butter from the fridge turns the whole batch into a thick, gloppy disaster. Scoop the jar out 10 minutes before mixing—just enough to soften it to a smooth, spreadable consistency. If it’s still stubborn, microwave it for 10 seconds in 5-second bursts (yes, even if you’re impatient like me).
- Press Gently, Not Hard: I used to jam the pan down with all my weight, thinking more pressure = better texture. Wrong. Lightly press the mixture into the pan with a spatula or your fingers, then let it settle naturally. Over-pressing compacts the Rice Krispies, making them soggy instead of light and crisp.
- Fold in Chocolate Last: Sounds weird, but it works: melt the dark chocolate chips separately (microwave in 20-second bursts) and stir them into the already cooled peanut butter mixture. This keeps the chocolate chips from turning into sad, greasy blobs—plus, they stay firmer and more defined in the final treat. Sprinkle extra chips on top right before cutting for a pro finish.
Creative variations of this 3 ingredient peanut butter rice krispie treats
Peanut Butter Swaps
Want to experiment with different nut butters? Try almond butter for a subtler, slightly sweet flavor—it creates a lighter texture but still binds beautifully. For a bold, earthy twist, swap in cashew butter (blend raw cashews first for smoothness).
If you love spicy kick, mix in 1 teaspoon of cinnamon or ½ teaspoon cayenne with the peanut butter before melting. 🌶️
Crunchy Add-Ins
Upgrade the texture by folding in ½ cup chopped peanuts or toasted coconut flakes for extra crunch. For a sweet-salty combo, sprinkle crushed pretzels over the top before chilling. I also love adding ¼ cup mini vegan marshmallows—they melt slightly when pressed, creating pockets of gooey goodness.
Just fold them in gently at the end to avoid breaking.
Flavor Boosters
Enhance the peanut butter base with 1 teaspoon of espresso powder for a mocha twist, or ½ teaspoon of orange zest for a bright, citrusy note. For caramel lovers, stir in 2 tablespoons of vegan caramel sauce with the melted butter.
If you’re feeling fancy, drizzle melted dark chocolate over the top after cutting for a decadent finish. 🍫
Gluten-Free Twist
Skip the Rice Krispies and use 6 cups gluten-free cornflakes or puffed quinoa for a grain-free version. These hold together just as well and add a different crunch. For a nut-free option, replace peanut butter with sunflower seed butter—it’s slightly earthier but works perfectly in this recipe.
Always check labels to ensure all ingredients are certified gluten-free.
Seasonal Variations
In summer, add ¼ cup freeze-dried strawberries or raspberries for a fruity surprise. For fall, fold in ½ teaspoon pumpkin pie spice and top with chopped pecans.
During the holidays, mix in chopped dried cranberries and white chocolate chips for a festive touch. Each variation keeps the core recipe simple while adding seasonal excitement. 🍂
Make-Ahead Magic
Double the recipe and press into two 8×8-inch pans for easy sharing. Store in the freezer for up to 3 months—wrap each pan tightly in plastic wrap and foil. To serve, thaw at room temperature for 1 hour or microwave for 30 seconds to soften.
For gift-giving, cut into squares, wrap individually in parchment paper, and tie with twine. These treats travel beautifully and always disappear quickly! ✨
Nutrition facts
Frequently asked questions
Can I use regular peanut butter instead of oil-based?
Regular peanut butter works, but it may be too thick to bind properly. If using it, microwave in 20-second bursts while stirring until completely smooth, adding 1 teaspoon hot water at a time if needed. The texture will be slightly denser but still delicious. For best results, opt for natural, creamy oil-based peanut butter.
Why did my treats crumble when cutting?
Under-chilling is the most common cause. Let the treats sit in the fridge for at least 2 hours (or overnight) to fully set. If they’re still crumbly, press them back into the pan and chill another 30 minutes. For cleaner cuts, dip your knife in hot water between slices.
Are these treats really vegan?
Yes! This recipe uses oil-based peanut butter (check for no added sugar) and vegan butter. Just ensure your chocolate chips and vanilla extract are also vegan-certified. The original Rice Krispies cereal is accidentally vegan, but always verify labels for any hidden dairy traces.
Can I make these without a microwave?
Melt the peanut butter and vegan butter in a small saucepan over low heat, stirring constantly until smooth. Keep the heat gentle to avoid burning—160°F is ideal. Stir in vanilla and chocolate chips immediately after melting to prevent separation.
How do I store leftovers?
Wrap tightly in plastic wrap or store in an airtight container. They’ll keep in the fridge for 5 days or freeze for 3 months. For best texture, let them sit at room temperature for 10 minutes before serving. The peanut butter softens slightly, making each bite more enjoyable!

- 3-Ingredient Peanut Butter Rice Krispie Treats Recipe: No-Bake Magic in 10 Minutes - September 26, 2026
- 2 Layer Carrot Cake Recipe with Pineapple: Tropical Swirl That Stays Moist for Days - September 26, 2026
- 40 30 30 Chili Recipe: Meat-Packed Heartiness in One Pot - September 26, 2026