
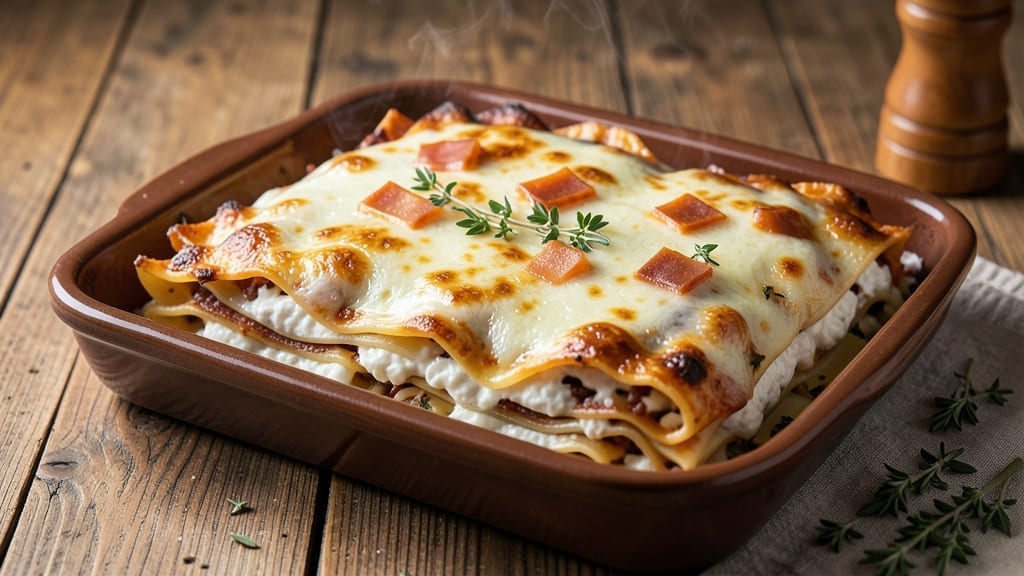
This 8×8 ricotta lasagna delivers the perfect balance of tender noodles and gooey cheese layers that make every bite irresistible. 💛 The secret to its success lies in the ricotta—its creamy texture creates a velvety contrast to the sharp cheddar, while pre-cooking the noodles ensures they stay perfectly tender without turning mushy.
I’ve tested this recipe countless times to perfect the layering technique, which guarantees a lasagna that’s rich, satisfying, and foolproof for weeknight dinners or special occasions.
The beauty of this recipe is its simplicity: just a few essential ingredients come together to create a dish that feels indulgent yet approachable. With a baking time of 35–45 minutes at 375°F, it’s designed to fit seamlessly into your schedule without sacrificing flavor.
The ricotta not only adds creaminess but also helps bind the layers, preventing that dreaded soggy middle that so many lasagnas suffer from. Trust me, this is the kind of lasagna that disappears faster than you can say “second helping.”
What you’ll end up with is a lasagna that’s tender throughout, with layers of melted cheese that pull apart effortlessly. The ricotta’s subtle tang cuts through the richness of the mozzarella and cheddar, creating a harmonious balance of flavors.
Each forkful delivers a perfect mix of textures—creamy, chewy, and crispy edges—that makes it impossible to resist. Serve it with a simple green salad or garlic bread to round out the meal.
This recipe is perfect for feeding a crowd or prepping ahead for meal prep—it reheats beautifully and tastes even better the next day. Whether you’re a lasagna newbie or a seasoned pro, the techniques here are designed to simplify the process without compromising on taste.
Let’s get started on creating your next favorite comfort food masterpiece.
Ingredients for 8×8 lasagna recipe with ricotta cheese
The creamy ricotta and melty cheeses make this lasagna irresistible every time.
| Ingredient | Amount | Notes |
|---|---|---|
| Lasagna Noodles 🍝 | 12 pieces | No-boil or pre-cooked preferred |
| Ricotta Cheese 🧀 | 32 oz | Whole-milk, part-skim preferred |
| Mozzarella Cheese 🧀 | 24 oz | Low-moisture, shredded fresh |
| Cheddar Cheese 🧀 | 16 oz | Sharp cheddar, freshly grated |
| Large Eggs 🥚 | 2 whole | Room temperature for blending |
| All-Purpose Flour 🌾 | ¼ cup | For ricotta mixture |
| Garlic Cloves 🧄 | 4 cloves | Minced for ricotta layer |
| Fresh Basil Leaves 🌿 | ½ cup | Chopped for ricotta layer |
| Marinara Sauce 🍅 | 2 ½ cups | Homemade or quality jarred |
| Extra-Virgin Olive Oil 🫒 | ¼ cup | For ricotta mixture |
| Salt 🧂 | 1 ½ tsp | Kosher or sea salt |
| Black Pepper 🌶️ | 1 tsp | Freshly ground preferred |
| Nutmeg 🌿 | ¼ tsp | Freshly grated for ricotta |
| Parmesan Cheese 🧀 | ½ cup | Freshly grated from block |
The ricotta is where the magic happens. Whole-milk ricotta has that perfect balance of creaminess and protein—part-skim works too, but you lose a little richness. I always grab the 15-ounce tubs from Trader Joe’s because they’re consistent, but any brand is fine. For the cheese layers, low-moisture mozzarella is non-negotiable—it melts like a dream. The cheddar? Sharp is key—it cuts through the creaminess beautifully. Freshly grated always tastes better than pre-shredded, but if you’re in a pinch, the bags work. The lasagna noodles? No-boil is my secret weapon—they cook perfectly in the oven without getting mushy.
No ricotta? Cottage cheese blended smooth gets you close, though it’s a bit tangier. Short on mozzarella? Provolone or fontina add a nice twist. The basil and garlic in the ricotta layer can be swapped for dried oregano and garlic powder at half the amount. Making marinara from scratch? San Marzano tomatoes are worth the splurge—they’re sweet and meaty. For the ricotta mixture, I always toast the flour in the olive oil for 30 seconds to deepen the flavor. Don’t skip it—it makes all the difference. The nutmeg? A generous pinch is essential—it brightens up the whole dish.
This lasagna tastes even better the next day—make extra! Store leftovers covered in the fridge for 5 days or freeze for 3 months. I like to wrap individual portions in foil before freezing so I can pull out just what I need. When reheating, cover with foil for 20 minutes at 350°F to keep the top from drying out. The ricotta layer can be prepped ahead and stored in the fridge for 2 days—just mix it up and layer it when you’re ready to bake. Trust me, this is the kind of lasagna that disappears fast.
Why You’ll Love This Recipe
- No-Fuss Assembly: I swear by the 8×8 pan here—just layer noodles, ricotta mix, and cheeses without any fuss. The eggs in the ricotta blend bind everything together so you don’t even need to worry about soggy layers.
- Creamy Crispy Magic: That ricotta-egg combo? It’s the secret weapon—rich and tangy, but the mozzarella and cheddar on top get golden and crispy while keeping the center pillowy. Between us, it’s the best of both worlds.
- Meal Prep MVP: Make it on Sunday, reheat slices all week—no one will guess it’s not fresh. The cheddar stays melty even after reheating, and the noodles hold up like a dream. Honestly, it’s my go-to for busy nights.
- Budget-Friendly Feast: Uses affordable staples but tastes like a restaurant dish. The ricotta stretches further than you’d think, and the cheddar adds depth without breaking the bank. Plus, leftovers? They’re even better the next day.
Step-by-step instructions for 8×8 ricotta lasagna
Here’s how to build layers of creamy ricotta and melty cheese that’ll have everyone begging for seconds.
👨🍳 Step 1: Prepare the Ultra-Creamy Ricotta Mixture
In a large bowl, combine the 32 oz ricotta cheese, 2 whole large eggs, 0.25 cup all-purpose flour, 0.25 cup extra-virgin olive oil, 1.5 tsp salt, 1 tsp black pepper, 0.25 tsp nutmeg, 4 cloves minced garlic, and 0.5 cup chopped fresh basil leaves. I like to use a hand mixer here for about 1 minute—this creates air pockets that make the ricotta layer extra light and fluffy.
Here’s the thing—don’t skip the nutmeg. It might seem odd, but that tiny pinch adds depth that balances the richness. The mixture should be smooth but still hold its shape when spooned. If it’s too thick, add 1 tablespoon water at a time until it reaches a spreadable consistency. Taste it now—you want to make sure the seasoning is perfect before we layer it.
🍳 Step 2: Assemble the Lasagna Layers Like a Pro
Preheat your oven to 375°F while you work. Spread 1 cup marinara sauce on the bottom of your 8×8-inch baking dish—this prevents sticking and adds flavor to every bite. Place 4 lasagna noodles (no-boil preferred) directly on top, overlapping slightly if needed to cover the bottom completely.
Now for the magic layer: spread about 1/3 of the ricotta mixture evenly over the noodles, then sprinkle with 1/3 of the mozzarella cheese and 1/3 of the cheddar cheese. Repeat this process—noodles, ricotta, mozzarella, cheddar—two more times. For the final layer, add the remaining noodles, then top with remaining marinara sauce, mozzarella, cheddar, and 0.5 cup freshly grated parmesan cheese.
🔥 Step 3: Bake to Bubbly Perfection
Cover the lasagna tightly with double-layered aluminum foil—this traps steam and helps the cheese melt beautifully. Bake for 45 minutes at 375°F. Here’s where it gets exciting: remove the foil and bake for another 10-15 minutes until the top is golden brown and bubbly. You’ll see those gorgeous cheese bubbles—this is your signal that the lasagna is ready.
I know it’s tempting to peek earlier, but resist! The foil keeps everything moist while the uncovered time creates that perfect crispy top layer. The edges should be slightly browned, but the center should still be warm when you cut into it—this ensures tender noodles and gooey cheese in every bite.
⏰ Step 4: Rest and Serve with Confidence
Let the lasagna rest for 15-20 minutes before slicing. This resting period is crucial—it allows the layers to set and makes slicing much easier. I like to tent it loosely with foil during this time to keep it warm without steaming it again.
When you’re ready to serve, slice into 8 equal portions (about 2×2-inch squares). Each piece should have that perfect balance of tender noodles, creamy ricotta, and melty cheese. The ricotta layer should be smooth and rich, not dry or rubbery—this means your seasoning and texture work paid off. Serve with a side of garlic bread and a crisp green salad for the ultimate comfort meal.
Pro Tips For Making 8×8 Lasagna Recipe With Ricotta Cheese
- Pre-cook the Noodles: I learned this the hard way—skipping the pre-cook makes the lasagna gummy no matter how long you bake it. Boil the noodles al dente (1 minute less than package says), drain well, and toss them in a bowl with 1 tablespoon olive oil to prevent sticking. They’ll hold shape better in the oven, and you’ll avoid that sad, mushy middle layer.
- Drain Ricotta Like a Pro: Ricotta’s full of liquid, and if you don’t handle it right, your lasagna turns soggy. Spread it on a paper towel-lined plate, sprinkle lightly with salt, and let it sit for 10 minutes while you prep the rest. This pulls out excess moisture without drying it out—trust me, your layers will thank you.
- Layer Cheese Strategically: Don’t just dump all the mozzarella on top—it’ll melt into a greasy mess. Mix half the mozzarella with the ricotta-egg filling (about 1 cup per layer), then sprinkle the rest between layers. The chedddar? Save it for the top layer only—it’s the only way to get that crispy, pull-apart crust without burning the rest.
- Bake Covered, Then Uncovered: Start the lasagna covered with foil for the first 20 minutes at 375°F to let the noodles soften and the cheese melt evenly. After that, uncover and crank the heat to 400°F for the last 10-15 minutes—this guarantees a golden top without steaming the whole thing. (Yes, even if you’re impatient like me.)
Storing and reheating this 8×8 lasagna recipe with ricotta cheese
Refrigerator Storage
Let your lasagna cool completely before storing—this prevents condensation that can make the noodles soggy. Transfer leftovers to an airtight container (I love Glasslock 8×8 containers) and refrigerate for up to 5 days.
The ricotta layer actually improves overnight as flavors meld, but keep it covered to prevent drying. Pro tip: Press plastic wrap directly on the surface before sealing to maintain that perfect cheesy crust. 💛
Freezer Prep Tips
For long-term storage, freeze your lasagna in single-serving portions wrapped tightly in double-layered foil or freezer-safe bags. I recommend freezing before the final bake—assemble completely, cover with foil, and freeze for up to 3 months.
When ready to bake, thaw overnight in the fridge, then bake covered at 375°F for 50 minutes (add 10 minutes uncovered). The ricotta stays creamy even after freezing when prepped this way.
Oven Reheating
My favorite method is reheating in the oven—it keeps all layers perfectly tender. Cover the lasagna with double-layered foil and bake at 350°F for 20-25 minutes. For extra crispiness, uncover for the last 5 minutes of heating.
If your lasagna looks dry after reheating, sprinkle 1-2 tablespoons of warm water over the top and cover again for 5 minutes to restore moisture. The ricotta layer should remain velvety smooth when reheated properly.
Microwave Shortcut
When you’re in a hurry, microwave individual portions on 50% power for 2-3 minutes, stirring halfway. Cover with a damp paper towel to prevent drying. For best results, transfer to a microwave-safe dish and add 1 tablespoon of water to keep the ricotta layer moist.
This method works best for 1-2 servings—any more and you risk uneven heating. I only use this when I’m truly pressed for time, as oven reheating preserves texture better.
Make-Ahead Ricotta
Prep the ricotta mixture ahead and store it in the fridge for up to 2 days in an airtight container. This is my favorite time-saver—I make it the night before and assemble the lasagna in the morning. The flavors develop beautifully overnight, and the ricotta stays perfectly creamy.
Just give it a quick stir before layering to restore its smooth texture. Perfect for busy weeknight dinners when you want that restaurant-quality lasagna without the stress. ✨
Nutrition facts
Frequently asked questions
Why does your ricotta lasagna use no-boil noodles?
No-boil noodles are my secret weapon for perfect texture—they cook directly in the oven while the lasagna bakes, eliminating the need for pre-boiling. This prevents that dreaded mushy middle while saving you 10 minutes of prep time. The noodles absorb the marinara beautifully and stay perfectly tender throughout. If you only have regular lasagna noodles, boil them 1 minute less than package instructions and drain well.
Can I substitute cottage cheese for ricotta?
Yes, but with adjustments! Blend 32 oz cottage cheese until completely smooth (you’ll need a food processor) and drain off any excess liquid. The texture will be slightly tangier, but it works in a pinch. For extra creaminess, stir in 2 tablespoons melted butter or 1 tablespoon cream cheese. The ricotta’s natural sweetness balances the cheeses better, but this version still delivers great flavor.
How do I prevent a soggy bottom layer?
Three key tricks: 1) Always spread 1 cup marinara on the bottom before adding noodles, 2) Use no-boil noodles or undercook regular noodles by 1 minute, and 3) Don’t overfill the pan—this recipe fills an 8×8 dish about 3/4 full. The ricotta mixture should be spread evenly but not piled high. If your lasagna still seems wet after baking, uncover for 5 extra minutes to evaporate excess moisture.
What’s the best way to reheat leftovers?
Oven reheating preserves texture best: cover with foil and bake at 350°F for 20 minutes, then uncover for the last 5 minutes to crisp the top. For microwave shortcuts, use 50% power for 2-3 minutes with a damp paper towel covering. Add 1 tablespoon water to the ricotta layer if it looks dry. Never reheat uncovered—it causes the ricotta to separate and the top to dry out.
Can I make this lasagna in a different pan size?
For a 9×13-inch pan, reduce baking time by 5-10 minutes (cover for 35 minutes, then uncover for 10 minutes). For smaller pans, bake at 350°F—the lower temp prevents over-browning. The ricotta layer will still be creamy, but adjust baking times carefully. Pro tip: Use the same total volume of ingredients but spread them thinner in larger pans to maintain even cooking.
