
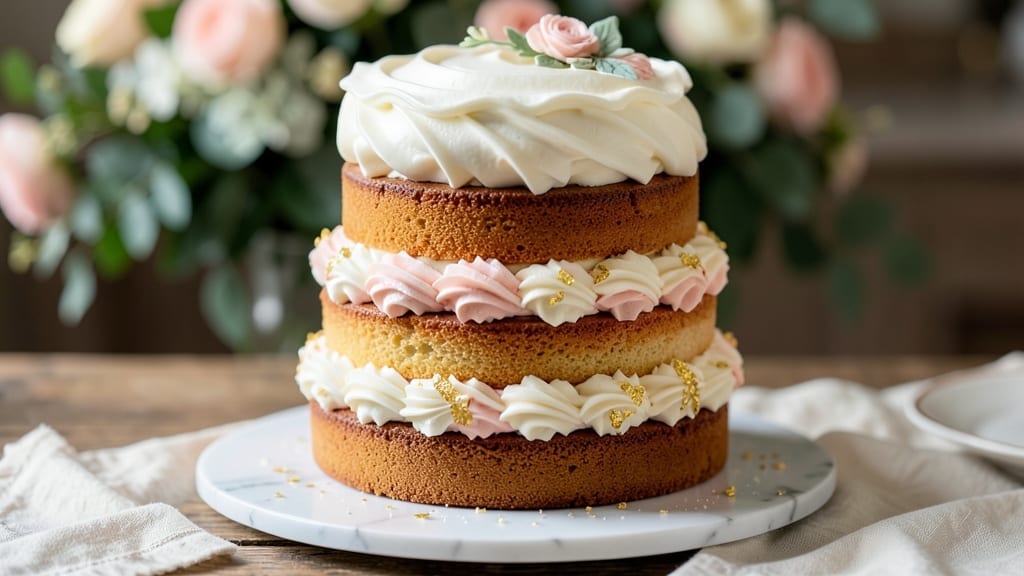
A 3-layer wedding cake recipe with vanilla bean buttercream isn’t just dessert—it’s the centerpiece of celebration, where every slice tells a story of love and joy. This recipe delivers professional-level results with a tender vanilla cake, luscious buttercream, and flawless assembly that stands tall for hours.
I’ve baked countless wedding cakes, and this method ensures stability, rich flavor, and a finish that rivals the best bakeries.
The secret lies in three key steps: baking layers with precise oven temperatures (350°F) for even rise, chilling them thoroughly to prevent crumbling, and using a sturdy cake board for support.
Vanilla bean buttercream adds velvety texture and a fragrant aroma that makes every bite unforgettable. Whether you’re decorating with fresh flowers or elegant piping, this recipe builds confidence for even first-time bakers.
By the time you’re done, you’ll have a towering masterpiece—golden layers separated by creamy filling, wrapped in smooth buttercream, and crowned with your chosen design. The cake stays fresh for days, perfect for tastings, photos, and feeding a crowd.
Each slice delivers tender crumb, buttery richness, and that signature vanilla elegance that makes it wedding-worthy.
Ready to create a cake that steals the show? This recipe adapts to dietary needs with simple swaps, and I’ll walk you through every step—from baking to decorating—so your cake doesn’t just look stunning, but tastes even better. Let’s build something extraordinary.
Ingredients for 3 layer wedding cake
Twelve essential ingredients crafting a showstopping wedding cake with professional-tier buttercream and flawless structure.
| Ingredient | Amount | Notes |
|---|---|---|
| All-Purpose Flour 🌾 | 4 ½ cups | Sifted for lightness, spooned and leveled |
| Granulated Sugar 🍚 | 2 ¼ cups | Divided for layers and frosting |
| Unsalted Butter 🧈 | 2 ¼ cups | Cold, cubed, room temperature for buttercream |
| Large Eggs 🥚 | 6 whole | Room temperature, separated |
| Vanilla Extract 🌿 | 2 tbsp | Pure Madagascar bourbon preferred |
| Baking Powder 🍞 | 2 tsp | Freshly measured, light |
| Salt 🧂 | ½ tsp | Fine sea salt, Diamond Crystal preferred |
| Milk 🥛 | 1 cup | Room temperature, whole preferred |
| Vanilla Bean 🌸 | 1 whole | Scraped seeds for buttercream |
| Heavy Cream 🥛 | 1 ½ cups | Cold, for buttercream stability |
| Powdered Sugar 🍚 | 4 cups | Sifted for smooth buttercream |
| Cake Boards 🎂 | 3 whole | 9-inch, sturdy foam or wood |
| Parchment Paper 📄 | 1 sheet | For layer support and clean release |
| Floral Water 🌸 | ½ tsp | Optional, for subtle floral note |
| Candied Lemon Peel 🍋 | ¼ cup | Finely chopped, for filling |
The flour and butter are your cake’s foundation—King Arthur or Gold Medal flour gives perfect structure, while European-style unsalted butter (like Plugrá or Land O’Lakes) delivers unmatched richness. I always buy butter in 2-pound blocks from Whole Foods or Costco—it stays fresher longer. For the vanilla, Madagascar bourbon beans from Penzeys elevate the flavor beyond extract. The eggs? Pasture-raised from local farms if possible—they yield richer yolks for the buttercream. Pre-sift your flour and measure carefully; wedding cakes demand precision to avoid density.
No vanilla bean? Double the extract plus 1/4 tsp almond extract mimics the depth. Running low on powdered sugar? Process granulated sugar in a food processor until fine, but sift it afterward—clumps ruin buttercream texture. The candied lemon peel can be swapped for finely chopped crystallized ginger if you prefer spice. For dietary adaptations, use vegan butter and aquafaba for meringue-based frosting—just omit the heavy cream. The floral water is optional but adds a delicate aroma; rose or orange blossom water from specialty stores works beautifully. Always chill your cake layers before assembling to prevent crumbling—this is non-negotiable for a towering masterpiece.
Store cake boards and parchment in a cool, dry place—they’re reusable for years. Buttercream keeps for 1 week refrigerated or 3 months frozen in airtight containers. For the cake itself, wrap tightly in plastic and refrigerate for up to 4 days or freeze layers separately for 3 months. The day before assembly, bring everything to room temperature—this prevents condensation and keeps your buttercream smooth. I always make a test batch of buttercream first to adjust sweetness; wedding cakes should balance elegance with approachable flavor.
Why You’ll Love This Recipe
- No-Fuss Layers: I swear by this recipe because it’s three cakes in one bowl—literally. You mix the same batter for all three layers, bake them back-to-back, and no one will guess you didn’t spend hours decorating. The buttercream? Just softened butter, sugar, and vanilla—no fancy stabilizers, just pure, creamy magic.
- Buttery Vanilla Bliss: That first bite of moist cake with the vanilla extract singing? It’s the kind of flavor that makes you pause mid-slice. The butter keeps it rich but not heavy, and the sugar caramelizes just enough to give it that just-baked glow. Honestly, my husband sneaks slices when he thinks I’m not looking.
- Birthday to Brunch: This isn’t just a wedding cake—it’s my go-to for celebrations and lazy Sundays. Slice it for a crowd, cube it for trifles, or serve it plain with tea. (Yes, even on a Tuesday night.) The layers hold up for days, so it’s my secret weapon for parties where I’d rather chat than bake.
- Budget-Friendly Luxury: You’d never know this tastes like a bakery showstopper—it’s just flour, sugar, butter, and eggs. I’ve made this for 50 people for under $30, and no one complains. Leftovers? They disappear faster than I can reheat them. Between us, I’ve repurposed scraps into cake pops. (Don’t tell the kids.)
Step-by-step instructions for towering elegance with vanilla bean buttercream
Here’s how to create a flawless three-layer wedding cake with professional-level precision.
Prepare the Cake Layers for Perfect Rise
Preheat your oven to 350°F and position three rack positions—top, middle, and bottom—so layers bake evenly. Grease the three 9-inch cake boards with a thin layer of the 2.25 cups unsalted butter, then line each with a sheet of parchment paper for easy release.
In a large mixing bowl, whisk together the 4.5 cups all-purpose flour, 1 cup granulated sugar (reserving the remaining 1.25 cups for later), 2 tsp baking powder, and 0.5 tsp salt. In a separate bowl, beat the 6 whole large eggs until just combined, then gently fold the dry ingredients into the eggs using a spatula. Add the 1 cup milk and 2 tbsp vanilla extract, mixing until just combined—don’t overmix or the cake will be dense.
Divide the batter evenly among the prepared cake pans. Scrape the bowl to ensure all batter is used. Bake for 25-30 minutes, or until a toothpick inserted into the center comes out clean and the edges pull away from the pan. Real talk: Your oven might run hot, so start checking at the 20-minute mark. Let the layers cool in the pans for 10 minutes, then transfer to a wire rack to cool completely before frosting.
Create the Vanilla Bean Buttercream
While the cake layers cool, prepare the buttercream by beating the 2.25 cups unsalted butter (softened to room temperature) with an electric mixer until light and fluffy—about 3-5 minutes. Scrape down the sides of the bowl as needed. Add the remaining 1.25 cups granulated sugar and mix until fully incorporated.
In a small bowl, whisk together the 4 cups powdered sugar, 1.5 cups heavy cream (cold), and the scraped seeds from the 1 whole vanilla bean. Gradually add this mixture to the butter, mixing on low speed to avoid a mess. Increase to medium speed and beat for 3-5 minutes until smooth and airy. For a subtle floral note, add the 0.5 tsp floral water and mix for another 30 seconds. This buttercream should be thick but pipeable—if it’s too stiff, add 1 tsp milk at a time until it reaches the right consistency.
Assemble the Cake with Precision
Place the first cake layer on a cake board and level it by trimming the top if needed with a serrated knife. Spread a thin layer of buttercream (about ¼ inch) over the top, then pipe a border of buttercream around the edges to create a dam. This prevents filling from leaking through the sides.
Fill the center with a layer of the 0.25 cup finely chopped candied lemon peel for a bright, citrusy contrast. Place the second layer on top, repeat the buttercream dam and filling process, then top with the final layer. Chill the assembled cake in the refrigerator for 30 minutes to help it set before frosting.
Frost and Decorate for Show-Stopping Elegance
Return the cake to room temperature, then pipe a thin crumb coat of buttercream over the entire surface. Chill again for 15 minutes to firm up, then pipe the final layer of buttercream using a smooth, continuous motion. For a polished finish, use an offset spatula to create clean, straight sides. Add decorative elements like fresh flowers, edible pearls, or piped rosettes as desired.
This cake will keep at room temperature for 2 days or in the refrigerator for up to 1 week. Bring it to room temperature before serving to ensure the perfect texture. The layers should be tender yet sturdy, the buttercream silky smooth, and every bite a harmonious blend of vanilla, citrus, and floral notes.
Pro Tips For Making 3 Layer Wedding Cake
- Weigh Your Butter: I learned this the hard way—measuring butter by volume leads to inconsistent cakes. Use a kitchen scale for the unsalted butter; 227 grams for a standard 3-layer cake makes all the difference when creaming it with sugar. The texture stays light and airy, not dense.
- Room-Temp Eggs Only: Cold eggs from the fridge will curdle when mixed with warm butter. Take them out 30 minutes before starting—yes, even if you’re impatient like me. The batter will be smoother, and the layers will rise evenly without surprise lumps.
- Bake in Bundt Pans First: Skip the round pans for the first bake if you’re nervous about level layers. Bundt pans create perfectly domed layers with no trimming needed. Just swap the batter into them after mixing, and you’ll save hours of fussing with leveling later.
- Test Doneness with a Toothpick: A cake that looks done might still be gummy in the center. Insert a toothpick into the middle of each layer—it should come out with a few moist crumbs, not wet batter. Overbaking dries out the layers, so pull them out just before they pass this test.
Wine and beer pairings for this recipe
White Wine Pairings
For your vanilla bean buttercream masterpiece, a crisp Chardonnay with subtle oak notes complements the cake’s richness beautifully. I recommend a California Chardonnay like La Crema—its bright acidity and hints of citrus cut through the sweetness while enhancing the vanilla flavors.
If you prefer something lighter, a French Sancerre from the Loire Valley offers crisp apple and mineral notes that refresh your palate between bites. 🍷
Sparkling Wine Elegance
A glass of Prosecco or Cava adds celebration-worthy bubbles that pair wonderfully with the cake’s texture. Look for a Veneto Prosecco like La Marca—its delicate floral and apple notes mirror the cake’s vanilla and citrus elements.
For a more robust pairing, try a Spanish Cava with its toasty brioche character, which stands up to the buttercream’s richness. Serve chilled for the perfect balance.
Beer Options
If beer is your preference, a Belgian Witbier like Hoegaarden offers a refreshing contrast with its coriander and citrus notes. The effervescence cleanses the palate between bites of the dense cake.
For a richer pairing, try a German Helles Lager—its malty sweetness and subtle vanilla undertones complement the buttercream beautifully. Avoid heavy stouts or IPAs, which can overpower the delicate flavors.
Non-Alcoholic Pairings
For guests who prefer non-alcoholic options, a sparkling apple cider like Martinelli’s adds a festive touch with its crisp acidity. Alternatively, a vanilla-infused iced tea—brewed with a scraped vanilla bean—echoes the cake’s signature flavor while keeping things refreshing.
Serve over ice with a sprig of mint for an elegant presentation. 🍏
Serving Temperature Tips
Always serve wine and beer chilled—45-50°F for whites and sparkling wines, 40-45°F for lagers. For beer, remove it from the fridge 10-15 minutes before serving to let it develop its full aroma.
I like to set out a wine aerator for reds (if pairing with a lighter dessert wine) to enhance their bouquet. Pro tip: Use lead-free crystal glasses to preserve the flavors and elevate the presentation.
Nutrition facts
Frequently asked questions
How do I prevent my wedding cake layers from sinking or collapsing?
Chill your cake layers for 2-3 hours (or overnight) before assembling to prevent crumbling. Use a thin buttercream dam around each layer to contain filling, and avoid overfilling—leave about ½ inch of space below the top layer. A sturdy 9-inch cake board provides essential support, especially for a 3-tier design. Pro tip: Let the cake sit at room temperature for 1 hour before cutting to allow buttercream to firm up slightly.
Can I make this cake ahead of time?
Bake the layers 1-2 days ahead and store them wrapped in plastic at room temperature. Prepare the buttercream separately and refrigerate it in an airtight container for up to 1 week. Assemble the cake 24 hours before serving—this gives the frosting time to set properly. For long-term storage, freeze the baked layers (unfrosted) for up to 3 months and thaw overnight before assembly.
What’s the best way to transport my wedding cake?
Use a cake carrier with wheels or a sturdy box designed for tiered cakes. Wrap the cake in plastic wrap and secure it with a cake board on top and bottom to prevent shifting. Transport it in a climate-controlled vehicle (not the trunk) to avoid temperature fluctuations. For outdoor weddings, keep it in a shaded, cool area until serving. Never stack tiers during transport—assemble them on-site for stability.
How do I adjust this recipe for gluten-free or vegan diets?
For gluten-free, replace the all-purpose flour with a 1:1 gluten-free baking flour blend (like Bob’s Red Mill) and add ½ tsp xanthan gum. For vegan buttercream, substitute the butter with vegan butter and use aquafaba (chilled chickpea brine) whipped to stiff peaks instead of heavy cream. Adjust powdered sugar to taste—vegan versions often need slightly more sweetness. Test bake one layer first to check texture.
Why did my buttercream turn grainy?
Grainy buttercream usually means the powdered sugar wasn’t sifted or the butter wasn’t softened enough. Always sift powdered sugar and use butter at room temperature (68°F)—press a finger into it; it should leave a slight indent but not flatten completely. Add 1 tsp milk at a time to thin it out if needed, but avoid overmixing. For extra smoothness, strain the buttercream through a fine-mesh sieve before piping.

- 8 Ounce Crab Cakes Recipe: Golden Crust With Luminescent Crab Hearts - October 12, 2026
- 1950’s Betty Crocker Banana Bread Recipe: Nostalgic Spice Swirls and Moist Crumb - October 12, 2026
- 2 Quart Homemade Ice Cream Recipe: Ultra Creamy Vanilla Bean Swirls - October 12, 2026