
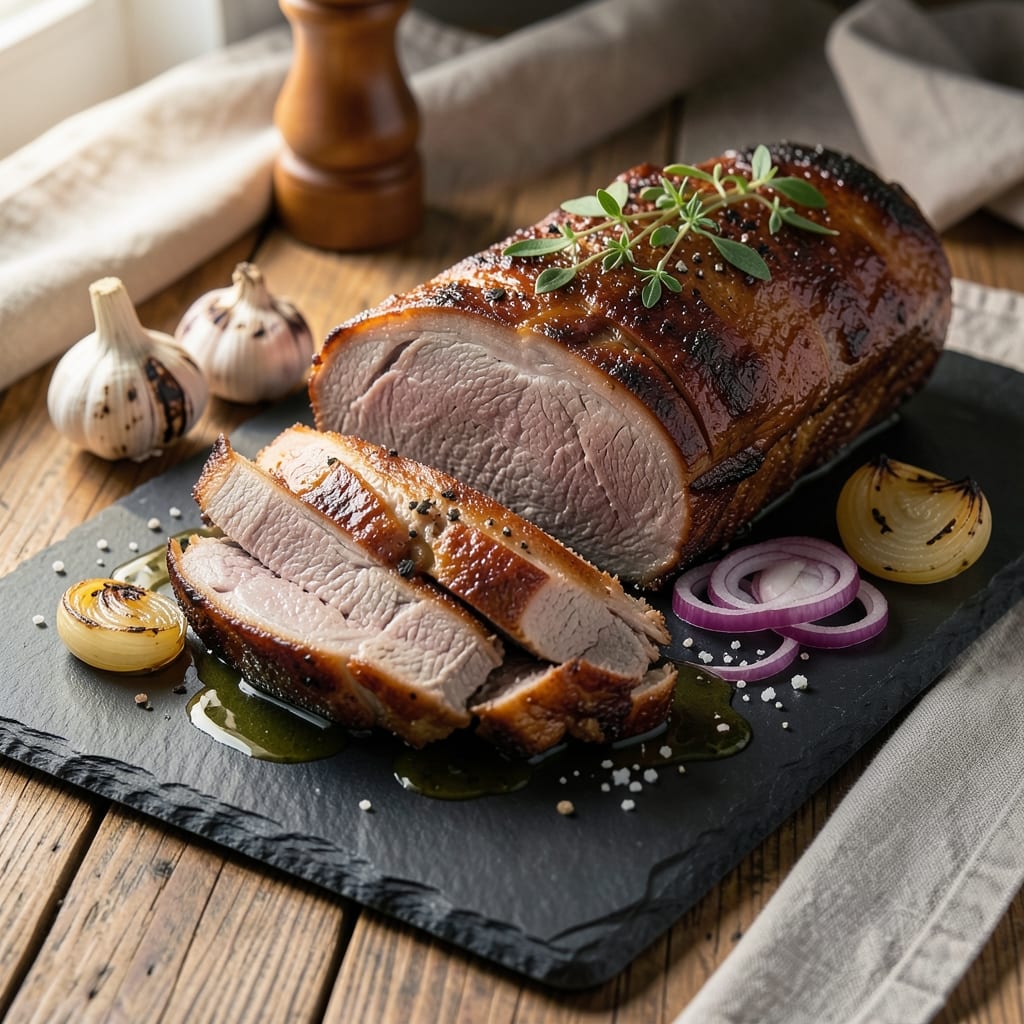
Mastering a juicy 3 lb bottom round roast starts with the reverse-sear method, a game-changer for achieving that perfect pink core every time.
This lean but flavorful cut transforms from tough to tender when cooked low and slow, then finished with a high-heat sear to lock in moisture and create a caramelized crust. I’ve perfected this technique after years of trial and error—no more dry, stringy roasts here.
The secret lies in patience: slow-cooking the roast to 145°F internal temperature ensures a melt-in-your-mouth texture, while the final sear adds depth and richness. Seasoning simply with salt, pepper, and garlic powder lets the meat shine, though optional herb crusts or peppercorn blends can elevate it further.
With just 30 minutes of prep and 3 hours of cooking, this method delivers restaurant-quality results at home.
What you’ll end up with is a perfectly cooked roast—juicy, flavorful, and visually stunning—ready to slice against the grain for maximum tenderness. The crust will be deep golden, the interior moist and pink, and every bite will be a testament to the power of slow cooking.
Serve with roasted potatoes, caramelized onions, or a bold red wine reduction for a complete meal.
This recipe isn’t just about the roast; it’s about the confidence that comes from knowing you’ve nailed the technique. Whether you’re cooking for a family dinner or a special occasion, this method guarantees success. Let’s get started—your taste buds will thank you.
Ingredients for 3 lb bottom round roast
The perfect 3 lb bottom round roast starts with these simple but powerful ingredients.
| Ingredient | Amount | Notes |
|---|---|---|
| Bottom Round Roast 🥩 | 3 lb | Well-trimmed, even thickness preferred |
| Kosher Salt 🧂 | 1 ½ tsp | Diamond Crystal preferred for balance |
| Freshly Ground Black Pepper 🌶️ | 1 tsp | Cracked peppercorns for texture |
| Garlic Powder 🧄 | 1 tsp | Freshly ground preferred |
| Olive Oil 🫒 | 2 tbsp | High smoke point for searing |
| Yellow Onion 🧅 | 1 whole | Sliced for crust option |
| Fresh Rosemary 🌿 | ½ tsp | Chopped, for optional herb crust |
| Fresh Thyme 🌿 | ½ tsp | Leaves only, for optional herb crust |
| Butter 🧈 | 2 tbsp | Unsalted, softened for basting |
| Red Wine 🍷 | ½ cup | Bold dry variety for deglazing |
| Beef Broth 💧 | ½ cup | Low-sodium preferred |
| Russet Potatoes 🥔 | 2 lb | Cut into 2-inch chunks for sides |
| Red Bell Pepper 🌶️ | 1 whole | Sliced for optional garnish |
The bottom round is the star, and quality matters here. Look for a roast with good marbling—Costco or Whole Foods usually have excellent cuts. If yours is lean, don’t stress; the slow cook and butter basting will keep it juicy. Trim any excess fat, but leave a thin layer for flavor. For the herb crust, I grab fresh rosemary and thyme from Trader Joe’s—they’re affordable and potent. The red wine should be something you’d drink; no cooking wine here. If you’re short on time, skip the crust and just focus on the reverse-sear method—it still delivers incredible results.
No fresh herbs? Dried rosemary and thyme at half the amount work in a pinch, though fresh is ideal. Running out of red wine? Beef broth with a splash of balsamic does the trick. The potatoes can be swapped for parsnips or carrots if you prefer. For the crust, if you don’t have onions, garlic powder plus a pinch of smoked paprika adds depth. The butter is non-negotiable for basting—full-fat, unsalted ensures maximum flavor without over-salting. And if you’re feeling fancy, add a handful of crushed peppercorns to the crust mix for extra complexity.
This roast reheats beautifully—2-3 hours at 300°F if you’re prepping ahead. The potatoes? Roast them alongside the meat; they’ll be perfectly crispy by the time you’re done. Store leftovers in the fridge for 3-4 days, or freeze portions for up to 3 months. I always make extra because it’s that good. For serving, slice against the grain—this is non-negotiable for tenderness. Pair with a bold red wine or a simple arugula salad to let the meat shine.
Why You’ll Love This Recipe
- Minimal Prep, Maximum Payoff: I swear by this roast—just a quick rub of salt, pepper, garlic powder, and olive oil, then it goes in the oven. No fancy marinades, no last-minute stress. Honestly, I’ve made it while scrolling through my phone during dinner.
- Crispy Outside, Tender Inside: That’s the magic of the bottom round—when you sear it first in olive oil, the crust locks in all the juices. The garlic powder gives it a subtle, warm kick without overpowering, and the pepper? Just enough to make every bite feel special.
- Weeknight Workhorse: Between us, this roast is my go-to for busy nights. Slice it thin for sandwiches, cube it for tacos, or serve it with mashed potatoes—it never lets me down. My kids even ask for it when I forget to order pizza.
- Budget-Friendly Leftovers: A 3 lb roast feeds my family for days, and the best part? It’s cheap. I’ll be real, the first night might be the star, but the second night—when it’s shredded into soups or tossed in pasta—it’s still solid. No waste, all flavor.
Step-by-step instructions for juicy bottom round roast
Here’s how to transform tough bottom round into melt-in-your-mouth perfection using the reverse-sear method.
Prep and Season the Roast
Remove the 3 lb bottom round roast from the refrigerator and let it sit at room temperature for 30 minutes. This ensures even cooking throughout. Pat the roast dry with paper towels—this step is crucial for achieving a good sear later.
In a small bowl, combine the 1.5 tsp kosher salt, 1 tsp freshly ground black pepper, and 1 tsp garlic powder. Rub this mixture evenly over all sides of the roast, pressing it into the meat so it adheres well. For extra flavor, you can also create an herb crust by mixing the 0.5 tsp chopped fresh rosemary and 0.5 tsp fresh thyme with the seasoning before applying.
Low-Temperature Oven Cook (The Slow Magic)
Preheat your oven to 275°F. Place the seasoned roast on a wire rack set inside a roasting pan to allow air circulation. Roast for 2 hours, or until the internal temperature reaches 115-120°F when measured with a meat thermometer.
This slow cooking phase is where the magic happens. The roast will develop a beautiful pink core while the outer layers gently cook. You’ll notice the meat becoming tender but not yet fully cooked—this is exactly what we want. The slow cook prevents the outer layers from sealing in moisture too early, which would lead to dryness.
High-Temperature Sear for Crispy Perfection
While the roast is still in the oven, preheat a large cast-iron skillet over high heat until smoking hot. Add the 2 tbsp olive oil and let it get shimmering hot. Remove the roast from the oven and carefully place it in the skillet.
Sear the roast for 4-5 minutes per side, until it develops a deep golden-brown crust. You’ll see the oil bubble vigorously and the meat release easily from the pan—this indicates it’s ready. For extra flavor, add 2 tbsp softened butter to the pan during the last minute of searing, letting it baste the roast.
Rest and Slice for Maximum Juiciness
Transfer the seared roast to a cutting board and let it rest for 15-20 minutes before slicing. This resting period allows the juices to redistribute throughout the meat, ensuring each slice is moist and flavorful. During this time, you can prepare your sides—like the 2 lb russet potatoes roasted with olive oil, salt, and pepper, or the 1 whole yellow onion caramelized in the same pan you seared the roast.
Slice the roast against the grain into ¼-inch thick slices. The meat should be tender enough to pull apart slightly with a fork, with a beautiful pink center that’s juicy but fully cooked. For serving, you can deglaze the searing pan with 0.5 cup red wine and 0.5 cup beef broth, reducing it slightly to create a rich gravy. Garnish with slices of the 1 whole red bell pepper for color and freshness.
Pro Tips For Making 3 Lb Bottom Round Roast
- CRANK THE HEAT FIRST: I learned this the hard way—bottom round needs a sear to stay juicy. Start with your oven at 475°F for the first 15 minutes, then drop to 325°F. That crust locks in flavor and moisture, not just looks.
- SALT LIKE IT’S 1920: Bottom round is lean and dry by nature, so don’t skimp: 1.5 tsp kosher salt per pound (that’s 4.5 tsp for 3 lbs) before you sear. Rub it in hard—yes, it’ll look like you’re overdoing it, but it dissolves into the meat as it cooks.
- DON’T CUT THE FAT: Bottom round is lean, but if your roast has even a sliver of fat cap, leave it on. It renders down into the meat, keeping it from drying out. Only trim the edges if you’re really struggling to fit it in your pan—otherwise, resist the urge.
- USE A THERMOMETER (OR GUESS WRONG): Bottom round’s safe zone is 135–140°F for medium-rare. I used to pull it at 145°F every time and wondered why it tasted dry. A cheap instant-read thermometer solves this—stick it in the thickest part, not touching bone or fat. (Pro move: Let it rest 10 minutes first.)
Troubleshooting perfect results
Uneven Cooking
If your roast has cold spots or overcooked edges, it’s likely due to uneven heat distribution. Always use a wire rack in your roasting pan to allow air circulation—this prevents the bottom from steaming while the top sears.
For thicker roasts, consider rotating the pan halfway through the slow cook to ensure even exposure. I’ve found that Costco’s roasting pans with adjustable racks work best for this. 🌡️
Dry or Tough Meat
Dryness usually means the roast was cooked too fast or didn’t rest long enough. Stick to the reverse-sear method—slow-cooking to 115-120°F first ensures tenderness, while the final sear locks in moisture.
If your roast feels dry after cooking, baste it with butter during the sear or add a splash of beef broth to the pan for extra moisture. Never skip the 15-20 minute rest—this redistributes juices and makes all the difference.
Temperature Fluctuations
Oven temperature swings can throw off your timing. Invest in an oven thermometer—I swear by the Thermoworks Oven Thermometer—to confirm your oven actually hits 275°F. If your kitchen runs hot, try cooking at 250°F for longer.
For grilling, use a meat probe thermometer to monitor internal temps precisely. Avoid opening the oven door frequently, as this causes temperature drops that extend cook time.
Searing Failures
A weak sear happens when the pan isn’t hot enough or the meat is too wet. Pat the roast completely dry before searing, and use a heavy cast-iron skillet—like a Lodge 10.25-inch—to retain heat. If your oil isn’t smoking hot, let it heat longer.
For extra insurance, sear in batches if your pan is too small. I’ve ruined many a sear by rushing this step—patience pays off with a deep golden crust.
Gravy Too Thin
If your red wine reduction turns out watery, you likely didn’t reduce it enough. After deglazing the pan with 0.5 cup red wine and 0.5 cup beef broth, let it simmer uncovered until it thickens to a light syrup consistency.
For extra richness, whisk in 1 tbsp cornstarch mixed with 1 tbsp cold water at the end. If you’re short on time, store-bought demi-glace works in a pinch—just warm it through with a splash of beef broth.
Herb Crust Not Sticking
Fresh herbs can slip off if not applied properly. Mix your chopped rosemary, thyme, and garlic powder with a little olive oil to create a paste before rubbing it onto the roast. Press the mixture firmly into the meat so it adheres.
For extra grip, lightly sear the herb-coated side first before flipping. If herbs burn during the final sear, reduce heat slightly or sear them in a separate pan first for a garlic-herb butter topping instead. 🌿
Nutrition facts
Frequently asked questions
Why does this recipe use a reverse-sear method?
The reverse-sear method is perfect for lean cuts like bottom round because it prevents dryness. Slow cooking to 115-120°F first breaks down tough fibers, while the final high-heat sear creates a flavorful crust without overcooking the interior. This technique transforms what could be a tough, stringy roast into melt-in-your-mouth perfection.
Can I cook this roast in a slow cooker instead of the oven?
Transfer the seasoned roast to a slow cooker and cook on low for 5-6 hours until it reaches 145°F internally. Then finish with the same high-heat sear in a cast-iron skillet. The slow cooker maintains consistent temperature, making it ideal for busy days. Just avoid adding liquid—this is a dry-heat method.
How do I know when the roast is fully cooked?
Use a meat thermometer to check the internal temperature—145°F is perfect for medium-rare. Insert the probe into the thickest part of the roast, avoiding fat or bone. The reverse-sear method ensures you’ll get that juicy pink center without overcooking. If you prefer medium, aim for 160°F.
What’s the best way to reheat leftovers?
Slice the roast and reheat in a 300°F oven for 2-3 hours with a splash of beef broth to keep it moist. For quick reheating, use a skillet over medium-low heat with a little butter, basting frequently. Never microwave—it makes the meat tough. Leftovers keep well for 3-4 days in the fridge.
Can I substitute another cut of beef?
While bottom round is ideal, you can use chuck roast or top round with similar success. Chuck has more fat, so reduce cook time slightly. Avoid tender cuts like ribeye—they’ll become dry with this method. For best results, stick with leaner, tougher cuts that benefit from slow cooking.

- 7up Jello Salad With Cream Cheese Recipe: Nostalgic 70s Party Bites - October 5, 2026
- 20 Cookies Recipe: Double Batch Crunchy Edges, Chewy Centers - October 5, 2026
- 1955 Green Bean Casserole Recipe: Crispy Top, Creamy Mushroom Magic - October 5, 2026