
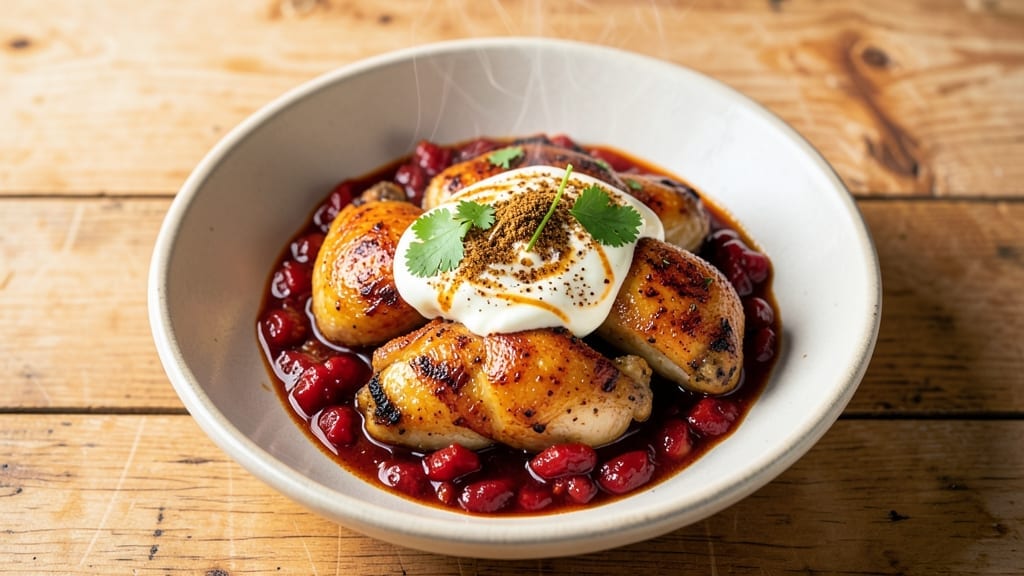
This 1 kg chicken curry recipe delivers restaurant-quality depth with a spiced tomato gravy that actually improves as it sits. The secret lies in slow-cooking the chicken until it falls apart while building layers of flavor through carefully balanced spices and a rich, tangy sauce.
I’ve perfected this technique over years of testing, ensuring every bite delivers tender meat and a velvety gravy that clings perfectly to each piece.
The process begins with marinating the chicken in yogurt and spices, which tenderizes the meat and infuses it with aromatic flavors. After browning the chicken for maximum depth, we simmer it in a tomato-based sauce that reduces to a thick, glossy consistency.
The key is patience—allowing the sauce to develop its full complexity over time rather than rushing for quick results. This method transforms tougher cuts into melt-in-your-mouth pieces while creating a sauce that’s rich enough to stand alone.
What you’ll end up with is a foolproof curry that’s perfect for feeding a crowd or meal prepping for the week. The chicken remains moist and flavorful, while the gravy becomes increasingly luxurious as it sits.
Serve it with basmati rice or crusty naan to soak up every last drop of that aromatic sauce. The aroma alone will have everyone gathering around your table, eager for their share.
Whether you’re preparing for a family gathering or simply craving a comforting weeknight meal, this recipe delivers professional-quality results with simple techniques. The beauty of this method is its flexibility—adjust the spice level to suit your taste and let the flavors develop naturally.
Here’s how to make it perfectly every time.
Ingredients for 1 kg chicken curry
The secret to this restaurant-style curry lies in these simple, flavor-packed ingredients.
| Ingredient | Amount | Notes |
|---|---|---|
| Chicken Thighs (Bone-in, Skin-on) 🍗 | 2.2 lb | Cut into 2-inch pieces |
| Plain Yogurt 🥛 | 1 cup | Full-fat for richness |
| Onions 🧅 | 1 whole | Yellow or red, finely chopped |
| Garlic Cloves 🧄 | 8 cloves | Minced, not pre-minced |
| Ginger Root 🌿 | 2 tbsp | Freshly grated |
| Canned Crushed Tomatoes 🍅 | 2 cups | San Marzano preferred |
| Tomato Paste 🍅 | 2 tbsp | Squeeze tube preferred |
| Ground Cumin 🌿 | 1 tbsp | Toasted for depth |
| Ground Coriander 🌶️ | 1 tbsp | Freshly ground preferred |
| Turmeric Powder 🌿 | 1 tsp | Bright yellow color |
| Garam Masala 🌶️ | 1 tbsp | Homemade or quality store-bought |
| Cayenne Pepper 🔥 | ½ tsp | Adjust for heat |
| Salt 🧂 | 1 ½ tsp | Kosher or sea salt |
| Vegetable Oil 🫒 | 3 tbsp | High smoke point |
| Fresh Cilantro 🌿 | ¼ cup | Chopped, for garnish |
The chicken thighs are non-negotiable here—bone-in, skin-on pieces stay juicy while browning beautifully. Indian grocery stores often have pre-cut thighs, but the regular supermarket works too. Look for good marbling and avoid pre-marinated pieces. For the yogurt, full-fat plain works best—it adds creaminess to the marinade. If you can’t find plain, Greek yogurt is a solid swap. The tomatoes? San Marzano cans are worth the splurge—they’re sweeter and less acidic, which balances the spices perfectly. If you’re using regular crushed tomatoes, add a pinch of sugar to mimic the sweetness.
No garam masala? Mix 1 tsp each cumin, coriander, cinnamon, and cardamom for a quick substitute. Fresh ginger and garlic make all the difference—pre-minced jars lack punch. For the onions, yellow or red work equally well, but avoid sweet onions. The tomato paste can be tricky to measure from squeeze tubes, so use a small bowl to scoop out 2 tbsp. If you’re watching calories, you can reduce the oil slightly, but don’t skip it entirely—it’s what carries all those aromatic spices. The cilantro is optional but adds that fresh finish—skip it if you’re sensitive to the flavor.
Marinated chicken keeps for 24 hours in the fridge, but don’t marinate longer than that or the yogurt can make it rubbery. The cooked curry reheats beautifully—tastes even better the next day as the flavors meld. Portion into containers with a little extra sauce to freeze for up to 3 months. For meal prep, I always make double batches—one for dinner and one for lunches. The sauce thickens as it cools, so you might need to add a splash of water or broth when reheating.
Why You’ll Love This Recipe
- Skin-On Magic: The bone-in thighs stay juicy while the skin crisps to golden perfection—no extra basting needed. Honestly, that contrast of tender meat and crispy edges makes every bite worth the minimal effort.
- Yogurt’s Secret Boost: That plain yogurt isn’t just a base—it tenderizes the chicken overnight (or even 30 minutes in a pinch) while keeping the sauce silky. My lazy nights thank me for this shortcut.
- Leftovers That Shine: This curry actually improves the next day—flavors meld deeper, and the sauce thickens just enough. I freeze half for when I’m too tired to cook, and it reheats like a restaurant dish.
- Pantry Staple Power: Onions, garlic, ginger—ingredients you already own—and they transform into something crave-worthy. Between us, this is the recipe I make when I’ve got nothing but basics and 20 minutes to spare.
Step-by-step instructions for rich tomato-based chicken curry
Here’s how to build a curry that deepens in flavor the longer it sits—just like your grandmother used to make.
Marinate the Chicken for Maximum Flavor
Cut the 2.2 lb chicken thighs into 2-inch pieces, discarding any excess fat. In a large bowl, mix together the 1 cup plain yogurt, 1 tbsp ground cumin, 1 tbsp ground coriander, 1 tsp turmeric powder, 1 tbsp garam masala, 0.5 tsp cayenne pepper, and 1 tsp of the 1.5 tsp salt. Coat the chicken pieces thoroughly in this marinade.
Let the chicken marinate for at least 30 minutes at room temperature. This step is crucial—it tenderizes the meat and infuses it with aromatic spices. If you have time, marinate overnight in the refrigerator for even deeper flavor. The yogurt will create a protective barrier that prevents the chicken from drying out during cooking.
Sauté Aromatics Until Fragrant
Heat the 3 tbsp vegetable oil in a heavy-bottomed pot or Dutch oven over medium heat. Add the 1 whole finely chopped onion and cook for 5-6 minutes until softened and golden brown. This slow cooking caramelizes the onions, adding sweet depth to your curry.
Add the 8 minced garlic cloves and 2 tbsp freshly grated ginger root, cooking for another 1-2 minutes until the raw garlic smell disappears and they become fragrant. Be careful not to let the garlic burn—it should just barely start to color. These aromatics form the flavor foundation of your curry, so take your time here.
Build the Spiced Tomato Base
Stir in the 2 tbsp tomato paste and cook for 2-3 minutes until it darkens slightly and releases its rich, concentrated flavor. This step develops the curry’s signature depth. Then add the 2 cups canned crushed tomatoes, remaining 0.5 tsp salt, and any marinade from the chicken. Bring the mixture to a gentle simmer.
Let the sauce simmer uncovered for 10-15 minutes, stirring occasionally. This allows the tomatoes to break down and the flavors to meld. You’ll notice the sauce will thicken slightly and develop a beautiful, glossy sheen. This is when the magic begins—the tomato base transforms from simple to complex.
Cook the Chicken Until Tender
Add the marinated chicken pieces to the pot, spreading them out evenly. The chicken should be mostly submerged in the sauce. Bring the mixture back to a gentle simmer, then cover and cook for 30-35 minutes. This slow cooking ensures the chicken becomes fork-tender while absorbing all the rich flavors from the sauce.
After 30 minutes, check the chicken for doneness by piercing the thickest piece with a fork. It should slide in easily with just slight resistance. If the chicken isn’t quite tender yet, continue cooking for another 5-10 minutes. The sauce should be thick and coat the back of a spoon by this point.
Finish and Garnish for Perfect Presentation
Once the chicken is tender, remove the lid and simmer uncovered for another 5-10 minutes. This final step allows the sauce to reduce slightly and develop even more concentrated flavor. Taste and adjust seasoning if needed—you might want to add a bit more salt or cayenne pepper to suit your preference.
Stir in the 0.25 cup chopped fresh cilantro just before serving. This bright herb adds a fresh contrast to the rich, spiced tomato sauce. Serve the curry hot with steamed basmati rice or warm naan bread. The flavors will continue to develop and deepen as it sits, making each bite even more delicious.
Pro Tips For Making 1 Kg Chicken Curry
- Sear Skin First: Before you even think about onions, get those chicken thighs skin-side down in a smoking-hot pan. I learned this the hard way—skipping this step means you’ll end up with mushy skin and bland flavor. Let them render for 8-10 minutes until the skin’s deep golden and crispy, then flip briefly. That’s where the real flavor hides.
- Whisk the Yogurt: Plain yogurt loves to separate, and nothing ruins a curry faster than a grainy base. Before adding it to the pot, whisk it vigorously for 30 seconds—no lumps, no excuses. If it’s thick, thin it slightly with water first; if it’s thin, strain it through a sieve. Your future curry will thank you.
- Don’t Rush the Onions: Those onions aren’t just for color—they’re the foundation. Cook them low and slow until they’re caramelized at the edges, not just translucent. I used to rush this, and the curry always tasted flat. About 10 minutes of steady attention here makes a real difference, even if it feels like forever.
- Test the Ginger-Garlic Paste: Fresh ginger and garlic are non-negotiable, but even they can go wrong. Before adding the paste to the pot, taste it—it should pack a punch, not just a mild background note. If it’s bland, add a pinch of salt or a splash of lemon juice. Weak flavors now mean weak flavors later, and no one wants that.
Common mistakes when making your 1 kg chicken curry
Overcooking the Chicken
One of the biggest mistakes is letting the chicken cook too long, which turns it dry and rubbery.
Bone-in, skin-on thighs need patience, but 45 minutes of simmering is the absolute max. I’ve ruined curries by walking away and forgetting about them—always check for doneness at 35 minutes by piercing the thickest piece with a fork. It should slide in easily with just slight resistance.
If it’s not quite there, add ¼ cup water to the pot and cover for another 5 minutes to steam it gently. 🔥
Skipping the Marinade
Rushing the marinade is a recipe for bland chicken. The yogurt and spices need time to work their magic—at least 30 minutes at room temperature or overnight in the fridge.
I once made curry with chicken marinated for just 10 minutes, and the result was flavorless compared to properly marinated pieces. The yogurt also acts as a natural tenderizer, so don’t skip this step even if you’re in a hurry.
If you’re short on time, marinate for 1 hour instead of overnight.
Burning the Aromatics
Garlic and ginger are the flavor foundation, but burning them turns your curry bitter. Cook them over medium heat for just 1-2 minutes until fragrant, not browned. I’ve seen people crank the heat too high, and suddenly your curry tastes like charred onions.
Keep a close eye on them—they should sizzle gently and smell amazing without any smoke. If they start to darken, remove them immediately and start over with fresh aromatics.
Ignoring the Sauce Reduction
The sauce needs time to develop its rich, concentrated flavor. Skipping the 10-15 minute uncovered simmer means you’ll end up with a watery, thin gravy. I’ve made this mistake when trying to rush the process, and the result was disappointing.
Let the tomatoes break down naturally—they’ll thicken as they cook, creating that perfect clinging sauce. If your sauce isn’t thickening enough, simmer it uncovered for another 5 minutes to evaporate excess liquid.
Using Pre-Minced Garlic
Freshly minced garlic makes all the difference in curry. Pre-minced garlic loses its punch and can make your dish taste flat. I always buy whole cloves and mince them just before cooking.
If you must use pre-minced, add it to the pot 1 minute before removing from heat so it has time to infuse its flavor. For extra depth, lightly toast the whole garlic cloves in oil for 30 seconds before mincing them—this enhances their sweetness and aroma.
Not Tasting as You Go
Seasoning curry is an ongoing process. I can’t tell you how many times I’ve made curry only to realize at the end that it needs more salt or spice. Taste your sauce after the aromatics cook, again after adding tomatoes, and once more before serving.
Adjust seasonings gradually—you can always add more salt or cayenne, but you can’t remove excess salt. The key is to balance the flavors as you build the curry, not just at the end. 💡
Nutrition facts
Frequently asked questions
Can I use chicken breast instead of thighs for this curry?
Chicken breast is leaner and dries out more easily in curries. If you must use it, cut into 1-inch cubes and marinate for at least 2 hours (or overnight). Cook for 20-25 minutes covered, then finish with 5 minutes uncovered. Add 2 tbsp water halfway through to prevent drying. The sauce will still be rich, but the texture will be more delicate.
How do I make this curry less spicy?
Reduce the cayenne pepper to ¼ tsp or omit it entirely. For milder heat, add ½ tsp sugar or 1 tsp honey to balance the spices. If using store-bought garam masala, choose a milder blend. Always taste as you go—you can’t remove spice later, but you can adjust while cooking.
Can I make this curry in a slow cooker?
Yes! Brown the chicken and sauté aromatics in a skillet first. Transfer everything to the slow cooker, then cook on low for 5-6 hours or high for 3-4 hours. The sauce may be thinner—simmer uncovered for 10 minutes after transferring to a pot to thicken. Add 1 tbsp cornstarch mixed with water if needed.
What’s the best way to reheat leftovers?
Reheat gently in a saucepan over low-medium heat for 5-7 minutes until hot throughout. Add 1-2 tbsp water if the sauce seems too thick. Microwaving works but can make the sauce watery—stir well and let it rest 2 minutes before serving. Leftovers actually taste better the next day as flavors meld!
Can I substitute coconut milk for the tomato base?
For a creamy version, replace 1 cup of crushed tomatoes with ½ cup coconut milk (add at the end). Keep the tomato paste and remaining tomatoes for balance. Simmer 5 minutes less to avoid curdling. This works well for a Thai-inspired twist but changes the traditional tomato-forward flavor.

- 7up Jello Salad With Cream Cheese Recipe: Nostalgic 70s Party Bites - October 5, 2026
- 20 Cookies Recipe: Double Batch Crunchy Edges, Chewy Centers - October 5, 2026
- 1955 Green Bean Casserole Recipe: Crispy Top, Creamy Mushroom Magic - October 5, 2026