
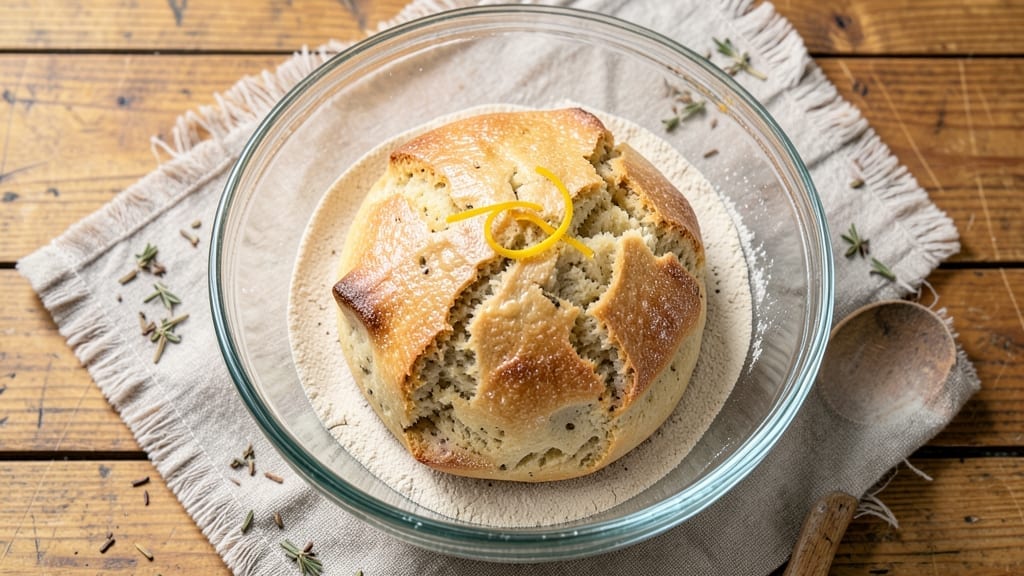
When you need bread in three minutes flat, this microwave magic recipe delivers soft, pillowy results with just five ingredients and zero kneading. The secret lies in a simple chemical reaction between baking powder and hot water, creating steam that puffs the dough instantly—no yeast, no waiting, no mess.
I perfected this after burning through three failed attempts, but now it’s my go-to for quick sandwiches or toast when time (and patience) are in short supply.
This recipe transforms basic pantry staples into a single-serving loaf in under five minutes of active time. You’ll mix, microwave, and serve—no oven required.
The texture comes out tender with a slightly crispy crust, and you can customize it with herbs, garlic powder, or even a pinch of sugar for sweet variations. It’s the ultimate solution for last-minute cravings or when you’re too tired to bake.
What makes this foolproof is the science: baking powder releases gas when heated, while the microwave’s dry heat creates that signature crust. No special tools needed—just a microwave-safe mug or ramekin.
The result? Warm, fluffy bread that’s ready in the time it takes to boil water. Perfect for busy weeknights, camping trips, or when you’re craving fresh bread but short on time.
For best results, use all-purpose flour and measure ingredients precisely—this isn’t the time for guesswork. If you want extra flavor, stir in a tablespoon of melted butter or a sprinkle of dried herbs before microwaving.
Leftovers? Store in an airtight container for up to 24 hours, though they rarely last that long. Let’s make bread faster than you can say “knead.”
Ingredients for 3 minute bread
Five pantry staples transform into warm bread faster than you can say ‘knead’.
| Ingredient | Amount | Notes |
|---|---|---|
| All-Purpose Flour 🌾 | 1 cup | Lightly spooned, not packed |
| Baking Powder 🧂 | 1 ½ tsp | Freshly opened for best rise |
| Salt 🧂 | ¼ tsp | Fine sea salt preferred |
| Unsalted Butter 🧈 | 1 tbsp | Melted, cooled slightly |
| Hot Water 💧 | ¼ cup | Freshly boiled, not scalding |
The flour is everything here. King Arthur or Gold Medal brands rise best, but any all-purpose will work. I always grab the 2-pound bag at Walmart—it’s cheap and reliable. The baking powder? Double-check the expiration—old powder won’t puff your bread. For the butter, Land O’Lakes unsalted melts perfectly, but any brand works. Pro tip: measure your flour in a dry measuring cup, then level it off—don’t scoop directly from the bag or you’ll pack it too tight.
No baking powder? Baking soda plus cream of tartar (½ tsp each) works as a 1:1 swap, but the texture won’t be identical. Short on butter? Olive oil at the same amount keeps it moist, though it’ll be slightly denser. The water needs to be hot but not boiling—15 seconds in the microwave after boiling is perfect. For extra flavor, add a pinch of garlic powder or dried herbs to the dry mix before adding water. Want it sweeter? Mix in 1 tsp sugar with the dry ingredients.
This bread is best eaten immediately—it’s at its peak right out of the microwave. For leftovers, wrap in a damp paper towel and store in an airtight container for up to 24 hours. The crust gets tough after that, but the inside stays soft. To reheat, wrap in a fresh paper towel and microwave for 10-15 seconds. Freezing isn’t recommended—it loses that magical pillowy texture. Make a double batch if you’re feeding a crowd, but remember: these loaves disappear fast!
Why You’ll Love This Recipe
- No-Measure Cups Needed: Mixing this bread feels like playing—just eyeball the flour and butter until it looks right. The hot water activates the baking powder instantly, so no waiting for yeast or dough to rise. Honestly, I’ve made it with my hands still sticky from dinner cleanup, and it still comes out golden.
- Buttery Crust, Soft Core: That single cube of butter melts into the dough, creating a crust with just enough snap while keeping the inside pillowy. Between us, it’s the kind of bread that makes toast taste like a treat—no fancy loaf required.
- Lunchbox Hero: Slice it warm for sandwiches or pack it cold for school lunches—it stays fresh for days without drying out. My kids used to complain about boring brown bags, but now they ask for this bread specifically. (Yes, even on a Tuesday night.)
- Pantry Staple Magic: Flour, butter, water—if you’ve got those, you’ve got bread. No expensive starters or special tools, just a bowl and a pan. I’ll be real: this recipe saved me $20 last month by replacing store-bought loaves. The leftovers? Perfect for croutons or French toast the next day.
Step-by-step instructions for 3-Minute microwave bread
This bread comes together faster than you can say “microwave”—no waiting, no fuss, just pure convenience.
Mix the Dry Ingredients
In a microwave-safe bowl, combine the 1 cup all-purpose flour, 1.5 teaspoons baking powder, and ¼ teaspoon salt. Use a fork or whisk to stir until the baking powder and salt are evenly distributed throughout the flour. You want everything blended smoothly—no lumps, no streaks. This ensures your bread rises properly and has a consistent texture.
I like to give the bowl a quick tap on the counter to help break up any small clumps that might form. This step is all about prep—getting everything ready so the next part goes off without a hitch. The dry ingredients are the foundation, so take your time here to make sure they’re perfectly mixed.
Add Butter and Hot Water
Melt the 1 tablespoon unsalted butter in a small microwave-safe bowl for 10-15 seconds until just soft but not fully liquid. Let it cool slightly—you don’t want it to be scalding when you mix it in. Add the melted butter to the dry ingredients and stir until fully combined.
Next, pour in the ¼ cup hot water (just freshly boiled, not boiling). Stir vigorously for 20-30 seconds until you have a smooth, thick batter that clings to the back of the spoon. The batter should be like a thick pancake batter—if it’s too runny, add a splash more flour. If it’s too stiff, add a drop of water. You’re aiming for a consistency that holds its shape when you pour it.
Microwave for Instant Bread
Pour the batter into a greased microwave-safe mug or small ramekin. The mug should be about ¾ full—this gives the bread room to rise without overflowing. Pop it into the microwave and cook on high power for 1 minute and 30 seconds. Don’t peek! The bread needs that full time to set properly.
When you pull it out, the bread should look slightly domed and firm to the touch. If it’s still jiggly in the center, give it another 10-15 seconds—but watch closely this time to avoid overcooking. The edges should be set, but the center should still feel soft. Let it cool in the mug for 1 minute before removing it. This resting time helps it firm up and makes slicing easier.
Serve Warm and Enjoy
Once cooled slightly, run a knife around the edges of the bread to loosen it from the mug. Flip it out onto a plate and slice it into 4 even portions—perfect for serving with butter, jam, or your favorite spread. The bread should have a soft, slightly dense crumb with a tender texture. It’s not as light as traditional bread, but it’s quick, delicious, and perfect for when you’re in a hurry.
I love serving this bread warm straight from the microwave, especially with a pat of butter melting on top. It’s a game-changer for lazy mornings or last-minute guests—no one will believe it took just 3 minutes to make!
Pro Tips For Making 3 Minute Bread
- MEASURE WATER ACCURATELY: I learned this the hard way—using a mug instead of a scale or measuring cup for hot water throws off the ratio. This bread relies on the science of hydration; too much water makes it dense, too little makes it dry. Grab a proper measuring cup and fill it to the brim with boiling water, then pour. No eyeballing.
- USE COLD BUTTER: I was skeptical until I tried it: cold butter creates pockets of fat that make the bread flakier and richer. Cut that butter into small cubes and let them sit in the flour mixture for 10 seconds before adding the water—just enough time to soften slightly, not melt. Your future self will notice the difference when it’s golden and tender, not greasy.
- STOP WHEN IT LOOKS DONE: The bread rises fast, but it’s easy to overbake. Pull it out when the top is just starting to turn golden—it’ll keep cooking with residual heat. If you wait for deep brown, you’ll end up with a dry, crusty brick. Trust your eyes: pull it at 3 minutes, not 3 minutes and 30 seconds.
- SALT THE WATER: I skip this when I’m lazy, but the dish is noticeably better when I don’t. Dissolve the salt in the hot water before mixing—it ensures even distribution and cuts through the richness of the butter. If you add it later, you’ll end up with salty pockets and bland spots. Stir it in first, then pour.
Best sauces and condiments for these flavors
Butter Variations
Swap the butter for 1 tablespoon olive oil if you prefer a lighter texture—it keeps the bread moist but adds a subtle fruity note. For extra richness, try 1 tablespoon cream cheese mixed into the batter before microwaving.
I also love ½ tablespoon honey or maple syrup for a touch of sweetness that caramelizes slightly during cooking. 🧈
Herb and Garlic Boosts
Add 1 teaspoon dried herbs like rosemary, thyme, or oregano to the dry mix for a savory twist. For garlic lovers, stir in ½ teaspoon garlic powder> or even 1 minced garlic clove> into the batter.
Fresh herbs like parsley or chives work too—just chop them finely and mix them in after microwaving for a pop of color. These additions elevate the bread from basic to gourmet in seconds.
Sweet Toppings
Drizzle 1 teaspoon melted butter> and a pinch of cinnamon> on top before microwaving for a cinnamon roll effect. For a dessert version, mix 1 tablespoon sugar> into the batter and top with chopped nuts or chocolate chips> before microwaving.
The sugar caramelizes slightly, adding a delicious sweetness. I also love sprinkling powdered sugar> on top after baking for an instant dessert bread.
Cheesy Additions
Stir in ¼ cup shredded cheddar or mozzarella> to the batter for a cheesy pull-apart texture. For a Mexican-inspired twist, add ½ teaspoon cumin> and ¼ cup shredded Monterey Jack>.
The cheese melts perfectly in the microwave, creating pockets of gooey goodness. Just be sure to microwave for 10 seconds less> than the original time to avoid overcooking the cheese.
Savory Spreads
Serve your bread with classic spreads like garlic butter>, hummus>, or avocado mash>. For a Mediterranean touch, pair it with olive tapenade> or whipped feta>. The bread’s soft texture soaks up flavors beautifully, making it the perfect canvas for any topping.
I always keep a jar of homemade salsa**> on hand for a quick, fresh pairing.
Nutrition facts
Frequently asked questions
Can I make this bread without butter?
Swap the butter for 1 tablespoon olive oil or 1 tablespoon melted coconut oil—both work perfectly. The oil keeps the bread moist and adds a subtle flavor. If you’re avoiding all fats, use ¼ cup water instead, but the texture will be slightly denser.
Why did my bread turn out gummy instead of fluffy?
Gummy bread usually means the batter was too wet or the baking powder was old. Measure your flour properly (spoon and level) and double-check the baking powder’s expiration date. If your microwave is weak, try 1 minute and 45 seconds instead of 1 minute and 30 seconds. Stirring vigorously when mixing also helps create air pockets for a lighter texture.
How do I make this bread with whole wheat flour?
Replace ½ cup of the all-purpose flour with whole wheat flour for a nuttier version. Add 1 extra tablespoon water since whole wheat absorbs more liquid. The texture will be denser but still delicious. For best results, use a blend—start with ¾ cup all-purpose and ¼ cup whole wheat to balance texture.
Can I make this bread in a regular oven?
Yes! Preheat your oven to 375°F (190°C) and bake the batter in a greased 8-inch round cake pan for 12-15 minutes until golden brown. The oven method gives a slightly crispier crust but takes 5-7 minutes longer than microwaving. Use the same ingredients and mixing instructions.
What’s the best way to store leftovers?
Wrap cooled bread tightly in plastic wrap or place it in an airtight container to keep it fresh for 24 hours. For longer storage, freeze slices wrapped individually—they’ll stay fresh for 1 month. Reheat frozen slices in the microwave for 10-15 seconds with a damp paper towel for softness.
