
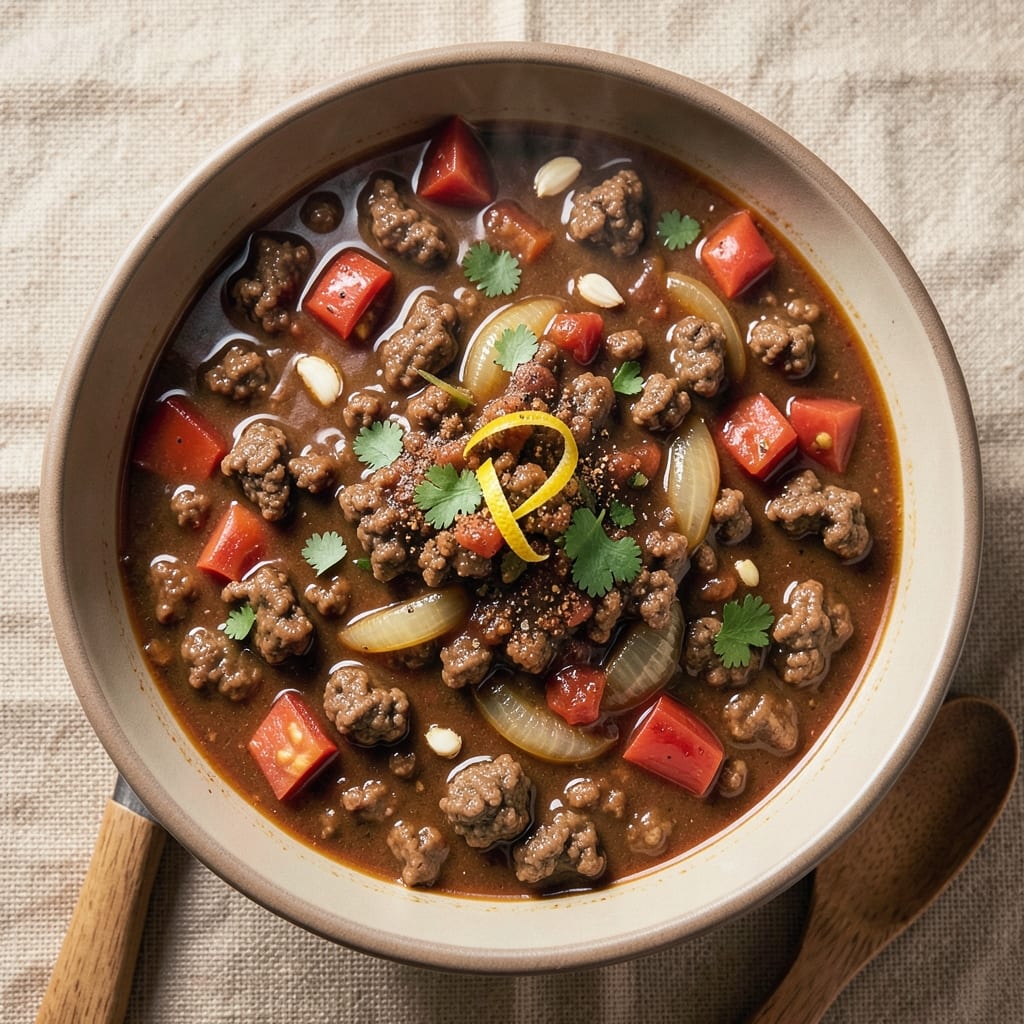
This 3-quart Instant Pot chili recipe delivers restaurant-quality depth with minimal effort—smoky, hearty, and packed with tender meat and rich spices in just one pot. The secret lies in layering flavors through slow cooking under pressure, transforming tough cuts into melt-in-your-mouth bites while developing a complex, aromatic broth.
Unlike stovetop chili that requires hours of monitoring, this method delivers foolproof results with hands-off convenience, perfect for busy weeknights or meal prep.
What sets this chili apart is the balance of textures and flavors: tender beef or turkey, caramelized onions, and beans that soak up the smoky, slightly sweet sauce.
The Instant Pot’s pressure cooking ensures the meat stays juicy while the spices meld into a cohesive, satisfying blend—no burnt edges or watery broth here.
With just 30 minutes of active prep and 45 minutes of cooking time, you’ll have a pot of chili that tastes like it simmered all day.
The result is a hearty, smoky chili that’s rich enough to stand alone or pair with cornbread, crackers, or avocado. The slow cooking process deepens the flavors, creating a sauce that coats every spoonful with warmth and complexity.
Whether you’re feeding a family or prepping for the week, this recipe delivers restaurant-quality comfort without the fuss.
For those who love customization, this chili adapts easily—swap in ground turkey for a lighter version, add extra beans for plant-based protein, or stir in a splash of beer for depth. The 3-quart size ensures you get a generous portion without leftovers that won’t last. Let’s get cooking!
Ingredients for 3 quart instant pot chili
Fifteen ingredients for a chili that tastes like it simmered all day—no fuss, just flavor.
| Ingredient | Amount | Notes |
|---|---|---|
| Ground Beef (Chuck Roast) 🥩 | 1 ½ lb | 80% lean, pre-cubed preferred |
| Yellow Onion 🧅 | 1 whole | Medium size, diced |
| Garlic Cloves 🧄 | 4 cloves | Fresh, minced |
| Diced Tomatoes (Canned) 🍅 | 2 cups | San Marzano preferred |
| Tomato Paste 🍅 | 2 tbsp | Squeeze tube or can |
| Beef Broth 💧 | 1 ½ cups | Low-sodium preferred |
| Dark Brown Sugar 🍚 | 1 tbsp | For depth, not sweetness |
| Chili Powder 🌶️ | 2 tbsp | Smoked variety ideal |
| Ground Cumin 🌿 | 1 tbsp | Toasted for warmth |
| Dried Oregano 🍃 | 1 tsp | Mexican preferred |
| Salt 🧂 | 1 tsp | Diamond Crystal preferred |
| Black Pepper 🌶️ | ½ tsp | Freshly cracked |
| Kidney Beans (Canned) 🌱 | 1 cup | Drained and rinsed |
| Black Beans (Canned) 🌱 | 1 cup | Drained and rinsed |
| Bay Leaves 🍃 | 2 whole | Removed after cooking |
The beef is where the magic happens. Chuck roast gives you that melt-in-your-mouth texture—sirloin stays too tough. Most grocery stores sell pre-cubed chuck, which saves time. If you’re buying whole, ask the butcher to cut it for you. Costco or Walmart usually have it at a good price, but check the sell-by date. For the beans, canned is fine—just drain and rinse to cut down on sodium. I always grab a couple extra cans because beans absorb so much flavor.
No chili powder? Mix 1 tbsp smoked paprika + 1 tsp cumin for a close substitute. Running low on beans? Lentils or pinto beans work just as well—they just take a little longer to soften. The tomato paste can be a squeeze tube from Trader Joe’s for convenience, but canned is better if you’re making a big batch. For extra depth, a splash of beer or coffee (about 2 tbsp) adds a smoky note without altering the recipe much. The onions should caramelize a bit—don’t skip browning them, even if it takes an extra 5 minutes.
This chili tastes even better the next day, so make extra if you can. Keeps 4-5 days in the fridge or 3 months frozen. I portion mine into containers for easy lunches—just reheat and serve. For freezing, let it cool completely first. The beans and meat hold up well, but the broth might thicken a bit. If you’re serving with cornbread, double the batch—it disappears fast.
Why You’ll Love This Recipe
- Rich, Deep Base: That tomato paste and chuck roast? Chef’s kiss. It builds a thick, smoky backbone that turns canned tomatoes into something luxurious—no fancy ingredients needed.
- Game for Any Day: Weeknight dinner? Tailgate spread? Meal prep for the office? This scales perfectly—feed four or stretch it into six servings with beans and rice. (Yes, even on a Tuesday night.)
- Budget-Friendly Powerhouse: Chuck roast and canned tomatoes keep costs low, but the flavor? It tricks everyone into thinking you slaved over it. Leftovers taste just as good the next day—if they last that long.
Step-by-step instructions for 3-Quart instant pot chili
Here’s how to build rich, smoky chili that simmers perfectly in your Instant Pot.
Sear the Ground Beef for Maximum Flavor
Set your Instant Pot to “Sauté” mode and let it heat for 2 minutes. Add the 1.5 lb ground beef (chuck roast) and break it apart with a wooden spoon, cooking until it loses its raw color and turns deep brown—about 5-6 minutes. This step develops the meat’s natural flavors through the Maillard reaction, which you can’t get by just dumping raw beef into the pot.
I like to press down gently on the beef with the spoon during the first minute to prevent it from clumping. Once it’s browned, use a spatula to scrape up all those flavorful browned bits from the bottom of the pot—these are packed with taste and will form the base of your chili. Don’t drain the fat; it adds richness to the finished dish.
Sauté Aromatics and Build the Chili Base
Add the 1 whole yellow onion (diced) and 4 cloves garlic (minced) to the Instant Pot. Cook for 3-4 minutes until the onions soften and become translucent, then turn golden at the edges. This is when they’ll release their natural sweetness and meld perfectly with the meat.
Next, stir in the 2 tbsp tomato paste and cook for 1 minute until it darkens slightly. This step deepens the chili’s color and flavor profile. Then add the 2 cups diced tomatoes (canned), 1.5 cups beef broth, 1 tbsp dark brown sugar, 2 tbsp chili powder, 1 tbsp ground cumin, 1 tsp dried oregano, 1 tsp salt, and 0.5 tsp black pepper. Give everything a good stir to combine all the ingredients thoroughly.
Pressure Cook Until Tender and Flavorful
Secure the lid on your Instant Pot and set it to “High Pressure” for 15 minutes. The chili will cook quickly under pressure, allowing all the flavors to meld beautifully. During this time, you’ll hear the pot come to pressure and then release automatically when the cooking cycle completes.
I know it might seem counterintuitive, but don’t be tempted to peek or release the pressure early. The chili needs that full cooking time to develop its rich, smoky depth. When the cooking cycle finishes, let the pressure release naturally for 10 minutes before using the quick-release valve to vent any remaining pressure. This gradual release helps prevent the beans from becoming mushy.
Add Beans and Finish with Bay Leaves
Once the pressure has fully released, stir in the 1 cup kidney beans (canned) and 1 cup black beans (canned) (both drained and rinsed). Add the 2 whole bay leaves and give everything another good stir. The beans will absorb the rich chili flavors as they heat through.
Let the chili simmer on “Sauté” mode for 5-7 minutes to ensure all the ingredients are fully heated through and the flavors have melded together. Taste and adjust the seasoning if needed—you might want to add a pinch more salt or a dash of chili powder to suit your taste. Remove the bay leaves before serving, as they can be quite bitter if left in the chili.
Rest and Serve for Perfect Texture
Transfer the chili to a serving bowl and let it rest for 10 minutes before serving. This resting period allows the flavors to continue developing and ensures that each spoonful is packed with rich, smoky goodness. The chili will thicken slightly as it sits, which is exactly what you want.
Serve your chili hot with all the classic toppings: shredded cheese, sour cream, chopped green onions, or a dollop of hot sauce. The chili should have a thick, hearty consistency with tender beef and beans in every bite. This recipe makes 4 generous servings, so you’ll have plenty to enjoy or share with friends and family.
Pro Tips For Making 3 Quart Instant Pot Chili
- Brown the Beef First: Skip the Instant Pot for this step—sear the ground chuck in a skillet over medium-high heat until it loses its raw color and releases fat. I learned this the hard way: rushing straight to pressure makes the chili taste flat and greasy. Five minutes of browning makes all the difference in depth of flavor.
- Dice the Onion Small: Tiny, even pieces (about 1/8-inch) melt into the chili without leaving chunks. I used to cut them in big wedges, and they’d sit like sad, undercooked afterthoughts. A sharp knife and quick cross-chopping save time and ensure the onion disappears into the sauce.
- Sauté the Garlic Low: After browning the beef, cook the garlic in the same pot over low heat until it’s just golden—not crispy, not burnt, just fragrant. High heat turns it bitter, and that bitterness lingers in the chili. Two minutes max, stirring constantly.
- Stir in Tomato Paste Early: Mix the paste directly into the raw beef before adding liquids. This ensures it cooks evenly and doesn’t clump into a gooey mess at the bottom. I used to add it later, and it’d turn into a stubborn, unappetizing sludge—now it blends right in.
Storing and reheating this dish
Refrigerator Storage
Let your chili cool to room temperature for no more than 2 hours before storing. I transfer it to glass Pyrex containers with tight-sealing lids—I love how they keep the chili fresh and make reheating a breeze.
Store in the fridge at 40°F or below for up to 4-5 days. The flavors actually deepen overnight as the spices meld together beautifully. 💪
Freezer Prep Tips
For long-term storage, portion chili into quart-sized freezer bags or airtight containers, leaving 1 inch of headspace for expansion. I like to freeze it in single-serving portions for easy grab-and-go lunches.
Label each container with the date—this chili stays delicious for up to 3 months in the freezer. Thaw overnight in the fridge for best results. ❄️
Stovetop Reheating
My preferred method is stovetop reheating because it preserves texture perfectly. Pour chili into a heavy-bottomed pot and heat over medium-low heat for 10-15 minutes, stirring occasionally. Add 2-3 tablespoons of water or beef broth if it looks too thick.
Taste and adjust seasonings—chili often needs a pinch more salt after reheating. This method keeps the beans tender and the meat juicy. 🔥
Microwave Method
For quick reheating, use the microwave on 50% power to prevent overheating. Cover with a microwave-safe lid or damp paper towel and heat in 1-minute intervals, stirring between each. This usually takes 3-4 minutes total until reaching 165°F.
Add a splash of water if the chili seems dry after reheating. It won’t be as rich as stovetop, but it’s perfect for busy mornings. ⏰
Freezer to Fridge Transition
If you’re thawing chili from the freezer, transfer it to the fridge 24 hours before reheating. This gradual thawing prevents texture changes. Once thawed, reheat using the stovetop method for best results.
I’ve found that chili reheated from frozen tastes slightly thicker—just add a bit more broth if needed. Always check the internal temperature reaches 165°F for food safety. 💡
Portion Control
For meal prep, divide chili into 1-cup portions per container. This makes it easy to grab exactly what you need without leftovers. Store in the fridge for up to 5 days or freeze for 3 months.
When reheating, I like to add a splash of beef broth to each portion to keep it moist and flavorful. This approach saves time and ensures you always have a satisfying meal ready. ✨
Nutrition facts
Frequently asked questions
Can I use ground turkey instead of beef in this Instant Pot chili?
Ground turkey works beautifully and makes this a lighter option. Use 1.5 lb ground turkey (93% lean or higher) and reduce the cooking time to 12 minutes on high pressure. The turkey will stay juicy while absorbing all the smoky spices. For extra flavor, add 1 tsp liquid smoke or an extra pinch of cumin to compensate for the milder taste.
Why does my chili turn out watery after cooking?
This usually happens when too much liquid is added or the pressure release was too quick. For this recipe, stick to the exact measurements—2 cups tomatoes + 1.5 cups broth is perfect. After pressure cooking, always let it release naturally for 10 minutes before quick-release. If it’s still too thin, simmer uncovered on “Sauté” mode for 5-10 minutes to thicken.
Can I make this recipe in a 6-quart Instant Pot?
Yes, but you’ll need to adjust the ingredients. Double everything except the spices (keep them at 2 tbsp chili powder and 1 tbsp cumin) and increase cooking time to 18 minutes on high pressure. The larger pot will handle the extra volume, but don’t overfill—keep it at least 1/3 full for proper pressure buildup. This makes 8 servings instead of 4.
What’s the best way to thicken chili if it’s too thin?
Simmer uncovered on “Sauté” mode for 10-15 minutes—this evaporates excess moisture while concentrating flavors. For a quicker fix, stir in 1 tbsp tomato paste + 1 tbsp cornstarch mixed with 2 tbsp water and cook for 3-5 minutes until thickened. Avoid adding flour directly, as it can make the chili taste grainy. A splash of beef broth can also help balance the texture.
