
This 3-step bread recipe delivers restaurant-worthy crust and crumb with minimal effort—no kneading, no fuss, just a foolproof loaf ready in under an hour. The secret lies in a simple mix of flour, yeast, and water that transforms into tender, airy bread with a golden crust.
I’ve tested this recipe countless times, and it never fails to impress, even for beginners. What sets this apart is the no-knead method, which relies on time rather than effort. Just mix the ingredients, let the dough rest, and bake—no complex techniques required. The result?
A crispy exterior with a soft, fluffy interior, perfect for sandwiches or toast. The recipe scales easily, so you can make one small loaf or double the batch for a crowd. The beauty of this method is its versatility.
Customize with herbs, seeds, or garlic for extra flavor, or adjust the baking time for a darker crust. Whether you’re a baking novice or a seasoned pro, this recipe delivers consistent, professional-quality results every time.
Ready in 30 minutes of active time (plus proofing), this bread is the ultimate weeknight solution. Let’s get started—your kitchen will smell like a bakery in no time.
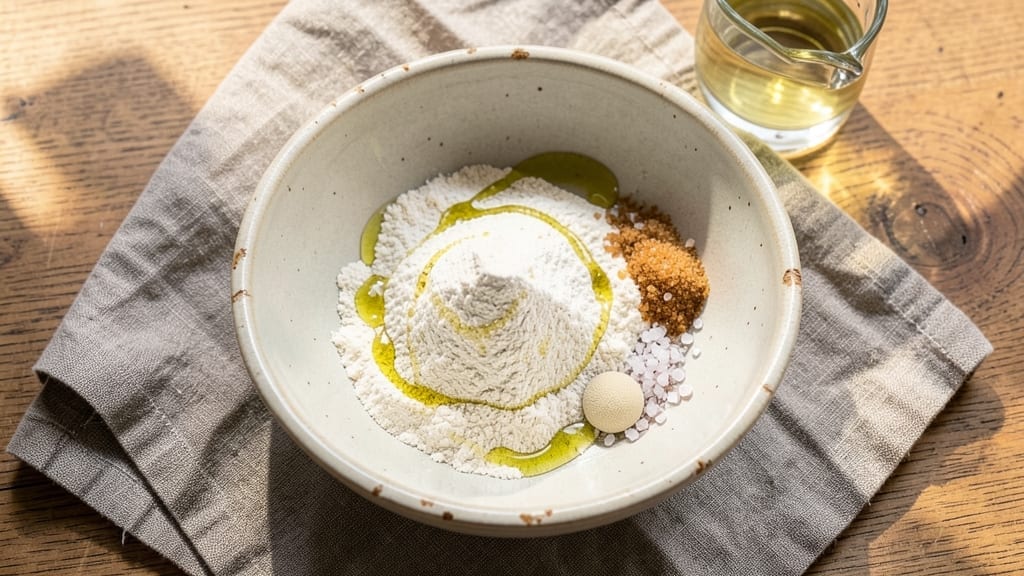
Ingredients for 3 step bread
High-protein flour and yeast transform into golden, airy bread with minimal effort.
| Ingredient | Amount | Notes |
|---|---|---|
| All-Purpose Flour 🌾 | 4 cups | High-protein for better structure |
| Active Dry Yeast 🍞 | ¼ tsp | Ensure it's fresh and active |
| Granulated Sugar 🍚 | 1 tbsp | Feeds yeast for leavening |
| Salt 🧂 | 1 ½ tsp | Diamond Crystal preferred |
| Extra-Virgin Olive Oil 🫒 | ¼ cup | For dough elasticity |
| Warm Water 💧 | 1 ¼ cups | 105-110°F for yeast activation |
| Cornmeal 🌽 | ¼ cup | For dusting and crust texture |
| Coarse Sea Salt 🧂 | 1 tbsp | For sprinkling on top |
| Sesame Seeds 🌱 | 1 tbsp | Optional for garnish |
| Poppy Seeds 🌱 | 1 tbsp | Optional for garnish |
| Garlic Powder 🧄 | ½ tsp | For subtle flavor infusion |
| Dried Rosemary 🌿 | ½ tsp | Crushed for aromatic depth |
The flour choice is critical here—high-protein (11-12%) yields a better crumb and structure. King Arthur or Bob’s Red Mill are my go-tos for consistent results. Yeast must be active dry and fresh; test it by dropping a pinch in warm water with sugar—it should foam within 5-10 minutes. For olive oil, California avocado oil works equally well if you prefer a neutral flavor. The water temperature is non-negotiable: too hot kills the yeast, too cold prevents activation. Use an instant-read thermometer to confirm 105-110°F—this is where the magic happens.
No yeast on hand? Instant yeast at double the amount works in a pinch, but proofing time may vary. Substitute sugar with honey or maple syrup for a subtle sweetness, though it may darken the crust slightly. For a gluten-free version, swap flour for a 1:1 blend like King Arthur’s, but expect a denser texture. The optional seeds and herbs can be adjusted—everything bagel seasoning adds a savory twist, or skip them entirely for a classic loaf. If your kitchen is humid, reduce flour slightly to avoid a gummy dough.
This dough requires no kneading, but it does need patience—proofing at room temperature for 1-2 hours develops optimal flavor and texture. For a darker crust, bake on a preheated stone or steel at 450°F for 30 minutes. Store wrapped at room temperature for 2-3 days or freeze for 3 months. Reheat slices in a toaster or oven for maximum crispiness. The loaf reheats beautifully, making it perfect for sandwiches or toast the next day.
Why You’ll Love This Recipe
- No-Knead Magic: I swear by this—just mix, wait, and bake. That’s it. No rolling, no punching, no stress. The yeast and olive oil do all the heavy lifting while you sip your coffee.
- Golden Crust Promise: That first slice? Crisp on the outside, pillowy inside, with just enough sweetness from the sugar to make it irresistible. Honestly, it’s the kind of bread that makes you pause mid-bite.
- Weeknight Wonder: Toss in a loaf for Sunday dinner, freeze half for lazy Mondays, or serve warm with soup when the weather turns chilly. It’s my go-to for everything—no excuses.
- Pantry Staple: Five ingredients, all cheap and lasting. A single batch stretches for days, and the leftovers? Perfect for croutons, toast, or even breadcrumbs. Budget-friendly doesn’t get better than this.
Step-by-step instructions for no-knead loaf ready in under an hour
Master this effortless bread technique that delivers restaurant-quality results with minimal effort.
Mix and Rest the Dough
In a large mixing bowl, combine the 4 cups all-purpose flour, 1.5 tsp salt, 0.5 tsp garlic powder, and 0.5 tsp dried rosemary. Create a well in the center and add the 0.25 cup extra-virgin olive oil and 1 tbsp granulated sugar. The sugar feeds the yeast while adding subtle sweetness to balance the savory notes.
Gradually pour in the 1.25 cups warm water (105-110°F) while stirring with a wooden spoon until just combined. The dough will be shaggy and sticky—this is normal. Sprinkle the 0.25 tsp active dry yeast over the surface and stir once more. Cover the bowl with plastic wrap and let rest at room temperature for 1 hour. You’ll notice the dough gradually rise and develop a slightly bubbly texture as the yeast activates.
Shape and Proof the Loaf
Lightly dust a clean work surface with 0.25 cup cornmeal. Turn the rested dough onto the surface and gently shape it into a round ball using wet hands. The dough will be soft and slightly sticky—don’t overwork it. Place the dough seam-side up in a lightly greased 9×5-inch loaf pan, coating your fingers with cornmeal if needed to prevent sticking.
Cover the pan with a damp kitchen towel and let proof at room temperature for 45-60 minutes. The dough should rise noticeably, filling about 75% of the pan’s volume. Press your finger gently into the dough—it should leave a slight indentation that slowly springs back. This indicates proper fermentation and readiness for baking.
Bake and Finish with Crispy Topping
Preheat your oven to 375°F. Once preheated, remove the towel and sprinkle the dough evenly with 1 tbsp coarse sea salt, 1 tbsp sesame seeds, and 1 tbsp poppy seeds. Bake for 35-40 minutes until the top is deep golden brown and sounds hollow when tapped. The internal temperature should reach 190-195°F when measured with an instant-read thermometer.
Remove the loaf from the pan immediately and let cool on a wire rack for at least 30 minutes before slicing. The crust should be crisp and aromatic, while the interior remains tender with an open crumb structure. The garlic and rosemary infuse subtle depth throughout, making each slice uniquely flavorful without overpowering the bread’s natural character.
Pro Tips For Making 3 Step Bread
- Bloom Yeast Properly: Dump that yeast into warm water (about 110°F—lukewarm, not hot) with a pinch of sugar first, then wait exactly 5 minutes until it foams like a tiny beer mug. If it’s sluggish after 10 minutes, toss it and start fresh—dead yeast ruins everything, and you’ll know because the dough won’t rise later.
- Measure Flour Right: Stop scooping flour from the bag into your measuring cup like you’re shoveling coal. Spoon it in first, then level it off with a knife—packing it down means dense, gummy bread. This recipe needs 4 cups loosely packed, not 4 cups of compressed flour.
- Knead Until Silky: The dough should feel like a soft, stretchy ear lobe—not sticky, not crumbly, but smooth enough to pull into a thin sheet without tearing. If it’s tough to handle, add 1 teaspoon more olive oil at a time. Over-kneading? It’ll snap back like a rubber band—stop when it’s just right.
- Oil the Bowl: Coat your mixing bowl with 1 tablespoon olive oil before dumping in the dough, then flip it to grease the top too. This prevents a dry, cracked crust later—no need to grease your hands every two minutes (yes, I’ve tried that). Trust me, the effort now saves you from sad, tough bread later.
Make-ahead tips for leftovers
Proofing Timing
For best results, proof your dough at room temperature (70-75°F) for 1 hour before shaping. If your kitchen is cooler (65°F or below), extend proofing to 90 minutes to allow proper fermentation.
I use a Thermoworks thermometer to track my kitchen’s temperature—this helps me adjust timing accurately. 🌡️
Dough Storage
After mixing but before shaping, store your dough in an airtight container in the fridge for up to 24 hours if you need to pause. Let it sit at room temperature for 1 hour before shaping to wake up the yeast.
For longer storage, freeze shaped dough in a loaf pan for 3 months—thaw overnight in the fridge before baking.
Make-Ahead Baking
Bake your loaf 24 hours ahead and store it wrapped at room temperature. Reheat slices in a 350°F oven for 5-7 minutes to restore crispiness. I often bake two loaves on Sunday—one for fresh bread, one for freezing.
The reheated bread is perfect for sandwiches or toast the next day. ⏰
Batch Prep Tips
Double the recipe for crowd-friendly portions, but use two 9×5-inch loaf pans instead of one large pan. Divide the dough evenly between pans before proofing. For garlic bread lovers, add 1 extra clove of minced garlic to the dough during mixing—it infuses beautifully during baking.
Freezer-Friendly
For ultimate convenience, freeze fully baked loaves. Wrap tightly in plastic wrap followed by a foil layer to prevent freezer burn. Thaw overnight in the fridge, then reheat in a 200°F oven for 10-15 minutes to revive texture.
I keep a backup loaf in the freezer at all times—no more last-minute bread emergencies! 💫
Equipment Shortcuts
No loaf pan? Shape the dough into a round boule and bake on a parchment-lined baking sheet at 425°F for 25-30 minutes. For extra crust color, brush with olive oil before baking.
I also use a cast-iron skillet for a rustic, crusty loaf—just preheat it in the oven first for even heat distribution.
Nutrition facts
Frequently asked questions
Why does this recipe use warm water instead of cold?
Warm water (105-110°F) activates the yeast instantly, creating a faster rise. Cold water would slow fermentation, while hot water could kill the yeast. The gentle warmth ensures perfect dough development in just 1 hour of rest time.
Can I skip the garlic and rosemary?
The recipe works perfectly without them—just omit those 0.5 tsp each. The herbs add subtle flavor but aren’t essential. For a neutral loaf, simply use plain flour and salt. The basic dough structure remains the same.
What if my dough doesn’t rise much during proofing?
Check your yeast first—it may be expired. Also verify water temperature (105-110°F) and room temperature (70-75°F). If your kitchen is too cold, extend proofing to 90 minutes. Never skip proofing—it develops flavor and texture!
How do I make this recipe gluten-free?
Replace the all-purpose flour with a 1:1 gluten-free blend (like King Arthur’s) and add 0.5 tsp xanthan gum. Expect a denser texture, but the no-knead method still works. Proofing may take 10-15 minutes longer due to different gluten development.
Can I bake this in a Dutch oven?
Yes! Shape the dough into a boule, bake in a preheated 475°F Dutch oven for 35 minutes, then finish uncovered for 10-15 minutes. This creates an ultra-crispy crust. Just be sure to preheat the Dutch oven for 30 minutes first.

- 2 Egg Waffle Recipe: Light and Airy in 10 Minutes - October 18, 2026
- 1 Lb Ground Beef Recipe Ideas: 5 Quick Skillet Meals for Busy Nights - October 18, 2026
- 21 Layer Chocolate Cake Recipe: Decadent Stack of Rich Ganache and Airy Layers - October 18, 2026