
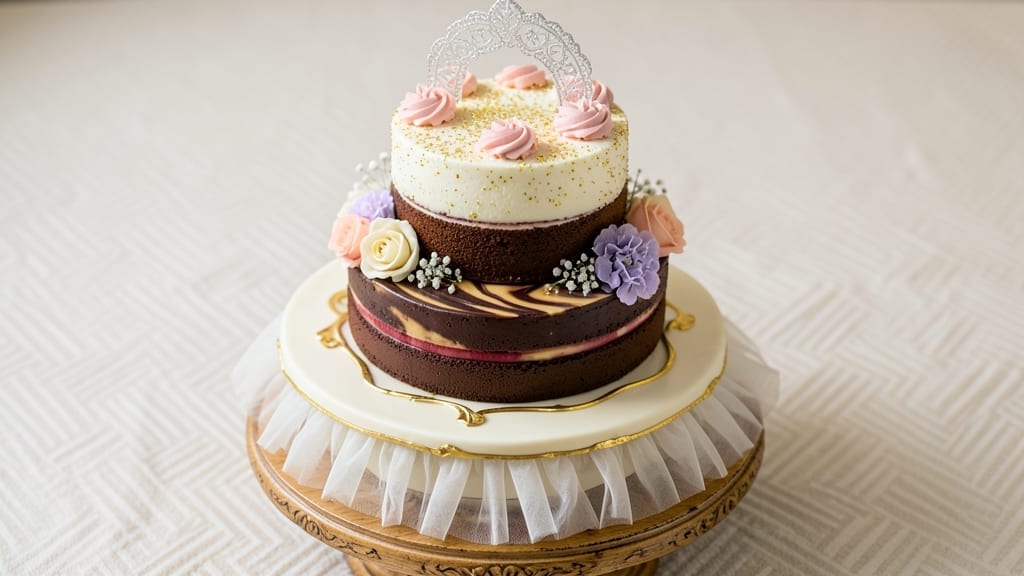
Creating a three-tier wedding cake that stands tall and elegant requires precision, patience, and a touch of artistic flair—this recipe delivers all three. The secret lies in sturdy cake layers, expert frosting techniques, and a buttercream so smooth it looks like it belongs on a magazine cover.
I’ve baked and decorated dozens of wedding cakes, and this method ensures stability, flawless tiers, and a finish that’ll have guests in awe.
This recipe focuses on classic vanilla and chocolate layers, but the techniques work for any flavor—think citrusy sponge, rich red velvet, or even a modern naked cake with fresh flowers.
We’ll cover everything from baking perfect, level tiers to assembling them with dowels for support, plus how to create clean edges and professional-looking buttercream swirls. No fancy equipment needed—just time, care, and a steady hand.
The result? A showstopping centerpiece that’s as delicious as it is beautiful—each bite as perfect as the presentation. The buttercream isn’t just sweet; it’s sculpted to complement the tiers, whether you prefer classic ruffles, sleek geometric lines, or delicate floral accents.
Every detail matters, from crumb coats to final decor, so you can focus on the celebration while the cake does the talking.
Whether you’re a seasoned baker or tackling your first wedding cake, this step-by-step guide breaks down the process into manageable stages. We’ll address common pitfalls—like uneven tiers or frosting that slides off—and share pro tips for a cake that looks (and tastes) like it came from a five-star bakery.
Let’s build something unforgettable, layer by layer.
Ingredients for 3 tier wedding cake
Twelve essential ingredients create a showstopping three-tier wedding cake with flawless structure and elegant buttercream artistry.
| Ingredient | Amount | Notes |
|---|---|---|
| All-Purpose Flour 🌾 | 6 cups | Sifted for light texture |
| Granulated Sugar 🍚 | 2 ½ cups | Divided for layers |
| Unsalted Butter 🧈 | 2 cups | Room temperature, full-fat |
| Large Eggs 🥚 | 6 whole | Room temperature |
| Milk 🥛 | 1 ½ cups | Whole milk preferred |
| Vanilla Extract 🌿 | 2 tbsp | Pure Madagascar preferred |
| Baking Powder 🧂 | 2 tsp | Freshly measured |
| Salt 🧂 | ½ tsp | Fine sea salt |
| Unsweetened Cocoa Powder 🍫 | ¾ cup | Dutch-processed for smoothness |
| Confectioners' Sugar 🍯 | 6 cups | Sifted for buttercream |
| Heavy Whipping Cream 🥛 | 2 cups | Cold for whipping |
| Wooden Dowels 🪵 | 24 pieces | 12-inch length |
| Wax Paper 📄 | 2 sheets | For tier separation |
| Fresh Flowers 🌸 | ½ cup | Edible varieties only |
| Food Coloring 🎨 | 1 tbsp | Gel-based for intensity |
The flour and butter are the foundation—King Arthur or Gold Medal flour gives the best structure, while Plugrá butter (if you can find it) adds richness without graininess. For the chocolate layer, Dutch-processed cocoa powder like Droste ensures smoothness, not bitterness. Eggs should be room temperature—cold yolks can cause cracks in the batter. I always buy organic eggs from the grocery store’s bakery section for better flavor. The vanilla extract? Madagascar bourbon is worth the splurge—it adds depth that imitation can’t match. Measure your baking powder and salt carefully; Diamond Crystal is my go-to for consistent results.
No vanilla extract? Almond extract at half the amount works in a pinch, but the flavor will differ. Substituting cocoa powder? Natural unsweetened cocoa is fine, but reduce by 0.25 cup since it’s denser. For the buttercream, European-style butter (like Land O’Lakes European Style) whips up lighter than regular. Running short on dowels? Popsicle sticks work for small cakes, but they won’t support heavy tiers. The wax paper between layers prevents sticking—use parchment paper if you’re worried about wax transfer. Fresh flowers? Local florists often sell edible varieties by the stem, and roses or orchids add drama without overpowering the cake.
Store unbaked layers in airtight containers with parchment between them for up to 3 days. Buttercream keeps 5 days in the fridge, but bring it to room temperature before using—microwave 30 seconds if you’re in a rush. For long-term storage, freeze tiers unfrosted for up to 3 months. The dowels can be reused if cleaned properly—soak in hot soapy water and let air dry. When decorating, work in a cool room to prevent the buttercream from sliding. The cake tastes best the day it’s served, but the presentation will wow guests for days—just cover loosely with plastic wrap.
Why You’ll Love This Recipe
- Here’s what sold me: this cake costs a fraction of what bakery versions do, but no one can tell the difference. All-purpose flour and basic pantry staples mean you’re not breaking the bank, and the leftovers? They turn into cupcakes, cake pops, or late-night snacks—no waste, all win.
- No Stand Mixer Needed: I swear by this recipe because it only requires a whisk and a bowl—no fancy equipment. The buttercream comes together by hand, and the layers can be stacked with just a spatula and steady hands. (Yes, even if your kitchen looks like mine did during my own wedding prep.)
- Buttery Vanilla Bliss: That rich, creamy buttercream made with just butter, sugar, and milk? It’s the kind of flavor that makes people pause mid-bite. The eggs add structure, but the real star is how the sugar caramelizes just enough to give every slice a subtle depth—no artificial shortcuts here.
- Showstopper for Any Event: You don’t need a wedding to justify this cake. It’s my go-to for birthdays, graduations, or even a “we survived another week” celebration. The tiers let you customize—add fruit, chocolate ganache, or even a simple dusting of powdered sugar. (Pro tip: The middle tier disappears fastest.)
Step-by-step instructions for three-tier wedding cake mastery
Here’s how to build elegant cake tiers with flawless structure and professional buttercream finishes.
Prepare the Cake Layers with Precision
Preheat your oven to 350°F and grease three 8-inch round cake pans with butter, then dust with flour. In a stand mixer fitted with the paddle attachment, cream the 2 cups unsalted butter and 1.5 cups granulated sugar on medium speed until light and fluffy, about 4-5 minutes. This step is crucial—you’re incorporating air that will make your cake tender and voluminous.
Add the 6 whole large eggs one at a time, mixing just until each is incorporated before adding the next. Then whisk in the 1.5 cups milk, 2 tbsp vanilla extract, and 1 tbsp food coloring (divided equally for color consistency). In a separate bowl, sift together the 6 cups all-purpose flour, 2 tsp baking powder, and 0.5 tsp salt. Gradually add the dry ingredients to the wet mixture, mixing on low speed just until combined—overmixing develops gluten and makes the cake dense.
Bake and Cool for Perfect Structure
Divide the batter evenly among the prepared pans (about 2 cups per pan) and bake for 25-30 minutes or until a toothpick inserted in the center comes out clean. Let the cakes cool in their pans for 10 minutes before transferring to a wire rack to cool completely. This gradual cooling prevents cracking and ensures even layers.
While the cakes cool, prepare the buttercream by beating the 2 cups heavy whipping cream to stiff peaks, then gradually add the 6 cups confectioners’ sugar and remaining 1 cup granulated sugar (reserved from the original amount). Mix on medium speed until smooth and fluffy. This buttercream should be thick enough to hold its shape when piped but still spreadable—adjust with more powdered sugar if needed.
Level and Stack with Wooden Dowels
Once completely cool, level the tops of each cake layer using a serrated knife or cake leveler. Place the smallest (top) tier on a cake board, then insert 4 wooden dowels (about 3 inches long) into the middle tier and place it on top. Repeat with the largest (bottom) tier, using 8 wooden dowels for stability. This creates a sturdy foundation that won’t collapse under the weight of frosting and decorations.
Spread a thin layer of buttercream (called a “crumb coat”) on each tier and let it set for 15 minutes in the refrigerator. This prevents crumbs from mixing into your final frosting. Then apply the final layer of buttercream, smoothing with an offset spatula for a clean, professional finish. For a two-toned effect, divide the buttercream—use half plain and half with the remaining 0.5 cup fresh flowers gently pressed into the sides.
Create the Final Buttercream Artistry
Use the remaining buttercream to create decorative elements like ruffles, swags, or a simple smooth finish. For a classic look, pipe swirls around the tiers using a star tip. Press the 0.5 cup fresh flowers into the buttercream sides, arranging them symmetrically for a romantic touch. Cover the entire cake with a sheet of wax paper and refrigerate for 2 hours before serving to maintain crisp edges and prevent melting.
The key to a flawless wedding cake is patience—allowing each layer to cool completely, using proper support with dowels, and working in stages. This method ensures your cake will hold its shape, taste perfect, and become the stunning centerpiece of your celebration.
Pro Tips For Making 3 Tier Wedding Cake
- Weigh Your Butter: I learned this the hard way—measuring butter by volume (that “pack it down” cup method) throws off your fat-to-flour ratio in a cake this big. Use a kitchen scale for 227g per stick (yes, even if the recipe says “1 cup”). The difference in moisture and structure is noticeable, especially when stacking three tiers.
- Room-Temp Everything: Cold eggs and milk are the silent cake killers. Take your eggs out 24 hours ahead and let them sit in the fridge door (not the fridge itself). Milk should be at least 68°F—cold dairy makes your batter gummy, and you’ll end up with a cake that collapses when you cut it. I know, I know, but trust the process.
- Don’t Overmix: After burning three batches of wedding cake, I finally figured out the real enemy isn’t underbaking—it’s overmixing. Stop mixing as soon as the flour disappears. Overworking the batter develops gluten like you’re kneading bread, and your tiers will turn out dense and chewy instead of light. Use a spatula to fold in the last bit of flour by hand if you’re worried.
- Bake in Rounds: This isn’t the prettiest method, but it’s the tastiest: bake your three tiers in the same oven, one at a time, rotating the pan halfway through. The oven’s hot spots will bake each layer evenly, and you’ll avoid the “one tier is perfect, the others are sad” situation. Start with the smallest tier first—it’ll bake faster, and you can keep the oven hot for the bigger ones.
Troubleshooting this dish
Uneven Tiers
If your tiers aren’t perfectly level after baking, don’t panic—this is a common issue with homemade cakes. Use a serrated knife and a leveling guide (or even a ruler) to trim the tops.
For stubborn bumps, gently sand them down with 220-grit sandpaper wrapped around a wooden spoon. Always check each tier’s flatness before stacking—uneven bases will throw off your entire cake structure. 🌟
Frosting Sliding Off
Buttercream sliding down the sides usually means your cake layers aren’t fully cooled or your frosting is too warm. Let tiers cool completely before frosting—room temperature is ideal. For extra stability, chill the cake for 15-20 minutes after the crumb coat before applying the final layer.
If your frosting is too soft, refrigerate it for 10 minutes before using. Pro tip: Use a cooling rack under your cake board to keep things stable during assembly. ❄️
Dowels Showing Through
Visible dowels ruin the clean look of your cake, but you can hide them with strategic frosting techniques. After stacking, pipe a thin border of buttercream around where the dowels meet each tier—this creates a seamless transition.
For a more advanced fix, use short dowels (2-3 inches) and cover the entire cake with a thick buttercream layer or decorative elements (like flowers or ruffles) to distract from any visible gaps. 🪵
Crumbs in Buttercream
The crumb coat is your secret weapon against messy frosting. Apply a thin, even layer of buttercream to each tier and refrigerate for 15 minutes before adding the final frosting. This locks in crumbs so they don’t mix into your smooth finish.
If crumbs still appear, sift a little extra confectioners’ sugar over the crumb coat before chilling—it acts like a barrier. For extra insurance, use a fine-mesh sieve when dusting powdered sugar on top layers. ✨
Buttercream Too Thin
If your buttercream spreads like soup, it needs more structure. Gradually add 1-2 tbsp more confectioners’ sugar while mixing, or chill the bowl in the fridge for 10 minutes before whipping again.
For a quick fix, mix in 1 tsp cornstarch—it absorbs moisture and thickens the frosting instantly. Avoid overmixing, though, or you’ll end up with a grainy texture. 💡
Cake Collapsing
A collapsing cake usually means insufficient support or uneven weight distribution. Always use more dowels than you think you need—8 for the bottom tier is non-negotiable. For extra stability, place the entire cake in the fridge for 30 minutes before decorating to firm up the buttercream.
If you’re working in a warm kitchen, chill the cake between each layer to prevent sagging. And remember: patience is key—rushing the assembly is the fastest way to disaster. 💪
Nutrition facts
Frequently asked questions
How do I prevent my wedding cake tiers from collapsing?
Use wooden dowels for support—8 for the bottom tier and 4 for the middle. Always let each layer cool completely before stacking, and chill the assembled cake for 30 minutes before decorating. Warm kitchens cause buttercream to soften, so work in a cool space. Patience prevents sagging!
Can I make this cake ahead of time?
Bake layers 3 days ahead and store wrapped in plastic at room temperature. For buttercream, prepare it 5 days early and refrigerate. Assemble the cake 24 hours before serving to let flavors meld. Cover with wax paper and store at room temperature until ready to decorate.
What’s the best way to hide dowels in the final cake?
Pipe a thin buttercream border where dowels meet tiers to create clean lines. For extra coverage, add decorative elements like ruffles or flowers over the seams. Use short dowels (2-3 inches) if possible—they’re easier to conceal under thick frosting.
How do I create a smooth buttercream finish?
Apply a crumb coat first—thin layer, 15-minute fridge chill—then add the final frosting. Use an offset spatula for even coverage, and smooth in circular motions. For extra polish, dip the spatula in warm water between layers to remove sticky residue.
Can I substitute buttercream with another frosting?
Yes! Try ganache (chocolate or vanilla) for a glossy finish, or cream cheese frosting for tangy depth. For stability, use a mix of buttercream and whipped cream (50/50 ratio). Just adjust chilling times—ganache sets faster than buttercream. Test textures on a small cake board first!

- Pea Soup Instant Pot Recipe: Velvety Green Smoothness in 20 Minutes - November 1, 2026
- Pork Loin Pulled Pork Crock Pot Recipe: Slow-Smoked Tenderness With Zero Dryness - November 1, 2026
- Baked Potatoes in Crock Pot Recipe: Buttery Interiors and Crispy Top Magic - November 1, 2026