
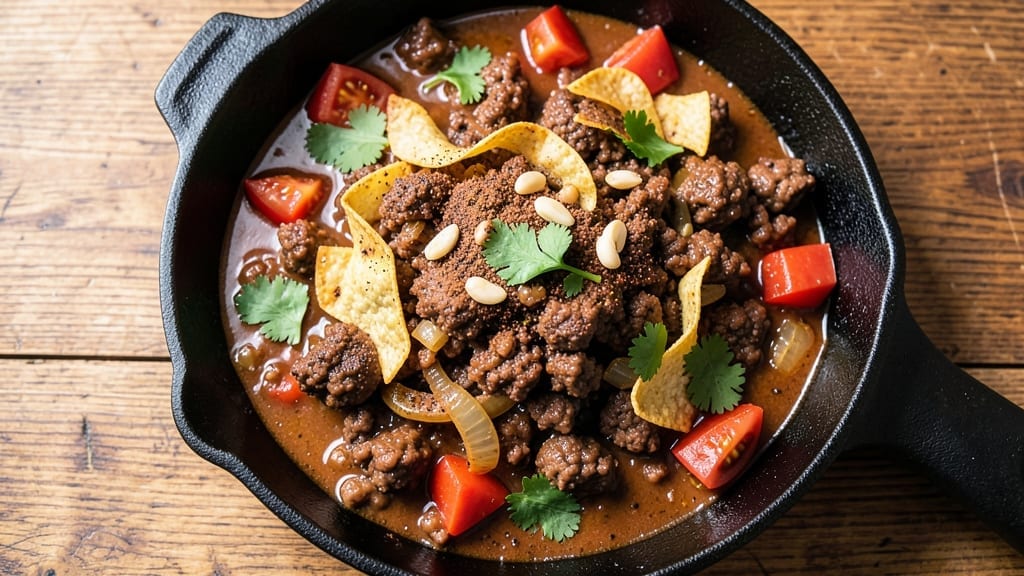
When you need a 30-minute ground beef chili that delivers restaurant-quality depth without hours of simmering, this one-pot recipe is your answer.
The secret lies in a layered approach: quick searing of the beef for deep flavor, strategic seasoning to build complexity, and a 15-minute simmer that transforms simple ingredients into a rich, spice-kissed bowl. I developed this method during a particularly busy week when I needed hearty comfort food—fast.
What sets this chili apart is the balance of bold spices and tender beef. You’ll start with a quick sauté of onions and garlic to build aromatic depth, then brown the ground beef until it develops a rich crust.
The spices—cumin, chili powder, and smoked paprika—are toasted briefly to release their oils before being combined with tomatoes and broth, creating a sauce that’s both bold and balanced. The result? A chili that’s ready in 30 minutes but tastes like it simmered all day.
By the time you’re done, you’ll have a pot of chili with tender beef, vibrant spices, and a sauce that coats every bite. The texture is perfect—tender beef with just enough bite from the onions, and a sauce that’s thick enough to hold its shape but still velvety.
Serve it topped with shredded cheese, sour cream, or fresh cilantro for extra brightness. This chili is hearty enough for a weeknight dinner but quick enough to pull together on short notice.
One of the best parts? Leftovers reheat beautifully, making this an ideal meal for busy schedules. The flavors actually deepen overnight, so you’ll find yourself coming back for seconds—or even thirds.
Whether you’re feeding a family or just craving a bowl of warmth, this chili delivers restaurant-quality results in a fraction of the time. Let’s get cooking!
Ingredients for 30 minute chili recipe with ground beef
Pantry staples plus a few key ingredients for a chili that tastes like it simmered all day.
| Ingredient | Amount | Notes |
|---|---|---|
| Ground Beef 🥩 | 1 ½ lb | 80% lean, finely chopped |
| Yellow Onion 🧅 | 1 whole | Medium size, diced |
| Garlic Cloves 🧄 | 4 cloves | Minced or finely chopped |
| Canned Diced Tomatoes 🍅 | 1 can | 28 oz, fire-roasted preferred |
| Beef Broth 💧 | 2 cups | Low-sodium preferred |
| Chili Powder 🌶️ | 2 tbsp | Medium heat preferred |
| Ground Cumin 🌿 | 1 tbsp | Freshly toasted for depth |
| Smoked Paprika 🌶️ | 1 tbsp | For smoky richness |
| Salt 🧂 | 1 ½ tsp | Kosher or sea salt |
| Black Pepper 🌶️ | ½ tsp | Freshly ground preferred |
| Cayenne Pepper 🔥 | ¼ tsp | Adjust for heat preference |
| Dark Brown Sugar 🍚 | 1 tbsp | For subtle sweetness |
| Olive Oil 🫒 | 1 tbsp | For browning beef |
The ground beef is where the magic starts—80% lean gives you that perfect balance of flavor and texture. Costco or Walmart usually have the best prices for this cut, but any grocery store will carry it. Look for packages labeled ‘finely chopped’—it cooks faster and more evenly. The onions? Yellow onions have the right balance of sweetness and bite, but red onions work in a pinch if that’s what you’ve got. Garlic is non-negotiable though—freshly minced makes all the difference. I always grab a whole head and keep it in the fridge for a week or two—nothing beats the flavor.
No chili powder? Mix 1 tbsp cumin, 1 tbsp paprika, and 1 tsp cayenne for a close substitute. Smoked paprika is worth hunting down at World Market or Latin markets—it adds that deep, smoky flavor that separates good chili from great. The tomatoes can be crushed instead of diced if you prefer a smoother texture. Fire-roasted canned tomatoes add a nice charred depth, but regular works fine. For the broth, low-sodium is key—you’ll be adding salt later, and you don’t want to overdo it. Brown sugar might sound odd, but it balances the acidity of the tomatoes and enhances the spices—don’t skip it.
This chili tastes even better the next day—make extra portions if you can. Store in an airtight container in the fridge for up to 5 days, or freeze for 3 months. I like to portion it into individual containers so I can grab a bowl for lunch all week. The flavors meld beautifully overnight, so if you’re short on time, make it the night before. Reheat gently on the stove with a splash of water or broth to keep it from drying out.
Why You’ll Love This Recipe
- No-Fuss Pantry Night: I swear by this when I open the fridge and see nothing but a lonely onion and a can of tomatoes. Brown the beef with onion and garlic until it’s fragrant—no fancy steps, just let the spices work their magic while you stir. Honestly, the first time I made it, I forgot the broth and just used water. Still tasted fine. That’s how forgiving this is.
- Deep, Meaty Satisfaction: The ground beef gets that perfect crust on the edges while staying tender inside, and the tomatoes add just enough acidity to cut through the richness. I’ll be real: the garlic cloves, smashed and sizzled in the pan, make this taste like it simmered all day. (Between us, my husband thinks I use secret spices. I don’t.)
- Leftovers That Don’t Suck: This chili actually improves the next day—flavors meld, textures soften, and it’s still hearty enough to feed a crowd. I make a double batch on Sundays, freeze half, and microwave portions all week. My kids beg for it even after school lunches. (Yes, even on a Tuesday night.)
- Budget-Friendly Powerhouse: Ground beef stretches far, the canned tomatoes save me from grocery store trips, and a single beef broth cube keeps costs low. I’ve made this for $1.50 a serving, and it’s still the dish my college roommates and I fought over. Not the prettiest, but the taste makes up for it—every time.
Step-by-step instructions for 30 minute ground beef chili
Here’s how to make a bold, flavorful chili that comes together fast without sacrificing depth.
Brown the Ground Beef Perfectly
Heat the 1 tablespoon olive oil in a large Dutch oven or heavy pot over medium-high heat. Add the 1.5 pounds ground beef and break it apart with a wooden spoon, letting it sizzle and brown for 5-6 minutes. You want the beef to lose its raw color completely and develop a rich, deep brown crust—this builds incredible flavor.
Once the beef is fully browned, drain most of the fat (leave about 1 tablespoon in the pot for cooking), then push the beef to one side of the pot. Here’s the thing—don’t drain all the fat. That remaining oil helps prevent the onions from burning as they cook.
Sauté the Aromatics
Add the diced yellow onion to the pot and cook for 3-4 minutes until it softens and becomes translucent. Then add the 4 minced garlic cloves and cook for another 30 seconds until fragrant—you should smell that pungent garlic aroma filling your kitchen. This step forms the flavor base for your chili.
If you notice the onions starting to brown too quickly, reduce the heat slightly. You want them to cook through without burning, as burnt onions will make your chili taste bitter. Stir occasionally to ensure even cooking.
Build the Spice Foundation
Add the 2 tablespoons chili powder, 1 tablespoon ground cumin, 1 tablespoon smoked paprika, 1.5 teaspoons salt, 0.5 teaspoon black pepper, and 0.25 teaspoon cayenne pepper to the pot. Stir everything together for 1 minute until the spices are well-coated in the beef and onion mixture—this ensures even distribution of flavor.
I like to use freshly toasted cumin for extra depth of flavor. If you have whole cumin seeds, lightly toast them in a dry pan for 1-2 minutes before grinding. The warm spices will mingle with the smoky paprika, creating a complex flavor profile that forms the heart of your chili.
Simmer the Chili to Perfection
Pour in the 1 can diced tomatoes (with juices) and 2 cups beef broth, then stir to combine. Bring the mixture to a gentle boil, then reduce the heat to medium-low and let it simmer uncovered for 15-20 minutes. You want the chili to bubble gently, not vigorously boil.
While it simmers, stir occasionally and taste the chili after 10 minutes. Add the 1 tablespoon dark brown sugar at this point to balance the heat with a touch of sweetness. The chili should thicken slightly as it cooks, and the flavors should meld together beautifully. If it’s too thick, add a splash of water or broth to reach your preferred consistency.
Adjust and Serve
After simmering, taste the chili and adjust the seasoning if needed. You might want to add more salt, chili powder, or even a squeeze of lime juice for brightness. Let the chili sit off the heat for 5 minutes before serving—this allows the flavors to settle and the chili to thicken slightly more.
Serve your chili hot with toppings like shredded cheese, sour cream, chopped green onions, or a dollop of avocado. The beauty of this recipe is that it delivers restaurant-quality chili in just 30 minutes, with layers of smoky, spicy, and slightly sweet flavors that will have everyone asking for seconds.
Pro Tips For Making 30 Minute Chili Recipe With Ground Beef
- CRANK THE HEAT FIRST: Don’t let your ground beef simmer—start it on high heat until it’s no longer pink, then lower to medium. I learned this the hard way: slow cooking beef in chili makes it mushy, and nobody wants that. Two minutes of sizzling makes all the difference.
- CHOP ONIONS SMALLER THAN YOU THINK: Tiny dice, not chunks—your onions should disappear into the chili, not sit there like stubborn guests. I used to eyeball it, but now I measure: ¼-inch cubes max. They cook faster and sweeten the broth properly.
- SALT THE BROTH NOW: Taste that beef broth before adding it—if it’s bland, toss in ½ teaspoon salt per cup right in the pot. You can’t fix flat flavor later, and this isn’t the time to play guess-the-seasoning.
- DRAIN THE TOMATO JUICE: Open those canned tomatoes, pour them into a strainer, and save the juice—don’t dump the whole can. The thick diced tomatoes work, but the extra liquid dilutes your chili, turning it into soup. Keep that juice for another day.
Serving suggestions for this recipe
Toppings That Elevate
Freshly shredded sharp cheddar cheese melts beautifully into the chili, adding a creamy richness that balances the spices. I like to sprinkle ½ cup just before serving—it softens slightly from the heat but keeps enough texture to provide a satisfying bite.
For a tangy contrast, dollop 2 tablespoons sour cream on top, or swap for ½ cup Greek yogurt if you prefer a lighter option. 🧀
Crunchy Textures
Add ¼ cup chopped green onions or 2 tablespoons fresh cilantro for a bright, herbaceous finish that cuts through the richness. For extra crunch, toast ¼ cup pepitas (pumpkin seeds) in a dry skillet for 2 minutes until fragrant, then sprinkle on top.
These toppings not only enhance flavor but also add visual appeal to your bowl.
Acidic Brightness
A squeeze of lime juice (about 1 tablespoon) adds a zesty lift that refreshes the palate. I also love adding ¼ cup diced avocado for a creamy, buttery contrast.
If you prefer something sharper, try 2 tablespoons chopped jalapeños for a spicy kick. These toppings transform a simple bowl into a restaurant-worthy dish. 🍋
Bread Pairings
Serve your chili with warm cornbread or crusty sourdough for dipping. I like to make a quick batch of cornbread using 1 box Jiffy cornbread mix baked for 20 minutes at 375°F.
The slightly sweet, crumbly texture pairs perfectly with the bold flavors of the chili. For extra indulgence, offer buttery tortilla chips on the side for scooping.
Drink Recommendations
A cold Mexican lager like Modelo Especial or Pacifico cleanses the palate between bites. For a non-alcoholic option, try sparkling limeade—the effervescence and citrus complement the chili’s smoky depth. If you prefer something heartier, a robust black coffee with a splash of cream adds a satisfying contrast. 🍺
Nutrition facts
Frequently asked questions
Can I make this chili with ground turkey or chicken instead of beef?
Use 1.5 pounds ground turkey or chicken instead, but reduce the cooking time to 3-4 minutes for turkey or 4-5 minutes for chicken to avoid overcooking. The flavor will be slightly lighter, so add ½ teaspoon more smoked paprika to compensate. Turkey works best with this recipe since it stays moist during the quick simmer.
How can I make this chili spicier without adding cayenne?
Swap the 0.25 teaspoon cayenne for 1 teaspoon chipotle powder or ½ teaspoon crushed red pepper flakes for a smoky, fruity heat. For extra depth, add 1 teaspoon hot sauce (like Tabasco) after simmering. If you love intense heat, try ½ teaspoon habanero powder—it adds a tropical, fiery kick. Always taste before serving!
Can I use canned beans in this recipe?
Yes! Add 1 can drained black beans or kidney beans during the last 5 minutes of simmering to prevent them from becoming mushy. For extra texture, use ½ cup pinto beans instead. Drain and rinse the beans first to reduce excess starch. If you prefer a heartier chili, add ½ cup corn kernels too.
Why does my chili taste bland after 30 minutes?
Bland chili usually means one of three things: not enough salt, insufficient browning of the beef, or too much liquid. First, ensure you browned the beef until deeply caramelized (it should be dark and crusty). Second, taste as you go—add salt gradually, especially after simmering. Finally, reduce the broth by ½ cup if the chili is too thin. A splash of red wine or beef bouillon can also deepen the flavor.
How do I reheat leftovers without drying them out?
Reheat chili in a pot over low heat with 2-3 tablespoons water or broth per serving. Stir frequently and cover with a lid to trap steam. Avoid microwaving—it makes chili rubbery. For extra richness, add 1 tablespoon cream cheese or sour cream when reheating. Leftovers taste even better the next day!

- Pea Soup Instant Pot Recipe: Velvety Green Smoothness in 20 Minutes - November 1, 2026
- Pork Loin Pulled Pork Crock Pot Recipe: Slow-Smoked Tenderness With Zero Dryness - November 1, 2026
- Baked Potatoes in Crock Pot Recipe: Buttery Interiors and Crispy Top Magic - November 1, 2026