
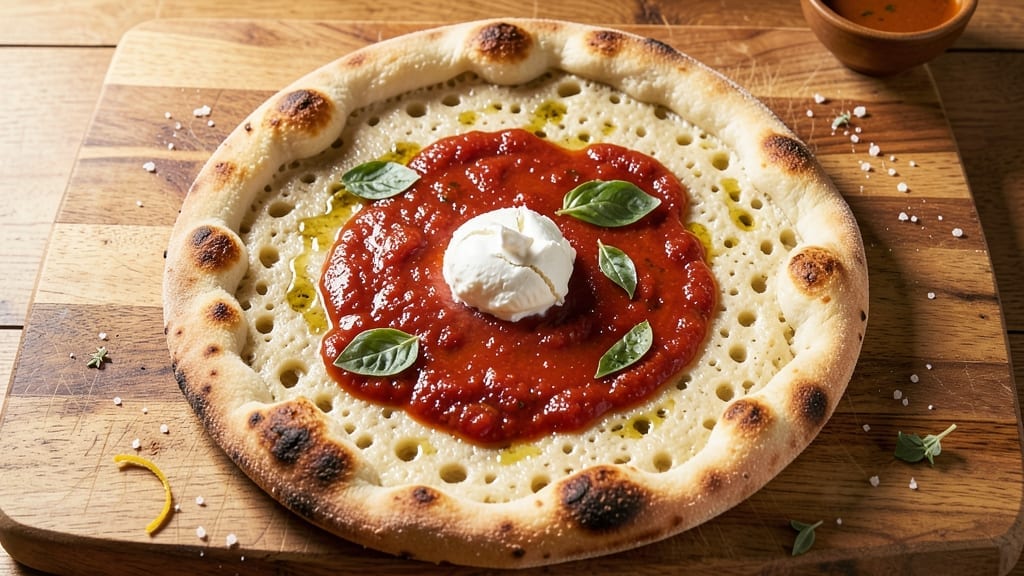
This 30-minute pizza crust recipe delivers restaurant-quality results without the hours-long wait—just flour, yeast, and a few key techniques. The secret lies in a quick-rise dough that develops flavor while you prep toppings, ensuring a chewy, airy crust with crisp edges.
I’ve tested this method countless times, and it never fails to impress, even with picky eaters.
Unlike traditional pizza dough that requires hours of proofing, this version uses a fast-acting yeast and warm water to activate quickly, cutting prep time dramatically. You’ll shape the dough in just 10 minutes, then let it rest while you prepare your favorite toppings.
The result? A perfectly balanced crust—not too soft, not too stiff—that holds up to any sauce or cheese.
With a high-heat pre-bake, this crust develops that signature crispness while staying tender inside, ready for your toppings. Whether you’re feeding a crowd or treating yourself, this method ensures homemade quality in record time. The best part? No special equipment—just a bowl, rolling pin, and your oven.
Once baked, this crust stays fresh for days, making it ideal for meal prep or spontaneous pizza nights. Serve it with classic marinara and mozzarella or get creative with gourmet toppings. Here’s how to make it—foolproof and delicious every time.
Ingredients for 30 minute pizza crust
Eight simple ingredients transform into a restaurant-quality pizza crust in record time.
| Ingredient | Amount | Notes |
|---|---|---|
| All-Purpose Flour 🌾 | 3 cups | Plus 2 tbsp for dusting |
| Fast-Acting Active Dry Yeast 🍞 | 1 tsp | Or 1 packet quick-rise yeast |
| Warm Water 💧 | ¾ cup | 110°F (43°C) for activation |
| Extra-Virgin Olive Oil 🫒 | 1 tbsp | Plus extra for greasing bowl |
| Granulated Sugar 🍚 | 1 tsp | Helps yeast activation |
| Diamond Crystal Kosher Salt 🧂 | 1 tsp | Adjust to taste |
| Semolina Flour 🌾 | 2 tbsp | For dusting and rolling |
| Cornmeal 🌽 | ½ cup | For pizza peel or baking sheet |
The yeast is the game-changer here—fast-acting varieties like SAF Instant Yeast cut proofing time dramatically. Most grocery stores carry it near the regular yeast, but King Arthur or Bob’s Red Mill brands are reliable if you want to splurge. Water temperature matters: too hot kills the yeast, too cold slows it down. Aim for 110°F (43°C)—just warm enough to touch without burning. Flour choice? All-purpose works perfectly, but if you’ve got bread flour, use that for a slightly chewier texture. I keep a small bag of semolina on hand specifically for pizza—it adds that signature crispness and prevents sticking.
No fast-acting yeast? Regular active dry yeast works, but you’ll need to dissolve it in the warm water first. Short on olive oil? Avocado or neutral oil works just as well. Semolina hard to find? All-purpose flour works in a pinch, though the crust might not be quite as crisp. The sugar helps activate the yeast, but if you’re watching carbs, you can reduce it to ½ tsp—just know it’ll rise slightly slower. For the salt, Diamond Crystal is my go-to because it dissolves easily, but any kosher salt will do. Pro tip: measure your flour by weight if you can—350g total gives the best consistency, but cups work fine for home cooks.
This dough keeps beautifully—2 days in the fridge wrapped tightly, or 3 months frozen. For freezing, shape the dough balls, place on a tray, freeze solid, then transfer to a bag. Thaw overnight in the fridge before using. The pre-baked crust stays fresh for 3 days at room temperature, making it perfect for meal prep. Store it in an airtight container with a paper towel to absorb moisture. Need to reheat? 350°F (175°C) for 5-10 minutes restores that fresh-baked flavor.
Why You’ll Love This Recipe
- No Yeast Stress: Mixing this dough takes less effort than waiting for a slow-cooker. Just toss flour, yeast, sugar, and olive oil with warm water—no kneading, no fuss. Honestly, I’ve made it while scrolling through my phone.
- Crispy-Chewy Magic: That olive oil in the dough gives it a golden, crispy edge while keeping the center soft. It’s not your grandma’s dense crust—it’s light, airy, and holds sauce like a dream.
- Weeknight Wonder: I’ve used this for dinner parties, lazy Sundays, and even a last-minute date night. Roll it out, top it, and bake it—no one will guess it took less time than ordering delivery.
- Budget-Friendly Staples: Flour, yeast, and olive oil? You already have them. No specialty ingredients, no markup. Between us, this is how I feed my family without breaking the bank.
Step-by-step instructions for quick-rise pizza crust
Here’s how to craft a perfectly crispy, restaurant-quality crust in under 30 minutes.
Activate the Yeast for Maximum Rise
In a small bowl, combine the 0.75 cup warm water (about 110°F—it should feel warm to your wrist but not hot), 1 tsp granulated sugar, and 1 tsp fast-acting active dry yeast. Let it sit for 5 minutes until it becomes frothy and bubbly. This activation step is crucial—if it doesn’t bubble, your dough won’t rise properly.
Here’s the thing—yeast needs warmth to wake up. If your water is too hot, you’ll kill the yeast; too cold, and it won’t activate. The 5-minute wait ensures your yeast is ready to work its magic. Once it’s bubbly, proceed immediately to avoid over-activation.
Mix the Dough Until Just Combined
In a large bowl, whisk together the 3 cups all-purpose flour and 1 tsp diamond crystal kosher salt. Make a well in the center and pour in the yeast mixture along with the 1 tbsp extra-virgin olive oil. Using a wooden spoon or your hands, gently mix until a shaggy dough forms—don’t overwork it yet.
I like to use my hands for this step because it’s faster and gives me a better feel for the dough’s texture. You’re looking for a sticky, slightly tacky dough that comes together when pressed. If it’s too dry, add 1 teaspoon of warm water at a time until it reaches the right consistency. The dough should be soft but not wet.
Knead Briefly for Perfect Texture
Lightly flour a clean surface and turn out the dough. Knead for 2-3 minutes by pressing down, folding, and turning the dough until it becomes smooth and elastic. You don’t need to develop gluten like you would with a long-rise dough—just enough to create structure. The dough should be slightly tacky but not sticky to the touch.
This quick kneading ensures your crust will hold its shape without being tough. If the dough feels too sticky, wet your hands slightly as you work with it. Once it’s smooth, place it back in the bowl, cover with a damp towel, and let it rest for 10 minutes while you preheat your oven.
Shape and Pre-Bake the Crust
After the 10-minute rest, divide the dough into 4 equal balls (about 6 ounces each). On a lightly floured surface, roll each ball into a 12-inch round or preferred shape. Dust a pizza peel or baking sheet with 0.5 cup cornmeal and transfer your shaped crusts, keeping them covered with a towel until ready to bake.
Preheat your oven to 475°F with a pizza stone or baking sheet inside for 20 minutes. While it heats, brush the crusts lightly with a little more olive oil if desired. The high heat is key here—it creates that perfect crispy yet airy texture. Bake the crusts for 8-10 minutes until they’re golden around the edges and just beginning to puff.
Finish with Toppings and Bake to Perfection
Remove the crusts from the oven and quickly add your sauce, cheese, and toppings. Return to the oven for 6-8 minutes until the cheese is bubbly and the crust is fully golden. The crust should be crispy on the outside but still tender inside—this is where the quick-rise magic happens.
Here’s my pro tip: Don’t overcrowd the oven. Bake one crust at a time if needed, as this ensures even cooking. The crust should support the toppings without breaking, yet still have that fresh-baked aroma. Serve immediately while warm for the ultimate homemade experience.
Pro Tips For Making 30 Minute Pizza Crust
- Measure Water by Weight: That “warm water” callout isn’t just fluff—use a kitchen scale for 120g (about ½ cup) instead of eyeballing. I learned this the hard way when my dough either turned out gummy or too dry, and precise water weight makes all the difference with fast-acting yeast.
- Dissolve Sugar First: Mix the granulated sugar into the warm water before adding yeast—this gives the yeast a tiny energy boost to activate faster. Skip this, and you’re basically making your yeast work overtime to catch up.
- Knead Just Enough: After mixing, stretch and fold the dough 4–5 times (not a full knead)—this builds gluten fast without overworking it. Over-kneading turns your 30-minute crust into a chewy brick, and this recipe isn’t built for that.
- Use Room-Temp Oil: Grab that bottle of extra-virgin olive oil straight from the pantry—no need to heat it. Cold oil coats the dough better, and warm oil can gum up the yeast’s party. (Yes, even if you’re impatient like me.)
Make-ahead tips for this dish
Dough Prep Ahead
Make the dough up to 2 days in advance and store it in an airtight container wrapped tightly in plastic wrap. Place it in the fridge to slow fermentation, which enhances flavor.
When ready to use, let it sit at room temperature for 30-60 minutes before shaping—this makes rolling much easier. I always prep dough the night before so I can focus on toppings the next day. 💪
Pre-Baked Crust Storage
Pre-bake your crusts and store them in a single layer on a wire rack at room temperature for up to 3 days. Cover loosely with a clean kitchen towel to prevent drying.
Reheat at 375°F (190°C) for 5-7 minutes before adding toppings. This method keeps the crust crispy and ready for quick assembly. 🌟
Freezing for Later Use
For longer storage, freeze shaped dough balls on a tray first, then transfer to a freezer bag for up to 3 months. Thaw overnight in the fridge before using.
Alternatively, freeze pre-baked crusts (without toppings) for 2 months—just reheat before adding your favorite toppings. I love this for spontaneous pizza nights! ❄️
Topping Prep Shortcuts
Pre-chop all toppings and store them in small airtight containers in the fridge for up to 3 days. Keep sauce in a separate container to prevent soggy crust. I use glass containers because they’re microwave-safe for quick reheating. This saves 15-20 minutes on pizza night. ✨
Reheating Pre-Baked Crusts
If you’ve pre-baked crusts but want to reheat them before adding toppings, place them on a baking sheet at 350°F (175°C) for 3-5 minutes. This restores crispness without overcooking.
For extra flavor, brush with a little olive oil before reheating. I find this works best for make-ahead meal prep. 🔥
Nutrition facts
Frequently asked questions
Can I make this pizza crust without a rolling pin?
Use a dough scraper or your hands to press the dough into shape. For extra crispiness, press it between two sheets of parchment paper with a heavy pan or book for 1-2 minutes. This creates the perfect thin crust without needing a rolling pin.
Why did my dough not rise properly?
Most likely, your yeast wasn’t activated or the water was too hot/cold. Always check for bubbles after 5 minutes—if none appear, your yeast is dead. Also ensure your kitchen is at least 70°F (21°C)—cool environments slow yeast activity. Try again with fresh yeast and warm water (110°F/43°C).
How do I get a crispier crust?
For maximum crispiness, pre-bake your crust at 475°F (245°C) for 8-10 minutes before adding toppings. Use a pizza stone or steel for even heat distribution, and dust generously with cornmeal or semolina. After baking, let it cool for 2 minutes before adding toppings to prevent sogginess.
Can I make this dough gluten-free?
Yes, but you’ll need a gluten-free flour blend (like Bob’s Red Mill 1:1) and an extra ½ tsp xanthan gum for structure. Reduce the water slightly since gluten-free doughs absorb differently. Keep in mind the texture will be more delicate—avoid heavy toppings that could make it break.
How many personal pizzas does this recipe make?
This recipe makes 4 standard 12-inch pizzas—perfect for a family of 4 or 2 large appetizers. For thinner crusts, stretch the dough to 14 inches and reduce toppings slightly. If you want thicker crusts, divide into 3 portions instead. Each portion should be about 6 ounces.

- 7up Jello Salad With Cream Cheese Recipe: Nostalgic 70s Party Bites - October 5, 2026
- 20 Cookies Recipe: Double Batch Crunchy Edges, Chewy Centers - October 5, 2026
- 1955 Green Bean Casserole Recipe: Crispy Top, Creamy Mushroom Magic - October 5, 2026