
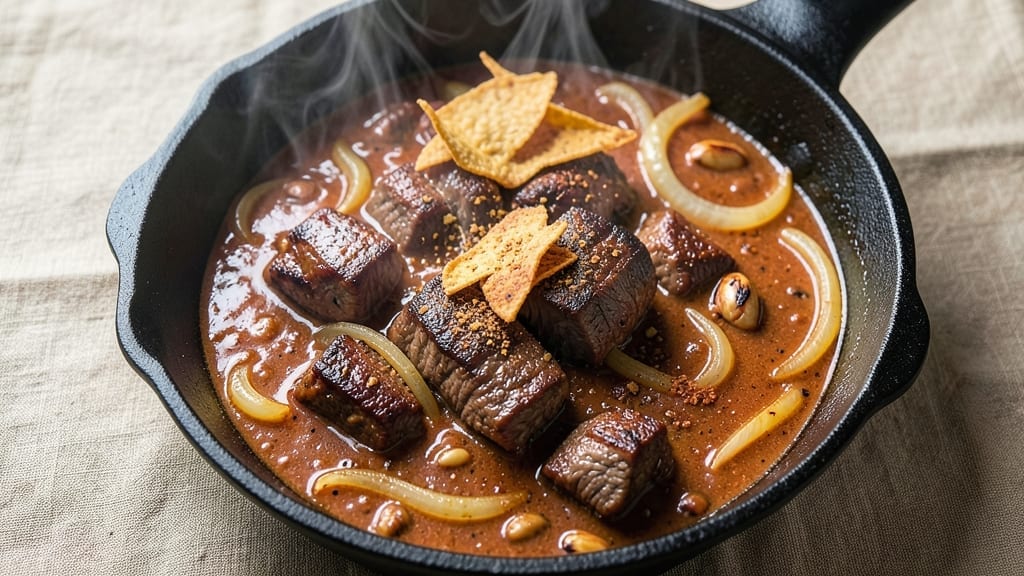
A 3lb chili recipe that delivers deep, smoky flavors and hearty texture transforms a simple pot of beans and meat into a crowd-pleasing centerpiece. The secret lies in slow-cooked beef that develops rich, caramelized edges while staying tender, paired with beans that absorb all the smoky, spiced goodness.
I’ve perfected this over years of testing—no shortcuts, just layers of flavor built through proper browning, aromatic spices, and a long, slow simmer that lets everything meld together.
This recipe starts with a 3lb beef chuck roast cut into chunks, seared until deeply browned to lock in flavor before simmering for hours with onions, garlic, and a blend of chili powder, cumin, and smoked paprika.
Kidney beans add heartiness, while tomatoes and broth create a thick, velvety base. The result? A chili so rich and flavorful it disappears faster than you can say “second helping.”
What makes this chili truly special is its balance—smoky without being overpowering, tender without being mushy, and packed with depth from the spices and slow cooking.
The aroma alone will have everyone gathering around the table, and the texture is just right: fork-tender beef, creamy beans, and a sauce that clings perfectly to every bite. This isn’t just chili; it’s a meal that feels like a hug in a bowl.
Serve it with cornbread, crusty rolls, or a simple green salad to round out the meal. The leftovers? Even better the next day as the flavors continue to develop. Let’s get cooking—this chili is worth every minute of the wait.
Ingredients for 3lb chili
Pantry staples plus a few specialty spices create this restaurant-quality 3lb chili masterpiece.
| Ingredient | Amount | Notes |
|---|---|---|
| Beef Chuck Roast 🥩 | 3 lb | Cut into 1.5-inch chunks |
| Yellow Onions 🧅 | 2 whole | Medium size, chopped |
| Garlic Cloves 🧄 | 6 cloves | Peeled, minced |
| Chili Powder 🌶️ | 2 tbsp | Smoked variety preferred |
| Ground Cumin 🌿 | 1 ½ tbsp | Toasted for depth |
| Smoked Paprika 🌶️ | 1 ½ tbsp | For authentic smokiness |
| Salt 🧂 | 1 ½ tsp | Kosher or sea salt |
| Black Pepper 🌶️ | 1 tsp | Freshly ground |
| Cayenne Pepper 🔥 | ½ tsp | Adjust for heat preference |
| Kidney Beans 🌱 | 2 cups | Drained, rinsed |
| Tomato Paste 🍅 | 2 tbsp | High-quality, smooth |
| Beef Broth 💧 | 4 cups | Low-sodium preferred |
| Dark Brown Sugar 🍚 | 1 tbsp | Balances heat |
| Extra-Virgin Olive Oil 🫒 | 2 tbsp | For searing beef |
The beef chuck roast is non-negotiable here—it’s the star of the show. Costco or Walmart usually have the best prices for a 3lb roast, and it’s worth the extra cost for that deep, beefy flavor. Look for good marbling when you pick it up; that’s what gives you the rich, tender texture after slow cooking. If you can’t find chuck roast, brisket or short ribs work too, but they’ll need longer cooking time. The onions and garlic are your aromatic base—don’t skip toasting them in the oil before adding the beef. That first step builds all the flavor foundation. For the spices, Penzeys or local Latin markets have the best selection if you want to go beyond grocery store basics, but the regular stuff works fine too.
No smoked paprika? Regular paprika plus a pinch of liquid smoke gets you close. The cayenne can be swapped for red pepper flakes at half the amount if you’re sensitive to heat. Kidney beans not your thing? Black beans or pinto beans work just as well, but adjust the broth amount if you’re using canned beans with liquid. For the tomato paste, those little squeeze tubes from Trader Joe’s are perfect—they’re concentrated and keep forever. If you’re making this ahead, the beans can be added later to prevent mushiness. The brown sugar might seem odd, but it’s essential for balancing the heat and adding depth. Trust me on this one.
This chili tastes even better the next day as the flavors meld together. Store it in an airtight container in the fridge for up to 5 days, or freeze portions for 3 months. The beef gets even more tender after a day of resting, so plan ahead if you’re serving a crowd. I always double the recipe when I’m hosting—leftovers disappear fast. For serving, a sprinkle of fresh cilantro or chopped green onions adds a nice bright finish. The broth ratio is designed to keep it thick but not dry, so no need to add water later unless you’re serving a much larger group.
Why You’ll Love This Recipe
- One-Pot Magic: I swear by this chili—just dump everything into a pot, let it simmer, and walk away. The chuck roast practically melts into tender chunks while the onions caramelize right in the same pot. No fancy steps, no extra dishes.
- Deep, Smoky Richness: That beef chuck roast? It’s the star—slow-cooked until it’s fall-apart tender, wrapped in layers of cumin and chili powder that cling to every bite. Honestly, the first time I tasted it, I grabbed the spoon and didn’t stop until the pot was empty.
- Leftovers That Beg for More: This recipe makes way more than you’ll eat in one sitting, and that’s a good thing. The flavors actually get better the next day as the spices meld together. I freeze half for lazy Mondays—just reheat and serve with cornbread. Easy win.
- Budget-Friendly Crowd-Pleaser: A 3lb chuck roast stretches for a week’s worth of lunches, and the spices cost pennies. Between us, this is the kind of dish where you can feed six people for less than takeout, and they’ll still ask for seconds. (Yes, even on a Tuesday night.)
Step-by-step instructions for deep-smoked beef and bean chili
Transform simple ingredients into restaurant-quality chili with this foolproof method.
Sear the Beef for Maximum Flavor
Heat a large Dutch oven over medium-high heat until hot. Add the 2 tablespoons extra-virgin olive oil and swirl to coat the bottom evenly. Working in batches to avoid crowding, add the 3 lb beef chuck roast cut into 1.5-inch chunks and sear for 3-4 minutes per side until deeply browned.
This searing step creates the Maillard reaction, developing rich, caramelized flavors that form the foundation of your chili. You’ll know it’s ready when the beef releases easily from the pan and develops a deep golden crust. Transfer the browned beef to a plate and set aside temporarily.
Build the Chili Base with Aromatics
In the same Dutch oven, add the 2 whole yellow onions chopped and cook for 5-6 minutes until softened and beginning to caramelize. Stir in the 6 cloves minced garlic and cook for 30 seconds until fragrant—don’t let it burn, as garlic turns bitter quickly.
Add the 2 tablespoons tomato paste and stir to coat the onions and garlic completely. This creates a flavorful paste that will blend seamlessly with your chili. Cook for 1 minute until the raw tomato taste disappears and the mixture becomes uniformly browned.
Develop the Spice Blend
Reduce heat to medium and add the 2 tablespoons chili powder, 1.5 tablespoons ground cumin, 1.5 tablespoons smoked paprika, 1.5 teaspoons salt, 1 teaspoon black pepper, and 0.5 teaspoon cayenne pepper. Stir constantly for 1-2 minutes until the spices are fully incorporated and the mixture becomes aromatic.
This is where the magic happens—the spices toast slightly, releasing their essential oils and creating complex flavors. You should notice the kitchen filling with warm, earthy aromas. The smoked paprika adds depth while the cayenne provides subtle heat that balances the richness of the beef.
Simmer the Chili to Perfection
Return the seared beef to the Dutch oven and add 4 cups beef broth and 1 tablespoon dark brown sugar. Bring to a gentle boil, then reduce heat to low, cover partially, and simmer for 1 hour. Stir occasionally to prevent sticking and ensure even cooking.
After 1 hour, add the 2 cups drained kidney beans and continue simmering uncovered for another 1-2 hours until the beef is fork-tender and the chili has thickened to your desired consistency. The beans will absorb the flavors while adding hearty texture.
Adjust and Serve
Taste the chili and adjust seasoning if needed—add more salt if it tastes bland, or a pinch of cayenne if you want more heat. The chili should be rich with deep smoky flavors, tender beef that pulls apart easily, and a perfect balance of spice and sweetness from the brown sugar.
Serve immediately with toppings like shredded cheese, sour cream, or chopped green onions. For best results, let the chili rest for 10 minutes before serving to allow the flavors to meld completely. This chili makes 8 generous servings and tastes even better the next day as the flavors continue to develop.
Pro Tips For Making 3lb Chili
- SEAR THE ROAST FIRST: I learned this the hard way—skipping the sear means flavorless chili. Cut the beef chuck into 1.5-inch chunks, pat them dry, and hit a screaming-hot Dutch oven with just a teaspoon of oil. Let them brown 3-4 minutes per side before adding onions. That crust locks in flavor and makes the whole pot taste deeper.
- SWEAT ONIONS LOW AND SLOW: After burning three batches, I finally figured out: onions need time. Dice them fine, then cook them on medium-low with a pinch of salt until they’re translucent and just starting to caramelize—about 8-10 minutes. If you rush this, they’ll turn to mush and muddle the chili’s texture. (Yes, even if you’re impatient like me.)
- TOAST THE SPICES: Skip this, and your chili tastes flat. Dry-toast the chili powder and cumin in the same Dutch oven for 30 seconds after removing the meat—just until you smell that earthy, toasty aroma. It’s not about burning them; it’s about waking up their flavors. (Your future self will notice the difference.)
- SIMMER LONG, NOT HARD: Start with a rolling boil, but once everything’s in, drop to a gentle simmer. Too much heat = a watery, thin chili. Aim for 2-2.5 hours total, stirring occasionally. If it gets too thick, add a splash of beef broth. The goal is tender beef and deep flavor, not a rushed, grainy mess.
Best sauces and condiments for 3lb chili
Classic Toppings
Fresh cilantro or green onions add a bright, herby contrast to the rich chili. I like to chop ¼ cup cilantro and sprinkle it over each serving just before eating. For extra creaminess, add ½ cup sour cream or a dollop of Mexican crema—both balance the heat beautifully.
A sprinkle of crumbled cotija cheese or sharp cheddar adds a salty crunch that elevates every bite. 🌿
Spicy Kick
For those who love heat, a dash of hot sauce like Cholula or Tabasco takes this chili to the next level. I recommend starting with 1 teaspoon and adjusting to taste.
If you prefer a smoky heat, try 2 tablespoons of chipotle in adobo sauce, minced, which adds depth and complexity. For a quick fix, a pinch of red pepper flakes works too.
Creamy Additions
Stir in ½ cup of Greek yogurt or sour cream during the last 10 minutes of cooking to create a creamy texture without thinning the chili. For extra richness, add ¼ cup of evaporated milk or heavy cream while simmering.
If you’re serving this chili at a gathering, offer toppings on the side so guests can customize their bowls.
Smoky Enhancements
Boost the smoky flavor with 1 teaspoon of liquid smoke or a pinch of smoked salt. I often add both for an extra layer of depth.
For a smoky-sweet twist, drizzle with 2 tablespoons of honey or maple syrup just before serving. This works especially well if you prefer a milder heat profile.
Crunchy Textures
Add ¼ cup of toasted pepitas (pumpkin seeds) or crushed tortilla chips for a satisfying crunch. For a spicy crunch, top with diced jalapeños or pickled red onions. These toppings not only add texture but also keep the chili interesting with every bite. 🌶️
Acidic Balance
A squeeze of fresh lime juice or a splash of apple cider vinegar brightens the flavors and cuts through the richness. I recommend 1 tablespoon of lime juice per serving—just enough to enhance without overpowering.
For a tangy twist, try pickled jalapeños or a few slices of avocado on top.
Nutrition facts
Frequently asked questions
Can I substitute ground beef for chuck roast in this 3lb chili?
You can, but the texture will differ significantly. Ground beef will make the chili thicker and more saucy, while chuck roast creates tender, pull-apart beef chunks. If substituting, use 2.5 lbs ground beef (80/20 blend for best flavor) and reduce the broth to 3 cups to maintain balance. Brown the meat thoroughly first to develop deep flavor.
How do I adjust this recipe for a slow cooker?
Transfer all ingredients except beans to your slow cooker (use a 6-quart model). Cook on low for 8 hours or high for 4-5 hours, then stir in beans and cook 1 more hour. The slow cooker’s gentle heat prevents the beef from overcooking while letting flavors meld beautifully. Add beans later to maintain their texture.
Why does my chili taste bland after simmering?
This usually happens from insufficient browning or under-seasoning. Always sear the meat until deeply browned to develop the Maillard reaction. Taste as you go—add ½ teaspoon more salt or ¼ teaspoon cayenne if needed. For extra depth, stir in 1 tablespoon of beef bouillon powder or 1 teaspoon of Worcestershire sauce during the last 30 minutes.
Can I make this chili vegetarian?
Replace the beef with 3 cups of hearty mushrooms (cremini or portobello) and 1 cup of textured vegetable protein (TVP). Rehydrate the TVP in 1 cup beef broth first, then proceed with the recipe. Add 1 teaspoon soy sauce or 1 tablespoon tomato paste extra for umami depth. The beans will still provide plenty of protein and heartiness.
How long can I store leftovers safely?
Store in an airtight container in the fridge for up to 5 days, or freeze portions for 3 months. The chili actually improves overnight as flavors meld. When reheating, warm over medium-low heat to 165°F, stirring frequently to prevent scorching. Add a splash of broth if it thickens too much during reheating.

- Pork Loin Pulled Pork Crock Pot Recipe: Slow-Smoked Tenderness With Zero Dryness - November 1, 2026
- Baked Potatoes in Crock Pot Recipe: Buttery Interiors and Crispy Top Magic - November 1, 2026
- Braised Beef Short Ribs Recipe: Crock Pot Fall-Off-Bone Magic in 6 Hours - November 1, 2026