
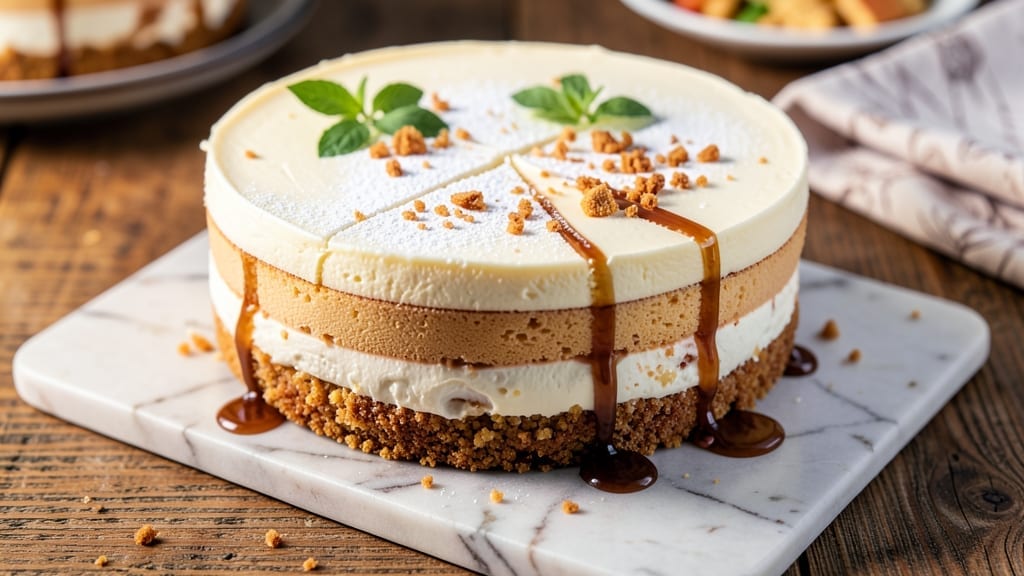
This 4 cream cheese cheesecake recipe delivers the richest, densest texture without a single crack in sight—no water bath required. The secret lies in blending four creamy blocks of cream cheese with precise technique, creating layers of velvety smoothness that rival bakery quality.
I’ve perfected this method after years of trial and error, ensuring every slice stays sturdy yet tender.
The foundation starts with a buttery graham cracker crust that stays crisp, while the filling combines full-fat cream cheese with sour cream and eggs for that signature foolproof density.
No overmixing, no guesswork—just a smooth batter that bakes evenly in the oven. The key? A slow cool-down process that prevents cracks while developing that signature creamy texture.
What you’ll end up with is a restaurant-quality cheesecake that’s rich, slightly tangy, and perfectly set—no wobble, no cracks, just pure indulgence. The top stays smooth and velvety, ready for your favorite toppings like fresh berries, caramel drizzle, or a dusting of powdered sugar.
This is the cheesecake recipe I make for special occasions, and it never disappoints.
Whether you’re hosting a dinner party or treating yourself to a decadent dessert, this method guarantees success. The instructions walk you through every step—from crust prep to chilling—so you can confidently create a showstopping dessert that’ll have everyone asking for seconds. Let’s get started!
Ingredients for 4 cream cheese cheesecake
Four creamy blocks of cream cheese plus a few pantry staples—this is all you need for foolproof, crack-free perfection.
| Ingredient | Amount | Notes |
|---|---|---|
| Full-Fat Cream Cheese Blocks 🧀 | 4 whole | Room temperature for blending |
| Sour Cream 🥛 | 1 cup | Full-fat for creaminess |
| Large Eggs 🥚 | 4 whole | Room temperature for smooth batter |
| Granulated Sugar 🍚 | 2 cups | Superfine preferred for smoothness |
| Vanilla Extract 🌿 | 2 tsp | Pure vanilla preferred |
| Graham Cracker Crumbs 🍪 | 2 ½ cups | For buttery crust foundation |
| Unsalted Butter 🧈 | ½ cup | Melted for crust binding |
| Light Brown Sugar 🍚 | ¼ cup | Packed for crust sweetness |
| Salted Butter 🧈 | 2 tbsp | For crust richness |
| Powdered Sugar 🍚 | ¼ cup | For final dusting |
| Fresh Blueberries 🫐 | 1 ½ cups | Optional topping |
| Heavy Whipping Cream 🥛 | ½ cup | Optional caramel drizzle base |
The cream cheese is non-negotiable here—full-fat blocks are essential for that signature velvety texture. Philadelphia is my go-to brand, but any high-quality block works. Grab them a day ahead so they can soften at room temperature (that’s the secret to smooth blending). The sour cream adds that signature tang—full-fat only, trust me on this. For the crust, Honey Maid graham crackers give the best buttery flavor, but any sturdy graham will do. The key is to pulse them in a food processor until they’re fine crumbs—no big chunks in the crust.
No vanilla extract? Vanilla bean paste works even better, or a splash of vanilla sugar if that’s what’s in your cabinet. The eggs should be at room temperature—this prevents lumps in the batter. For the sugar, superfine dissolves smoother, but regular granulated works if you pulse it in a food processor first. Want extra richness? Add 2 tbsp sour cream to the crust mix. The blueberries? Grab them fresh if you can, but frozen works too—just toss them in a bit of sugar and lemon juice first.
This cheesecake needs patience to set properly. Chill for 6-8 hours (overnight is best) before slicing—this prevents cracks. Store leftovers covered in the fridge for 4-5 days, but honestly, it’s best enjoyed fresh. The crust stays crisp for 2 days if you keep it sealed. For the blueberry topping, mix them with 1 tbsp sugar and 1 tsp lemon juice before spreading. The caramel drizzle? Just heat the heavy cream with 2 tbsp brown sugar until bubbly, then drizzle over the top.
Why You’ll Love This Recipe
- No Mixing Madness: This recipe beats the water bath drama. Just beat the cream cheese and sugar until it’s actually smooth—no lumps, no stress—then fold in the eggs one at a time. That’s it. No fancy gadgets, no waiting for the oven to get hotter than my patience.
- Rich Without the Guilt: Full-fat cream cheese and sour cream team up for that velvety, almost-too-good texture. The sugar caramelizes just enough to balance the tang, and a splash of vanilla? It’s like dessert had a personality upgrade. (Yes, even on a Tuesday night.)
- Party in a Pan: Slice it for a crowd, cube it for lunches, or serve it whole with berries for a fancy dinner. The crust? Optional. The portions? Flexible. I’ve taken it to potlucks, packed it for picnics, and still had leftovers for breakfast. (Don’t judge.)
- Budget Luxury: Four cream cheese blocks stretch farther than you’d think—this feeds 8-10 for under $15. The eggs and sugar are pantry staples, and the sour cream adds that creamy magic without breaking the bank. Fancy dessert, zero splurge.
Step-by-step instructions for 4 cream cheese cheesecake
This layered approach ensures rich, dense texture without a single crack in sight.
Prepare the Buttery Crust Foundation
Preheat your oven to 325°F and melt the 0.5 cup unsalted butter in a small saucepan over low heat. Once fully melted, remove from heat and stir in the 2.5 cups graham cracker crumbs and 0.25 cup packed light brown sugar until evenly combined. The mixture should look like wet sand.
Press this mixture firmly into a 9-inch springform pan, using the back of a measuring cup to create an even, compact layer. I like to press it down until it’s about ¼-inch thick—this prevents a soggy crust. Bake for 10 minutes until lightly golden. Let cool completely before adding the filling.
Blend the Cream Cheese Filling Smoothly
While the crust bakes, beat the 4 whole full-fat cream cheese blocks (at room temperature) in a stand mixer fitted with the paddle attachment until completely smooth. This takes about 3-4 minutes—don’t rush it. You want to eliminate every single lump for that silky texture.
Gradually add the 2 cups granulated sugar and 1 cup sour cream while mixing on medium speed. Scrape down the sides of the bowl as needed to ensure even incorporation. The mixture should be pale yellow and completely smooth. Here’s the thing—if you see any streaks of cream cheese, blend for another minute. This is where cracks start if you’re not careful.
Incorporate Eggs and Vanilla for Stability
Add the 4 whole large eggs (also at room temperature) one at a time, mixing just until each is fully incorporated after about 30 seconds per egg. This gentle mixing prevents over-aeration, which can cause cracks. Stir in the 2 teaspoons vanilla extract until fully combined.
The batter should be thick but pourable. Here’s a quick test: Dip a spoon in and lift it slowly. If the batter holds its shape for a few seconds before dripping, you’re good to go. If it’s too thin, let it rest for 10 minutes before proceeding—this allows the cream cheese to firm up slightly.
Assemble and Bake for Perfect Texture
Pour the filling over the cooled crust and smooth the top with a spatula. Tap the pan gently on the counter a few times to release any air bubbles. Bake in the preheated 325°F oven for 50-55 minutes until the edges are set and the center still jiggles slightly—this is called “springback.”
Turn off the oven, crack the door open, and let the cheesecake cool inside for 1 hour. This gradual cooling prevents sudden temperature shifts that cause cracking. Remove from the oven and let it cool completely at room temperature before refrigerating.
Top and Serve for Maximum Flavor
Once fully chilled (at least 4 hours or overnight), run a knife around the edge of the pan to loosen. Dip the bottom in warm water if needed to release cleanly. Dust the top with 0.25 cup powdered sugar for a professional finish.
For the blueberry topping, gently toss the 1.5 cups fresh blueberries with 2 tablespoons salted butter and a pinch of sugar. Spoon over the cheesecake and chill for 30 minutes before serving. For extra decadence, whip the 0.5 cup heavy whipping cream to soft peaks and pipe a swirl over the top just before serving.
Pro Tips For Making 4 Cream Cheese Cheesecake
- Soften Cream Cheese First: DESCRIPTION: Take those blocks out of the fridge at least 2 hours before mixing—room temperature is your friend here. I used to just chop them straight from the fridge, and the batter always ended up lumpy no matter how much I beat it. Trust me, the texture difference is night and day.
- Whip Eggs Separately: DESCRIPTION: Beat the eggs alone first until they’re pale and thick—then gently fold in the cream cheese mixture. My first attempt was dumping everything in the bowl at once, and the eggs scrambled before they even had a chance. This keeps your cheesecake silky, not rubbery.
- Skip the Overmixing: DESCRIPTION: Mix just until combined—no need for a smoothie texture. Overworking the batter traps air, which causes cracks later. I learned this after slicing into a cheesecake that looked like a cracked eggshell. Two minutes max after everything’s incorporated.
- Water Bath Mandatory: DESCRIPTION: Wrap that pan in two layers of foil before the bath—one to catch drips, one to keep the water out. I once skipped this and ended up with a soggy crust. A 350°F oven for 50–60 minutes, then cool slowly in the water bath overnight. No shortcuts here.
Make-ahead tips for this dish
Prep Ahead Crust
Assemble the graham cracker crust up to 24 hours in advance and store it in an airtight container at room temperature. This prevents sogginess when you’re ready to add the filling.
I like to press it into the pan early in the day so it’s completely cooled by baking time—no waiting around later! 🧀
Filling Mix Prep
Blend the cream cheese filling up to 12 hours ahead and store it in the fridge in a sealed container. Let it sit at room temperature for 30 minutes before pouring over the crust to prevent temperature shock.
I often make this step the night before so the filling is perfectly smooth when I bake in the morning.
Chill for Stability
The most critical make-ahead step is chilling the baked cheesecake for at least 6 hours before serving. I recommend baking it in the morning and letting it set overnight in the fridge. This deep chilling develops the perfect texture—no wobble, no cracks, just that signature firm yet creamy bite. 💫
Topping Prep
Prepare your blueberry topping or caramel drizzle the day before and store them separately in the fridge. For the blueberries, toss them with sugar and lemon juice and refrigerate in a sealed container.
The caramel sauce can be made up to 3 days ahead—just reheat gently before drizzling. This saves you last-minute prep when guests arrive.
Portion Control
Slice the cheesecake into 8 equal wedges using a hot knife (dip in hot water and wipe dry between cuts) before serving. Store individual portions in airtight containers with parchment paper between layers to prevent drying. These keep beautifully for 4 days in the fridge—perfect for grab-and-go dessert cravings.
Freezer Strategy
For long-term storage, wrap the whole cheesecake tightly in plastic wrap, then in aluminum foil. Freeze for up to 2 months. When ready to serve, thaw overnight in the fridge and bring to room temperature before slicing. The texture remains perfect—just as rich and creamy as fresh-baked! ❄️
Nutrition facts
Frequently asked questions
Why does this recipe use four blocks of cream cheese?
Four blocks create that ultra-rich, dense texture that separates this from classic cheesecakes. The extra fat content prevents cracks while delivering maximum creaminess in every bite. It’s the secret to that bakery-style quality without needing a water bath!
Can I substitute sour cream with Greek yogurt?
Not recommended—Greek yogurt has a different protein structure that can make the texture too tangy and slightly grainy. Stick with full-fat sour cream for that signature smoothness. If you’re lactose intolerant, try lactose-free sour cream or a cultured dairy alternative designed for baking.
How do I fix cracks that appear after baking?
Don’t panic! Cracks are common but fixable. Spread a thin layer of sweetened condensed milk or caramel sauce over the top, then chill for 2 hours. This creates a smooth, glossy finish that hides imperfections beautifully. For next time, ensure your cream cheese is fully blended and avoid overmixing the eggs.
What’s the best way to serve this cheesecake?
This recipe works beautifully with fresh berries, chocolate ganache, or a drizzle of salted caramel. For a showstopper, pipe whipped cream rosettes around the edges and dust with powdered sugar. Serve at room temperature for the best texture—it’s rich enough to enjoy straight from the fridge, but slightly warmer slices are even more decadent.
Can I make this in a different pan size?
Yes, but adjust baking times carefully. For a 7-inch pan, reduce to 40-45 minutes at 325°F, while an 8-inch pan may need 60 minutes. The key is to use the same oven temperature and check for springback in the center. Always let it cool gradually to prevent cracks regardless of pan size.

- Pea Soup Instant Pot Recipe: Velvety Green Smoothness in 20 Minutes - November 1, 2026
- Pork Loin Pulled Pork Crock Pot Recipe: Slow-Smoked Tenderness With Zero Dryness - November 1, 2026
- Baked Potatoes in Crock Pot Recipe: Buttery Interiors and Crispy Top Magic - November 1, 2026