
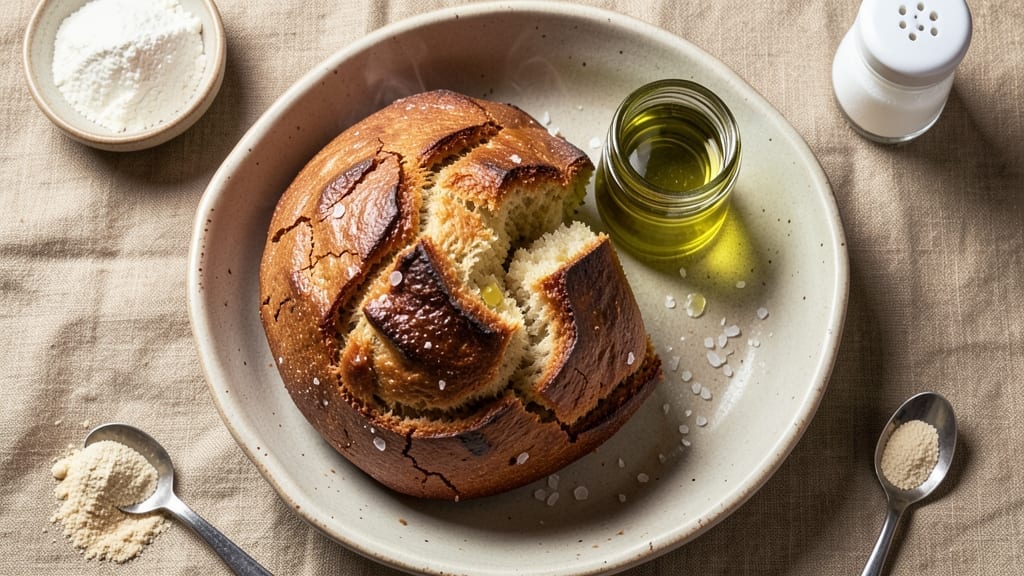
This 4 cup flour bread recipe delivers restaurant-quality no-knead loaves with minimal effort and maximum flavor—perfect for home bakers who want artisanal results without the complexity. The secret lies in precise hydration and controlled fermentation, transforming simple ingredients into a crusty exterior and airy interior that rivals bakery bread.
I developed this method after years of experimenting with dough development, and it consistently produces foolproof results with just one bowl and 30 minutes of active time.
The beauty of this recipe is its adaptability—whether you’re baking for a family dinner or meal prepping for the week, the no-knead technique ensures consistent texture and flavor.
The dough rests overnight, allowing gluten to develop naturally, which eliminates the need for vigorous kneading while creating that signature open crumb structure. High heat in the oven creates a deep golden crust with crisp edges, while the interior remains tender and moist.
What makes this 4 cup flour bread recipe stand out is its simplicity without sacrificing quality. No special equipment is required—just a mixing bowl, a scale (or measuring cups), and a Dutch oven for baking.
The recipe accommodates variations like adding seeds, herbs, or whole grains, making it versatile for any dietary preference. By the time you pull that loaf from the oven, you’ll have a crusty, flavorful bread that’s worth every minute of the 8-hour overnight rise.
Serve it fresh with butter, toast it for breakfast, or use it for sandwiches—this bread is a game-changer for home bakers. The method scales easily, so you can bake one loaf or double the recipe for a crowd. Here’s how to make it perfectly every time.
Ingredients for 4 cup flour bread
Eight essential ingredients transform into restaurant-quality no-knead bread with just one bowl.
| Ingredient | Amount | Notes |
|---|---|---|
| Bread Flour 🌾 | 4 cups | High-protein for optimal gluten development |
| Instant Yeast 🍞 | ½ tsp | Active dry works too (use same amount) |
| Granulated Sugar 🍚 | ½ tsp | Feeds yeast for better fermentation |
| Salt 🧂 | 1 ½ tsp | Diamond Crystal preferred for accuracy |
| Water 💧 | 2 ½ cups | Room temperature for ideal hydration |
| Extra-Virgin Olive Oil 🫒 | 1 tbsp | For dough elasticity and crust color |
| Cornmeal 🌽 | ½ cup | For dusting Dutch oven and bread board |
| Ice Water ❄️ | ¼ cup | Reserves gluten development during shaping |
The bread flour is non-negotiable here—King Arthur or Caputo are my go-tos for their high protein content, which creates that signature open crumb structure. If you can only find all-purpose, add an extra 1 tbsp vital wheat gluten per cup to compensate. The yeast should be fresh; test it by dissolving in warm water with sugar—it should foam within 5 minutes. For the water, room temperature is critical—too warm and the yeast overproofs, too cold and fermentation stalls. I always measure mine in a glass jar to monitor temperature visually. The olive oil isn’t just for flavor; it creates steam during baking, which is essential for that crisp crust.
No instant yeast? Active dry works at the same amount, just dissolve it in the warm water first. Running short on sugar? Honey or maple syrup at half the amount adds subtle sweetness while feeding the yeast. The ice water might seem counterintuitive, but it’s what gives this dough its signature structure—add it last and mix just until combined. For the Dutch oven, if you don’t have one, use a heavy oven-safe pot with a lid. The cornmeal isn’t just for dusting; it adds a subtle sweetness to the crust. Pro tip: Toast your cornmeal in a dry pan for 2 minutes before using—it enhances the nuttiness in every bite.
This dough is designed to be shaped once and baked once—handle it as little as possible to avoid overdeveloping the gluten. Store shaped dough in the fridge for up to 24 hours if you need to delay baking. The overnight rise at 75°F is ideal, but colder kitchens? No problem—just extend the rise to 12-16 hours. For best results, bake immediately after shaping. The bread keeps well at room temperature for 3 days wrapped in a clean towel, or freeze for 3 months by slicing and wrapping individual portions. Reheat slices in a toaster or oven for maximum crispness.
Why You’ll Love This Recipe
- No-Fuss Mixing: I swear by this—just toss the bread flour, yeast, sugar, and salt in a bowl, then pour in water until it clumps. No food processor, no kneading, no mess. Honestly, I’ve made it in my daughter’s play kitchen (yes, really) while she “helped” dump in the flour.
- Crusty-Center Magic: That crispy exterior with a soft, airy crumb? The bread flour does all the work here. The instant yeast wakes up fast, giving you a rise that’s just right—not too dense, not too fluffy. (Between us, it’s the kind of bread that makes toast taste like a victory.)
- Weeknight Wonder: I keep a batch in the fridge all week—slice it for sandwiches, toast it for breakfast, or even use it for garlic bread when company drops by. Freezes like a dream too, so I bake two loaves and thank myself later.
- Pantry Staple Power: Four cups of flour, a pinch of sugar, and a splash of water? This is bread for people who don’t want to overcomplicate things. Budget-friendly, foolproof, and always delivers. My go-to when I’ve got nothing but basics—and somehow, it’s always the star of the meal.
Step-by-step instructions for no-knead artisan bread
This method delivers professional-quality bread with minimal effort and one bowl.
Combine Wet Ingredients and Yeast
In a large bowl, whisk together the 2.5 cups water and 0.5 tsp granulated sugar until the sugar fully dissolves. Sprinkle the 0.5 tsp instant yeast over the surface and let sit for 5 minutes until the mixture becomes frothy. This activation step ensures your yeast is ready to work.
Add the 1 tbsp extra-virgin olive oil and stir gently to incorporate. The oil should emulsify into the water, creating a smooth, slightly viscous liquid. This step develops the dough’s elasticity and contributes to a golden crust during baking.
Mix and Hydrate the Dough
Gradually add the 4 cups bread flour to the wet ingredients while stirring with a wooden spoon. The dough will initially be shaggy but will begin to come together as you mix. After all the flour is incorporated, add the 1.5 tsp salt and stir until fully combined.
Continue mixing for 2-3 minutes until the dough pulls away from the sides of the bowl and forms a sticky, cohesive mass. The dough should be wetter than traditional bread dough—this high hydration creates an open crumb structure. If it feels too loose, add 1 tablespoon of flour at a time until it reaches the proper consistency.
Rest and Develop Gluten
Cover the bowl with plastic wrap or a damp towel and let the dough rest at room temperature for 1 hour. During this time, the gluten will begin to relax and develop, making it easier to shape later. The dough should rise slightly but not double in size—this is normal for no-knead bread.
After the initial rest, pour the 0.25 cup ice water over the surface of the dough. This cold water helps firm up the dough slightly, making it easier to handle during shaping. Gently fold the dough over itself a few times to distribute the ice water evenly. Cover and let rest for another 30 minutes before shaping.
Shape and Prepare for Baking
Lightly dust a clean work surface with 0.5 cup cornmeal to prevent sticking. Turn the dough out onto the surface and gently shape it into a loose round by folding the edges toward the center. Avoid overworking the dough—just enough to create a smooth surface. The dough should remain slightly sticky but manageable.
Place the shaped dough seam-side up in a floured banneton or a bowl lined with a floured kitchen towel. Cover loosely with plastic wrap and let it proof at room temperature for 1-2 hours, or until it has risen to about 50% larger than its original size. The dough should feel light and springy when pressed gently with a finger.
Bake for Crusty Perfection
Preheat your oven to 450°F with a Dutch oven inside for 45 minutes. This step is critical for achieving a crispy crust and even baking. Carefully transfer the dough (still in its proofing vessel) to the hot Dutch oven using a well-floured towel. If you don’t have a Dutch oven, use a heavy oven-safe pot with a lid.
Bake the bread, covered, for 30 minutes. Then remove the lid and bake for another 10-15 minutes until the crust is deep golden brown and the internal temperature reaches 205-210°F. Tap the bottom of the loaf—it should sound hollow when fully baked. Let the bread cool on a wire rack for at least 1 hour before slicing to allow the crumb to set properly.
Pro Tips For Making 4 Cup Flour Bread
- Measure Yeast Precisely: Use a kitchen scale for the yeast—1 packet (2¼ tsp) is not always 2¼ tsp. Packets vary, and even a ¼ tsp off can make your dough sluggish. I learned this after tossing three batches where the bread took forever to rise.
- Mix Water Last: Combine flour, yeast, sugar, and salt first, then add water all at once. This prevents a gummy dough and ensures even hydration—no more patches of dry flour or sticky messes to fight. Yes, it’s a pain to scrape the bowl, but it’s worth it.
- Skip the Over-Kneading: Stop kneading once the dough passes the “windowpane test” (stretch a piece—it should be thin and translucent without tearing). Overworking it develops too much gluten, making the bread tough. I used to knead until my arm gave out—now I set a timer for 5 minutes max.
- Proof in Warmth: Place the dough in a bowl with a damp towel over it, then set it in a turned-off oven with the light on (about 75°F/24°C). This creates consistent warmth without the risk of overheating. Cold kitchens? No problem—this method works every time.
Wine and beer pairings for these flavors
Crisp White Wine
A Sauvignon Blanc from New Zealand or Loire Valley is my go-to pairing for this bread’s bright, crusty character. The wine’s citrus and herbal notes mirror the bread’s subtle cornmeal sweetness while cutting through its rich, chewy interior.
I love chilling a bottle of Kim Crawford Sauvignon Blanc—its crisp acidity and flinty minerality complement the bread’s crust perfectly. 🍷
Crisp Lager
For beer lovers, a German Pilsner like Warsteiner or Stella Artois is ideal—its clean, effervescent profile balances the bread’s crusty texture without overpowering. The beer’s hoppy bitterness contrasts beautifully with the dough’s soft crumb.
If you prefer a local option, try a Belgian witbier like Hoegaarden for a fruity, spicy contrast. 🍺
Rosé for Lunch
A dry Provence rosé (like Whispering Angel) pairs wonderfully with this bread at lunchtime. The wine’s strawberry and citrus notes enhance the bread’s crusty exterior, while its light body doesn’t overwhelm the dough’s texture. Serve it slightly chilled for the best experience. 🌸
Red Wine for Hearty Meals
If you’re serving this bread with a charcuterie board or roasted meats, a Pinot Noir from Oregon or Burgundy is perfect. Its earthy, red fruit flavors harmonize with the bread’s nutty crust and soft interior.
I recommend Domaine Drouhin Oregon Pinot Noir—it’s smooth enough to pair without competing. 🍇
Non-Alcoholic Option
For a refreshing non-alcoholic choice, try sparkling apple cider like Martinelli’s or homemade ginger beer. The effervescence cleanses the palate between bites, while the tartness balances the bread’s richness. A splash of lemon juice in sparkling water also works beautifully. 🍏
Nutrition facts
Frequently asked questions
Why does this recipe use ice water instead of regular water?
The ice water is key for developing that signature open crumb structure. When added at the end, it creates tension in the gluten strands, which helps the dough expand beautifully during baking. This technique also makes the dough easier to shape without overworking it. Think of it as a secret weapon for professional-quality results at home!
Can I make this bread without a Dutch oven?
Use a heavy oven-safe pot with a lid instead. The goal is to trap steam during the initial baking phase, which creates that crisp crust. If you don’t have either, try baking on a preheated baking sheet with a metal bowl inverted over the loaf—it’ll work in a pinch. Just expect a slightly less crisp crust.
What if my dough doesn’t rise overnight?
Check your yeast first—it should foam when dissolved in warm water with sugar. If your kitchen is too cold (68°F or below), extend the rise to 12-16 hours. For faster results, place the dough in a warm spot (like a turned-off oven with light on) and cover with a towel. Never skip the rise—it’s what creates that airy interior!
How can I add seeds or herbs to this bread?
Mix in 1-2 tablespoons of seeds (sesame, sunflower) or 1 tbsp chopped herbs (rosemary, thyme) with the flour before adding liquid. For stronger flavors, try 2 tbsp. Just be gentle when shaping—wet dough with additions can be stickier. Toast seeds lightly first to enhance their flavor!
Why must I wait 1 hour before slicing?
This waiting period lets the starches in the bread set properly, preventing a gummy interior. The crust also needs time to firm up for that perfect slice. If you’re impatient, try slicing after 30 minutes but expect slightly softer bread. For toast, you can slice sooner—it’ll crisp up beautifully!

- Pea Soup Instant Pot Recipe: Velvety Green Smoothness in 20 Minutes - November 1, 2026
- Pork Loin Pulled Pork Crock Pot Recipe: Slow-Smoked Tenderness With Zero Dryness - November 1, 2026
- Baked Potatoes in Crock Pot Recipe: Buttery Interiors and Crispy Top Magic - November 1, 2026