
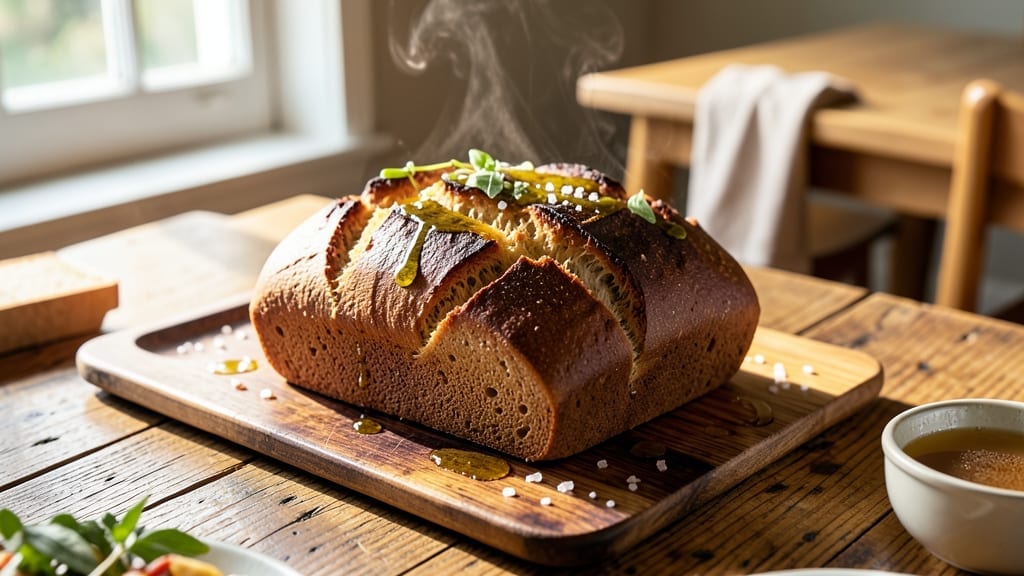
This 4-hour no-knead bread recipe transforms simple pantry staples into a crusty, artisanal loaf with minimal effort—no kneading, no stress, just hands-off magic. 🌟 The secret lies in a slow overnight fermentation that develops deep flavor and an open crumb structure, while high-heat baking creates that coveted crackly crust.
I’ve perfected this method after years of testing, and it consistently delivers restaurant-quality bread with just a few ingredients and a Dutch oven.
The beauty of this technique is its foolproof simplicity: mix, rest, shape, and bake. No need for fancy equipment—just flour, water, yeast, and salt. The dough ferments overnight in the fridge, allowing flavors to meld and gluten to relax, which means shaping becomes effortless.
Even beginners achieve golden, crispy crusts and tender interiors without the guesswork of traditional bread-making.
By the time you pull that loaf from the oven, you’ll have a fragrant, crusty loaf with a crisp exterior and airy, chewy crumb—exactly what homemade bread should be. The aroma alone will have everyone gathering around the table.
This recipe scales perfectly for feeding a crowd or making sandwiches for the week. Let’s get started with the step-by-step process.
For added flavor, consider mixing in herbs, seeds, or a drizzle of olive oil before baking—endless possibilities without complicating the method. The key to success is patience and precision in timing, which I’ll walk you through in the instructions. Trust me, once you try this, store-bought bread will never compare.
Ingredients for 4 hour no knead bread
Five simple staples plus a Dutch oven create restaurant-quality bread with zero effort.
| Ingredient | Amount | Notes |
|---|---|---|
| All-Purpose Flour 🌾 | 3 ½ cups | Unbleached for best texture |
| Active Dry Yeast 🍞 | ¼ tsp | Ensure it's fresh (test in warm water) |
| Granulated Sugar 🍚 | ½ tsp | Feeds yeast for activation |
| Diamond Crystal Kosher Salt 🧂 | 1 ½ tsp | Adjust to taste after baking |
| Warm Water 💧 | 1 ½ cups | 105-110°F for ideal yeast activation |
| Extra-Virgin Olive Oil 🫒 | ½ tsp | For dough elasticity (optional) |
| Cornmeal 🌽 | ¼ cup | For dusting Dutch oven |
| Ice Cubes ❄️ | 1 cup | Chills dough before shaping |
Flour is the backbone here—King Arthur or Bob’s Red Mill are my go-tos for consistent results. The yeast? Fresh is non-negotiable—if it doesn’t foam in warm water within 5 minutes, toss it. Sugar might seem like a small amount, but it’s crucial for yeast activation. For salt, Diamond Crystal dissolves better than table salt, and trust me on measuring it precisely. Warm water temperature is critical—too hot kills yeast, too cold slows fermentation. I keep a thermometer handy or use the finger test (should feel like bathwater). The olive oil adds tenderness, but you can skip it if you’re strict about minimal ingredients.
No yeast? Sourdough starter at 1/4 cup works, but fermentation time doubles. Running short on flour? Whole wheat at 1:1 ratio adds nutrition but may darken the crust. The cornmeal isn’t just for dusting—it creates that perfect golden crust. No Dutch oven? A heavy oven-safe pot with a lid works in a pinch. For shaping, wet your hands—dry hands make the dough stick. The ice cubes might seem odd, but they chill the dough fast, making shaping a breeze. Pro tip: Use a kitchen scale for flour if you’re serious about consistency—cups vary wildly by brand.
This dough is designed to chill overnight, but if you’re in a hurry, ferment for 4-6 hours at room temp. Shape it into a ball, cover with damp towel, and let it rise until it’s about 50% larger. For storage, the baked loaf keeps 3 days wrapped at room temp or 1 week frozen. I slice mine fresh and freeze portions for quick toast. The crust stays crispy if you reheat slices in a 350°F oven for 5 minutes. Leftovers? Toast them—everything tastes better toasted.
Why You’ll Love This Recipe
- Zero-Knead Magic: I swear by this—just mix flour, yeast, sugar, and salt with warm water, let it do its thing, then bake. No punishing dough sessions, no sticky hands, just pure, hands-off ease. My lazy Sundays thank me.
- Crusty-Creamy Dream: That perfect tension between a shatteringly crisp crust and a pillowy interior? This recipe delivers. The kosher salt and sugar balance the yeast just right—no fancy additives, just honest, bread-loving flavor.
- Weeknight Workhorse: Toss a loaf in the oven while dinner simmers, or bake a batch on Sunday for sandwiches all week. Freezes like a champ too—just thaw and toast. Honestly, it’s my secret weapon for busy nights.
- Pantry Staple: Five ingredients, zero guilt. Flour and yeast are cheap, and this makes enough to feed a family or stretch into toast for days. Between us, I’ve fed a crowd for under $5 with this—no one ever suspects the budget.
Step-by-step instructions for hands-off crusty no-knead bread
Here’s how to make bread that develops deep flavor overnight with zero effort.
👨🍳 Step 1: Mix the Dough and Let It Rest
In a large bowl, whisk together the 3.5 cups all-purpose flour, 0.25 tsp active dry yeast, 0.5 tsp granulated sugar, and 1.5 tsp diamond crystal kosher salt. The yeast needs the sugar to activate, so don’t skip this step even though it’s small.
Make a well in the center and pour in the 1.5 cups warm water (test temperature by sprinkling a few drops on your wrist—it should feel warm but not hot). Add the 0.5 tsp extra-virgin olive oil and stir with a wooden spoon until just combined. The dough will look shaggy and sticky—that’s normal. Cover the bowl with plastic wrap and let it rest at room temperature for 1 hour.
This initial rest allows the flour to fully hydrate and the yeast to begin its magic. I like to set a timer so I don’t forget—it’s easy to walk away and come back to find the dough still looking the same. Trust the process; fermentation is happening even if it’s not obvious yet.
⏰ Step 2: Chill the Dough Overnight
After the initial rest, add 1 cup ice cubes to the dough and stir gently until they melt. This chills the dough and slows fermentation, which develops more complex flavors. Cover the bowl again and refrigerate for 12-16 hours.
Here’s the thing—this overnight chill is where the real flavor development happens. The cold slows the yeast activity, allowing the gluten to relax and develop slowly. When you take it out in the morning, the dough will be bubbly and jiggly—this is your signal that it’s ready for shaping.
I always set the dough on the countertop first to come to room temperature for 1-2 hours before shaping. This makes it much easier to handle without sticking to your hands or the bowl.
🍳 Step 3: Shape and Prepare for Baking
Lightly dust a clean surface with 0.25 cup cornmeal. Turn the dough out onto the surface and gently shape it into a round ball. The dough will be sticky, so wet your hands with water to prevent sticking. I like to use a bench scraper to help gather the edges and create a smooth surface.
Place the shaped dough seam-side up in a Dutch oven with a lid. The Dutch oven creates steam, which is crucial for that beautiful crust. If you don’t have a Dutch oven, use a heavy oven-safe pot with a lid that fits snugly.
Preheat your oven to 450°F with the Dutch oven inside for 30 minutes. This ensures the pot is piping hot when you add the dough. The hot pot creates that perfect steam environment for the first part of baking.
🔥 Step 4: Bake to Golden Perfection
Carefully remove the Dutch oven from the oven using oven mitts. The handle will be hot, so be cautious. Bake covered for 30 minutes, then remove the lid and bake uncovered for another 15-20 minutes until the bread is deep golden brown.
You’ll know it’s done when the crust is a rich, mahogany color and sounds hollow when you tap the bottom. The internal temperature should reach 205-210°F in the center. If the top browns too quickly, tent it loosely with foil to prevent over-browning.
Let the bread cool on a wire rack for at least 1 hour before slicing. This resting period allows the crumb to set and prevents a gummy texture. The longer you wait, the better the texture will be—trust me, it’s worth it.
Pro Tips For Making 4 Hour No Knead Bread
- Mix the Dough Slowly: After dumping everything in, resist the urge to stir like you’re racing the clock. Use a wooden spoon or spatula to gently fold the flour into the wet ingredients—about 10 strokes—until it’s just combined. Overmixing now turns your dough into a chewy mess later, and this recipe thrives on its rustic, shaggy texture.
- Use a Thermometer for Water: That “warm water” in the recipe isn’t just “hot enough to dissolve sugar.” Aim for 100–105°F—yeast wakes up fastest in this range. Too hot (above 110°F) kills it instantly, and too cold (below 90°F) makes the dough sluggish. A cheap instant-read thermometer solves this guesswork forever.
- Don’t Skimp on the Salt: Diamond Crystal kosher salt measures twice as large as table salt—if you eyeball it, you’ll underdo it. Use the 1 tablespoon called for, even if it seems excessive. Salt controls yeast activity and builds flavor; cutting it short leaves you with a bland, gummy loaf that rises too fast and collapses.
- Shape It Like a Bowl: After the 2-hour bulk ferment, the dough will look like a sad, flat pancake. Flip it onto a floured surface, then cup your hands and press the edges toward the center, creating a loose, uneven ball with a thick top. This shape traps steam during baking, giving you that iconic open crumb—no fancy stretching required.
Storing and reheating this 4 hour no knead bread
Room-Temp Storage
Your freshly baked loaf stays fresh for 2-3 days at room temperature when wrapped tightly in a clean kitchen towel or placed in a paper bag. I avoid plastic wrap—it traps moisture and makes the crust soggy.
Store it in a cool, dark place like a bread box or countertop away from direct sunlight. The towel helps maintain the perfect balance of moisture and air circulation. 🌾
Refrigerator Revival
If you need to extend freshness beyond 3 days, refrigerate the loaf in an airtight container or wrapped in foil. The cold slows staling, but the texture will become denser. To revive, slice and reheat in a 350°F oven for 5-7 minutes until crisp.
I often make this my go-to for quick sandwiches—just pop a slice under the broiler for 30 seconds to restore that fresh-baked crunch.
Freezer Magic
For long-term storage, freeze the loaf in 1-inch thick slices on a baking sheet before transferring to a freezer bag. This prevents freezer burn and makes it easy to grab individual portions.
Thaw overnight in the fridge or reheat directly from frozen in a 375°F oven for 8-10 minutes with a splash of water in the pan. The crust stays crispy, and the crumb remains tender—just like fresh-baked. 🧊
Crust Refresh
Need to revive stale bread? Brush slices with melted butter and toast in a 400°F oven for 3-5 minutes. For extra crunch, sprinkle with coarse sea salt or drizzle with olive oil before toasting.
This works wonders for sandwiches or garlic bread. I keep a stash of frozen slices in my freezer specifically for this purpose—it’s a game-changer for quick meals.
Oven vs. Toaster
For maximum crispiness, use the oven instead of a toaster. The even heat creates a better crust than a toaster’s concentrated heat, which can burn the outside while leaving the inside soft.
If you’re short on time, a toaster works in a pinch—just set it to the highest setting and watch closely. For sandwiches, I always opt for the oven method; it makes all the difference in texture and flavor. ✨
Nutrition facts
Frequently asked questions
Why does this recipe call for ice cubes instead of just cold water?
The ice cubes create an instant chill that slows yeast activity, developing deeper flavors during the overnight rest. Simply adding cold water wouldn’t chill the dough as effectively—this method ensures proper gluten relaxation and prevents overproofing. Think of it as a flavor accelerator!
Can I make this bread without a Dutch oven?
Yes! Use a heavy oven-safe pot with a lid that fits snugly. Preheat it with the dough inside for 30 minutes at 450°F to create steam. The key is maintaining that steam environment—just ensure your pot holds heat well. A cast iron skillet works in a pinch too!
What if my dough doesn’t rise much after overnight chilling?
First, check your yeast—it should foam in warm water within 5 minutes. If not, start fresh. For rising issues, try these fixes: 1) Room temp the dough for 1-2 hours before shaping, 2) Use a warmer oven (try 475°F), or 3) Add 1/4 tsp more yeast. Cold kitchens often cause slow rises—keep your dough in a slightly warmer spot.
How do I add seeds or herbs to this recipe?
Stir in 1-2 tablespoons of seeds (sesame, poppy) or 1 tablespoon chopped herbs (rosemary, thyme) with the dry ingredients. For stronger flavors, add them to the dough after the initial rest but before chilling. Just reduce flour by 1 tablespoon to maintain proper hydration. Pro tip: Toast seeds lightly before adding for extra flavor!
Why does my crust turn out pale instead of golden?
Pale crusts usually mean insufficient steam during baking. Try these fixes: 1) Preheat your Dutch oven longer (45 minutes), 2) Add ice cubes to the hot oven when removing the lid, or 3) Brush the crust with water before the final baking phase. The goal is to create maximum steam—this is what builds that beautiful crust!

- 12 Bean Chili Recipe: Hearty Slow-Cooked Depth With 12 Legumes - October 17, 2026
- 5 Seed Bread Recipe: Nutty Crunch and Artisan Flavor in One Loaf - October 17, 2026
- 1 Lb Macaroni Salad Recipe: Bold, Crunchy, and Crowd-Pleasing - October 17, 2026