
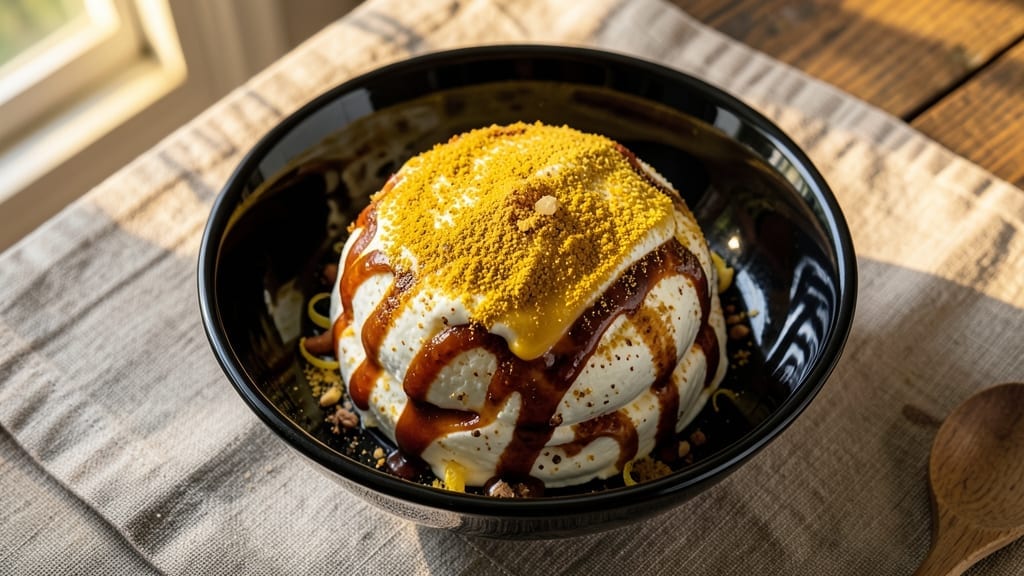
This 5-star cheese ball recipe delivers the ultimate crowd-pleaser with a creamy, flavorful center and a perfectly crispy coating that disappears with every bite.
The secret lies in balancing sharp cheddar, creamy cream cheese, and savory seasonings—then encasing it in a crunchy armor of breadcrumbs or crushed nuts that stays crisp even after chilling.
I’ve perfected this recipe through countless parties where it disappears faster than you can say “second helping,” making it the go-to snack for gatherings of any size.
The magic happens in two stages: first, blending the cheese mixture until smooth and flavorful, then rolling it into a perfect sphere before chilling. This foolproof method ensures the cheese stays firm enough to hold its shape while remaining rich and creamy.
The chilling time is critical—it allows the flavors to meld completely and prepares the cheese ball for its crispy transformation when coated. Whether you’re hosting a holiday party or just craving a satisfying snack, this recipe delivers restaurant-quality results with minimal effort.
Once coated and chilled, you’ll have a cheese ball that’s bold in flavor and texture—creamy, tangy, and perfectly balanced with a satisfying crunch that makes every bite irresistible.
The coating options are endless, from classic breadcrumbs to gourmet crushed nuts or herbs, allowing you to customize it to your taste. Serve it with crackers, sliced apples, or even as a dip for fresh vegetables, and watch it disappear faster than you can say “second helping.”
With just 30 minutes of prep time and 30 minutes of chilling, this recipe is perfect for last-minute gatherings or meal prep. The cheese ball keeps beautifully in the fridge for up to a week, making it an ideal make-ahead snack.
Plus, it’s easy to scale up or down—whether you’re feeding a crowd or just treating yourself to a satisfying bite.
Ingredients for 5 star cheese ball
These bold, crowd-pleasing ingredients transform into a restaurant-quality cheese ball that disappears at parties.
| Ingredient | Amount | Notes |
|---|---|---|
| Sharp Cheddar Cheese 🧀 | 8 oz | Aged at least 6 months for sharp flavor |
| Cream Cheese 🧈 | 8 oz | Full-fat for maximum creaminess |
| Worcestershire Sauce 🍶 | 1 tbsp | For deep umami flavor |
| Dried Mustard 🌶️ | 1 tbsp | Yellow mustard powder preferred |
| Garlic Powder 🧄 | 1 tsp | Freshly ground for best flavor |
| Onion Powder 🧅 | 1 tsp | For subtle depth |
| Ground Black Pepper 🌶️ | ½ tsp | Freshly cracked preferred |
| Panko Breadcrumbs 🍞 | 1 ½ cups | For ultra-crispy coating |
| Crushed Ritz Crackers 🍪 | ½ cup | For buttery crunch |
| Melted Butter 🧈 | 2 tbsp | For binding coating |
| Chopped Parsley 🌿 | 2 tbsp | For vibrant garnish |
| Toothpicks 📎 | 12 whole | For securing cheese ball |
| Aluminum Foil 📄 | 1 sheet | For easy handling |
The cheddar makes or breaks this—sharp, aged varieties like Cabot or Tillamook deliver that perfect tang. Whole Foods and specialty cheese shops carry the best, but most grocery stores stock decent options. Cream cheese isn’t just a filler; full-fat Philadelphia gives you that velvety texture. For the coating, Panko is non-negotiable—it stays crispy where regular breadcrumbs get soggy. I always double-check the expiration dates on these, especially the cheese, since we’re making a big batch. The parsley isn’t just for looks—it adds that fresh pop of color that makes the cheese ball look even more impressive when you serve it.
No sharp cheddar? Pepper jack or smoked cheddar work in a pinch, though the flavor profile shifts. Substituting cream cheese? Goat cheese or mascarpone adds richness but changes the texture. The Worcestershire sauce can be swapped for soy sauce or liquid smoke if you’re avoiding it. For the coating, crushed pretzels or almond flour give totally different vibes—fun for themed parties. The parsley can be swapped for chives or basil if you’re feeling fancy. Pro tip: if you’re making this ahead, prep the coating separately and mix it just before rolling—keeps everything extra crispy.
This cheese ball needs at least 30 minutes in the fridge to set properly—don’t rush it. Store leftovers in an airtight container with parchment paper between layers to prevent sticking. Keeps for up to 1 week in the fridge, though it’s usually gone in hours. For parties, I always make a double batch—one for the table, one for the ’emergency stash’ in the fridge**. The toothpicks are crucial for serving—people love picking up perfect bite-sized pieces. If you’re feeling extra, wrap the whole thing in foil before chilling for easy transport to gatherings.
Why You’ll Love This Recipe
- No Mixer Needed: I swear by this trick—just use a fork to mash the cream cheese and sharp cheddar right in the bowl. No pulsing, no sticky cleanup, just a few minutes of gentle smashing until it’s smooth. The Worcestershire and garlic powder blend right in without fuss.
- Umami Bomb: That splash of Worcestershire sauce? It’s the secret weapon. The sharp cheddar gives the bite, but the sauce rounds it out with a deep, savory punch—like a fancy charcuterie board in your hands. Honestly, I’ve had people ask if I aged it for months.
- Party in a Bowl: This isn’t just for holidays. Stick it in the fridge and grab it for game day, book club, or even a lazy Sunday with coffee. The dried mustard adds a subtle kick that keeps it interesting—no one ever leaves a bite behind.
- Cheap & Lasts Forever: A block of cheddar and a tub of cream cheese stretch for ages. I’ve had this recipe feed six people for under $10, and it stays fresh for weeks wrapped in parchment. Between us, it’s my go-to for birthdays, potlucks, or when I’m too tired to cook.
Step-by-step instructions for a 5-Star cheese ball with crunchy coating
Here’s the method that transforms simple ingredients into a showstopping party appetizer everyone will beg for.
Mix the Cheese Filling to Perfect Consistency
In a medium mixing bowl, combine the 8 oz sharp cheddar cheese and 8 oz cream cheese. I like to use my hands for this part—it’s faster and helps break up any lumps. Let the cheeses sit at room temperature for 10-15 minutes before mixing if they’re straight from the fridge, as cold cheese creates a grainy texture.
Once softened, use a hand mixer or stand mixer fitted with the paddle attachment to beat on medium speed until completely smooth. This should take about 2-3 minutes. The mixture will look like pale yellow whipped cream. Add the 1 tbsp Worcestershire sauce, 1 tbsp dried mustard, 1 tsp garlic powder, 1 tsp onion powder, and 0.5 tsp ground black pepper. Mix for another 30 seconds until all the seasonings are evenly distributed. Here’s the thing—don’t rush this step. The flavor develops as the cheeses emulsify together, creating that perfect balance of sharp, creamy, and savory that makes this cheese ball unforgettable.
Create the Ultimate Crunchy Coating
In a separate large bowl, combine the 1.5 cups panko breadcrumbs and 0.5 cup crushed Ritz crackers. This combination gives you both the crispy texture of panko and the buttery richness of Ritz. Add the 2 tbsp melted butter to the dry ingredients and mix thoroughly with your hands until every crumb is coated. The butter acts as a binder that will help the coating stick to the cheese ball.
Next, fold in the 2 tbsp chopped parsley into the cheese mixture from Step 1. The parsley adds a fresh, vibrant touch that cuts through the richness of the cheese. Now, here’s where it gets fun—transfer about 1 cup of the crumb mixture to a small plate for now. You’ll use this later to create that perfect golden crust on the outside of your cheese ball.
Shape and Secure the Cheese Ball
Using your hands, gently form the cheese mixture into a 6-inch diameter ball. Don’t pack it too tightly—you want it to hold its shape but still be soft enough to develop that creamy texture. Place the cheese ball on a sheet of aluminum foil and roll it around to create a smooth surface. This makes it easier to handle and prevents the coating from sticking to your hands.
Now for the magic that keeps everything together—insert 12 toothpicks evenly around the circumference of the cheese ball, about 1 inch apart. This creates a perfect base for the coating and prevents the cheese from oozing out when you serve it. The toothpicks also make it easy to carry and serve without messy fingers.
Build the Crunchy Exterior Layer by Layer
Roll the cheese ball in the remaining crumb mixture, pressing gently to ensure even coverage. The coating should stick well from the butter, but if it’s not adhering perfectly, dip your fingers in water and smooth it out. Place the coated cheese ball on a fresh sheet of aluminum foil, seam-side down. Now, here’s the secret to that restaurant-quality look—sprinkle the reserved 1 cup crumb mixture over the top of the cheese ball, pressing it down lightly with your palm.
This creates that beautiful, textured exterior that looks as good as it tastes. For extra presentation, you can make a small well in the center and add a few extra parsley leaves or even a sprinkle of smoked paprika if you’re feeling fancy. The key is to work quickly—this coating is best when it’s fresh and hasn’t had time to soften.
Chill and Serve for Maximum Impact
Cover the cheese ball tightly with aluminum foil and refrigerate for at least 4 hours, preferably overnight. This chilling time is crucial—it allows the flavors to meld together and the coating to set properly. When you’re ready to serve, remove the foil and let it sit at room temperature for 10-15 minutes before slicing. This gives the coating time to firm up slightly, making it easier to cut clean slices.
Use a sharp knife to cut the cheese ball into 1-inch thick slices, gently pressing down as you cut to prevent the coating from crumbling. Serve immediately with toothpicks for easy handling. The contrast of the creamy, tangy cheese with the crispy, buttery coating is what makes this cheese ball truly extraordinary. Trust me, once you try this method, you’ll never go back to the basic recipes again—this is the cheese ball that will have your guests coming back for seconds!
Pro Tips For Making 5 Star Cheese Ball
- Cube the Cheddar: DESCRIPTION: Sharp cheddar in big chunks? Nope. Pulse it in the food processor until it’s pea-sized—this ensures even melting and a creamy texture, not a lumpy mess. I learned this after staring at a cheese ball with visible chunks that refused to blend, no matter how much I mixed.
- Warm the Cream Cheese: DESCRIPTION: Take the cream cheese out of the fridge 30 minutes before mixing—it should be soft but not melted. Cold cream cheese fights you, making the dough stiff and hard to shape. Trust me, your hands (and your patience) will thank you.
- Taste Early, Adjust Late: DESCRIPTION: Mix in the Worcestershire and mustard before rolling the cheese ball, then taste the raw dough. Too bland? Add more garlic powder or a pinch of cayenne. Too sharp? A splash of cream cheese smooths it out. Fixing it after rolling is a nightmare—your knife will hate you.
- Chill Before Rolling: DESCRIPTION: Shape the cheese ball, then pop it in the fridge for 20 minutes. This firms it up so it holds shape when you coat it, instead of turning into a sad, crumbling blob. (Yes, I’ve done that. No, I won’t talk about it.)
Serving suggestions for this dish
Classic Pairings
Serve your 5-star cheese ball with water crackers or buttery Ritz crackers for the perfect crunch contrast. I always have a platter of Triscuits or Premium Crackers on hand—their sturdy shape holds up well to the creamy cheese.
For a more rustic touch, pair it with sliced baguette or rosemary crisps to elevate the presentation. 🍞
Sweet Contrasts
Balance the savory richness with sweet accompaniments like sliced apples or pear wedges—the crisp fruit cuts through the fat beautifully. I love adding dried cranberries or chopped dried apricots to the serving platter for a pop of color and sweetness.
For a gourmet twist, serve with honey-drizzled figs or dark chocolate-covered strawberries for a sophisticated contrast.
Dip Pairings
Turn your cheese ball into a dipping station with complementary sauces. A spicy honey mustard (mix 2 tbsp Dijon mustard with 1 tbsp honey and 1 tsp hot sauce) adds a zesty kick.
For something smoky, serve with chipotle cream cheese dip—just mix 4 oz cream cheese with 1 tsp chipotle powder and 1 tsp lime juice. A simple marinara sauce also works for a classic Italian touch.
Garnish Upgrades
Elevate your cheese ball’s presentation with fresh garnishes before serving. Sprinkle toasted sesame seeds or crushed pistachios over the top for a nutty crunch. A drizzle of balsamic glaze or truffle oil adds a luxurious finish.
For a pop of color, scatter edible flowers or microgreens—they look stunning and add a fresh, herbal note. 🌸
Themed Party Plates
For holiday gatherings, serve your cheese ball on themed plates to match the occasion. Use red and green plaid liners for Christmas, orange and black for Halloween, or pastel colors for spring parties.
I love using wooden cheese boards with herb sprigs (like rosemary or thyme) for a rustic vibe. Add mini skewers with cherry tomatoes and mozzarella balls for a full appetizer spread.
Make-Ahead Serving
If serving at a party, prep the cheese ball a day ahead and store it in an airtight container with parchment paper between layers. Before serving, brush the coating with melted butter and sprinkle with extra panko for freshness.
For outdoor events, place the cheese ball on a chilled platter to keep it cool. Always serve with extra toothpicks—guests will appreciate the easy handling! ❄️
Nutrition facts
Frequently asked questions
Can I make this cheese ball without cream cheese?
Yes, but the texture will change. Replace the cream cheese with 8 oz goat cheese or mascarpone for a richer, tangier version. If you’re avoiding dairy entirely, try 4 oz cream cheese + 4 oz vegan cream cheese for a hybrid texture. The key is keeping the mixture smooth—hand-mix until completely blended to avoid graininess.
Why does my cheese ball get oily after chilling?
Oil separation happens when the cheese mixture isn’t emulsified properly. Beat the cheeses until completely smooth (no streaks) and add 1 tsp lemon juice to help bind the fats. Also, avoid over-chilling—4 hours max in the fridge prevents excess moisture from forming. If it happens, sprinkle extra panko on top before serving to absorb the oil.
What’s the best way to transport a cheese ball to a party?
Wrap the chilled cheese ball tightly in plastic wrap, then place it in a foil-lined box> with a lid. For extra protection, nestle it in a bed of ice packs> (not touching the cheese) to keep it cool. Transport in a cooler if traveling more than 30 minutes. The foil prevents sticking, while the ice maintains texture. Never transport warm—it causes the coating to soften.
Can I freeze this cheese ball?
Freezing isn’t recommended as it can make the coating soggy. However, you can freeze the uncoated cheese mixture> for up to 1 month. Thaw overnight in the fridge, then re-coat and chill. For best results, make a fresh batch when you’re ready to serve. If you must freeze the finished product, wrap it in double layers of plastic wrap> and consume within 1 month>—the texture won’t be as crisp.
How do I make this gluten-free?
Replace the panko and Ritz crackers with crushed gluten-free crackers> (like Schär) and almond flour> mixed with melted butter. For extra crunch, use crushed gluten-free pretzels> or toasted coconut flakes**>. Keep the rest of the recipe the same—just ensure all seasonings are certified gluten-free. The texture will be slightly different but still delicious!

- 12 Bean Chili Recipe: Hearty Slow-Cooked Depth With 12 Legumes - October 17, 2026
- 5 Seed Bread Recipe: Nutty Crunch and Artisan Flavor in One Loaf - October 17, 2026
- 1 Lb Macaroni Salad Recipe: Bold, Crunchy, and Crowd-Pleasing - October 17, 2026